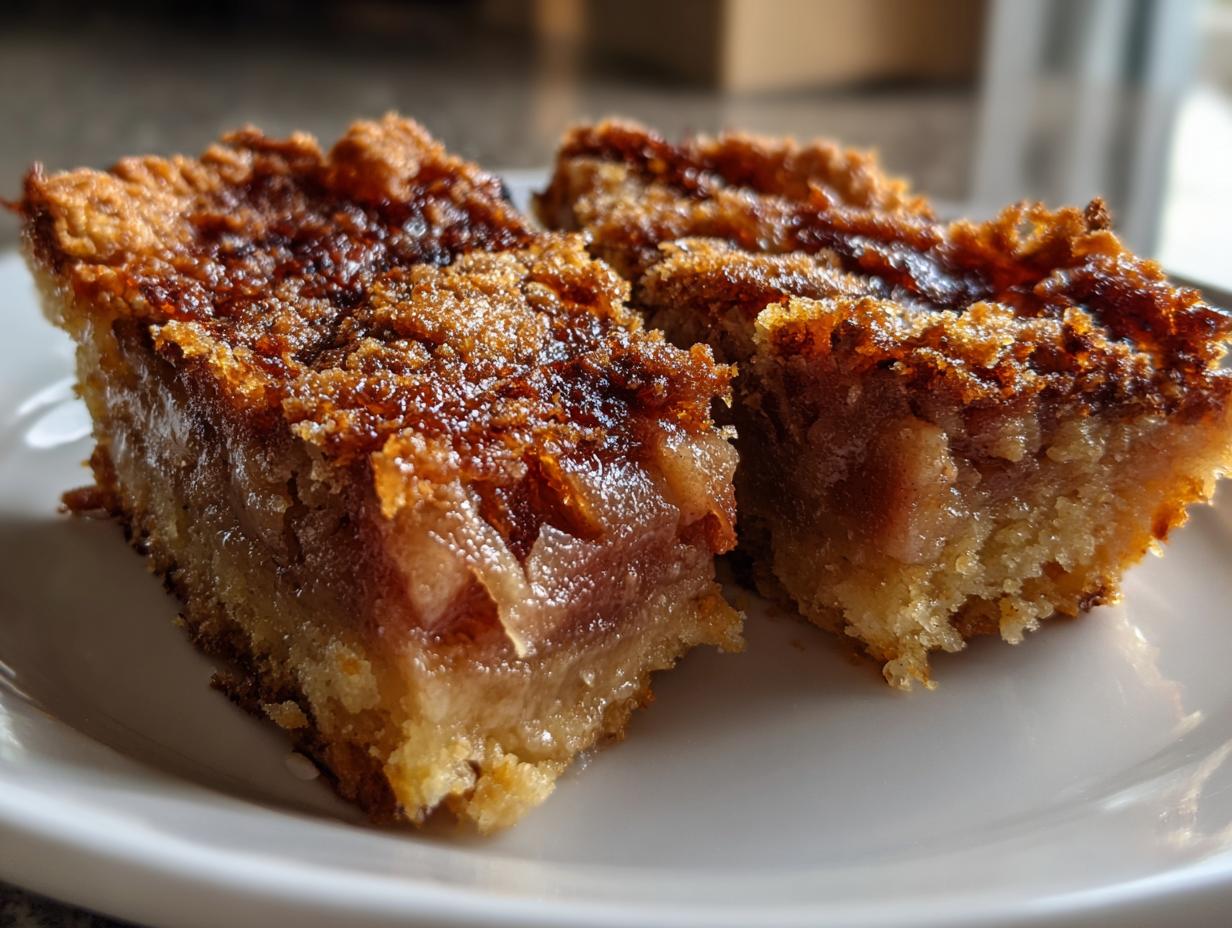
Oh, rhubarb belts—just saying the name makes me smile! This simple, old-fashioned dessert has been my go-to spring treat since I first tasted it at my aunt’s farmhouse years ago. The moment I bit into that crispy, buttery crust with its tangy-sweet rhubarb filling, I was hooked. What I love most is how effortlessly it comes together—just a handful of pantry staples and some fresh rhubarb (or frozen in a pinch).
These rhubarb belts are the kind of dessert that feels fancy but couldn’t be easier to make. They’re perfect for when you want something homemade without spending hours in the kitchen. The contrast between the tender rhubarb and the crumbly topping? Absolute magic. Trust me, once you try this recipe, you’ll understand why it’s been passed down in my family for generations.

Why You’ll Love These Rhubarb Belts
Let me tell you why these rhubarb belts are about to become your new favorite dessert:
- Effortless magic: Just five simple ingredients transform into something spectacular
- Perfect balance: The sweet, crumbly crust plays beautifully against the tart rhubarb filling
- Seasonal superstar: They make the most of fresh spring rhubarb (but frozen works too!)
- Crowd pleaser: Equally at home at backyard barbecues or fancy dinner parties
- Nostalgia in every bite: That old-fashioned comfort food feeling we all crave
The best part? You probably have everything you need in your kitchen right now. That’s what I call a win!
Ingredients for Rhubarb Belts
Gather these simple ingredients – I promise you won’t need anything fancy! The magic happens when these humble components come together:
- 2 cups chopped rhubarb – fresh is best, but frozen works in a pinch (just thaw and drain first)
- 1 cup sugar – packed lightly into your measuring cup
- 1 cup all-purpose flour – spooned and leveled for accuracy
- 1/2 cup butter – softened to room temperature (this makes all the difference!)
- 1/2 teaspoon cinnamon – for that warm, cozy flavor
See? Nothing complicated here – just good, honest ingredients that let the rhubarb shine. Now let’s get baking!

How to Make Rhubarb Belts
Okay, let’s get to the fun part – making these beauties! I promise it’s easier than you think. Just follow these simple steps, and you’ll have golden, bubbling rhubarb belts in no time.
Preparing the Rhubarb Filling
First things first – grab that chopped rhubarb and toss it with half the sugar (that’s 1/2 cup) in a medium bowl. The sugar will start drawing out the rhubarb’s juices almost immediately – that’s exactly what we want! If your rhubarb is extra tart, don’t be afraid to add an extra tablespoon or two of sugar. Give it a good stir and set it aside while you work on the crust.
Making the Crust
Now for the buttery goodness! In another bowl, combine the flour, remaining 1/2 cup sugar, softened butter, and cinnamon. Here’s my favorite part – use your fingers to work the butter into the dry ingredients until it looks like coarse crumbs. You’ll know it’s ready when the mixture holds together when squeezed but still crumbles easily. This texture makes that perfect crispy topping we all love.
Assembling and Baking
Time to put it all together! Press half of the crumb mixture firmly into the bottom of your baking dish – I use an 8×8 inch pan. Spread the sugared rhubarb evenly over this base, then sprinkle the remaining crumb mixture on top. Pop it in your preheated 350°F oven and bake for about 45 minutes, until the top is golden brown and you can see the rhubarb juices bubbling around the edges. Your kitchen will smell absolutely heavenly!

Tips for Perfect Rhubarb Belts
After making countless batches of these rhubarb belts, I’ve picked up some tricks that’ll guarantee dessert perfection every time:
- Rhubarb readiness: Choose firm, crisp stalks with vibrant color – limp ones won’t give you that perfect tart bite
- Size matters: Chop your rhubarb into 1/2-inch pieces – too big and they won’t soften properly, too small and they’ll turn mushy
- The golden rule: Wait until you see those ruby-red juices bubbling around the edges before taking it out
- Cool patience: Let it rest at least 15 minutes before slicing – I know it’s hard, but it makes cleaner cuts!
- Crust check: If the top’s browning too fast, just tent it loosely with foil
Follow these simple tips, and you’ll have rhubarb belts worthy of any baker’s bragging rights!
Ingredient Substitutions
No fresh rhubarb? No problem! Here are my favorite swaps when I need to improvise:
- Frozen rhubarb works beautifully – just thaw and drain well first
- Coconut sugar gives a lovely caramel note, though it’ll darken your crust
- Gluten-free flour blends work fine – I’ve had great results with 1-to-1 mixes
- For dairy-free, try plant-based butter – it won’t be quite as rich but still delicious
The beauty of this recipe is how forgiving it is – don’t be afraid to make it your own!
Serving Suggestions for Rhubarb Belts
Oh, the possibilities! These rhubarb belts shine all on their own, but I’ll let you in on my favorite ways to serve them. A scoop of vanilla ice cream melting over the warm crumble is absolute heaven – the cold creaminess against the tart rhubarb? Perfection! For something lighter, try a dollop of freshly whipped cream. My grandma always served hers alongside a strong cup of black coffee – the bitterness balances the sweetness beautifully. However you serve them, make sure to dig in while they’re still slightly warm!

Storing and Reheating Rhubarb Belts
These rhubarb belts keep like a dream! Let them cool completely, then cover tightly with plastic wrap or store in an airtight container at room temperature for up to 3 days. For longer storage, they freeze beautifully for 2-3 months. When you’re ready to enjoy, just pop a slice in the microwave for 15-20 seconds or warm it in a 300°F oven until toasty. The crust stays crisp, and that rhubarb filling tastes just as good as when it first came out of the oven!
Rhubarb Belts Nutrition Information
Now, I’m no nutritionist, but here’s the scoop on what’s in these tasty treats! Each serving (about one generous slice) comes to roughly 250 calories. Remember, these numbers are just estimates – your actual count might vary depending on your exact ingredients and portion size. The rhubarb brings some fiber and vitamin K to the party, while that buttery crust gives it that irresistible richness we all love. Everything in moderation, right?
Frequently Asked Questions
Can I use frozen rhubarb instead of fresh?
Absolutely! Just thaw it completely and drain off any excess liquid first. Frozen rhubarb tends to be a bit more watery, so I sometimes add an extra tablespoon of flour to the filling if it looks too juicy.
How can I adjust the sweetness?
Taste your rhubarb first – some stalks are tarter than others. Start with the recipe’s sugar amount, then add more by the tablespoon until it suits your taste. My aunt always said, “Better to add than take away!”
Why is my crust not crispy enough?
Two likely culprits: your butter might have been too soft, or you didn’t bake it quite long enough. Next time, make sure your butter is just softened (not melted) and wait for those golden edges!
Can I make these ahead of time?
You bet! They actually taste even better the next day as the flavors meld. Just store them covered at room temperature and warm slightly before serving.
Share Your Rhubarb Belts Experience
I’d love to hear how your rhubarb belts turned out! Did you add your own twist? Which serving suggestion did you try? Leave a comment below – your baking stories make my day!
Print
Irresistible 5-Ingredient Rhubarb Belts Recipe You’ll Crave
- Total Time: 60 minutes
- Yield: 6 servings 1x
- Diet: Vegetarian
Description
A simple and delicious dessert made with rhubarb and a crispy crust.
Ingredients
- 2 cups chopped rhubarb
- 1 cup sugar
- 1 cup flour
- 1/2 cup butter
- 1/2 tsp cinnamon
Instructions
- Preheat oven to 350°F (175°C).
- Mix rhubarb and 1/2 cup sugar in a bowl.
- Combine flour, remaining sugar, butter, and cinnamon to make the crust.
- Press half the crust mixture into a baking dish.
- Spread rhubarb mixture over the crust.
- Sprinkle remaining crust mixture on top.
- Bake for 45 minutes or until golden brown.
Notes
- Use fresh rhubarb for best results.
- Adjust sugar based on rhubarb tartness.
- Prep Time: 15 minutes
- Cook Time: 45 minutes
- Category: Dessert
- Method: Baking
- Cuisine: American
Nutrition
- Serving Size: 1 piece
- Calories: 250
- Sugar: 20g
- Sodium: 100mg
- Fat: 10g
- Saturated Fat: 6g
- Unsaturated Fat: 3g
- Trans Fat: 0g
- Carbohydrates: 35g
- Fiber: 2g
- Protein: 2g
- Cholesterol: 25mg