Oh my goodness, let me tell you about my absolute favorite no-bake dessert—this Cherry Oreo Icebox Cake! It’s the dessert I turn to when I need something magical but don’t want to turn on the oven (hello, summer heat!). I first made this for my niece’s birthday party last year, and now it’s been requested at every family gathering since. The combination of crunchy Oreos, fluffy whipped cream, and sweet-tart cherries is just heavenly.
What I love most is how ridiculously easy it is—just layers of cookies, cream, and cherries that magically soften into cake-like perfection after chilling. No fancy skills required! Trust me, once you try this Cherry Oreo Icebox Cake, you’ll understand why it’s become my go-to dessert for potlucks, picnics, and those “I really need chocolate” moments.

Why You’ll Love This Cherry Oreo Icebox Cake
Oh, where do I even start? This Cherry Oreo Icebox Cake isn’t just delicious—it’s downright magical in how easy and crowd-pleasing it is. Here’s why you’re going to adore it as much as I do:
- No oven required: When it’s too hot to bake or you’re just feeling lazy (no judgment!), this no-bake wonder saves the day.
- Minimal effort, maximum wow: Just layer, chill, and watch it transform into something spectacular.
- Always a hit: Between the Oreos and cherries, it pleases both kids and adults—I’ve never brought leftovers home!
- Endlessly customizable: Swap fruits, try different Oreo flavors, or add chocolate shavings—it’s your canvas!
Seriously, this recipe is my not-so-secret weapon for stress-free entertaining.

The Simple Ingredients That Make Magic
You won’t believe how just five simple ingredients come together to create something so special! I’ve tried fancy versions with all sorts of additions, but honestly, keeping it simple lets the cherry and Oreo flavors shine. Here’s exactly what you’ll need:
- 36 Oreo cookies – Regular or mini work great (I sometimes use the golden ones when I’m feeling fancy!)
- 2 cups heavy cream (chilled) – Must be cold! I pop mine in the freezer for 15 minutes before whipping
- 1/4 cup powdered sugar – Just enough sweetness without overpowering the Oreos
- 1 tsp vanilla extract – The secret flavor booster that ties everything together
- 1 can (21 oz) cherry pie filling – Look for ones with plump cherries (the syrup is liquid gold!)
That’s it! No complicated ingredients or special trips to the store. I always have most of these in my pantry for emergency dessert situations. One quick tip—make sure your cream is extra cold. It whips up so much faster and holds its shape better in the layers.
Equipment You’ll Need
One of the best things about this Cherry Oreo Icebox Cake? You probably already have most of these tools in your kitchen! Here’s what I always pull out when making it:
- Mixing bowl – A large metal one works best (chill it first if you can – trust me, it helps!)
- Hand mixer or stand mixer – For that perfect whipped cream texture (though I’ve whisked by hand in a pinch – just takes some arm muscle!)
- 9×9 inch baking dish – Glass or ceramic is my preference so you can see those gorgeous layers
- Rubber spatula – For spreading that dreamy cream without scratching your dish
- Measuring cups and spoons – Because guessing with whipped cream never ends well
See? Nothing fancy needed. I’ve even made this in a pie plate when my square dish was dirty – just adjust your layers accordingly. The beauty of this dessert is how forgiving it is!
How to Make Cherry Oreo Icebox Cake
Okay, let’s get to the fun part—building this glorious no-bake masterpiece! I promise it’s easier than you think, and the results will have everyone thinking you spent hours in the kitchen. Just follow these simple steps for the most dreamy Cherry Oreo Icebox Cake you’ve ever tasted.
Step 1: Prepare the Whipped Cream Layer
First things first—that luscious whipped cream! Here’s my foolproof method: toss your mixing bowl and beaters in the freezer for about 10 minutes (cold tools make all the difference). Pour in the chilled heavy cream and start whipping on medium speed. When it starts to thicken, sprinkle in the powdered sugar and vanilla. Keep going until you get beautiful stiff peaks—you’ll know it’s ready when the cream holds its shape when you lift the beaters. Don’t walk away though! Overwhipping turns cream to butter (trust me, I’ve cried over that mistake before).
Step 2: Layer the Oreos and Cream
Now for the fun part! Spread a thin layer of whipped cream in your dish—this helps anchor everything. Arrange Oreos in a single layer, breaking some if needed to fill gaps (I call this “cookie tetris”). Gently press them down so they get cozy in the cream. Dollop half the remaining whipped cream over the cookies and spread carefully—no need to be perfect here, those rustic swirls are part of the charm! The cookies will peek through, and that’s exactly what we want.
Step 3: Add the Cherry Filling
Time for the showstopper! Spoon half the cherry pie filling over the cream layer. Here’s my trick: use the back of the spoon to gently spread it, letting some cherries peek through while allowing the syrup to seep into the layers below. Resist the urge to pour all the syrup at once—we want moisture, not a soggy mess. Then repeat the layers: Oreos, cream, and the rest of those gorgeous cherries. I always save the prettiest cherries for the top!
Step 4: Chill the Cherry Oreo Icebox Cake
Here’s where the magic happens! Cover your creation with plastic wrap (press it right against the surface to prevent drying) and pop it in the fridge. I know it’s tempting to sneak a bite early, but trust me—wait at least 4 hours, though overnight is even better. The cookies soften into cake-like perfection, the flavors meld, and the layers set up beautifully. When you’re ready to serve, dust with cocoa powder or extra crushed Oreos if you’re feeling fancy!

Tips for the Perfect Cherry Oreo Icebox Cake
After making this Cherry Oreo Icebox Cake more times than I can count (my waistline can attest to that!), I’ve picked up some game-changing tricks. These little details take it from good to “oh my gosh, give me the recipe!” amazing:
- Chill everything first: I pop my mixing bowl and beaters in the freezer for 10 minutes before whipping the cream. Cold tools = faster, fluffier peaks that hold their shape beautifully.
- Use full-fat heavy cream only: I tried half-and-half once—big mistake! The higher fat content means stable whipped cream that won’t weep or deflate during chilling.
- Drain some cherry syrup: If your pie filling looks extra juicy, spoon off about 1-2 tablespoons of syrup. You want moist cookies, not a swimming pool!
- The overnight test: While 4 hours works, letting it chill overnight gives the flavors time to really mingle—the difference is incredible!
- Crush some Oreos: I like to sprinkle crushed cookies between layers for extra texture contrast—just don’t tell the cookie police I’m breaking their rules!
- Slice with a hot knife: Run your knife under hot water and dry it quickly for the cleanest slices. Works like a charm every time.
The best part? Even if you skip all these tips, you’ll still end up with something delicious. That’s the beauty of this no-fuss dessert—but trust me, these little tweaks make it extra special!
Variations & Substitutions
This Cherry Oreo Icebox Cake is like the little black dress of desserts—endlessly adaptable to whatever flavors or dietary needs you’re craving! Here are all my favorite ways to mix it up (because I can never resist playing with recipes):
Crazy for Cookies
Oreo purists might gasp, but swapping the cookie is such an easy way to reinvent this dessert! Try:
- Golden Oreos: Their vanilla flavor pairs beautifully with raspberry or strawberry filling (my niece’s favorite combo!)
- Mint Oreos: Add a splash of peppermint extract to the cream and use chocolate-covered cherries—it’s like a Thin Mint dream!
- Peanut Butter Oreos: Layer with banana slices and chocolate syrup for an Elvis-inspired version that disappears fast!
Fruity Twists
Not a cherry fan? No problem! The fruit filling is your playground:
- Blueberry: Mix a teaspoon of lemon zest into the cream for a bright, summery vibe
- Strawberry: Add sliced fresh strawberries between layers for extra texture
- Peach: Use cinnamon-spiced peaches and ginger snap cookies—heaven in the fall!
Dietary Swaps
For friends with dietary needs, here are my tested-and-approved alternatives:
- Dairy-free: Coconut cream whips up beautifully—just chill the can overnight and scoop out the thick part
- Gluten-free: Use GF sandwich cookies (Glutino makes great ones) and check your pie filling labels
- Lower sugar: Swap sugar-free cookies and use fresh fruit tossed with a smidge of honey instead of pie filling
The one rule? Have fun with it! I’ve even done a “cookies and cream” version with crushed Oreos mixed right into the whipped cream layers. Whatever you choose, just remember—the magic is in letting those layers chill and mellow together. Now go be your own dessert artist!
Serving and Storing Cherry Oreo Icebox Cake
Oh, the moment of truth—when you finally get to dive into that beautiful Cherry Oreo Icebox Cake! Here’s how I make sure every slice is as perfect as can be. First things first: presentation matters, right? I love dusting the top with a little cocoa powder or extra crushed Oreos right before serving—it makes it look bakery-fancy with zero effort. A few extra fresh cherries or chocolate shavings never hurt either!
Now for the important part: slicing. I always run my knife under hot water for a few seconds, dry it quickly, and make clean cuts. The warm blade glides through those layers like butter (you’re welcome for that game-changing tip!). Serve it cold—the flavors are brightest and the texture is just dreamy when it’s properly chilled.
As for leftovers (if you’re lucky enough to have any!), just cover the dish tightly with plastic wrap or transfer slices to an airtight container. It keeps beautifully in the fridge for about 3 days—though I can’t promise it’ll last that long! The cookies do soften more over time, but in the best way possible. Pro tip: don’t freeze it. I learned the hard way that the whipped cream gets icy and the texture turns grainy. Trust me, it’s better eaten fresh (like that’s a hardship!).

Nutritional Information
Okay, let’s be real—we’re not eating Cherry Oreo Icebox Cake because it’s a health food (though I firmly believe joy is nutritious in its own way!). But if you’re curious about what you’re enjoying, here’s the general breakdown per serving. Just remember, these numbers can vary based on the exact brands you use, so take them as friendly estimates rather than strict counts:
- Calories: About 320 per generous slice (worth every bite!)
- Fat: 18g (mostly from that heavenly heavy cream and Oreo filling)
- Sugar: 24g (the sweet spot between indulgent and overly sweet)
- Protein: 3g (surprising bonus from the dairy and cookies!)
I always say—life’s too short to stress over dessert calories, especially when shared with loved ones. This Cherry Oreo Icebox Cake is meant to be savored slowly, with lots of laughter and maybe an extra scoop of cherries on top. After all, some of the best nutrients can’t be measured!
Frequently Asked Questions
Can I use fresh cherries instead of pie filling?
Absolutely! I love using fresh cherries when they’re in season. Just pit and chop about 2 cups of cherries, then simmer them with 1/4 cup sugar and a splash of lemon juice until they release their juices (about 5 minutes). Let it cool completely before layering—you’ll get that gorgeous fresh cherry flavor with just the right amount of syrup!
How long does Cherry Oreo Icebox Cake keep in the fridge?
This beauty holds up surprisingly well! Covered tightly, it stays delicious for about 3 days in the fridge. The cookies continue softening (in that dreamy cake-like way), and the flavors actually deepen overnight. Just avoid freezing—I learned the hard way that thawed whipped cream gets weepy and loses its magic texture.
Can I make this dessert ahead of time?
That’s the best part! This Cherry Oreo Icebox Cake actually needs time to chill—making it the perfect make-ahead dessert. I often assemble it the night before a party. The extra time lets the cookies soften perfectly and lets all the flavors mingle beautifully. Just add any final garnishes right before serving.
My whipped cream seems runny—what went wrong?
Oh honey, I’ve been there! Usually it’s one of three things: the cream wasn’t cold enough, the bowl wasn’t chilled, or (most likely) you didn’t whip it long enough. Don’t panic! Pop everything back in the fridge for 15 minutes, then whip again. Pro tip: watch for those stiff peaks that stand straight up when you lift the beaters—that’s when you know it’s ready to hold those gorgeous layers!
Can I use a different size pan?
Of course! I’ve made this in everything from a 9-inch pie plate to a loaf pan. Just adjust your layers accordingly—fewer but thicker layers in a smaller dish, or more delicate layers in a larger one. The only rule? Make sure you’ve got enough height for at least two full sets of cookie-cream-cherry layers. My favorite is still the classic 9×9 dish because those square slices look so darn pretty!
Share Your Creation!
Okay, confession time—I LIVE for seeing your Cherry Oreo Icebox Cake masterpieces! There’s nothing that makes me happier than spotting your creations pop up on my social media feeds. Did you add a special twist? Maybe some extra chocolate drizzle or a fun cookie variation? I want to see it all!
Tag me @[YourHandle] so I can cheer you on—I’ll probably screenshot your genius ideas for my next batch (with full credit, of course). And if you loved this recipe as much as my family does, I’d be so grateful if you left a star rating below. Your feedback helps other dessert lovers find this easy, no-bake treasure!
Most importantly—have fun with it! Some of my favorite recipe variations have come from your brilliant suggestions. Now go forth and create something delicious (and don’t forget to snap a pic before it disappears—we all know how fast that happens!).
PrintIrresistible 5-Ingredient Cherry Oreo Icebox Cake in 4 Steps
- Total Time: 4 hrs 20 mins
- Yield: 9 servings 1x
- Diet: Vegetarian
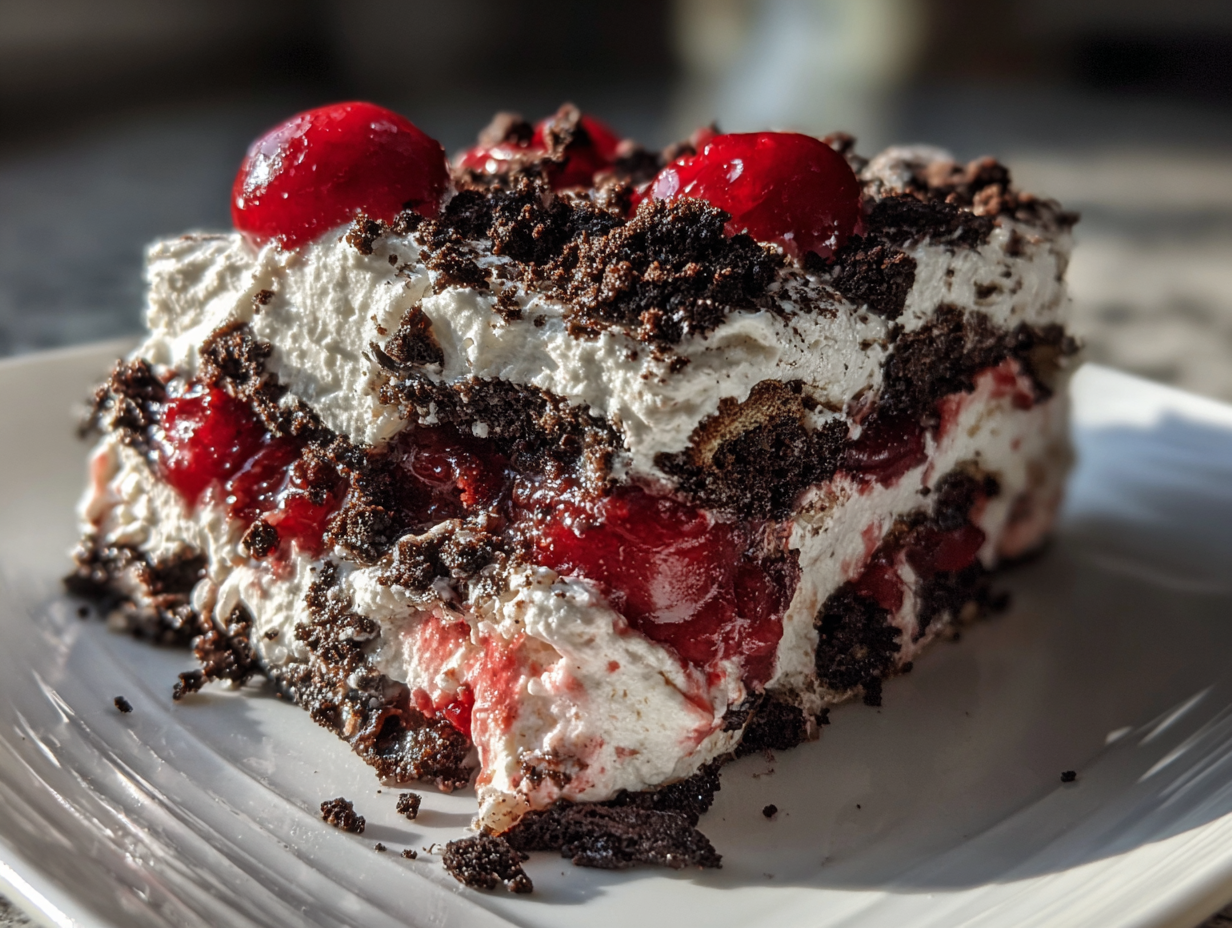
Description
A no-bake dessert with layers of Oreo cookies, whipped cream, and cherries.
Ingredients
- 36 Oreo cookies
- 2 cups heavy cream
- 1/4 cup powdered sugar
- 1 tsp vanilla extract
- 1 can cherry pie filling (21 oz)
Instructions
- Whip heavy cream, powdered sugar, and vanilla until stiff peaks form.
- Spread a thin layer of whipped cream in a 9×9 dish.
- Arrange a single layer of Oreo cookies over the cream.
- Spread half the remaining whipped cream over the cookies.
- Spoon half the cherry pie filling over the cream.
- Repeat layers: cookies, cream, and cherries.
- Cover and refrigerate for at least 4 hours or overnight.
- Serve chilled.
Notes
- Use mini Oreos for bite-sized servings.
- Substitute strawberries or blueberries if preferred.
- Dust with cocoa powder before serving for extra flavor.
- Prep Time: 20 mins
- Cook Time: 0 mins
- Category: Dessert
- Method: No-Bake
- Cuisine: American
Nutrition
- Serving Size: 1 slice
- Calories: 320
- Sugar: 24g
- Sodium: 180mg
- Fat: 18g
- Saturated Fat: 10g
- Unsaturated Fat: 6g
- Trans Fat: 0g
- Carbohydrates: 38g
- Fiber: 1g
- Protein: 3g
- Cholesterol: 45mg