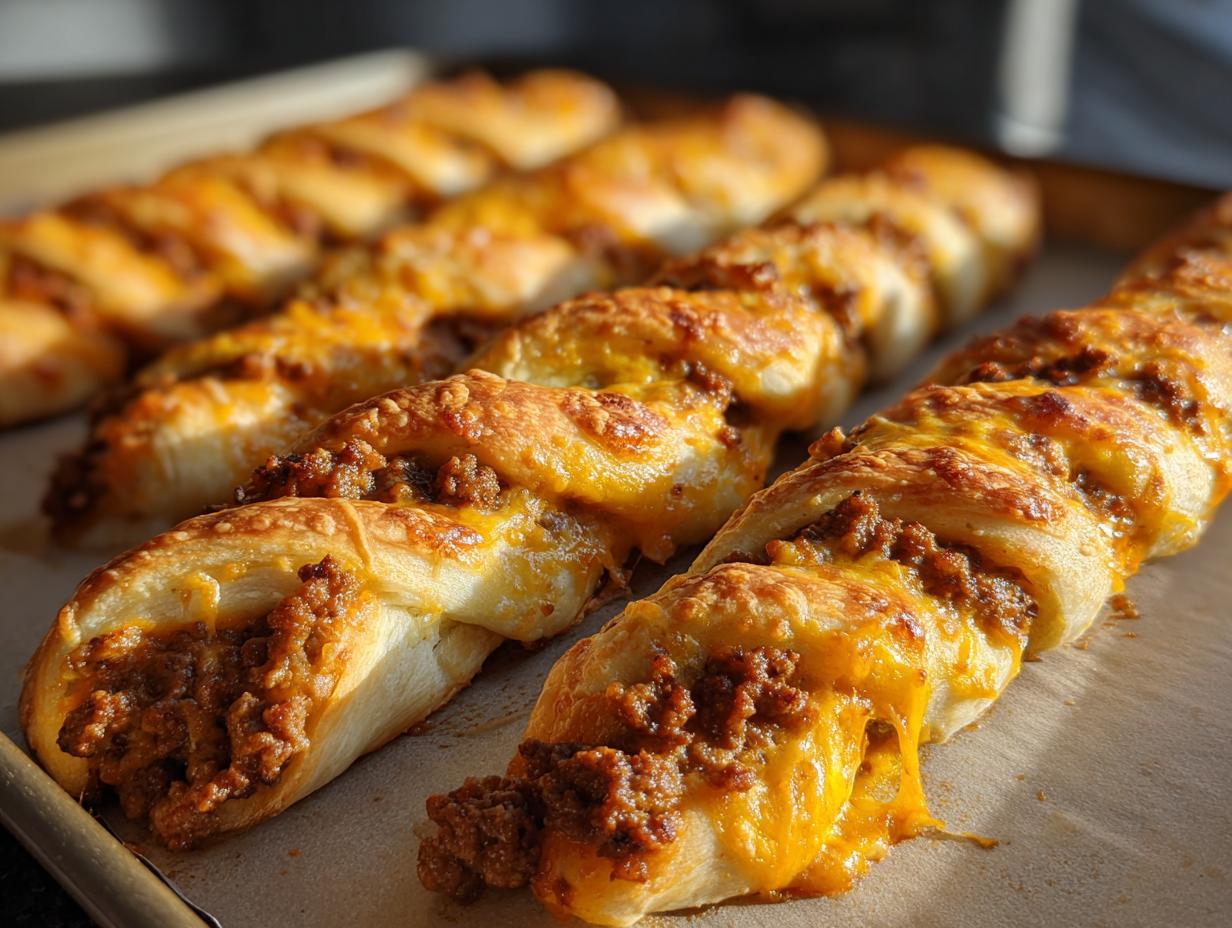
Picture this: golden, buttery breadsticks twisted around a molten core of spicy taco meat and gooey cheese. That first pull-apart bite where the cheese stretches endlessly? Pure magic. These Cheesy Taco Sticks became my ultimate party trick after I accidentally created them during a frantic “clean out the fridge” night. Now friends beg me to bring them to every game day—they disappear faster than you can say “touchdown!” The best part? You probably have most ingredients in your pantry already.

What makes these sticks so special isn’t just their bold taco flavor (though that’s definitely a highlight). It’s how stupidly easy they come together. One can of pizza dough transforms into crispy-chewy vessels for that classic taco filling we all crave. I’ve tested dozens of variations, but this simple version with melty cheddar and mozzarella remains my favorite. The garlic butter brush right before baking? That’s my grandma’s secret for that irresistible sheen and aroma.
These aren’t just appetizers—they’re edible happiness. Kids go wild for the fun twist shape, adults appreciate the nostalgic taco taste, and everyone fights over that last cheesy stick. Warning: You might need to make a double batch!
Why You’ll Love These Cheesy Taco Sticks
These cheesy wonders are my go-to for good reason:
- 20-minute magic: From fridge to table faster than delivery pizza (seriously, the dough does half the work)
- Kid-approved: My picky nephew calls them “cheesy tornadoes” and inhales three before I can blink
- Customizable: Swap in turkey, black beans, or extra jalapeños—they’re like edible artist canvases
- Crowd-pleasing: The perfect hand-held snack for game days, potlucks, or “I don’t wanna cook” nights
- Leftover hero: Tastes even better reheated (if they last that long!)
Trust me, once you smell that garlic butter hitting the oven, you’ll understand why these disappear faster than chips at a tailgate.
Ingredients for Cheesy Taco Sticks
Here’s what you’ll need to make these cheesy delights (measurements matter – I learned that the hard way when my first batch turned into a cheese lava explosion!):
- 1 can (13.8 oz) refrigerated pizza dough – the shortcut hero (I like Pillsbury™ but any brand works)
- ½ pound lean ground beef – 85/15 blend gives flavor without greasiness
- 1 packet (1 oz) taco seasoning – my guilty pleasure is McCormick™ spicy blend
- 1 cup packed shredded cheddar – pack it like snowballs for maximum melt
- 1 cup shredded mozzarella – the stretchy glue holding everything together
- 1 tablespoon melted butter – real butter only, please!
- ¼ teaspoon garlic powder – the finishing touch that makes people go “Ooh!”

Ingredient Substitutions & Notes
Ran out of something? No sweat! Here’s how to adapt:
- Ground turkey or chicken works great for a lighter version (add extra seasoning)
- Use vegan cheese and plant-based meat for dairy-free sticks (the butter can swap for olive oil)
- Feeling fancy? Homemade pizza dough takes these to artisan levels (just roll it ¼” thin)
- No taco packet? Mix 1 tbsp chili powder + ½ tsp each cumin, garlic powder, paprika, and salt
Pro tip: If your cheese blend isn’t sticking to the meat, sprinkle 1 tsp cornstarch on it first – stops the dreaded cheese slide!
How to Make Cheesy Taco Sticks
Alright, let’s get twisting! Here’s exactly how I make these beauties (with all the hard-learned tricks):
- Heat it up: Crank your oven to 375°F (190°C) and line a baking sheet with parchment paper – no skipping this or you’ll regret it when scraping off cheese!
- Brown that beef: In a skillet, cook your ground beef over medium heat until it’s nicely browned (about 5-7 minutes). Drain the fat (I tilt the pan and use a spoon), then stir in the taco seasoning with ¼ cup water. Let it simmer until thickened like a proper taco filling.
- Roll it out: Flour your counter liberally, then roll the pizza dough into a big rectangle (about 10×15 inches). Don’t stress perfection – my first attempts looked like abstract art!
- Load it up: Spread the taco meat evenly over one half of the dough, leaving a ½-inch border. Pile on the cheeses – I do cheddar first, then mozzarella, pressing gently so they stick to the meat.
- Seal the deal: Fold the bare dough over the filling and crimp the edges HARD with a fork. This is crucial – one unsealed edge means molten cheese escape!
- Twist time: Cut into 1-inch strips with a pizza cutter. Hold both ends of a strip and twist 3-4 times before placing on the baking sheet (space them 1 inch apart – they puff up!).
- Butter bliss: Brush each twist with melted butter and sprinkle with garlic powder. This makes them golden and gives that irresistible aroma.
- Bake to glory: 15-20 minutes until they’re golden brown and crispy at the edges. Let cool 2 minutes before serving (if you can wait!).

Pro Tips for Perfect Sticks
My battle-tested secrets for foolproof sticks:
- Dry filling = crispy sticks: If your taco meat looks watery after seasoning, cook it another minute or two. Wet filling makes soggy dough.
- Twist evenly: Give each strip the same number of rotations so they bake uniformly (I count aloud: “one-Mississippi, two-Mississippi…”)
- Parchment is non-negotiable: Even nonstick pans can’t handle that cheese pull – trust me, I’ve ruined pans learning this!
- Space them out: Overcrowding creates steam pockets = soft sticks. Give each twist breathing room.
Serving & Dipping Suggestions
Oh, the dipping possibilities! We always set up a “dipping station” with these crowd favorites:
- Classic trio: Cool sour cream, chunky salsa, and my lazy guacamole (just mashed avocado + lime juice)
- Game day upgrade: Spicy ranch (mix ¼ cup hot sauce into ½ cup ranch) for heat lovers
- Unexpected hit: Warm queso dip turns these into next-level cheesy bombs
For parties, I arrange the sticks standing up in a tall glass like a breadstick bouquet – looks fancy but takes 10 seconds! Pair with margaritas or an ice-cold beer for ultimate taco night vibes.
Storage & Reheating Instructions
These cheesy sticks stay delicious for days if stored right (though they rarely last that long in my house!). Airtight container in the fridge keeps them fresh for 3 days max – any longer and the dough gets soggy. For that just-baked crispiness, 3 minutes in an air fryer at 350°F works miracles! Microwave reheating makes them rubbery – learned that the hard way!
Cheesy Taco Sticks Variations
Once you’ve mastered the basic version, get creative with these fun twists (my family begs me to rotate through them!):
- Spicy fiesta: Mix diced jalapeños into the cheese blend and add a sprinkle of crushed red pepper – my brother-in-law demands this “firestick” version
- Veggie-loaded: Swap beef for black beans and corn, adding sautéed bell peppers for crunch (my vegetarian niece’s favorite)
- Breakfast special: Scrambled eggs + crispy bacon bits + pepper jack cheese make the ultimate hangover cure (Sunday brunch hero!)
The beauty? You can even do half-and-half batches on one baking sheet – just mark the spicy ones with extra garlic powder so no one gets surprised!
Nutritional Information
Now, I’m no nutritionist (my motto is “everything in moderation, especially cheese!”), but here’s the general breakdown per cheesy taco stick based on my standard recipe. Keep in mind – numbers will dance around depending on your specific ingredients and how generously you stuff those twists!
- Calories: About 320 per stick (that irresistible cheese comes at a cost!)
- Protein: 15g – thank you, beef and cheese dream team
- Carbs: 22g (mostly from that glorious pizza dough)
- Fat: 18g (but it’s the good, flavorful kind, right?)
My advice? Enjoy two sticks with a big salad to balance things out – or go all in and savor every melty bite guilt-free!
FAQs About Cheesy Taco Sticks
You’ve got questions? I’ve got answers (and probably made all these mistakes already!):
- Can I freeze these? Absolutely! Freeze before baking for best results. Assemble the twists, place them on a parchment-lined tray, and freeze solid (about 2 hours). Then transfer to a freezer bag. When ready, bake frozen sticks at 375°F for 22-25 minutes. Works like a charm for last-minute snacks!
- Gluten-free options? Swap regular dough for gluten-free pizza dough (I like the Against The Grain brand). The texture will be slightly different but still delicious. Just work quickly – GF dough tends to tear easier when twisting.
- Why did my cheese ooze out? Probably didn’t seal the edges well enough! Next time, really press that fork down hard around all sides. If some still escapes? Call it “cheese lace” and pretend it’s fancy.
- Can I make these ahead? You bet – assembled sticks keep in the fridge for up to 4 hours before baking. Just cover with plastic wrap so the dough doesn’t dry out.
Still stumped? Slide into my DMs – I’ve troubleshooted every possible taco stick disaster and lived to tell the tale!
Print
Irresistible Cheesy Taco Sticks Recipe Ready in 20 Minutes
- Total Time: 30 minutes
- Yield: 8 sticks 1x
- Diet: Low Lactose
Description
Cheesy Taco Stuffed Breadsticks with Taco Filling
Ingredients
- 1 can refrigerated pizza dough
- 1/2 pound ground beef
- 1 packet taco seasoning
- 1 cup shredded cheddar cheese
- 1 cup shredded mozzarella cheese
- 1 tablespoon butter, melted
- 1/4 teaspoon garlic powder
- Salsa and sour cream for dipping
Instructions
- Preheat oven to 375°F (190°C).
- In a skillet, cook ground beef over medium heat until browned. Drain any excess fat, then stir in taco seasoning according to the packet instructions. Set aside.
- Roll out the pizza dough on a floured surface into a large rectangle.
- Spread the cooked taco meat evenly over one half of the dough. Sprinkle the shredded cheddar and mozzarella cheese on top of the meat.
- Fold the other half of the dough over the filling and press the edges to seal.
- Cut the stuffed dough into strips about 1 inch wide. Twist each strip and place on a parchment-lined baking sheet.
- Brush the tops of the twisted sticks with melted butter and sprinkle with garlic powder.
- Bake for 15–20 minutes, or until golden brown and crispy.
- Serve with salsa and sour cream for dipping.
Notes
- Use lean ground beef for a less greasy filling.
- Customize with additional toppings like jalapeños or olives.
- Prep Time: 10 minutes
- Cook Time: 20 minutes
- Category: Appetizer
- Method: Baking
- Cuisine: Mexican-inspired
Nutrition
- Serving Size: 1 stick
- Calories: 320 kcal
- Sugar: 2g
- Sodium: 480mg
- Fat: 18g
- Saturated Fat: 8g
- Unsaturated Fat: 7g
- Trans Fat: 0.5g
- Carbohydrates: 22g
- Fiber: 1g
- Protein: 15g
- Cholesterol: 45mg