Oh my gosh, let me tell you about the magic that happens when buttery pastry meets sweet spiced apples – it’s apple Danish time! Nothing beats the smell of cinnamon and baked apples wafting through my kitchen on a lazy weekend morning. I’ve been making these flaky little delights since my college days (when I discovered how shockingly easy they are), and trust me, once you’ve had homemade, those sad coffee shop versions just won’t cut it. The beauty of this apple Danish recipe? It’s basically foolproof – just a handful of pantry staples transforms into golden, jammy perfection that makes everyone think you’re a pastry chef. My secret? Granny Smith apples for that perfect tang and keeping everything ice-cold for the flakiest layers imaginable.

Why You’ll Love This Apple Danish Recipe
Listen, I know we all want recipes that deliver maximum deliciousness with minimum fuss – and this apple Danish checks all the boxes. Here’s why it’s become my go-treat:
- Effortless elegance: Looks fancy but comes together faster than my morning coffee brews
- That perfect bite: Flaky crust gives way to tender, cinnamon-kissed apples – pure comfort
- Morning or night magic: Equally at home on a brunch table or as dessert with vanilla ice cream
- Your pastry, your rules: Add nuts, swap pears for apples, drizzle caramel – it’s endlessly adaptable
The best part? That moment when your kitchen smells like a Danish bakery and everyone comes running.
Ingredients for Apple Danish
Okay, let’s raid the pantry! Here’s what you’ll need for our apple Danish magic – and I promise, no weird ingredients hiding here. Just simple, honest stuff that makes your kitchen smell like heaven:
- 2 cups all-purpose flour (spooned and leveled, please – we’re not packing it like snow!)
- 1/2 cup butter, cold and cubed (I’m talking straight-from-the-fridge cold – warm butter is the enemy of flaky layers)
- 1/4 cup sugar (regular granulated works great here)
- 1/4 tsp salt (trust me, it makes the flavors pop)
- 1/4 cup cold water (ice water if you’re feeling extra fancy)
- 2 apples, peeled and diced (Granny Smiths are my ride-or-die for that perfect tangy-sweet balance)
- 1 tsp cinnamon (because what’s apple Danish without that cozy hug of spice?)
- 1/4 tsp nutmeg (just a whisper – it’s cinnamon’s best friend)
- 1 tbsp lemon juice (keeps those apples from turning brown and adds bright flavor)
- 1 egg, beaten (for that gorgeous golden shine on top)
See? Nothing scary. Just honest ingredients that’ll make your taste buds dance. Now let’s get to the fun part!
Equipment You’ll Need
Don’t worry – you don’t need fancy gadgets for this apple Danish! Just grab these basic kitchen tools (I bet you already have most of them):
- Mixing bowl (any decent-sized one will do)
- Pastry cutter or fork (for that butter-flour magic)
- Rolling pin (or a wine bottle in a pinch – I’ve been there!)
- Baking sheet lined with parchment paper (no-stick insurance)
- Knife and cutting board (for those apples)
- Pastry brush (or just use your fingers for the egg wash – no judgment)
That’s it! Now we’re ready to make some pastry magic happen.
How to Make Apple Danish
Alright, let’s get our hands floury! Making apple Danish is easier than you think – I’ve messed up enough times to know all the tricks that’ll guarantee success. Follow these steps and you’ll have golden, flaky perfection in no time.
Preparing the Dough
First things first – preheat that oven to 375°F (190°C). Now, let’s make magic with flour and butter! In your mixing bowl, whisk together the flour, sugar, and salt. Here comes the key to flaky layers – take your ice-cold cubed butter and work it into the flour mixture with a pastry cutter or fork until it resembles coarse crumbs with some pea-sized butter bits remaining. Don’t overdo it! Those butter pockets = flakiness heaven.
Drizzle in the cold water gradually, mixing just until the dough comes together. It should look shaggy at first – resist the urge to overmix! Turn it onto a lightly floured surface and gently knead into a ball. Pro tip: If the dough feels sticky, chill it for 15 minutes wrapped in plastic – this makes rolling easier.
Assembling the Apple Danish
Roll that beautiful dough into a roughly 10×14 inch rectangle – don’t stress about perfection, rustic is charming! Now for the fun part: toss your diced apples with cinnamon, nutmeg, and lemon juice until they’re nicely coated. Spread this spiced apple goodness evenly over one half of the dough, leaving about a 1-inch border.
Carefully fold the empty half over the apples like you’re closing a book. Use your fingers to crimp the edges firmly – this keeps all those juicy apples from escaping during baking! Transfer your masterpiece to the parchment-lined baking sheet. I sometimes make small diagonal slits on top – lets steam escape and looks professional.

Baking and Finishing
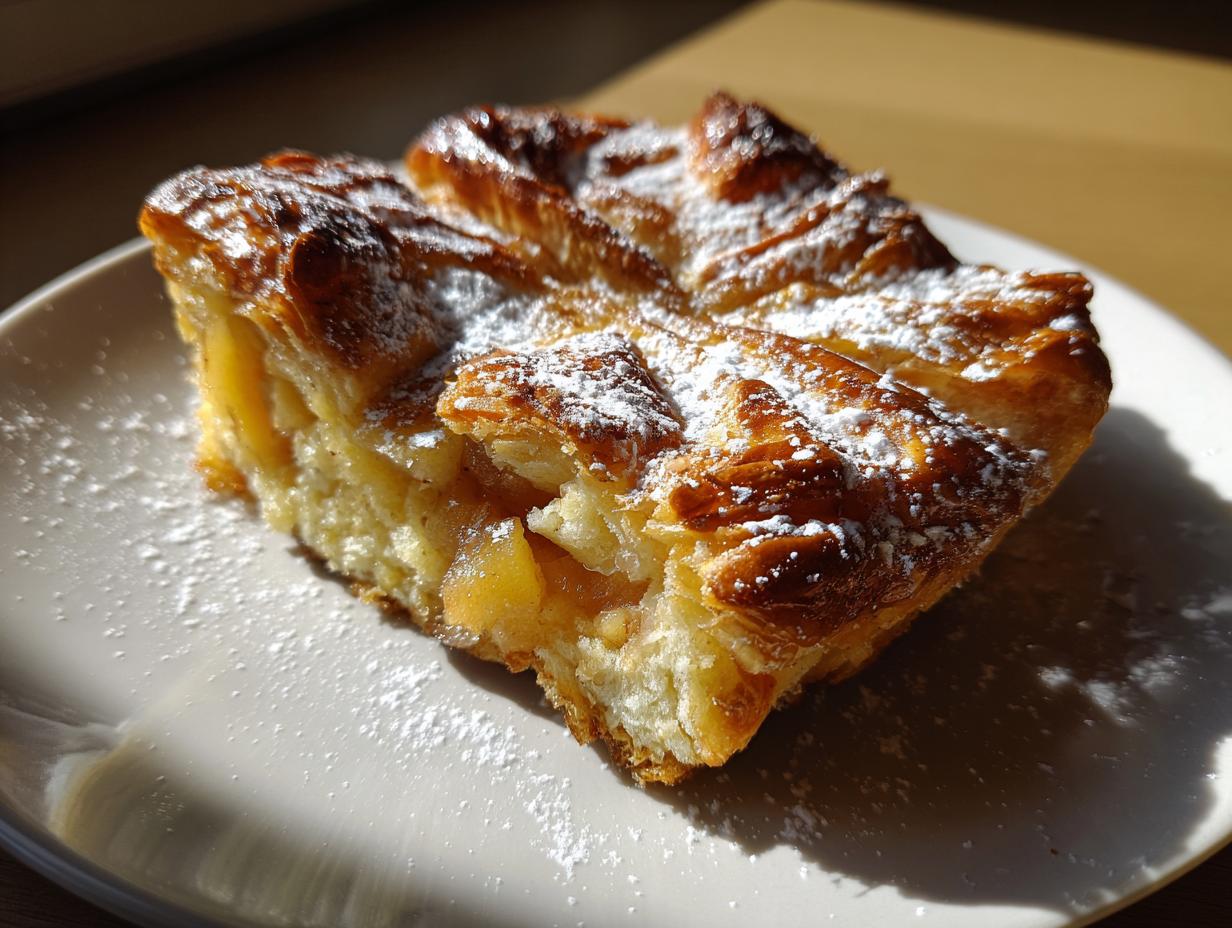
Brush the top generously with beaten egg – this gives that gorgeous golden glow. Pop it in the oven and let the magic happen for 25-30 minutes. You’ll know it’s done when the pastry puffs up gloriously and turns a deep golden brown, with maybe some apple juices bubbling at the edges.
Here’s my doneness test: gently lift one edge – the bottom should be lightly browned too. Remove from oven and let it cool just enough so you don’t burn your mouth (but seriously, who can wait?). That first bite of warm, flaky pastry with spiced apples? Absolute heaven!
Tips for the Perfect Apple Danish
After years of trial and error (and a few pastry disasters!), here are my foolproof tricks for apple Danish perfection:
- Keep it cold, cold, cold: I pop my diced apples in the fridge while making dough – cold filling prevents soggy bottoms!
- The apple matters: Granny Smiths are my top pick, but Honeycrisps work great too – just adjust sugar if they’re super sweet.
- Don’t skip the lemon: That splash of lemon juice keeps apples bright and cuts through the richness.
- Egg wash magic: For extra shine, add a teaspoon of water to your beaten egg – it brushes on smoother.
- Bake hot and fast: A properly preheated oven gives you that perfect rise before apples release too much juice.
See? Just little tweaks that make a world of difference in your pastry game!
Apple Danish Variations
Oh, the fun doesn’t stop with basic apple Danish! Here are my favorite ways to mix it up when I’m feeling creative:
- Nutty crunch: Toss chopped walnuts or pecans with the apples for texture
- Gooey upgrade: Drizzle warm caramel over the baked Danish – pure decadence!
- Spice swap: Try cardamom instead of nutmeg for a Scandinavian twist
- Berry buddies: Mix in some cranberries or raisins with the apples
- Cheese please: Add a sprinkle of sharp cheddar between dough and apples – sweet & salty perfection
The best part? No wrong answers here – make it your own!
Serving and Storing Apple Danish
Oh, the moment of truth! Let me tell you, apple Danish is absolute magic served warm from the oven – that’s when the flaky layers are at their peak and the apples are jammy perfection. My favorite way? A big scoop of vanilla ice cream melting over the top (the contrast of hot pastry and cold cream is heavenly). But honestly, it’s delicious at room temperature too – just pop individual slices in the microwave for 10-15 seconds to bring back that fresh-baked feel.
For storage, keep leftovers in an airtight container at room temperature for 2 days or refrigerate for up to 5 days. Freezing? Absolutely! Wrap cooled Danish tightly in foil, then freeze for up to 3 months. Reheat frozen slices straight in a 350°F oven for about 10 minutes – good as new!
Apple Danish FAQs
Over the years, I’ve gotten all sorts of questions about my apple Danish recipe – here are the ones that pop up most often with my honest answers:
Can I use puff pastry instead of making dough from scratch?
Absolutely! A good quality store-bought puff pastry works in a pinch (we’ve all been there). Just roll it out slightly, add your apple filling, and bake according to package directions. It won’t have quite the same homemade texture, but it’ll still be delicious.
How long does apple Danish stay fresh?
At room temperature, it’s best within 2 days (though mine never lasts that long!). You can refrigerate it for up to 5 days – just warm slices briefly before serving to bring back that fresh-baked magic.
Can I freeze unbaked apple Danish?
Yes! Assemble it completely, then freeze before baking. When ready, bake straight from frozen, adding 5-10 extra minutes. Perfect for having breakfast ready to pop in the oven!
Why did my apples make the pastry soggy?
Two tricks: 1) Pat apple pieces dry after dicing, and 2) Keep everything ice-cold before baking. Soggy bottoms usually mean the butter melted too soon.
Can I make mini individual Danishes?
Love this idea! Cut dough into squares instead of one big rectangle, add a spoonful of filling to each, then fold corners to the center. Bake time drops to about 15-20 minutes.
Nutritional Information
Now, I’m no nutritionist, but here’s the honest truth about our apple Danish – it’s a treat, plain and simple! These numbers are rough estimates since ingredients vary, but to give you an idea: each generous slice gives you that perfect balance of flaky carbs, buttery richness, and fruity goodness from the apples. The cinnamon and nutmeg? Those are basically health foods in my book!
Remember, homemade always beats store-bought because you control what goes in – no weird preservatives or mystery ingredients here. That said, if you’re watching specific dietary needs, feel free to tweak things like using whole wheat flour or reducing the sugar slightly (though I can’t promise the same magical results!).
Most importantly? Enjoy every delicious bite without guilt – life’s too short not to savor good pastry!
Try this recipe and share your results – I’d love to hear how your apple Danish turns out!
Print
Irresistible Apple Danish Recipe with 2 Secret Tricks for Flaky Perfection
- Total Time: 50 minutes
- Yield: 8 servings 1x
- Diet: Vegetarian
Description
A delicious pastry filled with apples and spices, perfect for breakfast or dessert.
Ingredients
- 2 cups all-purpose flour
- 1/2 cup butter, cold and cubed
- 1/4 cup sugar
- 1/4 tsp salt
- 1/4 cup cold water
- 2 apples, peeled and diced
- 1 tsp cinnamon
- 1/4 tsp nutmeg
- 1 tbsp lemon juice
- 1 egg, beaten (for glaze)
Instructions
- Preheat oven to 375°F (190°C).
- Mix flour, sugar, and salt in a bowl.
- Cut in butter until mixture resembles crumbs.
- Add cold water and mix until dough forms.
- Roll dough into a rectangle on a floured surface.
- Toss apples with cinnamon, nutmeg, and lemon juice.
- Spread apples over half the dough.
- Fold dough over apples and seal edges.
- Brush with beaten egg.
- Bake for 25-30 minutes until golden brown.
Notes
- Use Granny Smith apples for a tart flavor.
- Chill dough for 30 minutes before rolling for better texture.
- Serve warm with vanilla ice cream.
- Prep Time: 20 minutes
- Cook Time: 30 minutes
- Category: Dessert
- Method: Baking
- Cuisine: Danish
Nutrition
- Serving Size: 1 piece
- Calories: 250
- Sugar: 15g
- Sodium: 100mg
- Fat: 12g
- Saturated Fat: 7g
- Unsaturated Fat: 4g
- Trans Fat: 0g
- Carbohydrates: 32g
- Fiber: 2g
- Protein: 3g
- Cholesterol: 45mg