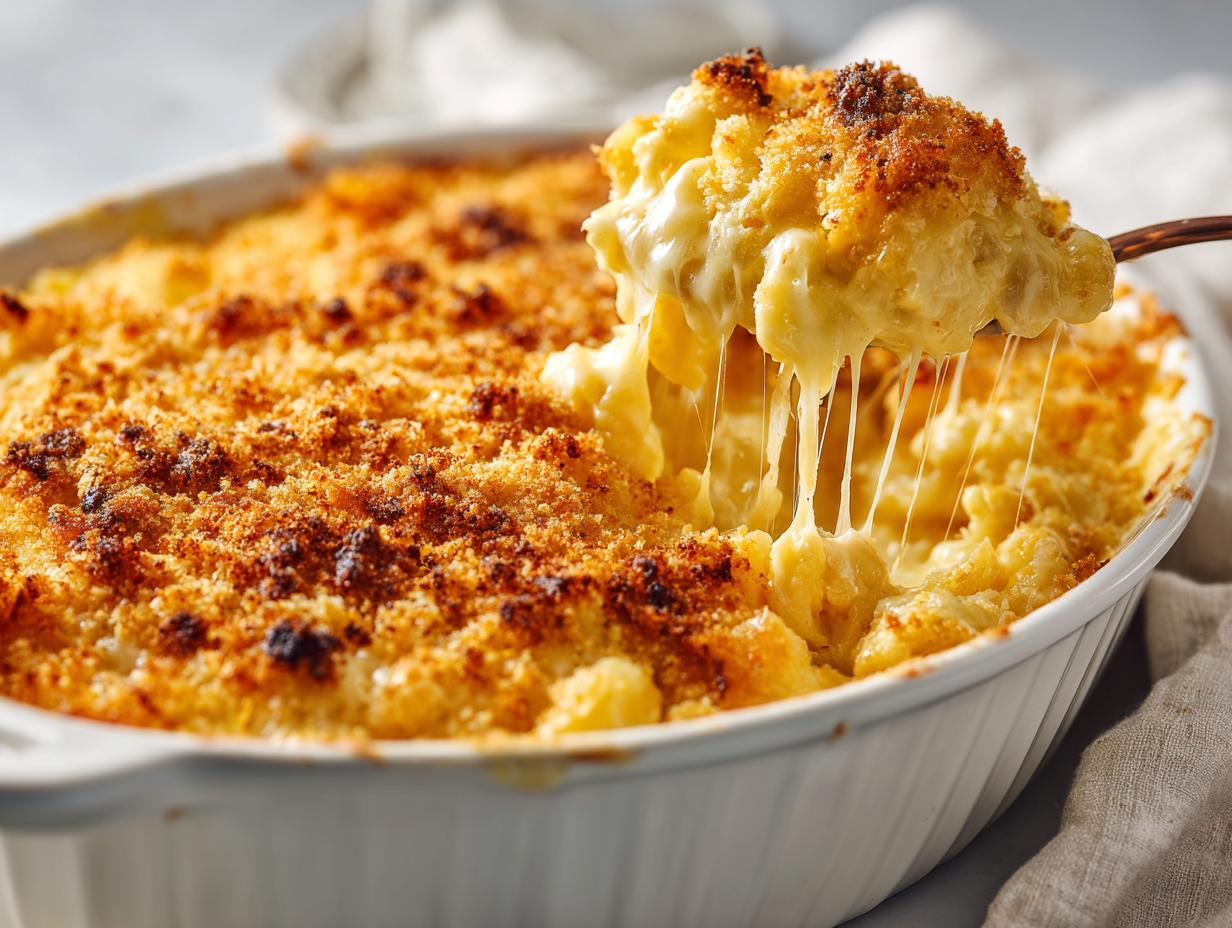
There’s nothing quite like the smell of Baked Mac and Cheese wafting from the oven – that perfect combination of creamy cheese sauce and crispy golden topping just screams comfort food to me. I swear, this dish has saved more rainy afternoons and picky-eater dinners in my house than I can count. It’s the ultimate American classic that somehow manages to be both simple and spectacular at the same time.
The secret to my version? A cheese sauce so velvety you’ll want to drink it with a spoon (I won’t judge if you do), and that irresistible crunchy topping that gives you texture in every bite. Whether it’s Sunday supper or potluck panic, this baked mac and cheese never lets me down. My kids start hovering near the oven the moment they hear the timer go off – and honestly, I don’t blame them.

Ingredients for Baked Mac and Cheese
Gathering the right ingredients makes all the difference between good mac and cheese and knock-your-socks-off mac and cheese. Here’s what you’ll need to create that perfect balance of creamy and crispy:
Cheese and Pasta
- 8 oz elbow macaroni – the classic choice with all those nooks for cheese to cling to
- 2 cups shredded sharp cheddar – freshly grated melts so much better than pre-shredded!
- 1 cup shredded mozzarella – for that glorious stretch factor
Sauce Components
- 2 tbsp butter – unsalted, because we control our own salt destiny
- 2 tbsp all-purpose flour – the magic thickener
- 2 cups whole milk – none of that skim milk business here
- 1/2 tsp salt – to taste
- 1/4 tsp black pepper – freshly ground if you’re fancy
Topping Ingredients
- 1/2 cup breadcrumbs – panko for extra crunch or regular for classic texture
- 1 tbsp olive oil – helps the topping get that perfect golden brown
Pro tip: Keep your cheeses cold until grating time – warm cheese clumps like crazy in the shredder! And don’t even get me started on pre-shredded cheese with its anti-caking additives – fresh is always best for silky smooth sauce.
How to Make Baked Mac and Cheese
Okay, here’s where the real magic happens! Don’t let the steps intimidate you – it’s basically just cooking pasta, making a simple sauce, and then baking it into something incredible. Trust me, once you get the hang of the roux (fancy word for butter+flour), you’ll feel like a kitchen superstar.
Cooking the Pasta
First thing’s first – get that oven preheating to 350°F (175°C). While it’s warming up, bring a big pot of salted water to a rolling boil. Drop in your elbow macaroni and cook it just until it’s al dente – that means it’s still got a little bite to it, usually about 1-2 minutes less than the package says. You don’t want mushy pasta here! Drain it well but don’t rinse it – that starchy coating helps the cheese sauce cling later.
Preparing the Cheese Sauce
While the pasta’s cooking, melt your butter in a medium saucepan over medium heat. Once it’s all bubbly, whisk in the flour and keep whisking for about a minute until it smells a bit nutty – that’s your roux! Now here’s the important part: slowly pour in the milk while you’re whisking constantly. I mean constantly – this is how you avoid lumpy sauce! Keep cooking and stirring until it thickens enough to coat the back of a spoon, about 3-5 minutes. Take it off the heat and stir in your gorgeous shredded cheeses until they’re all melted and dreamy. Season with salt and pepper – taste it! It should be slightly saltier than you think because the pasta will mellow it out.
Assembling and Baking
Now for the fun part! Pour that creamy cheese sauce over your drained macaroni and mix it all together until every single piece is coated. Transfer this beautiful, cheesy mess into your prepared baking dish. In a small bowl, mix your breadcrumbs with the olive oil until they’re all coated – this gives you that perfect crispy topping. Sprinkle this evenly over the mac and cheese. Pop it in the oven and bake for about 20 minutes, or until it’s all bubbly around the edges and that topping is golden brown. Oh, the smell in your kitchen will be insane!

Here’s my favorite tip: don’t dive in right away! Let it sit for 5 minutes after baking – I know it’s torture, but it lets the sauce set up so it’s creamy instead of runny.
Tips for the Best Baked Mac and Cheese
After making this recipe more times than I can count (my waistline can attest), I’ve learned a few tricks that take baked mac and cheese from good to oh-my-goodness amazing. First, always let it rest after baking – those 5 minutes make all the difference for the perfect creamy texture rather than soupy cheese. Second, don’t be afraid to play with cheese blends! I sometimes swap half the cheddar for gruyère when I’m feeling fancy – the nutty flavor is incredible.
My biggest sauce tip? Room temperature milk blends into the roux much smoother than cold. And if you do get lumps (we’ve all been there), just whisk like crazy or give it a quick blitz with an immersion blender – no one will ever know!
Variations of Baked Mac and Cheese
The beauty of baked mac and cheese is how easily you can make it your own! When I’m feeling adventurous, I love adding crispy bacon bits right into the cheese sauce – the salty crunch takes it to another level. My vegetarian friends go crazy when I stir in roasted broccoli or sautéed mushrooms. And for special occasions? Lobster mac and cheese makes everyone feel fancy (just fold in cooked lobster meat before baking).
Don’t forget the topping either! Sometimes I swap regular breadcrumbs for crushed Ritz crackers or potato chips for extra buttery goodness. And if you’re gluten-free, almond flour makes a surprisingly delicious crispy topping. The possibilities are endless – that’s why this dish never gets old in my kitchen!
Serving Suggestions for Baked Mac and Cheese
Oh honey, let’s talk pairings! My baked mac and cheese plays well with so many friends. For a light balance, I love it with a crisp green salad – the vinegar tang cuts through all that rich cheesiness perfectly. Fried chicken is my go-to protein pairing (that crunch! those juices!), but roasted veggies work great too when I’m pretending to be healthy. And don’t even get me started on how amazing it is with a side of garlic bread – because more carbs with your carbs is always a good idea in my book!
Storing and Reheating Baked Mac and Cheese
Let’s be real – leftovers rarely happen with this dish in my house! But when they do (miracle of miracles), here’s how I keep that cheesy goodness tasting fresh. Cool completely before covering tightly – it’ll last 3-4 days in the fridge. For freezer storage, wrap individual portions in foil then plastic; they’ll keep for 2 months. Reheating’s easy: oven at 350°F for 15-20 minutes (add a splash of milk to keep it creamy) or microwave in 30-second bursts, stirring between. Pro tip: sprinkle fresh breadcrumbs on top before reheating to revive that crispy magic!
Nutritional Information for Baked Mac and Cheese
Now, let’s be honest – we don’t eat mac and cheese for its health benefits! But for those curious minds (or meal planners), here’s the scoop: One serving clocks in around 420 calories, with 18g protein, 45g carbs, and 18g fat. Remember, these are estimates – your exact numbers will vary based on cheese brands and pasta types. I always say a little extra cheese never hurt anybody!
FAQs About Baked Mac and Cheese
Q1. Can I use different cheeses in this recipe?
Absolutely! While sharp cheddar and mozzarella are my go-to blend, feel free to experiment. Gruyère adds sophistication, pepper jack brings heat, and smoked gouda gives incredible depth. Just keep the total cheese quantity the same. Pro tip: Avoid pre-shredded cheeses – they contain anti-caking agents that can make your sauce grainy.
Q2. How can I make this gluten-free?
Easy peasy! Swap regular pasta for gluten-free elbows (I like brown rice pasta) and use cornstarch instead of flour for thickening (1 tbsp cornstarch = 2 tbsp flour). For the topping, gluten-free breadcrumbs or crushed gluten-free crackers work perfectly. The taste difference? Barely noticeable!
Q3. Can I prepare baked mac and cheese ahead of time?
You bet! Assemble everything (minus the breadcrumb topping) up to 2 days ahead. Store covered in the fridge, then add topping and bake when ready. Add 5-10 extra minutes if baking straight from the fridge. The sauce might thicken overnight – just stir in a splash of milk before baking.
Share Your Baked Mac and Cheese Experience
Now it’s your turn! Did you add your own twist? Maybe extra garlic or a secret cheese blend? Drop a comment below – I’d love to hear how your baked mac and cheese turned out. Snap a photo of that golden crust and tag me – nothing makes me happier than seeing your cheesy creations!
Print
Ultimate Baked Mac and Cheese Recipe with 3 Cheesy Secrets
- Total Time: 35 minutes
- Yield: 6 servings 1x
- Diet: Vegetarian
Description
A classic baked mac and cheese recipe with creamy cheese sauce and crispy breadcrumb topping.
Ingredients
- 8 oz elbow macaroni
- 2 cups shredded cheddar cheese
- 1 cup shredded mozzarella cheese
- 2 cups milk
- 2 tbsp butter
- 2 tbsp all-purpose flour
- 1/2 tsp salt
- 1/4 tsp black pepper
- 1/2 cup breadcrumbs
- 1 tbsp olive oil
Instructions
- Preheat oven to 350°F (175°C).
- Cook macaroni according to package directions, then drain.
- Melt butter in a saucepan over medium heat.
- Whisk in flour and cook for 1 minute.
- Gradually add milk, stirring constantly until thickened.
- Remove from heat and stir in cheddar and mozzarella cheese until melted.
- Combine cooked macaroni with cheese sauce.
- Transfer to a baking dish.
- Mix breadcrumbs with olive oil and sprinkle over macaroni.
- Bake for 20 minutes until golden and bubbly.
Notes
- Let stand 5 minutes before serving.
- Add cooked bacon or vegetables for variation.
- Use panko breadcrumbs for extra crunch.
- Prep Time: 15 minutes
- Cook Time: 20 minutes
- Category: Main Dish
- Method: Baking
- Cuisine: American
Nutrition
- Serving Size: 1 cup
- Calories: 420
- Sugar: 6g
- Sodium: 450mg
- Fat: 18g
- Saturated Fat: 10g
- Unsaturated Fat: 6g
- Trans Fat: 0g
- Carbohydrates: 45g
- Fiber: 2g
- Protein: 18g
- Cholesterol: 45mg