You know that moment when you walk into a Halloween party and spot THAT dessert? The one that makes everyone stop and go “Wow!”? That’s exactly what happened when I first brought this black and orange layered fudge to my neighbor’s spooky bash last year. I’m telling you, it disappeared faster than a ghost in the night!
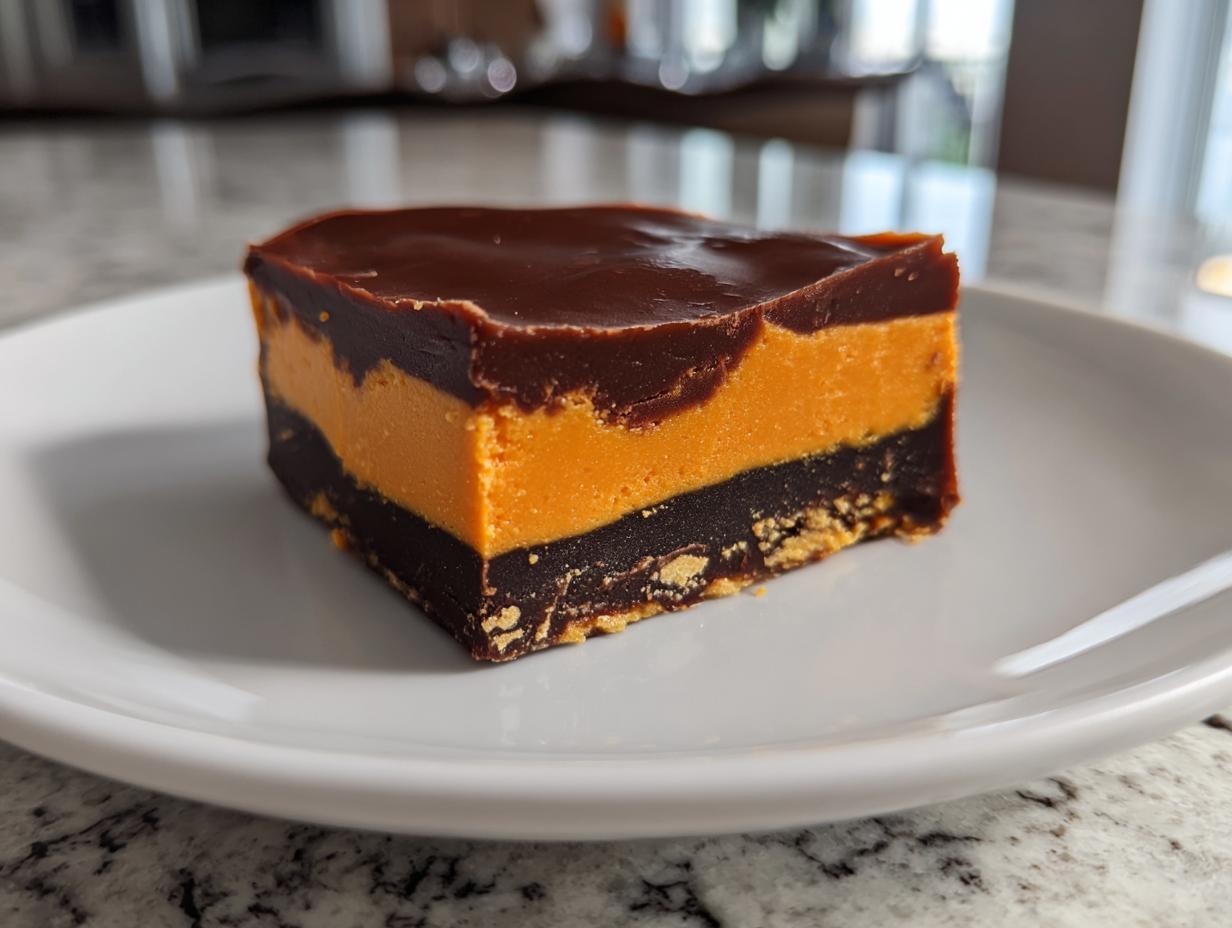
This fudge isn’t just delicious – it’s a total showstopper with its bold stripes of deep black and vibrant orange. The best part? It’s way easier to make than it looks. Just one simple base gets divided and colored, then layered up for maximum drama. My kids now demand I make it every October (though honestly, it’s great for any occasion where you want something fun and festive).
What I love most is how it combines that classic creamy fudge texture we all crave with a playful Halloween twist. Whether you’re hosting a party or just want to treat yourself, this recipe never fails to impress.

Why You’ll Love This Black and Orange Layered Fudge
Let me tell you why this fudge recipe became my go-to Halloween treat – and why you’ll adore it too:
- Instant wow factor: The bold black and orange stripes look like edible Halloween decor – people literally gasp when I bring it out!
- Easier than it looks: Don’t let the fancy layers fool you – it’s just one simple base divided and colored.
- Party superstar: I’ve lost count of how many times guests have asked for the recipe at Halloween gatherings.
- Totally customizable: Swap colors for any occasion – my niece loves pink and purple for her birthday.
- Crowd-pleasing texture: That perfect fudge consistency – creamy, rich, and melts right in your mouth.
Trust me, once you make this, you’ll never show up to a Halloween party empty-handed again!
Ingredients for Black and Orange Layered Fudge
Here’s everything you’ll need to create this striking Halloween treat. I’ve learned that using the exact ingredients listed makes all the difference – especially when it comes to getting those vibrant colors just right!
- 3 cups granulated sugar – Regular white sugar works perfectly here
- 1 cup (2 sticks) unsalted butter – I always use unsalted so I can control the flavor
- 1 can (5 oz) evaporated milk – Not sweetened condensed milk! That 5 oz can is key
- 1 bag (12 oz) semisweet chocolate chips – I prefer Ghirardelli or Guittard for best melting
- 1 jar (7 oz) marshmallow creme – Look for the classic Fluff or Kraft Jet-Puffed
- 1 tsp pure vanilla extract – The good stuff makes a difference
- 1 tsp orange gel food coloring – Gel gives the boldest color without thinning the fudge
- 1/2 tsp black gel food coloring – A little goes a long way with black!
Pro tip from my many test batches: measure everything before you start cooking. Once that sugar mixture starts boiling, you’ll want everything ready to go!
Equipment You’ll Need
Gathering your tools before starting makes this fudge-making process a breeze. Here’s what I always have ready on my counter:
- 9×9 inch square pan – My trusty glass one works perfectly
- Parchment paper – For easy fudge removal (no sticking disasters!)
- Medium saucepan – Heavy-bottomed prevents scorching
- Heatproof spatula – Silicone is my favorite for scraping every last bit
- Measuring cups and spoons – Precision matters with fudge
- 2 mixing bowls – For dividing and coloring the layers
That’s it! No fancy equipment needed – just basic kitchen essentials you probably already have.
How to Make Black and Orange Layered Fudge
Now for the fun part! Making this fudge is like creating edible Halloween magic. Follow these steps carefully, and you’ll have perfect layers every time.
Preparing the Pan
First things first – line your 9×9 inch pan with parchment paper, leaving some overhang on two sides. This little trick is my secret for lifting the whole slab out later without any fudge casualties!
Cooking the Base
In your saucepan, combine the sugar, butter, and evaporated milk over medium heat. Here’s where patience pays off – stir constantly as it comes to a boil. Once bubbling, keep stirring for a full 5 minutes (set a timer!). The mixture should look smooth and slightly thickened. Don’t walk away – burned sugar is no one’s friend!
Adding Chocolate and Flavor
Remove the pan from heat immediately. Now the magic happens! Dump in your chocolate chips, marshmallow creme, and vanilla. Stir like crazy until everything melts together into one gloriously smooth, glossy mixture. No lumps allowed – keep stirring until it’s perfectly velvety.

Coloring the Layers
Divide the mixture evenly between two bowls. In one bowl, stir in the orange gel coloring until you get that perfect pumpkin hue. In the other, carefully mix in the black gel coloring (warning: it stains!). Use a bit more black if needed – we want dramatic contrast! Pro tip: gel coloring gives the richest colors without making the fudge runny.
Layering and Setting
Pour the orange layer into your prepared pan first, spreading it evenly with a spatula. Now the hardest part – wait 10 minutes (no cheating!) for it to set slightly. Then gently pour the black layer on top. Smooth it out, then let the whole thing cool completely at room temperature for about 2 hours. Resist cutting too soon – patience gives you those clean, sharp layers!
Tips for Perfect Black and Orange Layered Fudge
After making this fudge more times than I can count (and learning from plenty of mistakes!), here are my can’t-live-without tips:
- Gel food coloring is non-negotiable – Liquid coloring makes the fudge runny and gives weak colors. That bold orange and deep black only come from gel!
- Warm your knife – Run it under hot water and dry before cutting for super clean slices. Rewarm between cuts.
- Airtight is everything – Store in a sealed container with parchment between layers to prevent sticking.
- Room temp is best – Unlike some fudge, this one stays perfectly creamy when stored at room temperature.
- Work fast – Once off heat, move quickly before the mixture starts setting up!
Follow these, and your fudge will look as good as it tastes – promise!
Variations for Black and Orange Layered Fudge
While I adore the classic version, sometimes I love switching things up! Try swapping the vanilla for peppermint extract (red and white layers are so festive for Christmas). Around Thanksgiving, I add pumpkin pie spice to the orange layer – just 1/2 teaspoon makes it taste like autumn! For birthdays, any color combo works – my niece adores teal and purple.
Serving and Storing Black and Orange Layered Fudge
Here’s how I keep this fudge looking and tasting its best! Store it in an airtight container at room temperature – no refrigeration needed. It stays perfectly creamy for up to a week (if it lasts that long!). For parties, I arrange the squares on a black platter with orange napkins – the contrast makes those layers pop even more!
Pro tip: Separate layers with parchment paper if stacking. The fudge actually tastes better after sitting overnight as the flavors meld together. Just try not to eat it all before your guests arrive!
Black and Orange Layered Fudge FAQs
Over the years, I’ve gotten the same excited questions about this fudge at every Halloween party. Here are the answers to everything you might wonder – straight from my messy, chocolate-stained recipe testing notes!
Can I use liquid food coloring instead of gel?
Oh honey, I learned this the hard way – don’t do it! Liquid coloring makes the fudge too soft and gives you weak, washed-out colors. Gel coloring is thicker and more concentrated, so you get that awesome bold orange and deep black without messing up the texture. Trust me on this one!
How long until the fudge sets completely?
I know it’s tempting to cut into it right away, but patience is key! At room temperature, it needs about 2 hours to set up properly. If you’re in a hurry, you can pop it in the fridge for 45 minutes – but I find room temp setting gives the creamiest texture.
Can I freeze this fudge?
Absolutely! Wrap individual pieces tightly in plastic wrap, then stash them in a freezer bag for up to a month. Thaw at room temperature when the craving hits. I always make an extra batch in October to have ready for last-minute Halloween guests!
Why did my black layer turn out gray?
This happened to me too on my first try! Black gel coloring needs a little extra help – I now add just a tiny pinch of cocoa powder to the black portion to deepen the color. Also, make sure you’re using enough coloring – black takes more than you’d think.
Can I make this with milk chocolate instead?
You can, but it’ll be much sweeter. The semisweet chocolate balances the sugar perfectly. If you do use milk chocolate, maybe cut the sugar by 1/4 cup. Personally, I think the deeper chocolate flavor is what makes this fudge extra special!

Nutritional Information
Okay, let’s be real – we’re not eating fudge for its health benefits! But since you asked, here’s the scoop on what’s in each delicious piece. Keep in mind these are estimates – actual numbers can vary depending on the exact brands you use.
Per piece (about 1-inch square):
- 120 calories – Totally worth every bite!
- 6g fat – Mostly from that glorious butter and chocolate
- 18g carbs – Hey, it’s a treat, not a salad
- 1g protein – Consider it a bonus
- 10mg sodium – Pretty low for something this indulgent
My philosophy? Enjoy a piece (or two) without guilt – Halloween only comes once a year! Just maybe balance it out with some extra steps while trick-or-treating.
Print
Spooky 2-Layer Black and Orange Fudge Magic
- Total Time: 25 minutes
- Yield: 36 pieces 1x
- Diet: Vegetarian
Description
A visually striking fudge with alternating black and orange layers, perfect for Halloween or themed parties.
Ingredients
- 3 cups sugar
- 1 cup unsalted butter
- 1 can (5 oz) evaporated milk
- 1 bag (12 oz) semisweet chocolate chips
- 1 jar (7 oz) marshmallow creme
- 1 tsp vanilla extract
- 1 tsp orange food coloring
- 1/2 tsp black food coloring
Instructions
- Line a 9×9 inch pan with parchment paper.
- In a saucepan, combine sugar, butter, and evaporated milk. Bring to a boil over medium heat, stirring constantly.
- Reduce heat and simmer for 5 minutes, stirring occasionally.
- Remove from heat and add chocolate chips, marshmallow creme, and vanilla. Stir until smooth.
- Divide the mixture into two equal parts. Add orange food coloring to one part and black food coloring to the other.
- Pour the orange layer into the pan and spread evenly. Let it set for 10 minutes.
- Pour the black layer over the orange layer and spread evenly. Let it cool completely before cutting into squares.
Notes
- Use gel food coloring for vibrant colors.
- Store in an airtight container at room temperature.
- For cleaner cuts, use a warm knife.
- Prep Time: 15 minutes
- Cook Time: 10 minutes
- Category: Dessert
- Method: Stovetop
- Cuisine: American
Nutrition
- Serving Size: 1 piece
- Calories: 120
- Sugar: 15g
- Sodium: 10mg
- Fat: 6g
- Saturated Fat: 3.5g
- Unsaturated Fat: 2g
- Trans Fat: 0g
- Carbohydrates: 18g
- Fiber: 0.5g
- Protein: 1g
- Cholesterol: 10mg