Oh my gosh, do I have a treat for you! Picture this: It’s Halloween night, the air is crisp, and you’ve got a plate of the most adorable Black Cat Cupcakes sitting on your kitchen counter. These little guys aren’t just delicious chocolate cupcakes – they’re playful, slightly spooky, and absolutely perfect for setting the Halloween mood. I started making these years ago for my niece’s costume party, and let me tell you, they were the hit of the night! The kids went wild for them, and the adults couldn’t resist sneaking seconds either.
What I love most about these Black Cat Cupcakes is how they bring together two of my favorite things: easy baking and creative decorating. The rich chocolate base is simple to whip up (no fancy ingredients needed!), and turning them into cute little felines is where the real fun begins. Whether you’re hosting a Halloween bash or just want to surprise your family with something special, these cupcakes always do the trick. And that moment when you place the candy eyes and see their little faces come to life? Pure magic!

Trust me, once you make these once, they’ll become your go-to Halloween tradition. I’ve lost count of how many batches I’ve baked over the years, but the reactions never get old. Last October, my neighbor’s kids actually started knocking on my door asking, “Are the kitty cupcakes ready yet?” Now that’s what I call a baking win!
Why You’ll Love These Black Cat Cupcakes
These aren’t just any cupcakes – they’re little bundles of Halloween joy that check all the boxes for the perfect spooky treat. Here’s why they’re absolutely irresistible:
- Easiest Halloween baking project ever: The chocolate batter comes together in one bowl with pantry staples – no fancy techniques required. Even if baking isn’t your strong suit, you can nail this recipe.
- Decorating is a blast: Turning simple cupcakes into adorable black cats is where the real magic happens. It’s like edible arts and crafts – perfect for getting kids involved too!
- Total Halloween vibes: That rich black frosting and cute candy eyes instantly set the mood for spooky season. They look fantastic on any dessert table.
- Crowd-pleasing cuteness: Kids go wild for them (mine always beg to “help” decorate), and adults can’t resist their chocolatey charm either. Bonus: they photograph amazingly for your Halloween social posts!
Seriously, these cupcakes are more than just dessert – they’re edible Halloween fun that’ll have everyone smiling. And that moment when you see your little black cat army lined up? Priceless.
Ingredients for Black Cat Cupcakes
Here’s everything you’ll need to whip up these adorable (and delicious!) black cat cupcakes. Don’t worry – most of these are pantry staples you probably already have on hand. I’ve made notes about any special prep to make sure your cupcakes turn out perfect!
- 1 1/2 cups all-purpose flour (I like to fluff it with a fork before measuring)
- 1 cup granulated sugar
- 1/3 cup unsweetened cocoa powder (sift it if it’s lumpy – this makes a BIG difference!)
- 1 tsp baking soda
- 1/2 tsp salt
- 1 cup water (room temp works best)
- 1/3 cup vegetable oil (or melted coconut oil if you prefer)
- 1 tbsp white vinegar (this reacts with the baking soda – don’t skip it!)
- 1 tsp vanilla extract
For decorating your feline friends:
- Black icing (I swear by gel food coloring for that deep black color)
- Candy eyes (the bigger ones look extra cute!)
- Yellow or green candy for pupils (mini M&Ms or jelly beans work great)
- Black licorice for whiskers (cut into thin strips – fruit leather works in a pinch)
See? Nothing too crazy! Just simple ingredients that transform into magic. Pro tip: measure everything before you start mixing – it makes the process so much smoother when you’re not digging through cabinets mid-recipe.
Equipment You’ll Need
Before we dive into making these adorable black cat cupcakes, let’s chat about the tools you’ll want to have ready. I promise, nothing too fancy here – just the basics that most home bakers already have in their kitchen. The great thing about this recipe is how approachable it is, equipment-wise!
- Muffin tin: Standard 12-cup size is perfect. If you’ve got a non-stick one, even better – but any will do.
- Cupcake liners: Go for Halloween-themed ones if you’re feeling festive, but plain work just fine (the black icing will cover them anyway!).
- Large mixing bowl: This will be your main mixing station for all the cupcake batter goodness.
- Whisk: A simple wire whisk is all you need to combine everything smoothly. No mixer required!
- Measuring cups and spoons: For accurate measurements (especially that crucial tablespoon of vinegar).
- Ice cream scoop or measuring cup: Makes portioning the batter into liners so much easier and less messy.
- Piping bag or ziplock bag: For applying the black icing neatly. If using a ziplock, just snip a tiny corner off.
- Scissors: For trimming the licorice whiskers to the perfect length.
That’s really it! No fancy gadgets needed. Though if you’re like me and have a collection of fun piping tips, a star tip can make cute furry-looking icing for the cats. But honestly, a simple smooth coating works great too – the candy eyes and whiskers do all the personality work!
Quick tip: Gather everything before you start baking. There’s nothing worse than having batter ready but realizing you’re missing liners (been there!). Setting up your “station” makes the whole process feel like a breeze.
How to Make Black Cat Cupcakes
Okay, let’s get baking! These black cat cupcakes come together so easily – you’ll be amazed at how simple it is to create something so adorable and delicious. I’ve made this recipe dozens of times, and here’s my foolproof method for perfect results every time.
- Preheat your oven to 350°F (175°C). This gives your oven time to reach the perfect temperature while you mix the batter. Trust me, starting with a properly heated oven makes all the difference!
- Line your muffin tin with cupcake liners. I like using plain black or orange ones for Halloween, but any color works since we’ll be covering them with frosting anyway.
- Whisk together your dry ingredients. In your large mixing bowl, combine the flour, sugar, cocoa powder (make sure it’s sifted if lumpy!), baking soda and salt. Give it a good whisk to banish any lumps and get everything evenly distributed.
- Add the wet ingredients. Pour in the water, vegetable oil, vinegar and vanilla all at once. Now here’s the fun part – mix it just until the batter comes together smooth. Don’t overmix! A few small lumps are totally fine and will disappear while baking.
- Fill your liners 2/3 full. I use an ice cream scoop for this – it’s the perfect portion and keeps things neat. The batter will rise, so don’t be tempted to overfill or you’ll get mushroom-top cupcakes!
- Bake for 18-20 minutes. Set your timer for 18 minutes, then do the toothpick test. If it comes out clean or with a few moist crumbs, they’re done. If not, give them another minute or two. Watch them closely – overbaked cupcakes lose that perfect moist texture.
- Cool completely before decorating. I know it’s tempting to frost them warm, but patience pays off here! Transfer them to a wire rack and let them cool for at least an hour. Warm cupcakes will melt your beautiful black icing into a puddle.

See? Nothing complicated at all! The vinegar might seem odd, but it reacts with the baking soda to give these cupcakes the perfect rise. And that rich chocolate flavor? Absolutely to die for – even before we turn them into cute little kitties!
Decorating Your Black Cat Cupcakes
Now for the really fun part – bringing our black cats to life! This is where your cupcakes transform from simple chocolate treats into adorable Halloween characters. I love how creative you can get with the decorations – every batch turns out just a little different.
- Frost with black icing. If using a piping bag, go for a smooth swirl or furry texture. No piping bag? No problem! Just spread the icing with a butter knife. Pro tip: Gel food coloring gives the deepest black color without making the icing taste bitter.
- Add the eyes. Place two candy eyes near the top center of each cupcake. For extra personality, angle them slightly inward to give your cats that playful, curious look. Press them in gently so they stick.
- Create the pupils. Take tiny pieces of yellow or green candy (I’ve used everything from mini M&Ms to jelly beans) and place them on the eyes. Off-center placement makes them look extra mischievous!
- Add whiskers. Cut black licorice into thin strips (about 1.5 inches long) and insert three on each side. No licorice? Thin strips of fruit leather or even pretzel sticks dipped in black icing work great too!
And there you have it – a whole litter of adorable black cat cupcakes ready to steal the show at your Halloween party! The best part? They’re just as fun to make as they are to eat. Last year, I let my niece arrange the whiskers, and her hilarious wonky-faced cats were the hit of the party!
Tips for Perfect Black Cat Cupcakes
After making these black cat cupcakes more times than I can count (my neighbors can vouch for this!), I’ve picked up some foolproof tricks to make sure yours turn out absolutely purr-fect every time. Here are my tried-and-true tips straight from my kitchen to yours:
- Gel food coloring is your best friend when making black frosting. The liquid kind will water down your icing and you’ll need SO much to get a true black. Gel gives you that deep, rich color without changing the frosting’s texture. Start with a small amount and add gradually – it gets darker as it sits!
- Cooling is non-negotiable. I know it’s hard to wait when those chocolatey smells are filling your kitchen, but decorating warm cupcakes is a recipe for melty disaster. Let them cool completely on a wire rack – about an hour should do it. Touch the tops to be sure they’re room temperature.
- The vinegar isn’t optional! I’ve had friends ask if they can skip it, but that tablespoon of white vinegar reacts with the baking soda to give these cupcakes their perfect rise and tender crumb. No vinegar taste remains, I promise!
- Sift that cocoa powder if it’s at all lumpy. I learned this the hard way when I discovered little cocoa lumps in my batter. A quick sifting makes for the smoothest, most luxurious chocolate flavor.
- Don’t overfill the liners. 2/3 full is the magic number – any more and your cupcakes will dome too much and possibly overflow. An ice cream scoop makes portioning foolproof.
- Get creative with decorations! No candy eyes? Mini Oreos work great. Out of licorice? Try pretzel sticks or chocolate sprinkles for whiskers. The beauty of these cupcakes is how adaptable they are to what you have on hand.
One last pro tip from my many baking experiments: If you’re making these ahead, decorate them the day you plan to serve. The candy eyes can get a bit “sweaty” if stored too long. But if you must store them assembled, keep them in a single layer in an airtight container at room temperature. Trust me, these little tips make all the difference between good cupcakes and absolutely magical black cat creations!
Ingredient Substitutions & Variations
Don’t stress if you’re missing an ingredient or want to put your own twist on these black cat cupcakes! Over the years, I’ve tested all sorts of variations – some out of necessity when I realized I’d run out of something mid-recipe (oops!), others just for fun. Here’s the scoop on what works and what doesn’t:
- No black licorice? Thin strips of fruit leather make fantastic whisker substitutes – try black or red for contrast. Chocolate-covered pretzel sticks or even piped black icing lines work in a pinch too!
- Dairy-free option: Swap the regular frosting for a vegan buttercream using plant-based butter and milk. The chocolate cupcakes themselves are naturally dairy-free!
- Gluten-free? Use a 1:1 gluten-free flour blend instead of all-purpose flour. I’ve had great results with Bob’s Red Mill and King Arthur brands.
- Different eyes: Out of candy eyes? Mini Oreos with yellow M&M pupils look adorable, or pipe white icing circles with chocolate chip centers.
- Cocoa powder alternatives: While I highly recommend natural unsweetened cocoa for best flavor, in an emergency you could use Dutch-processed – just omit the baking soda and use 1 tsp baking powder instead.
What NOT to substitute:
- The vinegar – it’s essential for the chemical reaction that makes these cupcakes rise properly
- The baking soda – unless switching to Dutch-process cocoa as mentioned above
- The oil – melted butter changes the texture too much
One of my favorite variations is making “witch cat” cupcakes by adding green food coloring to some of the frosting for fun two-toned designs. For adults, I sometimes dip the licorice whiskers in melted chocolate or add edible gold dust for fancy Halloween parties. The possibilities are endless – let your creativity run wild!
Remember, baking should be fun, not stressful. As long as you keep those key chemical reactions intact (that vinegar and baking soda combo!), feel free to play around with decorations and flavors. My niece once insisted we make “rainbow cats” with colorful whiskers, and you know what? They were a hit!
Storing & Serving Black Cat Cupcakes
Alright, let’s talk about keeping these adorable black cat cupcakes fresh and fabulous until showtime! Trust me, I’ve learned through trial and error (mostly error) how to store them properly so they stay as moist and delicious as the day they were baked. Here’s everything you need to know:
- Airtight is the way to go: Store your decorated cupcakes in an airtight container at room temperature. I like using one of those plastic cupcake carriers with the snap-on lids – they stack neatly and keep everything fresh for up to 3 days. No special equipment? A large Tupperware or even a cake dome with plastic wrap around the base works great too!
- Skip the fridge! I know refrigeration seems logical, but it’s the enemy of moist cupcakes. The cold dries them out faster than you’d think. Unless your kitchen is super hot (we’re talking tropical levels), room temp storage is perfect.
- Layer with care: If you need to stack cupcakes, place parchment paper between layers to protect those precious decorations. Those candy eyes can smudge if they’re pressed against the container lid!
- Best served at room temp: The flavors really shine when they’re not chilled. About 30 minutes before serving, take them out of storage to let any condensation evaporate. The icing will look its glossiest this way!
Pro tip from my many Halloween parties: If you’re transporting these cuties, secure the container on a flat surface in your car (not the trunk!). I once arrived at a party with a box of “sleeping” cats whose heads had rolled to one side – still tasty, but not quite the spooky effect I was going for!
For longer storage (though let’s be real – they rarely last that long!), you can freeze unfrosted cupcakes for up to a month. Just wrap them individually in plastic wrap, then thaw at room temperature before decorating. The icing and decorations should always be added fresh though – frozen frosting gets weirdly grainy.
One last thing – these make amazing next-day treats too! The chocolate flavor actually deepens overnight, so don’t feel like you have to eat them all immediately (though I won’t judge if you do). Just keep them covered and they’ll stay fresh-tasting for days. Now go forth and share your adorable black cat creations with the world!

Nutritional Information
Okay, let’s talk numbers – but remember, these black cat cupcakes are meant to be a fun treat, not a health food! (Though I firmly believe a little chocolate is good for the soul.) Here’s the nutritional breakdown per cupcake, but keep in mind these are estimates – your actual values might vary slightly based on specific ingredients and decorating choices.
- Calories: About 220 per cupcake
- Sugar: 18g (mostly from that delicious frosting!)
- Total fat: 8g
- Saturated fat: 1.5g
- Carbohydrates: 35g
- Fiber: 2g (thank you, cocoa powder!)
- Protein: 3g
- Sodium: 180mg
Now, here’s my baking philosophy: Life’s too short to stress over dessert calories. These cupcakes are portion-controlled little joys (one is satisfying but not overwhelming), packed with Halloween spirit. The chocolate base actually has some redeeming qualities – cocoa contains antioxidants, and there’s no cholesterol in this recipe since we’re using oil instead of butter.
A quick disclaimer: These values can change if you tweak the recipe – using sugar substitutes, different frosting, or alternative decorations will alter the numbers. But honestly? When those cute little candy eyes are staring up at you, the last thing you’ll be thinking about is the nutritional label. Enjoy them mindfully, share them generously, and savor every chocolaty, spooky bite!
FAQs About Black Cat Cupcakes
Over the years, I’ve gotten so many questions about these adorable black cat cupcakes – and I love sharing all my tips and tricks! Here are the most common things people ask me, along with the honest answers I’ve discovered through plenty of trial and error in my own kitchen.
Can I make these black cat cupcakes vegan?
Absolutely! The cupcake base is already egg-free and dairy-free (thank you, vinegar magic!). For a fully vegan version, just use a plant-based buttercream frosting with vegetable shortening or vegan butter, and make sure your candy eyes and decorations don’t contain gelatin or dairy. I’ve used Enjoy Life chocolate chips for vegan pupils with great success!
How do I prevent dry cupcakes?
Two words: don’t overbake! Set your timer for the minimum baking time (18 minutes) and check with a toothpick – it should come out with a few moist crumbs, not completely clean. Also, be sure to measure your flour correctly (fluff it first, then spoon into the cup) and don’t skip the oil – it’s what keeps these cupcakes beautifully moist.
What’s the best way to get truly black frosting?
Gel food coloring is the way to go – I swear by Americolor Super Black. Start by making chocolate frosting (the cocoa helps deepen the color), then add the gel coloring a little at a time. Let it sit for 30 minutes; the color darkens as it sets. Pro tip: Add a tiny bit of purple or blue first – it helps neutralize any brown tones!
Can I make these ahead of time?
You sure can! Bake the cupcakes 1-2 days in advance and store them unfrosted at room temperature in an airtight container. Wait to decorate until the day you’re serving – the candy eyes can get “sweaty” if stored too long. The undecorated cupcakes actually taste better on day two as the flavors meld!
Help! My cats look more like blobs than cats!
Haha, we’ve all been there! My first batch looked like sad little lumps. The trick is to pipe a slight peak in the center for the nose area before adding eyes. Angle the whiskers upward for that perky cat look. And remember – even “blob” cats taste delicious, so don’t stress too much about perfection!


3-Ingredient Black Cat Cupcakes – Spooky & Irresistible
- Total Time: 35 minutes
- Yield: 12 cupcakes 1x
- Diet: Vegetarian
Description
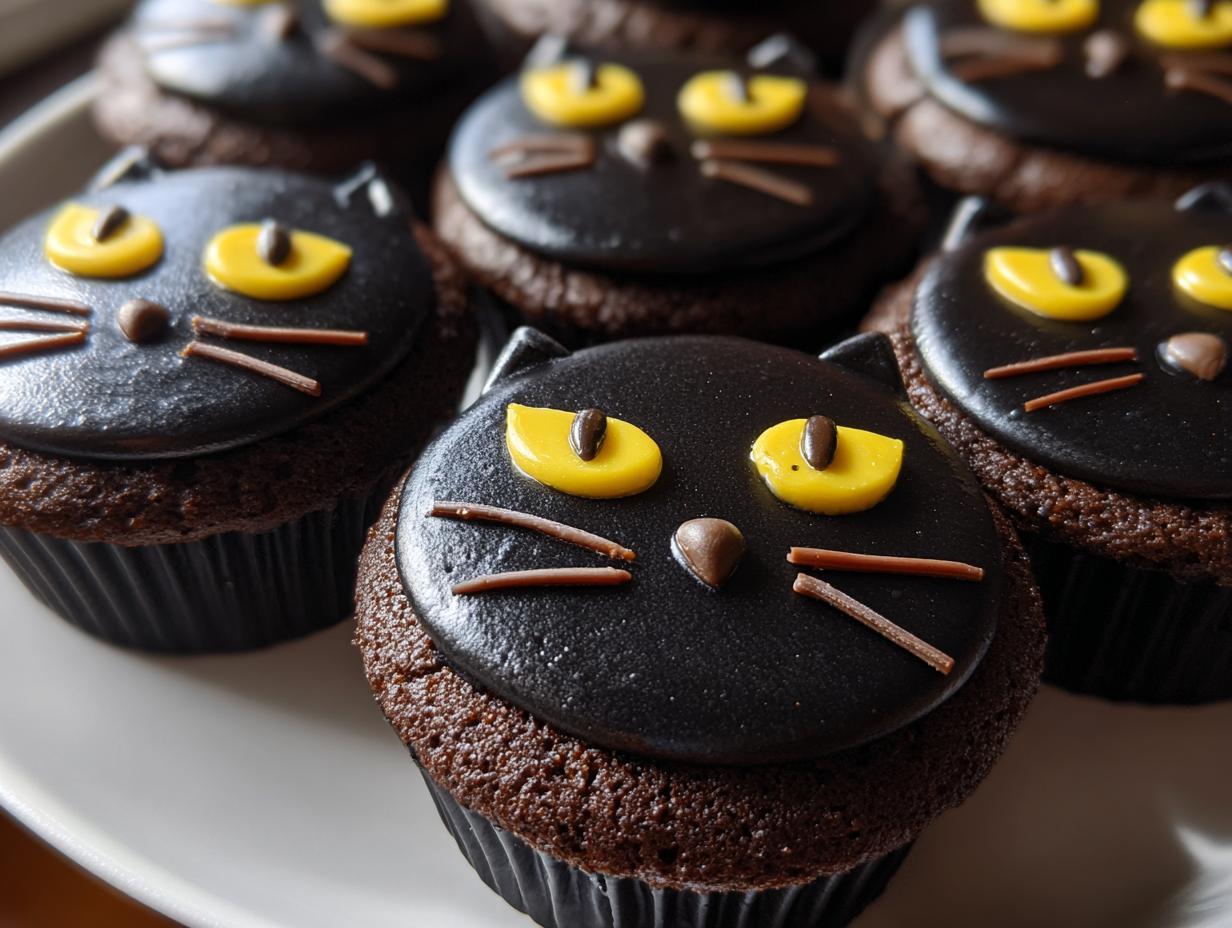
Delicious chocolate cupcakes decorated to look like black cats, perfect for Halloween or any spooky occasion.
Ingredients
- 1 1/2 cups all-purpose flour
- 1 cup granulated sugar
- 1/3 cup unsweetened cocoa powder
- 1 tsp baking soda
- 1/2 tsp salt
- 1 cup water
- 1/3 cup vegetable oil
- 1 tbsp white vinegar
- 1 tsp vanilla extract
- Black icing
- Candy eyes
- Yellow or green candy for pupils
- Black licorice for whiskers
Instructions
- Preheat oven to 350°F (175°C). Line a muffin tin with cupcake liners.
- In a large bowl, whisk together flour, sugar, cocoa powder, baking soda, and salt.
- Add water, vegetable oil, vinegar, and vanilla extract. Mix until smooth.
- Fill cupcake liners 2/3 full with batter.
- Bake for 18-20 minutes or until a toothpick comes out clean. Cool completely.
- Frost cooled cupcakes with black icing.
- Add candy eyes and small pieces of yellow or green candy for pupils.
- Cut black licorice into thin strips and insert for whiskers.
Notes
- Use gel food coloring for a deep black frosting color.
- If you can’t find black licorice, use thin strips of fruit leather.
- Store cupcakes in an airtight container for up to 3 days.
- Prep Time: 15 minutes
- Cook Time: 20 minutes
- Category: Dessert
- Method: Baking
- Cuisine: American
Nutrition
- Serving Size: 1 cupcake
- Calories: 220
- Sugar: 18g
- Sodium: 180mg
- Fat: 8g
- Saturated Fat: 1.5g
- Unsaturated Fat: 6g
- Trans Fat: 0g
- Carbohydrates: 35g
- Fiber: 2g
- Protein: 3g
- Cholesterol: 0mg