There’s something magical about sinking your teeth into a perfectly crisp yet melt-in-your-mouth shortbread finger. I still remember sneaking into my grandma’s cookie tin as a kid, always going straight for those buttery golden rectangles. The simplicity of shortbread fingers is what makes them so special—just butter, sugar, and flour transformed into something extraordinary.
My version stays true to the classic Scottish recipe I grew up loving, with that signature crumbly texture and rich flavor. No fancy ingredients, no complicated steps—just honest, wholesome goodness. Whether you’re enjoying them with afternoon tea or packing them as gifts (they disappear fast!), these shortbread fingers never fail to delight. That first bite takes me right back to Grandma’s kitchen every time.
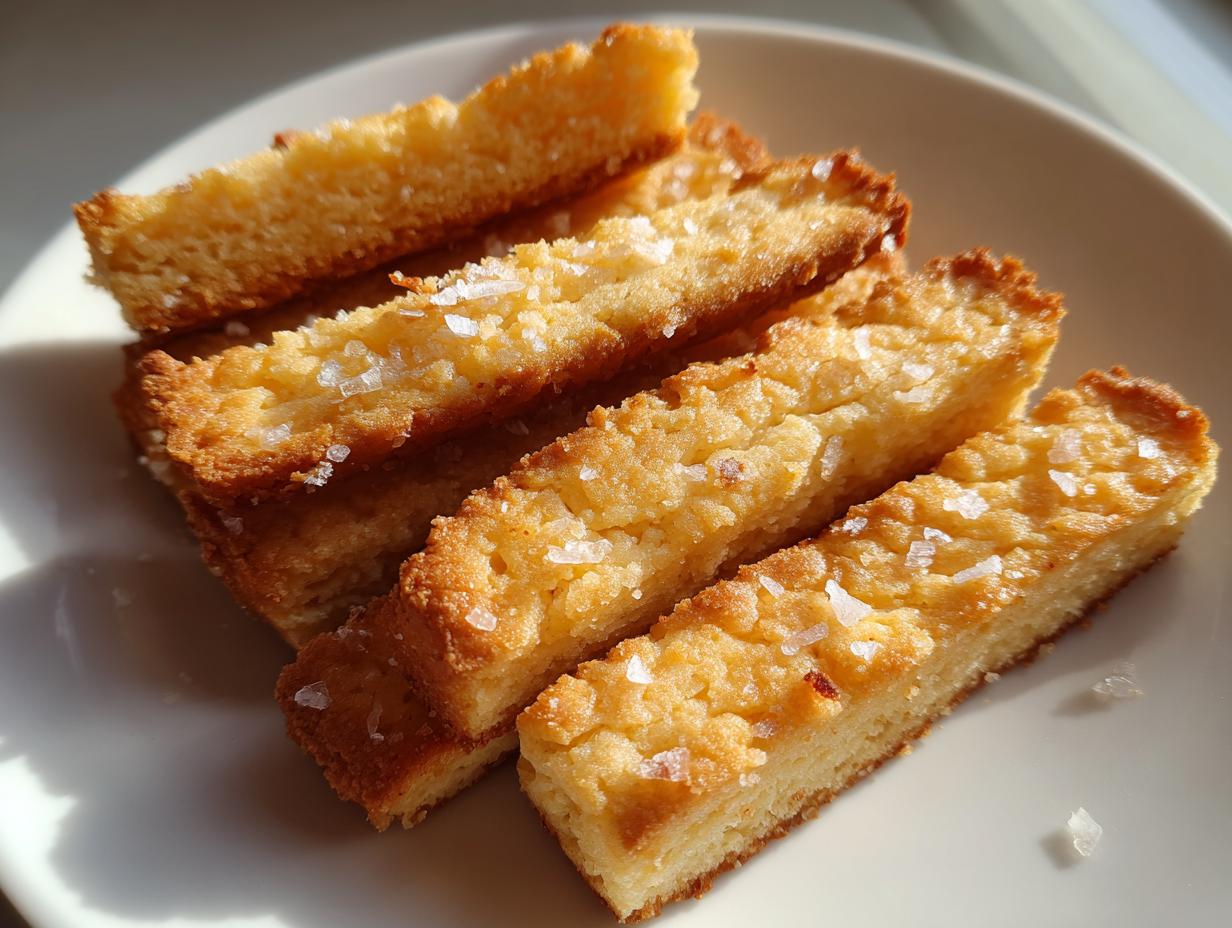
What I adore most is how the flavor deepens as the butter works its magic. The edges get this delicate crispness while the center stays tender—pure heaven with a cup of Earl Grey. Let me show you how to make these little bites of joy that have been warming hearts in my family for generations.

Why You’ll Love These Shortbread Fingers
Trust me, once you try these, you’ll understand why they’ve been my go-to treat for years. Here’s what makes them special:
- Buttery bliss: That rich, melt-in-your-mouth texture comes from using real butter—no skimping!
- Effortless elegance: Just 4 basic ingredients and 15 minutes of prep—even beginner bakers nail these.
- Gift gold: Pretty packaging turns them into heartfelt presents that always impress (if they last that long).
- Timeless taste: Classic flavors mean they pair perfectly with everything from coffee to cocktails.
Seriously, these disappear faster than I can bake them—and I bake a lot!
Ingredients for Shortbread Fingers
Here’s the beautiful part – you only need five simple ingredients to create these buttery wonders. But don’t let the short list fool you; each one plays a starring role in creating that perfect crumbly texture we all crave. I’ve learned through many batches that quality matters here – splurge on the good butter!
- 225g unsalted butter, softened – This is the heart of shortbread! Leave it out for an hour until it’s soft enough to leave a fingerprint when pressed (but not melted). I always use European-style butter when I can – that extra fat content makes all the difference.
- 110g caster sugar – The fine grains dissolve beautifully into the butter. If you can’t find caster sugar, pulse regular granulated sugar in your blender for 30 seconds – works like a charm!
- 225g plain flour – Sift this twice for the lightest texture. I learned this trick from my Scottish neighbor – it makes those fingers practically float off the plate.
- 110g rice flour or cornflour – The secret weapon! This gives that signature “melt” without making the dough too delicate. Rice flour adds a lovely sandy texture, while cornflour makes them extra tender.
- 1/4 tsp salt – Just a pinch to balance the sweetness. If you only have salted butter, reduce this to a tiny sprinkle.
See? Nothing fancy – just pantry staples transformed into something magical. Now let’s get mixing!

How to Make Shortbread Fingers
Now comes the fun part—turning those simple ingredients into golden, buttery perfection! I’ve made these so many times I could probably do it in my sleep, but I still get excited watching that dough come together. Follow these steps, and you’ll have bakery-worthy shortbread in no time.
Step 1: Preparing the Dough
First, grab your softened butter—I can’t stress enough how important that “fingerprint test” is here. Too hard, and your mixer will protest; too soft, and you’ll lose that perfect crumb. Cream it with the caster sugar for a good 3-4 minutes until it’s pale and fluffy. This isn’t just mixing—we’re creating tiny air pockets that’ll give our shortbread that melt-in-your-mouth lightness.
Now, sift in your flours and salt together. I use a fine mesh sieve and give it a good tap—watch those clouds of flour float down like snow! Mix just until the dough comes together. Here’s my golden rule: stop the second you can’t see dry flour. Overmixing makes tough shortbread, and we want tender, crumbly perfection.
Step 2: Shaping and Baking
Press the dough into your lined baking tray with lightly floured hands—no rolling pin needed! I aim for about 1cm thickness, smoothing the top with the back of a spoon. Now for the signature touch: prick the surface all over with a fork (my grandma called this “giving them their freckles”) and score into fingers. Don’t cut all the way through—just deep enough to guide your slices later.
Bake low and slow at 150°C (300°F) for 45-50 minutes. The magic happens here as the butter works its alchemy. You’ll know they’re ready when the edges turn the palest gold and your kitchen smells like a Scottish bakery.

Step 3: Cooling and Cutting
Here’s where patience pays off! Let the shortbread cool in the tray for about 10 minutes—just until it firms up slightly. Then, using a sharp knife, cut along your scored lines. I transfer the fingers to a wire rack immediately (they’ll crisp up beautifully as they cool completely). Resist sneaking a bite now—they’re fragile when warm! Wait until they’re completely cool, and you’ll be rewarded with that perfect snap.
Tips for Perfect Shortbread Fingers
After burning through more butter than I’d care to admit, I’ve picked up some foolproof tricks for shortbread success:
- Butter temperature is everything – Too cold won’t cream properly; too warm makes greasy fingers. Aim for cool-to-the-touch but leaves a dent when pressed.
- Mix with a light hand – Stop blending the moment the dough comes together. Overworked dough becomes tough instead of tender.
- Keep thickness consistent – Use your fingers to press the dough to an even 1cm across the pan for uniform baking.
- Store in a cookie tin – They’ll stay fresh for a week… if they last that long! Add a slice of bread to keep them crisp.
Follow these, and you’ll have buttery perfection every time!
Ingredient Substitutions for Shortbread Fingers
Listen, I’m all about sticking to tradition—but life happens! Here’s how to adapt when your pantry doesn’t cooperate, without sacrificing that perfect shortbread texture we love:
Rice flour vs. cornflour: They’re practically interchangeable here. Rice flour gives that classic sandy bite, while cornflour makes them extra tender. I’ve used both depending on what’s in my cupboard—just keep the same weight measurement.
Salted butter alert: If that’s all you’ve got, simply skip the added salt in the recipe. The butter’s saltiness varies by brand, so taste your dough (a chef’s perk!) and add a tiny pinch more if needed.
Granulated sugar swap: No caster sugar? Pulse regular sugar in your blender for 30 seconds—it’ll dissolve just as beautifully. Powdered sugar works in a pinch too, but reduce the amount slightly since it’s more concentrated.
Flour emergencies: In dire straits, you can use all plain flour—but expect a slightly denser result. For gluten-free versions, a trusted 1:1 GF flour blend works wonders (add 1/4 tsp xanthan gum if your mix doesn’t include it).
The beauty of shortbread? It’s forgiving. Just remember—butter quality is non-negotiable. That’s one substitution I won’t budge on!
Serving and Storing Shortbread Fingers
Oh, the joy of enjoying these buttery delights! My favorite way is with a steaming cup of Earl Grey—the bergamot plays beautifully with the rich butter flavor. They’re equally perfect dunked in strong coffee or served alongside afternoon tea. For special occasions, I’ll dust them lightly with powdered sugar—so pretty!
To keep them fresh, store in an airtight container at room temperature. They’ll stay crisp and delicious for up to a week (if they last that long!). Pro tip: toss in a slice of bread to absorb any moisture and keep them perfectly crisp. These little fingers freeze beautifully too—just layer between parchment paper in a tin.
Shortbread Fingers Nutrition Information
Now, let’s be real—we don’t eat shortbread for its health benefits! But since you’re curious (or maybe keeping track), here’s the nutritional breakdown per finger. Remember, these are estimates—your exact numbers will vary slightly depending on your butter’s fat content and precise measurements.
Per serving (1 finger):
- Calories: 120
- Fat: 7g (4g saturated)
- Carbohydrates: 13g
- Sugar: 5g
- Protein: 1g
See? Not too scary for an occasional indulgence! The beauty of shortbread is that a little goes a long way—that rich buttery flavor means one or two fingers satisfy your sweet tooth completely. I always tell myself that portion control is built right in when they’re pre-cut!
Of course, if you’re using premium European butter (like I often do), the fat content might be slightly higher—but oh, is it worth it. Just consider it an investment in happiness!

Frequently Asked Questions
I’ve gotten so many wonderful questions about these shortbread fingers over the years—here are the ones that pop up most often in my kitchen and inbox!
Can I freeze shortbread fingers?
Absolutely! These freeze like a dream. Just cool them completely, then layer between parchment paper in an airtight container. They’ll keep beautifully for up to 3 months. No need to thaw—they’re delicious cold straight from the freezer (trust me, I’ve “tested” this many times). If you prefer them room temp, just let them sit out for 10 minutes.
Why use rice flour in shortbread?
Ah, my favorite baking secret! Rice flour gives that signature melt-in-your-mouth sandy texture without making the dough too delicate. It absorbs butter differently than wheat flour, creating those irresistible crumbly layers. My grandma swore by it—said it was the difference between “good” and “transcendent” shortbread. Can’t argue with generations of Scottish wisdom!
Help—my shortbread crumbles when I cut it!
Don’t panic! This usually means one of two things: either you cut while still too warm (wait 10 minutes after baking) or overbaked slightly. Next time, check a few minutes early—they should be just barely golden at the edges. Also, make sure your knife is sharp and use a gentle sawing motion rather than pressing down hard.
Can I add flavors like vanilla or lemon zest?
You sure can—though purists might gasp! A teaspoon of vanilla or citrus zest folded into the creamed butter adds lovely dimension. For chocolate chip shortbread (my nephew’s favorite), mix in 50g mini chocolate chips after the flour. Just know: additions may slightly change the texture from classic crispness.
Why did my shortbread spread in the oven?
This breaks my butter-loving heart! Usually, it means your butter was too soft when creaming. Next time, make sure it’s cool to the touch—about 18°C (65°F). Also, chilling the shaped dough for 20 minutes before baking helps prevent spread. And double-check your oven temp with a thermometer—too low can cause spreading before setting.
Share Your Shortbread Fingers
Nothing makes me happier than seeing your versions of these buttery delights! Did you add a twist with lemon zest? Maybe you nailed that perfect snap on your first try? I want to hear all about your shortbread adventures—the triumphs and the tasty “learning experiences” (we’ve all had those!).
Snap a photo of your golden fingers and tag me—I’ll be your personal cheerleader! And if you’ve got questions or need troubleshooting, just shout. After countless batches (and a few hilarious kitchen mishaps), I’ve picked up every trick in the book.
Most importantly—did they disappear as quickly as they do in my house? Leave a star rating below so other bakers know just how addictive these really are. Your feedback keeps this little recipe alive and evolving. Now go forth and spread the buttery joy!
Print
“Buttery Shortbread Fingers Recipe – 5 Ingredient Bliss!”
- Total Time: 1 hour 5 mins
- Yield: 20 fingers 1x
- Diet: Vegetarian
Description
Classic buttery shortbread fingers, crispy and crumbly with a rich flavor.
Ingredients
- 225g unsalted butter, softened
- 110g caster sugar
- 225g plain flour
- 110g rice flour or cornflour
- 1/4 tsp salt
Instructions
- Preheat the oven to 150°C (300°F) and line a baking tray with parchment paper.
- Cream the butter and sugar until light and fluffy.
- Sift in the flours and salt, then mix until a dough forms.
- Press the dough into the tray, smoothing the top.
- Prick the surface with a fork and score into fingers.
- Bake for 45-50 minutes until pale golden.
- Cool slightly, then cut along the scored lines and transfer to a wire rack.
Notes
- Use room-temperature butter for easier mixing.
- Do not overwork the dough to keep it tender.
- Store in an airtight container for up to a week.
- Prep Time: 15 mins
- Cook Time: 50 mins
- Category: Dessert
- Method: Baking
- Cuisine: British
Nutrition
- Serving Size: 1 finger
- Calories: 120
- Sugar: 5g
- Sodium: 25mg
- Fat: 7g
- Saturated Fat: 4g
- Unsaturated Fat: 2g
- Trans Fat: 0g
- Carbohydrates: 13g
- Fiber: 0.5g
- Protein: 1g
- Cholesterol: 15mg