I’ll never forget the first time I brought these Caesar deviled eggs to a potluck. My friend Jen took one bite, gasped, and said, “Wait—these taste like Caesar salad?!” I just grinned and watched as the whole tray disappeared in minutes. That’s the magic of this recipe: all the bold, garlicky, tangy flavors of your favorite salad, packed into those creamy little egg white cups.

I came up with these when I was desperate for a twist on classic deviled eggs that would actually impress my foodie friends. The secret? A generous squeeze of lemon juice and a hit of Worcestershire sauce in the filling—trust me, it makes all the difference. And don’t even get me started on that Parmesan. It melts into the yolk mixture like a dream, giving you that rich, savory depth that keeps people coming back for “just one more.”
These aren’t just party food—they’re conversation starters. Every time I serve them, someone asks for the recipe. And now? It’s all yours.
Why You’ll Love These Caesar Deviled Eggs
Listen, I know what you’re thinking – “Deviled eggs? Really?” But hear me out. These aren’t your grandma’s church potluck deviled eggs. These babies have attitude!
Here’s what makes them special:
- The Caesar twist – That garlic-Parmesan-anchovy magic transforms ordinary eggs into something extraordinary
- Surprise factor – Guests will do a double-take when they realize they’re eating Caesar salad flavors
- Easy elegance – Fancy enough for dinner parties but simple enough for Tuesday night snacks
- Crowd pleaser – I’ve never seen a tray of these last more than 10 minutes at any gathering
- Make-ahead magic – The flavors get even better after chilling overnight
Seriously, once you try this version, you’ll never go back to plain old deviled eggs again. Pinky promise.
Ingredients for Caesar Deviled Eggs
Okay, let’s talk ingredients – because every little detail matters here. First rule? Use large eggs. Medium ones leave you with sad, shallow filling cups. And that Parmesan? Freshly grated beats the pre-shredded stuff every time – it melts into the filling like a dream.
Now the garlic – minced fine or pressed is key. No one wants chunky garlic surprises. And about those anchovies? Totally optional, but if you’re going for authentic Caesar flavor, two tiny fillets make all the difference. Just don’t tell my vegetarian friends I said that!

Equipment You’ll Need
You don’t need fancy gadgets for these – just grab:
- A medium saucepan for boiling eggs
- A mixing bowl for the creamy filling
- A piping bag (or just a spoon if you’re feeling rustic)
- A sharp knife for halving eggs
That’s it! See? I told you this recipe keeps things simple.
How to Make Caesar Deviled Eggs
Preparing the Eggs
Here’s my foolproof method for perfect hard-boiled eggs every time: Place 6 large eggs in a single layer in a saucepan and cover with cold water by about an inch. Bring to a rolling boil, then immediately remove from heat, cover, and let sit for exactly 12 minutes (set a timer!). The second that timer goes off, transfer them to an ice bath – this stops the cooking and makes peeling way easier. Let them chill for at least 15 minutes before peeling under cool running water – the shells will practically slide off!
Making the Filling
Now for the magic! Once your eggs are halved and yolks removed, mash those golden yolks with a fork until they’re nice and crumbly. Here’s my secret: push them through a fine mesh sieve for ultra-smooth texture. Then whisk in 2 tbsp mayo, 1 tbsp each Dijon and lemon juice, minced garlic, Parmesan, Worcestershire, salt, and pepper. Taste as you go – want more tang? Add lemon! Need more umami? Another pinch of Parmesan! The filling should be creamy but still hold its shape.
Assembling and Garnishing
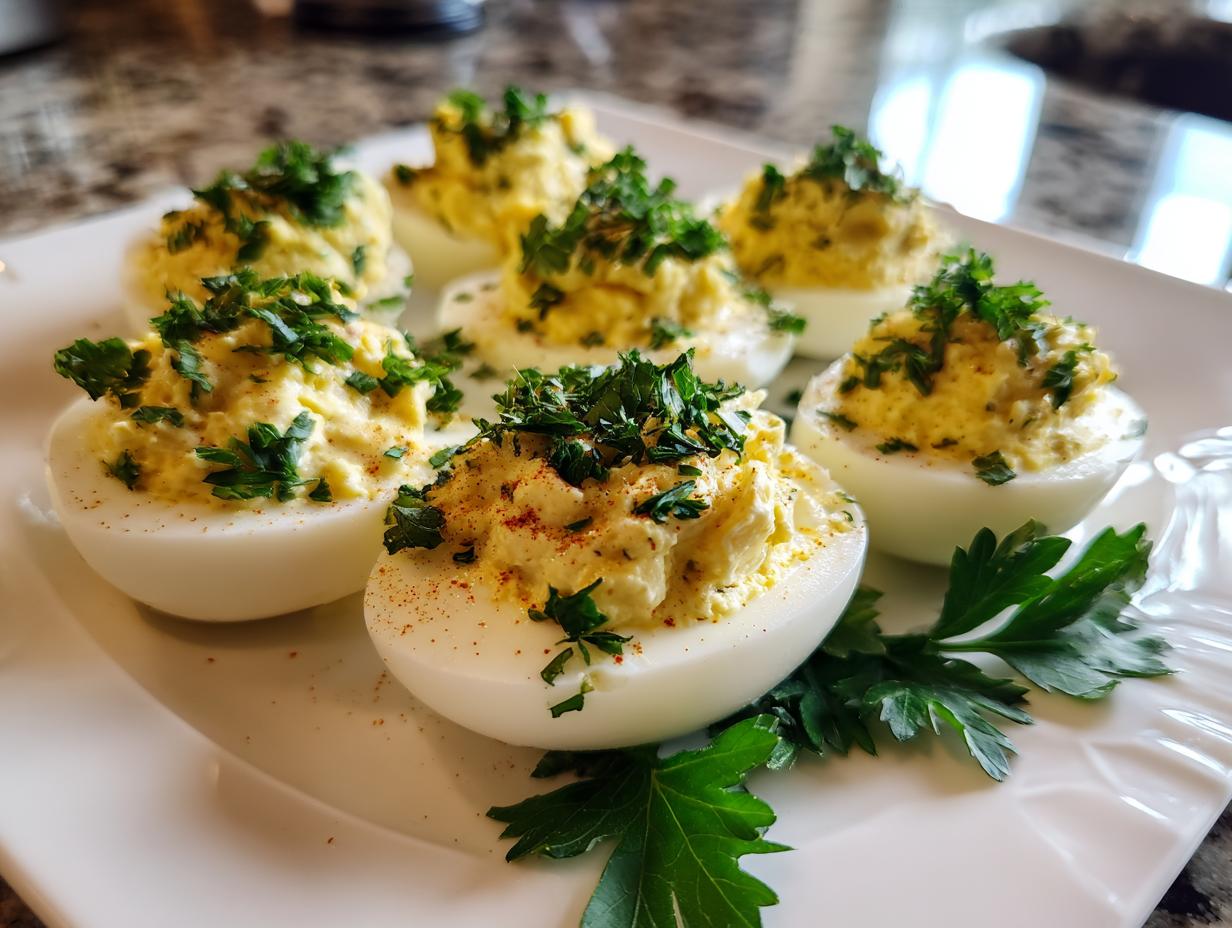
Time for the fun part! If you’re feeling fancy, pipe the filling using a star tip for pretty swirls. No piping bag? No problem – just spoon it in for that homemade charm. Top each egg with a sprinkle of fresh parsley and – here’s the showstopper – one delicate anchovy fillet draped artfully across the top (optional, but oh-so-good!). Chill for at least 30 minutes before serving – trust me, the flavors need this time to become best friends!

Expert Tips for Perfect Caesar Deviled Eggs
Want restaurant-quality results? Here are my hard-earned secrets after making dozens of batches. First, that sieve trick I mentioned? Non-negotiable if you want velvety-smooth filling. Press those yolks through with the back of a spoon – it takes 30 extra seconds but makes all the difference in texture.
Now about the garlic – start with half a clove if you’re sensitive. Raw garlic intensifies as it sits! I learned this the hard way when I once made “dragon breath” eggs that cleared a room. Taste your filling before piping – you can always add more.
And please, please don’t skip the chilling step! That 30-minute fridge time lets flavors meld beautifully. Your patience will be rewarded with every creamy, tangy bite.
Serving Suggestions
These Caesar deviled eggs shine brightest when you let them be the star of the show! I love arranging them on a platter with crisp romaine leaves and cherry tomatoes – it’s like serving mini Caesar salads. For parties, pair them with chilled Sauvignon Blanc or a citrusy gin cocktail to cut through the richness.
Brunch alert! They’re phenomenal alongside smoked salmon and crusty bread. My husband insists they belong with bloody marys – the spicy tomato juice plays off the garlicky eggs perfectly. Honestly though? They disappear just as fast when I sneak them straight from the fridge at midnight!
Storage and Make-Ahead Tips
Here’s the good news – these Caesar deviled eggs actually get better after chilling! They’ll keep beautifully in the fridge for up to 2 days (if they last that long). Just cover the tray with damp paper towels before wrapping in plastic – this keeps them from drying out. Oh, and don’t even think about freezing them – the texture turns all weird and rubbery. Pro tip: Wait to add the anchovy garnish until right before serving to keep it looking fresh!
Frequently Asked Questions
Can I make these Caesar deviled eggs ahead?
Absolutely! In fact, I highly recommend it. The flavors develop beautifully overnight in the fridge. Just prepare them up to the garnishing step, cover tightly, and store for up to 24 hours. Add your parsley and anchovies right before serving so they stay fresh-looking.
What’s a good substitute for anchovies?
I get it – anchovies aren’t everyone’s cup of tea! For similar umami flavor without the fish, try a teaspoon of capers (chopped fine) or a dash of fish sauce. Vegetarians can swap in sun-dried tomatoes for that salty punch. Or just skip it entirely – they’ll still taste amazing!
How long do Caesar deviled eggs keep?
Food safety first, friends! These are best eaten within 2 days when stored properly in the fridge. After that, the texture starts to change and they lose their magic. Pro tip: If you’re not sure how long they’ve been sitting, give them a sniff test – fresh eggs should smell clean and bright, not sulfur-y.
Nutritional Information
Just between us? I’m not much of a numbers person when it comes to these Caesar deviled eggs – I’m too busy enjoying that creamy, garlicky goodness to count calories! But since you asked, the nutrition info here is just a rough estimate. Values can vary based on your specific ingredients (like how generous you are with that Parmesan!).
Important disclaimer: These calculations aren’t exact since we all tweak recipes differently. Maybe you’ll add extra anchovies (no judgment!), or maybe you’ll use light mayo – it all changes things. The most important number to me? How many happy faces I see when this platter hits the table!
That said, eggs are packed with protein and healthy fats, and when you balance them with fresh ingredients like lemon juice and parsley, you’ve got yourself a snack that’s as nourishing as it is delicious. Now if you’ll excuse me, I need to go “quality test” another one…
Final Thoughts
There you have it – my foolproof way to turn ordinary deviled eggs into something extraordinary! I can’t wait to hear how your Caesar deviled eggs turn out. Snap a pic of your beautiful creation and tag me – I love seeing your kitchen wins. Now go wow your friends with these flavor-packed bites!


Irresistible Caesar Deviled Eggs: 6 Secret Twists You Need
- Total Time: 25 mins
- Yield: 12 halves 1x
- Diet: Vegetarian
Description
A twist on classic deviled eggs with Caesar salad flavors. Creamy, tangy, and packed with savory goodness.
Ingredients
- 6 large eggs
- 2 tbsp mayonnaise
- 1 tbsp Dijon mustard
- 1 tbsp lemon juice
- 1 garlic clove, minced
- 1 tbsp grated Parmesan cheese
- 1 tsp Worcestershire sauce
- 1/4 tsp black pepper
- 1/4 tsp salt
- 1 tbsp chopped fresh parsley
- Anchovy fillets (optional)
Instructions
- Hard boil eggs, cool, peel, and cut in half lengthwise.
- Remove yolks and place in a bowl.
- Mash yolks with mayonnaise, mustard, lemon juice, garlic, Parmesan, Worcestershire sauce, salt, and pepper.
- Spoon mixture back into egg whites.
- Garnish with parsley and anchovy fillets if desired.
- Chill before serving.
Notes
- For smoother filling, push yolks through a sieve.
- Adjust garlic and lemon to taste.
- Best served cold.
- Prep Time: 15 mins
- Cook Time: 10 mins
- Category: Appetizer
- Method: Boiling
- Cuisine: American
Nutrition
- Serving Size: 2 halves
- Calories: 120
- Sugar: 0.5g
- Sodium: 180mg
- Fat: 9g
- Saturated Fat: 2g
- Unsaturated Fat: 6g
- Trans Fat: 0g
- Carbohydrates: 1g
- Fiber: 0g
- Protein: 6g
- Cholesterol: 190mg