Oh my goodness, you have to try these cherry cheesecake dessert jars! I stumbled upon this idea last summer when I needed something quick yet impressive for a last-minute backyard gathering. These little jars became the star of the show – everyone kept asking for the recipe! What I love most is how they combine all the creamy, dreamy goodness of cheesecake with the convenience of individual servings. No slicing, no mess, just grab-and-go perfection. Plus, they’re no-bake, which means you can whip them up even when it’s too hot to turn on the oven. Trust me, once you try these, you’ll be making them for every potluck, picnic, and girls’ night from here on out!
Why You’ll Love These Cherry Cheesecake Dessert Jars
Let me count the ways these little jars will steal your heart (and your guests’ compliments):
- No oven required – perfect for hot summer days when baking sounds like torture
- Individually portioned – no fighting over who gets the biggest slice!
- Make-ahead magic – they actually taste better after chilling overnight
- Endlessly customizable – swap cherries for your favorite fruit topping
- Portable perfection – just pop on lids for picnics or potlucks
Honestly, I make these so often my friends now call them “Jen’s Famous Jar Cheesecakes” – and yours might too!
Ingredients for Cherry Cheesecake Dessert Jars
Here’s what you’ll need to make these irresistible little treats – and yes, every single ingredient matters! I’ve learned through trial and error that quality makes all the difference here:
- 1 cup graham cracker crumbs (I like mine with a bit of texture, not powder-fine)
- 3 tbsp melted butter (the real deal, none of that margarine business)
- 1 tbsp sugar (just a kiss of sweetness for the crust)
- 8 oz cream cheese, softened (full-fat please – this is dessert, not diet food!)
- 1/4 cup sugar (adjust to your sweet tooth)
- 1 tsp vanilla extract (the good stuff makes all the difference)
- 1/2 cup heavy cream (cold right from the fridge)
- 1 cup cherry pie filling (or get fancy with homemade if you’re feeling ambitious)
See? Nothing fancy – just simple ingredients that transform into something magical when layered together!

How to Make Cherry Cheesecake Dessert Jars
Okay, let’s get to the fun part – assembling these beauties! I promise it’s easier than you think, and the results will make you look like a dessert pro. Just follow these simple steps:
Step 1: Prepare the Graham Cracker Crust
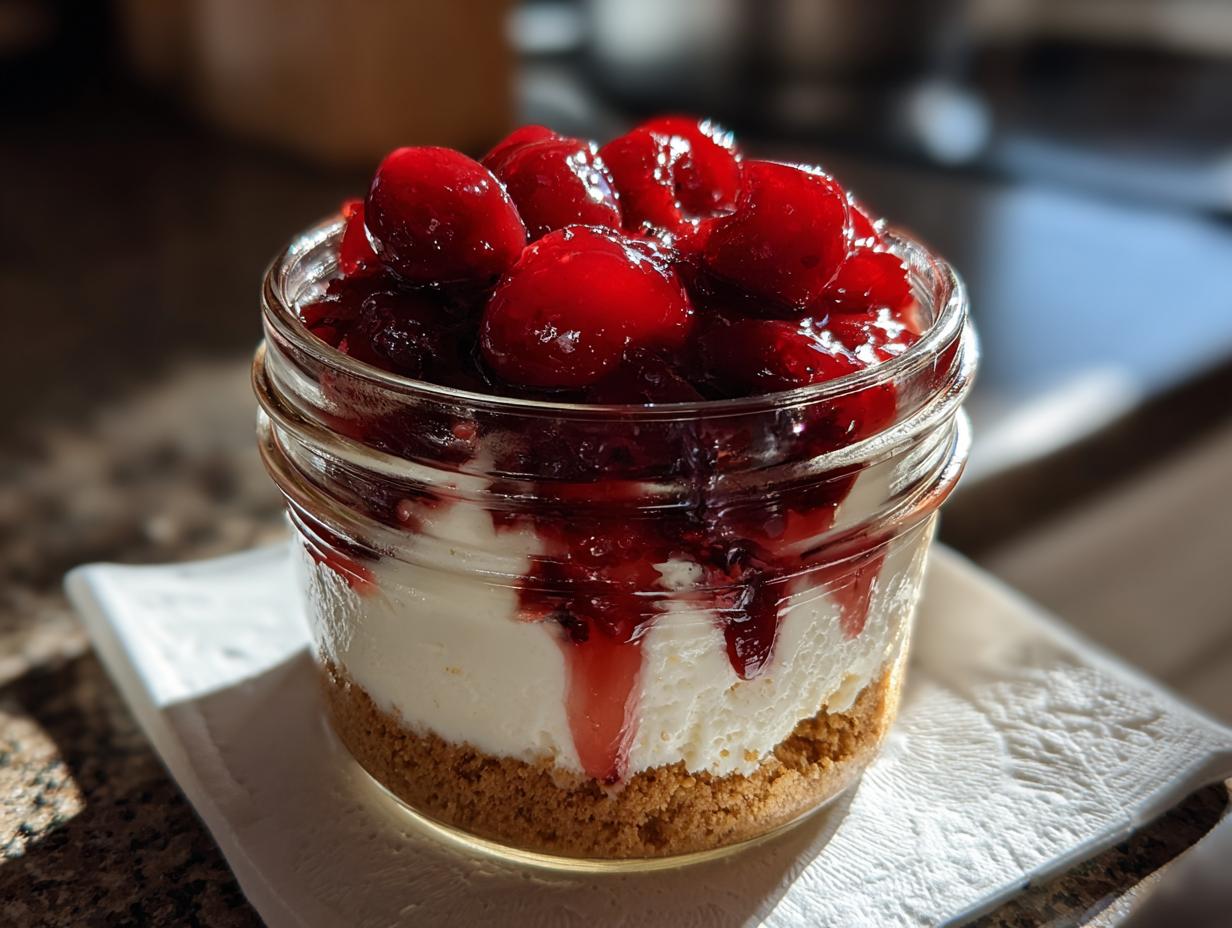
First, grab your favorite 8-ounce jars (mason jars work perfectly). In a medium bowl, mix together the graham cracker crumbs, melted butter, and that tablespoon of sugar until it looks like wet sand. Now here’s my secret – use the back of a spoon to press firmly about 2 tablespoons of this mixture into the bottom of each jar. You want it packed tight so it holds together when you dig in later!
Step 2: Make the Cheesecake Filling
This is where the magic happens! In a large bowl, beat the softened cream cheese (I can’t stress enough – it MUST be room temperature!) with the sugar and vanilla until it’s completely smooth. No lumps allowed! In another bowl, whip that cold heavy cream until you get stiff peaks – when you lift the beaters, the peaks should stand straight up without flopping over. Now gently fold the whipped cream into the cream cheese mixture. Be patient and fold slowly – we want to keep all that air in the whipped cream for the lightest, fluffiest texture.
Step 3: Layer and Chill
Time to assemble! Spoon the cheesecake filling over the crust in each jar, leaving about 1/2 inch at the top. Then comes the crowning glory – a generous spoonful of that gorgeous cherry pie filling. Pop the lids on and refrigerate for at least 2 hours (though overnight is even better). The wait is torture, I know, but trust me – that chilling time lets all the flavors meld together perfectly!

Tips for Perfect Cherry Cheesecake Dessert Jars
After making these dozens of times (okay, maybe hundreds), here are my can’t-live-without tips:
- Chill your jars first – 30 minutes in the freezer makes the crust set faster
- Wipe rim clean before adding lids for picture-perfect presentation
- Pipe the filling for neater layers (a zip-top bag with the corner snipped works)
- Add lemon zest to the filling for a bright contrast to the sweet cherries
These little tricks take your jars from “nice” to “oh-my-goodness-I-need-the-recipe” amazing!
Variations for Cherry Cheesecake Dessert Jars
Oh, the possibilities! While I adore the classic cherry version, sometimes I like to mix things up. Try swapping the cherry pie filling for luscious blueberry or tart raspberry – both are divine. For chocolate lovers, replace half the graham crumbs with crushed Oreos and top with chocolate shavings. My neighbor swears by a drizzle of caramel sauce under the fruit – not traditional, but oh-so-good!
Serving and Storing Cherry Cheesecake Dessert Jars
These little jars are practically made for easy entertaining! The best part? They’ll keep beautifully in the fridge for up to 3 days with their lids on – no drying out or absorbing fridge smells. The lids make them perfect for transporting to parties too – no spills, no mess, just deliciousness ready when you are. I always make extra because somehow they disappear faster than I expect!
Cherry Cheesecake Dessert Jars FAQ
I get asked these questions all the time – here’s everything you need to know about these irresistible treats!
Can I use frozen cherries instead of pie filling?
Absolutely! Thaw and drain them well, then toss with a bit of sugar and cornstarch to create your own quick “pie filling.” The texture will be slightly different but just as delicious.
How far ahead can I make these?
They’re actually better made a day ahead! The flavors develop beautifully overnight. Just keep them refrigerated with lids on for up to 3 days – if they last that long!
Can I make these dairy-free?
You bet! Use your favorite vegan cream cheese and coconut whipped cream. The crust works great with melted coconut oil too. The cherries stay naturally dairy-free – bonus!
Nutritional Information
Just so you know what you’re diving into (not that you’ll care once you taste these!) – each jar comes to about 320 calories with 22g fat. But remember, these numbers can change based on your exact ingredients. Worth every bite if you ask me!
Final Thoughts
There you have it – my absolute favorite way to enjoy cheesecake without the fuss! These cherry cheesecake dessert jars never fail to impress, whether I’m treating myself or sharing with friends. Give them a try at your next gathering and watch how quickly they disappear. Just warning you – you might need to start hiding a few jars in the back of the fridge for yourself!
Print
5-Star Cherry Cheesecake Dessert Jars You Must Try
- Total Time: 2 hours 15 minutes
- Yield: 4 servings 1x
- Diet: Vegetarian
Description
A simple and delicious cherry cheesecake dessert served in individual jars for easy serving.
Ingredients
- 1 cup graham cracker crumbs
- 3 tbsp melted butter
- 1 tbsp sugar
- 8 oz cream cheese, softened
- 1/4 cup sugar
- 1 tsp vanilla extract
- 1/2 cup heavy cream
- 1 cup cherry pie filling
Instructions
- Mix graham cracker crumbs, melted butter, and 1 tbsp sugar in a bowl.
- Press the mixture into the bottom of each jar.
- Beat cream cheese, 1/4 cup sugar, and vanilla until smooth.
- Whip heavy cream until stiff peaks form, then fold into cream cheese mixture.
- Spoon the cheesecake filling over the crust in each jar.
- Top with cherry pie filling.
- Chill for at least 2 hours before serving.
Notes
- Use room-temperature cream cheese for smoother mixing.
- Adjust sugar to taste.
- Can substitute cherry pie filling with other flavors.
- Prep Time: 15 minutes
- Cook Time: 0 minutes
- Category: Dessert
- Method: No-Bake
- Cuisine: American
Nutrition
- Serving Size: 1 jar
- Calories: 320
- Sugar: 25g
- Sodium: 180mg
- Fat: 22g
- Saturated Fat: 13g
- Unsaturated Fat: 7g
- Trans Fat: 0g
- Carbohydrates: 28g
- Fiber: 1g
- Protein: 4g
- Cholesterol: 65mg