Oh, cherry desserts! They take me right back to summer picnics at my grandma’s house, where the smell of sweet cherries baking would fill the whole kitchen. That’s why I’m so excited to share these Cherry Pie Crumb Bars with you—they’re like all the best parts of cherry pie, but easier to make and even more fun to eat. The buttery crust, the gooey cherry filling, and that irresistible crunchy topping? Pure magic. And the best part? You probably have most of the ingredients in your pantry already. Trust me, one bite of these bars, and you’ll be hooked—just like I was the first time I made them!

Why You’ll Love These Cherry Pie Crumb Bars
These bars are my go-to dessert for so many reasons, and once you try them, they’ll be yours too!
- Effortless to make: No fancy skills needed—just mix, layer, and bake!
- Perfect texture: Buttery crust, juicy cherries, and that crunchy crumble topping? Heaven.
- Always a hit: Bring these to a potluck, and watch them disappear before you can say “seconds!”
- Weekend or weeknight: Quick enough for a Tuesday, special enough for Sunday dessert.
Ingredients for Cherry Pie Crumb Bars
Gather these simple ingredients – I bet you have most of them already! The magic happens when they all come together just right.
- 2 cups all-purpose flour – spooned and leveled, not packed
- 1/2 cup granulated sugar – regular white sugar works perfectly
- 1/4 teaspoon salt – just enough to balance the sweetness
- 1 cup unsalted butter – cold and cubed (this is crucial!)
- 1 large egg – straight from the fridge
- 1 teaspoon vanilla extract – pure vanilla makes all the difference
- 1 can (21 oz) cherry pie filling – the star of the show
- 1/2 cup old-fashioned oats – for that perfect crunch
- 1/4 cup brown sugar – packed firmly
- 1/4 teaspoon ground cinnamon – just a hint of warmth
Ingredient Notes & Substitutions
Here’s where I can share all my little secrets and swaps – because sometimes you just need to improvise!
Butter is key: It must be cold – I pop mine in the freezer for 10 minutes before cubing. No substitutes here – margarine just won’t give you that perfect crumb texture.
Cherry filling options: While canned filling is convenient, homemade is amazing if you’ve got fresh cherries! Just simmer 3 cups pitted cherries with 1/2 cup sugar and 2 tablespoons cornstarch until thickened.
Flour swaps: Need gluten-free? Use a 1:1 gluten-free flour blend. The texture changes slightly but still works beautifully.
Egg emergency? If you’re out of eggs, 1/4 cup applesauce can work in a pinch, though the crust will be slightly more tender.
Oat alternatives: No old-fashioned oats? Quick oats work too, or you can skip them and add extra flour to the topping.
How to Make Cherry Pie Crumb Bars
Alright, let’s get baking! These bars come together in three simple parts – crust, filling, topping – and I’ll walk you through each step. Just follow along, and you’ll have perfect crumb bars in no time. Oh, and don’t forget to preheat that oven to 350°F (175°C) first thing – we want it nice and hot when our bars go in!

Step 1: Prepare the Crust
Here’s where we build our buttery foundation. In a large bowl, whisk together your flour, granulated sugar, and salt. Now for the fun part – cut in that cold, cubed butter. I like using a pastry cutter, but two forks work great too. You’re looking for that perfect coarse crumb texture – like wet sand with some pea-sized butter bits remaining. That’s what gives our crust its flaky magic!
Next, stir in the egg and vanilla just until the dough comes together. It’ll seem dry at first, but keep mixing – suddenly it’ll transform into this gorgeous, crumbly dough that holds together when squeezed. Resist the urge to overmix though! We want tender, not tough.
Now press about two-thirds of this mixture firmly into your parchment-lined pan. I use the bottom of a measuring cup to really pack it down evenly. This creates our perfect base that won’t get soggy from the cherry filling.
Step 2: Layer the Cherry Filling
Time for the star of the show! Open that can of cherry pie filling (or use your homemade if you’re fancy) and spread it evenly over the crust. I like to leave about a half-inch border all around – this keeps the filling from oozing out during baking.
Pro tip: If your filling seems extra thick, give it a quick stir to loosen it up before spreading. And don’t be tempted to add more – too much filling makes soggy bars. Trust me on this – the 21 oz can is perfect for an 8×8 pan!
Step 3: Add the Crumb Topping
Remember that remaining dough? Let’s make it even better! Mix in the oats, brown sugar, and cinnamon until well combined. Now comes the satisfying part – crumbling this mixture evenly over the cherry layer. Don’t press it down – we want those lovely nooks and crannies that’ll toast up golden and crisp.
Pop your pan in the oven and bake for 40-45 minutes. You’ll know they’re done when the topping is golden brown and the edges are slightly bubbly. Oh, that smell filling your kitchen? Pure happiness!
Here’s the hardest part – let them cool completely in the pan before cutting. I know, the temptation is real, but this patience pays off in perfect, clean slices. About 2 hours should do it, or speed things up in the fridge if you absolutely can’t wait!

Tips for Perfect Cherry Pie Crumb Bars
After making these bars more times than I can count, I’ve picked up some tricks that guarantee success every time. First, don’t skip the parchment paper – it’s the easiest way to lift out perfect bars without any sticking. Second, resist cutting while warm – I know it’s hard, but waiting means clean slices instead of crumbly messes.
Here’s my secret weapon: chill the dough for 15 minutes before pressing into the pan. This prevents shrinking and gives you that perfect firm base. And if your topping browns too fast, just tent with foil – no burnt crumbs here! Last tip: use a sharp knife dipped in hot water for those picture-perfect cuts.
Serving and Storage Suggestions
Okay, here’s the best way to enjoy these beauties! I always serve mine at room temperature – that way, the cherry filling has just the right gooey texture, and the crumb topping stays perfectly crisp. If you can’t resist (I never can), a tiny warm slice with a scoop of vanilla ice cream is heavenly – but let the rest cool fully before cutting more!
For storage, pop any leftovers (if there are any!) in an airtight container. They’ll keep well at room temperature for about 2 days, or up to 3 days in the fridge. The fridge actually helps the flavors meld even more – just let them come to room temp before serving again.
Want to get ahead? These bars freeze amazingly well! Just wrap individual portions tightly in plastic wrap, then foil, and freeze for up to 2 months. Thaw overnight in the fridge or at room temp for a few hours. Pro tip: Freeze before cutting – they hold their shape better that way.
A quick note if you’re transporting these – layer them between sheets of parchment in a container so the topping doesn’t get squished. Trust me, I learned this the hard way after bringing a batch to a potluck in a too-small tin!
Cherry Pie Crumb Bars Variations
One of my favorite things about this recipe is how easily you can change it up! Once you’ve mastered the basic cherry version, try these fun twists – they’re all winners in my book.
Berry Bliss: Swap the cherry filling for blueberry or strawberry pie filling. The blueberry version with lemon zest in the crust is absolutely magical on summer mornings with coffee.
Nutty Crunch: Add 1/4 cup chopped almonds or pecans to the crumb topping. The extra texture is divine, and the nuttiness pairs beautifully with fruit.
Flavor Boost: Try almond extract instead of vanilla – just 1/2 teaspoon is plenty. It makes the whole kitchen smell like marzipan while baking!
Chocolate Cherry: For special occasions, sprinkle 1/4 cup mini chocolate chips over the cherry layer before adding the crumb topping. The melty chocolate pockets take these bars over the top.
Seasonal Twist: In fall, use apple pie filling with a dash of nutmeg in the topping. Or try peach filling with a hint of ginger for summer.

Nutritional Information
Okay, let’s talk numbers – but remember, these are just estimates since ingredients can vary. I calculated based on cutting into 12 equal bars (though let’s be real, some might end up bigger when that craving hits!).
Each delicious bar contains:
- Calories: About 280 – perfect for that afternoon pick-me-up
- Fat: 12g (7g saturated, 4g unsaturated)
- Carbs: 40g – mostly from that sweet cherry goodness
- Sugar: 18g (some from the fruit, some from us being a little indulgent)
- Protein: 3g – hey, there’s an egg in there!
- Fiber: 2g – thank you, oats and whole fruit
Important note: These values can change if you make substitutions like different fruit fillings or gluten-free flour. And let’s be honest – when something tastes this good, sometimes the numbers just don’t matter as much as that first blissful bite!
FAQs About Cherry Pie Crumb Bars
Can I freeze these cherry crumb bars?
Absolutely! These bars freeze like a dream. Just make sure they’re completely cooled first, then wrap tightly in plastic wrap and foil. They’ll keep beautifully for up to 2 months in the freezer. When you’re ready to enjoy, thaw overnight in the fridge or at room temperature for a few hours. Pro tip: Freeze them whole before cutting – they hold their shape much better that way!
What if I don’t have cherry pie filling?
No worries at all! This recipe works with pretty much any canned pie filling you have on hand – blueberry, apple, or even peach would be delicious. If you’re feeling ambitious, homemade filling is fantastic too. Just simmer 3 cups of your favorite fruit with some sugar and cornstarch until thickened. The bars might need a few extra minutes in the oven if your homemade filling is extra juicy.
Can I use margarine instead of butter?
Honestly? I wouldn’t recommend it. Butter gives these bars their signature rich flavor and perfect crumbly texture. Margarine tends to make the crust greasy and the topping too soft. In a pinch, you could use half butter and half shortening, but real butter is really worth it here. Remember – cold butter is key to that irresistible crunch!
Why do my bars fall apart when I cut them?
This usually means they needed more cooling time – I know, the wait is torture! Let them cool completely in the pan, about 2 hours, before slicing. If you’re still having trouble, pop them in the fridge for 30 minutes to firm up. Using a sharp knife dipped in hot water (and wiped clean between cuts) helps too. And don’t forget – a little crumble is part of the charm!
Can I make these gluten-free?
You sure can! Just swap the all-purpose flour for a 1:1 gluten-free flour blend. The texture will be slightly more delicate, but still delicious. Make sure your oats are certified gluten-free too, since regular oats can sometimes have cross-contamination. I’ve had great success with Bob’s Red Mill gluten-free flour in this recipe – you’d never know the difference!
Final Thoughts
There you have it – my absolute favorite way to make cherry pie crumb bars! I still remember the first time I pulled a batch out of the oven – that golden topping, those little cherry bubbles peeking through… I knew right then this recipe would be a keeper. Now I want you to experience that same magic in your own kitchen!
Don’t be surprised if these become your new go-to dessert. They’re perfect for potlucks, holiday gatherings, or just because it’s Tuesday and you deserve something sweet. And hey, if you do make them (and I really hope you will!), tag me on social media or leave a comment – I’d love to hear how they turned out for you!
One last thing – don’t stress about making them look perfect. Some of my best batches have been the “messy” ones that got devoured in minutes. After all, that’s what homemade treats are all about – joy, not perfection. Now go preheat that oven and get baking! I can’t wait for you to take that first glorious bite of warm cherry goodness.
Print
Irresistible Cherry Pie Crumb Bars Recipe in 45 Minutes!
- Total Time: 1 hour
- Yield: 12 bars 1x
- Diet: Vegetarian
Description
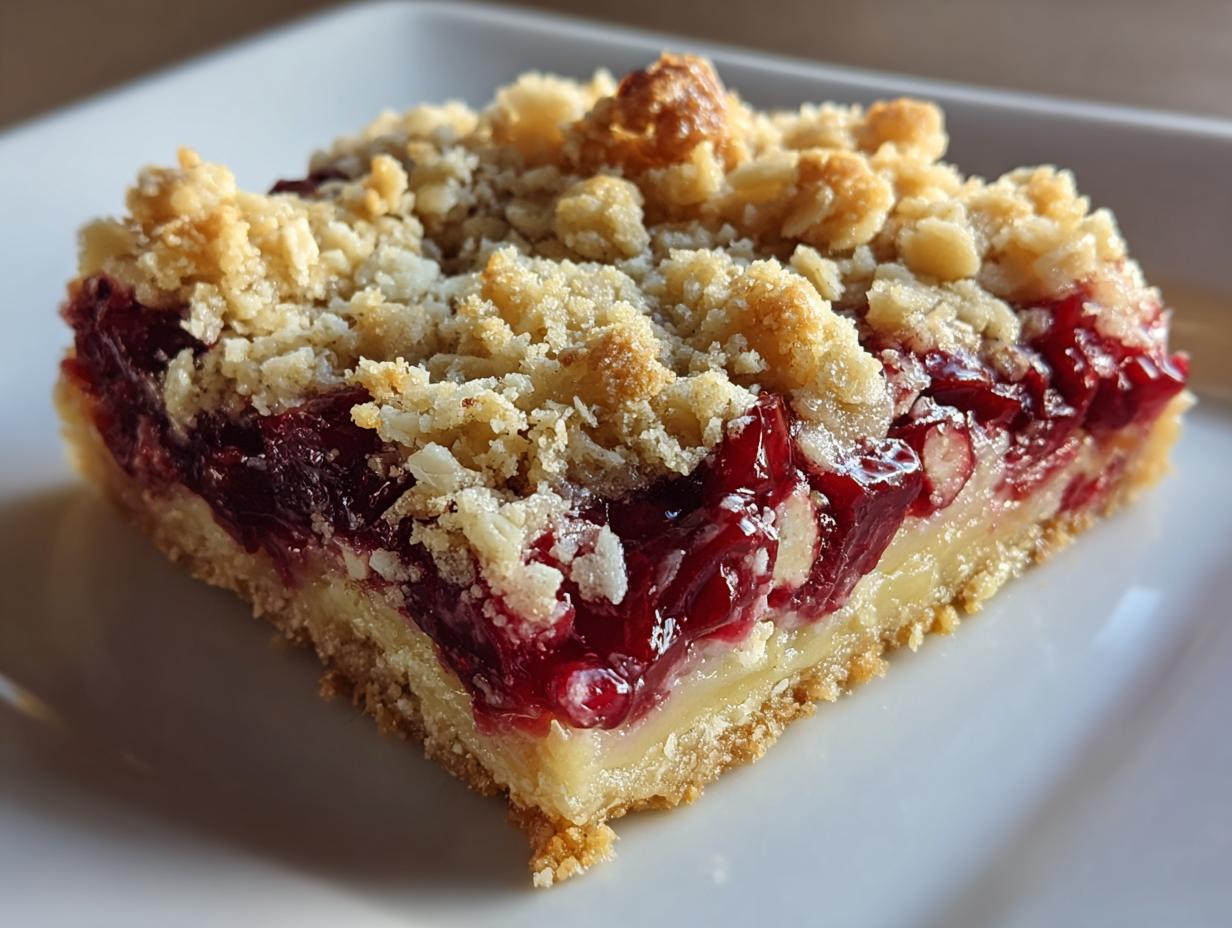
These cherry pie crumb bars are a delicious and easy-to-make dessert. They feature a buttery crust, sweet cherry filling, and a crunchy crumb topping.
Ingredients
- 2 cups all-purpose flour
- 1/2 cup granulated sugar
- 1/4 teaspoon salt
- 1 cup unsalted butter, cold and cubed
- 1 large egg
- 1 teaspoon vanilla extract
- 1 can (21 oz) cherry pie filling
- 1/2 cup old-fashioned oats
- 1/4 cup brown sugar
- 1/4 teaspoon ground cinnamon
Instructions
- Preheat oven to 350°F (175°C). Line an 8×8 inch baking pan with parchment paper.
- In a large bowl, mix flour, granulated sugar, and salt. Cut in cold butter until mixture resembles coarse crumbs.
- Stir in egg and vanilla extract until dough comes together.
- Press two-thirds of the dough into the bottom of the prepared pan.
- Spread cherry pie filling evenly over the crust.
- Mix remaining dough with oats, brown sugar, and cinnamon. Crumble over the cherry filling.
- Bake for 40-45 minutes, or until topping is golden brown.
- Cool completely before cutting into bars.
Notes
- Use cold butter for the best texture.
- Let the bars cool completely to set properly.
- Store in an airtight container for up to 3 days.
- Prep Time: 15 minutes
- Cook Time: 45 minutes
- Category: Dessert
- Method: Baked
- Cuisine: American
Nutrition
- Serving Size: 1 bar
- Calories: 280
- Sugar: 18g
- Sodium: 60mg
- Fat: 12g
- Saturated Fat: 7g
- Unsaturated Fat: 4g
- Trans Fat: 0g
- Carbohydrates: 40g
- Fiber: 2g
- Protein: 3g
- Cholesterol: 45mg