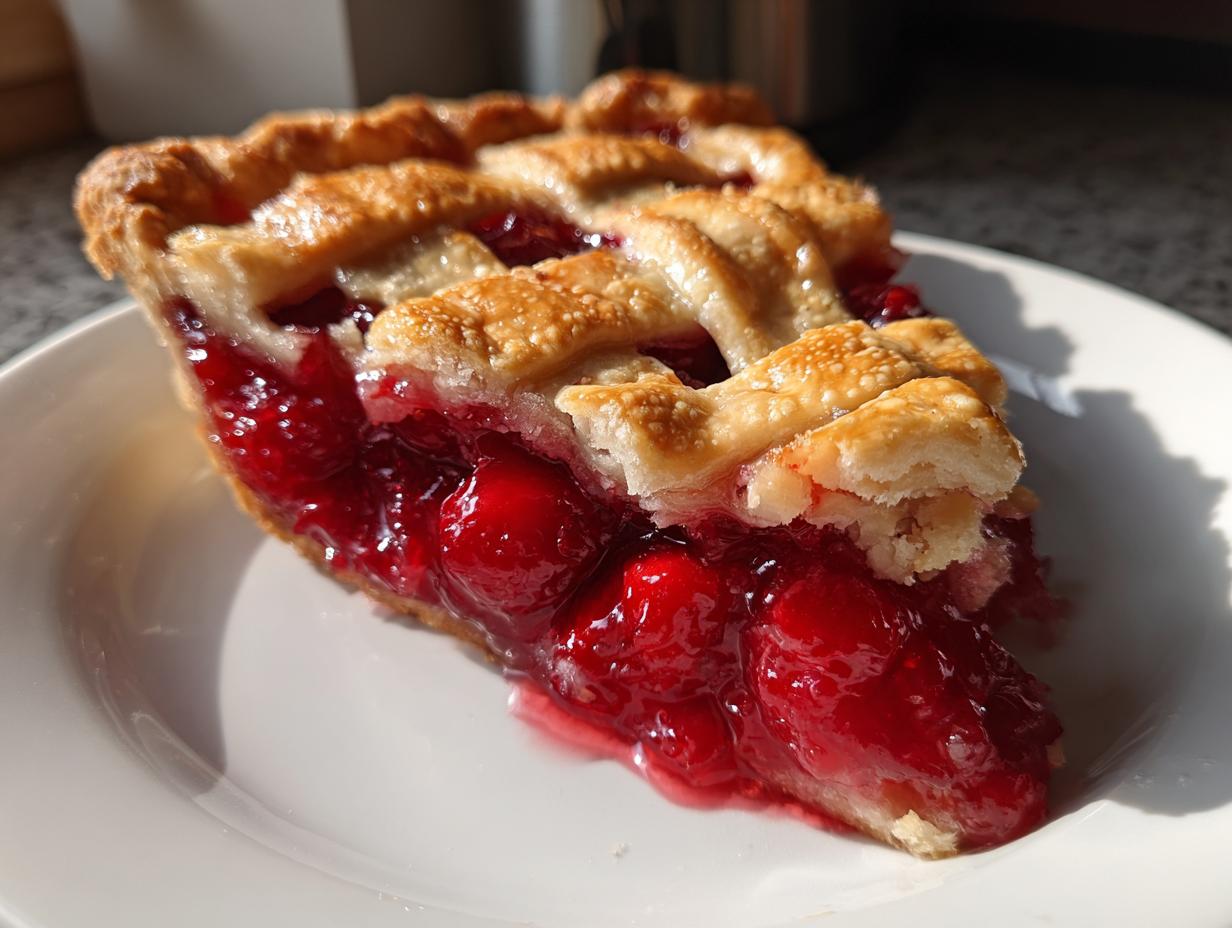
There’s something magical about pulling a golden-brown cherry pie with a lattice top out of the oven—the sweet-tart aroma filling the kitchen, the juices bubbling through those perfect little windows in the crust. My first attempt at lattice weaving was, well, a mess (let’s just say it looked more like abstract art than a pie!), but after years of practice—and a few happy accidents—I’ve nailed the secrets to a flaky crust and juicy filling that never fails to impress. This classic cherry pie with lattice top is my go-to for summer gatherings, holiday tables, or just when I need a little comfort in dessert form. Trust me, once you taste that buttery crust hugging those bright, syrupy cherries, you’ll understand why this pie has been a favorite for generations.

Why You’ll Love This Cherry Pie with Lattice Top
This isn’t just any pie—it’s the kind that makes people sneak second slices when they think no one’s looking. Here’s why:
- That flaky crust: Ice-cold butter creates layers so delicate, they shatter at the touch of a fork (my grandma’s secret? A quick chill between rolling and baking).
- Juicy, jammy filling: Fresh cherries burst with flavor, thickened just right so every slice holds its shape without being gloppy.
- Showstopper looks: The lattice top seems fancy but takes minutes to weave—I’ll teach you my foolproof “over-under” method that wows every time.
- Surprisingly simple: With my step-by-step tips, you’ll go from crust to cooling rack in under 2 hours (napkin for juice drips optional but highly recommended).
Ingredients for Cherry Pie with Lattice Top
Gather these simple ingredients—the magic happens when you use them just right! I always set everything out first (my mom called this “mise en place,” but I just call it “not running back to the fridge ten times”). Here’s what you’ll need:
- 2 1/2 cups all-purpose flour (spooned and leveled—no packing!)
- 1 cup unsalted butter, chilled and cubed (I freeze mine for 15 minutes first—cold is key!)
- 1/4 cup ice water (literally toss an ice cube in your measuring cup)
- 1 teaspoon salt (fine grain dissolves best)
- 4 cups fresh cherries, pitted (about 2 pounds—wear an apron, those stains are sneaky)
- 1 cup granulated sugar (adjust to taste if your cherries are extra tart)
- 1/4 cup cornstarch (this keeps the filling thick, not runny)
- 1 tablespoon lemon juice (brightens up all that sweetness)
See? Nothing fancy—just good stuff handled with care. Now let’s make some magic!
How to Make Cherry Pie with Lattice Top
Alright, let’s dive in! Don’t let the lattice intimidate you—I promise it’s easier than it looks. Follow these steps, and you’ll have a pie that’s as beautiful as it is delicious. Just remember: cold ingredients and patience are your best friends here.
Preparing the Pie Crust
First things first—the crust. In a large bowl, whisk together the flour and salt. Now, grab that ice-cold butter (I mean cold, straight from the fridge or even the freezer for 10 minutes). Cut it into small cubes and work it into the flour with your fingertips or a pastry cutter. You want pea-sized crumbs—don’t overmix, or your crust will be tough instead of flaky. Sprinkle in the ice water, a tablespoon at a time, just until the dough comes together. Wrap it in plastic, press into discs, and chill for 30 minutes. Trust me, this rest time makes rolling so much easier!

Making the Cherry Filling
While the dough chills, pit those cherries (a cherry pitter is a lifesaver, but a paperclip works in a pinch!). Toss them in a bowl with sugar, cornstarch, and lemon juice. The cornstarch is your secret weapon—it thickens the juices so your pie isn’t a soupy mess. The lemon juice? That’s what keeps the flavors bright and balanced. Let this sit for 10 minutes while you roll out the crust—the cherries will release their juices, and the sugar will work its magic.
Assembling the Lattice Top
Here’s the fun part! Roll out one dough disc and line your pie dish. Pour in the cherry filling (juices and all). Now, roll the second disc into a rectangle and cut it into 10 even strips. Lay 5 strips vertically over the filling, spacing them evenly. Fold back every other strip halfway, then lay a horizontal strip across the center. Unfold the vertical strips, fold back the others, and add another horizontal strip. Repeat until you’ve got a beautiful weave. Crimp the edges, brush with a little egg wash if you’re feeling fancy, and pop it in the oven. In 45-50 minutes, you’ll have a golden, bubbling masterpiece!

Expert Tips for the Best Cherry Pie with Lattice Top
After countless cherry pies (and a few hilarious disasters), I’ve learned these game-changing tricks that’ll take your pie from good to “can I have the recipe?” levels of amazing:
- Keep everything cold: I pop my flour in the freezer for 10 minutes before mixing—it prevents the butter from melting too fast. Even my rolling pin gets chilled!
- Preheat like your life depends on it: A piping hot oven (375°F minimum) gives that instant crust lift we all crave.
- Pit cherries over a bowl: Those rogue juices are liquid gold—save every drop for your filling!
- Resist the urge to slice warm: Letting the pie cool for 2 hours sets the filling so it doesn’t gush everywhere (worth the wait, promise).
- Bake on a sheet tray: Catches any bubble-overs so your oven doesn’t become a sticky crime scene.
Follow these, and you’ll avoid all my early mistakes—like the “cherry soup incident” of 2017.
Cherry Pie with Lattice Top Variations
Want to mix things up? This recipe’s a dream for tweaking! Try adding 1/2 teaspoon almond extract to the filling—it makes those cherries sing with a hint of marzipan goodness. For a summer twist, swap half the cherries with raspberries or blackberries (just bump the cornstarch to 3 tablespoons). My wildcard move? A sprinkle of coarse sugar on the lattice before baking—it adds the prettiest crunch. The best part? No matter how you customize, that buttery crust and gorgeous weave stay the star of the show!
Serving and Storing Cherry Pie with Lattice Top
Oh, the joy of slicing into that first warm piece! I always serve mine à la mode—a scoop of vanilla ice cream melting into those cherry juices is pure magic. Leftovers? (As if!) Store cooled pie under a cake dome or loosely covered with foil at room temp for up to 2 days. For longer keeping, refrigerate in an airtight container—just reheat slices gently to bring back that fresh-from-the-oven crispness. Pro tip: The lattice makes it easy to sneak “just one more” sliver straight from the fridge!
Cherry Pie with Lattice Top FAQs
Got questions? I’ve got answers! Here are the cherry pie queries I hear most often—solved with all my hard-earned kitchen wisdom:
Can I use canned cherries instead of fresh?
Absolutely! Drained canned cherries work in a pinch (about 2 cans). Just reduce the sugar to 3/4 cup since they’re already sweetened. But—and this is a big but—fresh cherries give that bright, juicy pop that makes this pie special. Worth the extra pitting time!
How do I make a gluten-free crust?
Swap the all-purpose flour for a 1:1 gluten-free blend (I like ones with xanthan gum). Handle the dough gently—it’s more delicate. Pro tip: Chill it twice as long before rolling to prevent cracks.
Why does my bottom crust get soggy?
Three words: blind bake first. Line your crust with parchment, fill with pie weights or dried beans, and bake at 375°F for 15 minutes before adding filling. Also, make sure your filling isn’t too watery—that cornstarch is there for a reason!
Can I freeze this pie?
You bet! Freeze before baking—just wrap tightly in plastic, then foil. When ready, bake straight from frozen (add 20 extra minutes). The lattice might not brown as evenly, but the flavor? Still unbeatable.

Nutrition Information
Here’s the scoop on what’s in each glorious slice (because let’s be real—we’re all having seconds!). Estimates vary based on ingredients, but on average, one serving of this cherry pie with lattice top contains:
- 320 calories
- 14g fat (8g saturated)
- 45g carbs (2g fiber, 25g sugar)
- 3g protein
Now go enjoy that pie—life’s too short to count every cherry!
Share Your Cherry Pie with Lattice Top
Nothing makes me happier than seeing your pie masterpieces! Snap a photo of that gorgeous lattice (juice drips and all—those are badges of honor!) and tag me #CherryPieMagic. Questions? Drop them in the comments—I’ll be your pie-cheering squad! Now go slice, savor, and share the love.
Print
Irresistible Cherry Pie with Lattice Top in 2 Hours
- Total Time: 1 hour 20 minutes
- Yield: 8 servings 1x
- Diet: Vegetarian
Description
A classic cherry pie with a lattice top crust, perfect for any occasion.
Ingredients
- 2 1/2 cups all-purpose flour
- 1 cup unsalted butter, chilled
- 1/4 cup ice water
- 1 tsp salt
- 4 cups fresh cherries, pitted
- 1 cup granulated sugar
- 1/4 cup cornstarch
- 1 tbsp lemon juice
Instructions
- Preheat oven to 375°F (190°C).
- Mix flour and salt in a bowl. Cut in butter until crumbly.
- Add ice water, 1 tbsp at a time, until dough forms.
- Divide dough into two discs, wrap in plastic, and chill for 30 minutes.
- Roll out one disc for the bottom crust and place in pie dish.
- Mix cherries, sugar, cornstarch, and lemon juice in a bowl.
- Pour cherry filling into the crust.
- Roll out the second disc and cut into strips for the lattice top.
- Weave strips over the filling and crimp edges.
- Bake for 45-50 minutes until golden brown.
Notes
- Use cold butter for a flaky crust.
- Pit cherries carefully to avoid staining.
- Let pie cool before slicing.
- Prep Time: 30 minutes
- Cook Time: 50 minutes
- Category: Dessert
- Method: Baking
- Cuisine: American
Nutrition
- Serving Size: 1 slice
- Calories: 320
- Sugar: 25g
- Sodium: 150mg
- Fat: 14g
- Saturated Fat: 8g
- Unsaturated Fat: 5g
- Trans Fat: 0g
- Carbohydrates: 45g
- Fiber: 2g
- Protein: 3g
- Cholesterol: 35mg