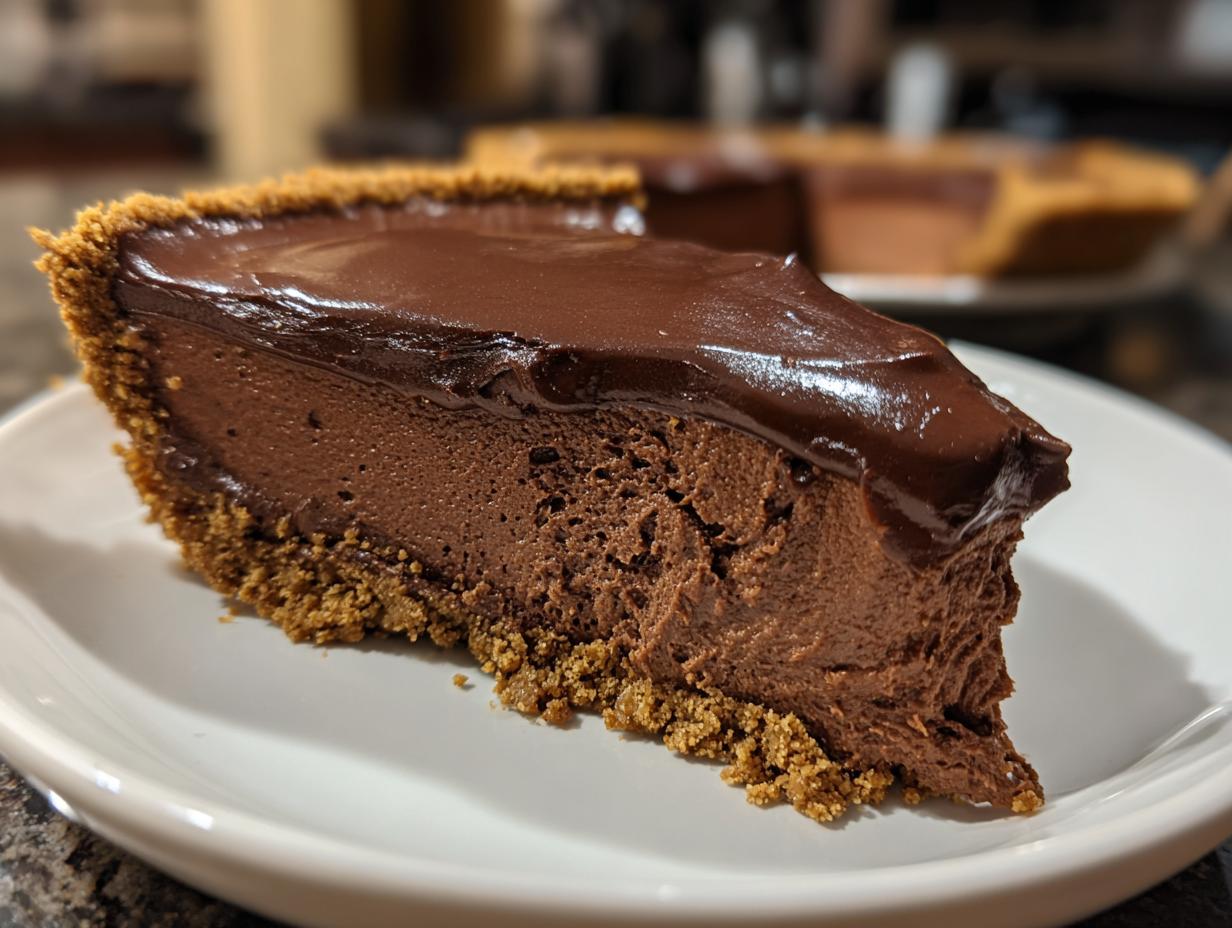
Oh my goodness, let me tell you about my absolute favorite dessert – chocolate silk pie! That first spoonful of rich, velvety chocolate filling melting on your tongue is pure magic. I’ve been making this pie for years – ever since my aunt passed down her recipe scribbled on an index card stained with chocolate fingerprints. What I love most is how simple it is to whip up something so decadent. Whether it’s for a fancy dinner party or just because it’s Tuesday (and let’s be honest, sometimes you need chocolate therapy on a Tuesday), this no-bake wonder comes together with minimal fuss. The hardest part? Waiting those agonizing hours while it chills!

Why You’ll Love This Chocolate Silk Pie
This chocolate silk pie is my go-to dessert for so many reasons – let me count the ways:
- That silky, melt-in-your-mouth chocolate filling will make you close your eyes and sigh – it’s that good
- Minimal baking (just the crust!) means you won’t be sweating over a hot oven all day
- Fancy enough for holiday parties but easy enough for weeknight “I need chocolate now” emergencies
- Kids and adults both go wild for it – I’ve never brought home leftovers from a potluck!
Chocolate Silk Pie Ingredients
Gather these simple ingredients – I promise you probably have most in your kitchen already! The magic happens when these humble items come together.
For the crust:
- 1 1/2 cups graham cracker crumbs – about 12 full sheets crushed (I like doing this in a zip-top bag with a rolling pin when I need stress relief!)
- 1/3 cup unsalted butter, melted – and yes, it must be unsalted – we control the flavor here
- 1/4 cup granulated sugar – just enough to make the crust slightly sweet without overpowering the chocolate
For that dreamy filling:
- 8 oz semisweet chocolate, chopped – splurge on good quality here – I’m partial to Ghirardelli or Guittard
- 1 1/2 cups heavy cream – cold straight from the fridge is crucial
- 1/4 cup powdered sugar – dissolves beautifully into the cream
- 1 tsp vanilla extract – the real stuff, please! It makes all the difference

How to Make Chocolate Silk Pie
Alright, let’s get to the fun part – making this dreamy chocolate silk pie! Don’t let the fancy name fool you – it’s actually super simple. I’ve made this so many times I could probably do it in my sleep (and honestly, after one particularly stressful week, I nearly did). Just follow these steps and you’ll have the smoothest, most luxurious pie in town.
Prepare the Graham Cracker Crust
First things first – that buttery crust! Preheat your oven to 350°F (175°C) while you mix up the crust ingredients. I always use my hands to really work the melted butter into the graham cracker crumbs and sugar – you want it to hold together when you pinch it. Press it firmly into your pie dish, going up the sides evenly. Here’s my trick: use the bottom of a measuring cup to really pack it down tight. Bake for just 8 minutes – you’ll smell that toasty, buttery goodness when it’s ready. Let it cool completely before adding the filling – I usually pop it in the fridge to speed things up.
Make the Chocolate Silk Filling
Now for the star of the show! Melt your chocolate gently – I use a double boiler (just a heatproof bowl over simmering water), but the microwave works too (30 second bursts, stirring between each!). Let it cool slightly while you whip the cream. Here’s where patience pays off – beat the cold heavy cream with powdered sugar and vanilla just until stiff peaks form. Don’t overdo it or you’ll get butter (trust me, I learned that the hard way!). Now the magic: fold the melted chocolate into the whipped cream in thirds. I use a big rubber spatula and gentle strokes to keep all that air in the cream – you want it light as a cloud!
Chill and Serve
Spoon that glorious chocolate filling into your cooled crust and smooth the top. This is the hardest part – you’ve got to let it chill for at least 4 hours (overnight is even better). I know, I know – the waiting is torture! But it’s worth it – the filling sets up perfectly silky. When you’re ready to serve, a dusting of cocoa powder or some chocolate shavings makes it look extra fancy. Pro tip: let it sit at room temperature for about 10 minutes before slicing – it cuts cleaner that way. Then just try not to eat the whole pie in one sitting – no promises though!

Tips for the Perfect Chocolate Silk Pie
After making this chocolate silk pie more times than I can count, I’ve picked up some foolproof tricks to guarantee success every time!
Chocolate matters: Splurge on good-quality semisweet chocolate – the better the chocolate, the richer your pie will taste. I once tried using chocolate chips in a pinch and learned my lesson – they contain stabilizers that mess with the silky texture.
Cold cream is key: Make sure your heavy cream is ice-cold before whipping – I even chill my mixing bowl sometimes. And stop beating the moment you get stiff peaks – overwhipped cream turns grainy (been there, cried over that).
Patience, grasshopper: Let that crust cool completely before adding filling – warm crust makes weepy filling. And resist sneaking bites early – the full chilling time gives you that perfect sliceable texture.
Chocolate Silk Pie Variations
Want to play with flavors? Oh, I do this all time! My favorite twists:
- Mocha magic: Stir 1 tsp espresso powder into the melted chocolate for a coffee kick – it makes the chocolate taste even richer!
- Minty fresh: Swap the vanilla for peppermint extract (just 1/2 tsp – it’s strong!) and sprinkle crushed candy canes on top for holiday flair.
- Nutty delight: Fold in 1/2 cup chopped toasted hazelnuts or almonds for crunch – divine with the smooth filling!
Serving and Storing Chocolate Silk Pie
Here’s how I serve my chocolate silk pie for maximum wow factor – let it sit at room temperature for about 10 minutes before slicing. The filling cuts cleaner when it’s not fridge-cold! I love topping slices with fresh whipped cream, chocolate curls, or a sprinkle of sea salt for that sweet-salty magic. Leftovers? Simply cover with plastic wrap and store in the fridge for up to 3 days (though let’s be real – it never lasts that long in my house!). The texture stays perfectly silky, though the crust might soften slightly by day 2.
Chocolate Silk Pie Nutritional Information
Just so you know, this nutritional info is an estimate (your exact chocolate and cream might vary slightly). Per slice (1/8 of pie): about 320 calories, 22g fat, and pure happiness. Worth every bite!
Chocolate Silk Pie FAQs
I get asked these questions all the time about my chocolate silk pie – here are the answers straight from my recipe-stained notebook!
Can I use milk chocolate instead of semisweet?
You can, but the pie will be much sweeter – I recommend using half semisweet and half milk chocolate if you want to try it. The first time I made this swap for my nephew (who thinks semisweet is “too grown-up”), we all agreed the original version has better balance.
How long does chocolate silk pie keep in the fridge?
It stays perfect for 3 days covered with plastic wrap – though in my house, it’s lucky to last 24 hours! The crust might soften slightly after day one, but that silky filling stays dreamy.
Can I freeze this pie?
Freezing changes the texture – the whipped cream filling gets a bit grainy when thawed. I’ve tried it (during my “let’s freeze everything” phase last summer), and while still tasty, it loses that signature silkiness.
Help! My filling won’t set – what went wrong?
Usually means either the cream wasn’t whipped stiff enough or the pie didn’t chill long enough. Pop it back in the fridge for another hour – patience is key! I learned this the hard way when I tried to serve it after only 2 hours… let’s just say we had chocolate soup with crust croutons!

Final Thoughts
There you have it – my beloved chocolate silk pie that’s foolproof and always wows. Now go make it! I’d love to hear how yours turns out. Tag me with your chocolatey masterpiece – happy baking!
Print
Decadent Chocolate Silk Pie Recipe in 4 Simple Steps
- Total Time: 4 hours 28 minutes
- Yield: 8 servings 1x
- Diet: Vegetarian
Description
A rich and creamy chocolate silk pie with a smooth texture and deep chocolate flavor.
Ingredients
- 1 1/2 cups graham cracker crumbs
- 1/3 cup unsalted butter, melted
- 1/4 cup granulated sugar
- 1 1/2 cups heavy cream
- 8 oz semisweet chocolate, chopped
- 1/4 cup powdered sugar
- 1 tsp vanilla extract
Instructions
- Preheat your oven to 350°F (175°C).
- Mix graham cracker crumbs, melted butter, and granulated sugar in a bowl.
- Press the mixture into a 9-inch pie dish and bake for 8 minutes. Let it cool.
- Melt the chocolate in a double boiler or microwave, then let it cool slightly.
- Whip the heavy cream with powdered sugar and vanilla until stiff peaks form.
- Fold the melted chocolate into the whipped cream until fully combined.
- Pour the filling into the cooled crust and refrigerate for at least 4 hours before serving.
Notes
- Chill the pie for at least 4 hours for best results.
- Use high-quality chocolate for a richer flavor.
- Store leftovers in the refrigerator for up to 3 days.
- Prep Time: 20 minutes
- Cook Time: 8 minutes
- Category: Dessert
- Method: No-Bake (except crust)
- Cuisine: American
Nutrition
- Serving Size: 1 slice
- Calories: 320
- Sugar: 20g
- Sodium: 120mg
- Fat: 22g
- Saturated Fat: 13g
- Unsaturated Fat: 7g
- Trans Fat: 0g
- Carbohydrates: 28g
- Fiber: 2g
- Protein: 3g
- Cholesterol: 45mg