There’s something magical about biting into a Chocolate Snowball Cookie—that first crumbly, buttery bite followed by a shower of powdered sugar that somehow ends up everywhere (including your sweater, but who’s counting?). These little snowballs have been my go-to holiday treat since I was a kid, back when my grandma would let me “help” by rolling the warm cookies in sugar, leaving tiny powdered fingerprints all over her kitchen. She’d laugh and say, “Well, that’s half the fun, isn’t it?”
Fast-forward to today, and I still make these every December, usually while blasting cheesy holiday music and pretending not to sneak too many bites of dough. What I love most is how simple they are—just a handful of pantry staples, a quick mix, and boom: you’ve got a plate of fudgy, nutty cookies that look like they’ve been dusted with fresh snow. They’re the kind of treat that disappears fast at parties, whether you’re hosting or just need a last-minute gift that says, “Hey, I actually baked this!” (No one needs to know it only took 30 minutes.)
So if you’re craving a dose of nostalgia or just a really good cookie, grab your mixing bowl. These Chocolate Snowball Cookies are about to become your new holiday tradition.
Why You’ll Love These Chocolate Snowball Cookies
Listen, I know we all have those holiday recipes that take hours and make every bowl in your kitchen dirty—but these Chocolate Snowball Cookies? They’re the opposite. Easy, fast, and so darn cute they’ll make your dessert table look like it’s straight out of a snowy fairytale.
Quick and Festive
From bowl to powdered-sugar-dusted finish, these come together in under 30 minutes. The dough is forgiving (no chill time!), and shaping the little balls is the perfect task to rope kids into helping. That snowy coating? Pure holiday magic with zero fuss.
Rich Chocolate Flavor
Don’t let their delicate look fool you—these pack serious chocolate depth. The cocoa powder gives them a fudgy intensity, while the toasted nuts add this cozy, almost caramel-like note. I’ve had friends swear they taste like brownies in cookie form (and who argues with that?).

Ingredients for Chocolate Snowball Cookies
Here’s the beautiful thing—you probably have most of this already in your pantry! But let’s talk specifics because, as my grandma used to say, “Baking is science with delicious consequences.” (She also insisted on measuring flour with a scale, but we’ll keep it simple.)
- 1 cup unsalted butter, softened – Not melted! Leave it out for 30 minutes until your finger leaves a slight dent. This makes creaming effortless.
- 1/2 cup powdered sugar, plus extra for coating – Pack it lightly into your measuring cup like brown sugar. No sifting needed!
- 1 teaspoon vanilla extract – The cheap stuff works fine here, but if you’ve got homemade, wowza.
- 2 cups all-purpose flour – Spoon it into the cup and level it off. No packing!
- 1/4 teaspoon salt – Just a pinch to balance the sweetness.
- 1 cup finely chopped nuts – Walnuts or pecans are my go-to. Chop them small so they don’t crack your teeth but big enough to taste.
- 1/2 cup cocoa powder – Natural or Dutch-processed both work. I use whatever’s open in my messy baking cupboard.
See? Nothing fancy. Now let’s turn this into cookie magic.
How to Make Chocolate Snowball Cookies
Alright, let’s get to the fun part—turning that bowl of ingredients into little powdered sugar clouds of joy. I’ve made these so many times I could probably do it in my sleep (and honestly, I might’ve once during a midnight baking spree). Follow these steps, and you’ll have a batch ready before your holiday playlist hits the third song.
Mixing the Dough
First, preheat your oven to 350°F (175°C)—no surprises here. Now, grab that softened butter and powdered sugar. Cream them together in a big bowl until they’re fluffy and pale, about 2 minutes with a mixer or 3-4 by hand (channel your inner arm workout). Add the vanilla and mix just until it disappears. In another bowl, whisk together the flour, salt, cocoa powder, and nuts. Gradually add this to the butter mixture, mixing on low until it all comes together into a thick, fudgy dough. It’ll look a bit crumbly at first, but keep going—it’ll clump when you press it between your fingers. Resist eating it by the spoonful (or don’t, I won’t judge).

Shaping and Baking
Time to roll! Scoop about a tablespoon of dough and gently shape it into a 1-inch ball—no need to be perfect, but try to keep them roughly the same size so they bake evenly. Place them on a baking sheet about 2 inches apart (they won’t spread much). Pop them in the oven for 12-15 minutes. They’re done when the bottoms are just slightly golden and the tops look set but still soft. Pro tip: If your oven runs hot, start checking at 10 minutes. Overbaking is the enemy of that melt-in-your-mouth texture!
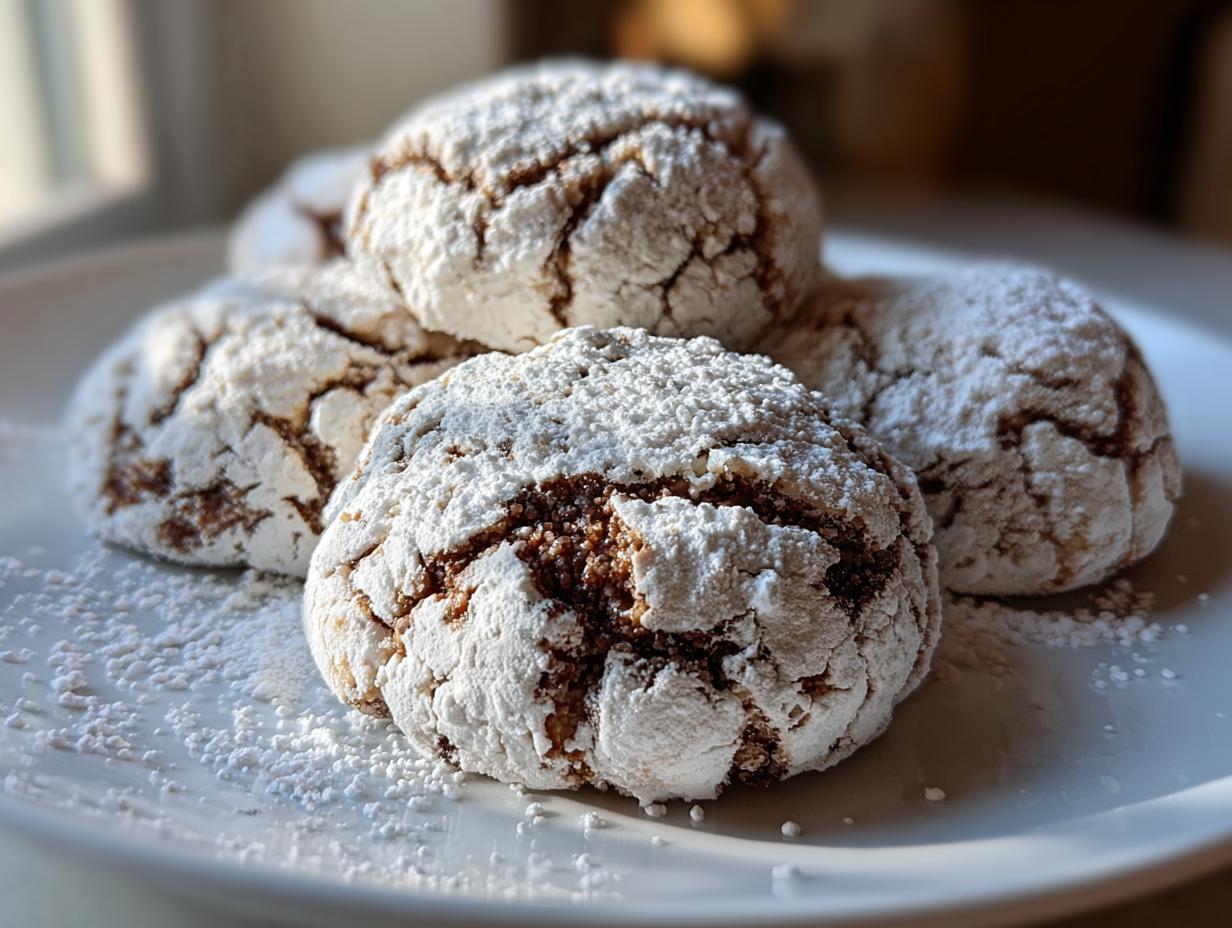
Double Coating for Snowy Finish
Here’s where the magic happens. While the cookies are still warm (but not scorching), roll them in powdered sugar. This first layer will melt slightly into the cookies, creating that signature “snowy” look. Let them cool completely on a rack—about 20 minutes—then roll them in powdered sugar again. This second coat gives them that fresh-from-the-North-Pole sparkle. Warning: You’ll have powdered sugar on your nose, your counter, and possibly your cat. Embrace the mess—it’s all part of the charm.

Tips for Perfect Chocolate Snowball Cookies
Want to take these from good to “I-need-another-batch-immediately” great? Here are my hard-earned secrets after years of snowball cookie experiments (and a few happy accidents):
Toast those nuts! Just 5 minutes in a dry skillet transforms them from blah to nutty perfection. Let them cool before chopping—trust me, it’s worth the extra step.
Underbake slightly. Pull them when they’re set but still soft in the center. They firm up as they cool, keeping that melt-in-your-mouth texture.
Store in layers. Place parchment between cookie layers in an airtight container. They’ll stay fresh for a week (if they last that long). Freeze unbaked dough balls for instant holiday magic later!
Ingredient Substitutions
Life happens—maybe you’re out of nuts or baking for someone with allergies. No stress! These Chocolate Snowball Cookies are surprisingly flexible. Swap the walnuts for toasted almond flour (about 3/4 cup) if nuts are a no-go. Dairy-free? Use your favorite plant-based butter—just make sure it’s the stick kind, not the spreadable tub version (too much water ruins the texture). Out of vanilla? A splash of almond extract gives a lovely marzipan twist. The cocoa powder’s non-negotiable though—that’s the chocolatey soul of these cookies!
Serving and Storing Chocolate Snowball Cookies
Here’s the best part—these cookies actually get better after a day or two! The flavors meld together, and that powdered sugar coating settles into the most dreamy, melt-in-your-mouth texture. Keep them in an airtight container at room temperature (no fridge—that makes them sad and dry). Layer them with parchment paper so they don’t stick together. For holiday parties, pile them high on a platter with peppermint bark and sugar-dusted cranberries. They disappear fast, but if by some miracle you have leftovers, a quick 5-second zap in the microwave brings back that just-baked warmth.
Nutritional Information
Okay, let’s be real—these are cookies, not kale. But in case you’re curious (or just keeping track), here’s the scoop: one Chocolate Snowball Cookie clocks in around 120 calories with that perfect balance of buttery richness and cocoa goodness. Remember, these are just estimates—your results might vary depending on your exact ingredients or how generously you roll them in powdered sugar (no judgment here!). Enjoy every crumbly, snowy bite.
FAQs About Chocolate Snowball Cookies
Can I freeze Chocolate Snowball Cookies?
Absolutely! These freeze like a dream. You’ve got two options: freeze the baked cookies (layered with parchment in an airtight container) for up to 3 months—just thaw and re-dust with powdered sugar. Or freeze the unbaked dough balls on a tray, then transfer to a bag. Bake straight from frozen, adding 1-2 extra minutes. Perfect for last-minute cookie emergencies!
How long do they stay fresh?
Stored properly in an airtight container, they’ll keep their magic for about a week at room temperature. The powdered sugar might absorb a bit, but a quick re-roll perks them right up. Pro tip: If your kitchen’s humid, toss in a silica packet to prevent stickiness.
Can I make these without nuts?
Of course! Swap the nuts for an equal amount of rolled oats (toasted for extra flavor) or just leave them out entirely. The cookies will be slightly less crumbly but just as delicious. My nut-allergic niece devours the oat version!
Why did my cookies turn out dry?
Overbaking’s usually the culprit—pull them when they’re just set. Also, measure your flour carefully (spoon-and-level method!) and don’t skip the double sugar coating. That second roll locks in moisture like a snowy hug.
Can I use melted butter?
Nope—softened butter creams properly to create air pockets. Melted butter makes dense, greasy cookies that won’t hold their shape. Patience pays off here!
Share Your Chocolate Snowball Cookies
Now I want to see your snowy creations! Did you add a twist? Maybe a pinch of cinnamon or a handful of chocolate chips? Snap a pic of your powdered-sugar-dusted hands (we all know that’s half the fun) and tag me—I love seeing your kitchen adventures. Happy baking, and may your holidays be as sweet as these little snowballs!
Print
Irresistible Chocolate Snowball Cookies in Just 30 Minutes
- Total Time: 30 minutes
- Yield: 24 cookies 1x
- Diet: Vegetarian
Description
Chocolate Snowball Cookies are buttery, nutty, and coated in powdered sugar for a snowy appearance.
Ingredients
- 1 cup unsalted butter, softened
- 1/2 cup powdered sugar, plus extra for coating
- 1 teaspoon vanilla extract
- 2 cups all-purpose flour
- 1/4 teaspoon salt
- 1 cup finely chopped nuts (walnuts or pecans)
- 1/2 cup cocoa powder
Instructions
- Preheat oven to 350°F (175°C).
- Cream butter and powdered sugar until light and fluffy.
- Mix in vanilla extract.
- Combine flour, salt, cocoa powder, and nuts in a separate bowl.
- Gradually add dry ingredients to butter mixture until fully incorporated.
- Shape dough into 1-inch balls and place on a baking sheet.
- Bake for 12-15 minutes.
- Roll warm cookies in powdered sugar, then cool completely.
- Roll in powdered sugar again before serving.
Notes
- Store in an airtight container to keep fresh.
- Use room-temperature butter for easier mixing.
- For extra flavor, toast the nuts before chopping.
- Prep Time: 15 minutes
- Cook Time: 15 minutes
- Category: Dessert
- Method: Baking
- Cuisine: American
Nutrition
- Serving Size: 1 cookie
- Calories: 120
- Sugar: 5g
- Sodium: 25mg
- Fat: 8g
- Saturated Fat: 4g
- Unsaturated Fat: 3g
- Trans Fat: 0g
- Carbohydrates: 10g
- Fiber: 1g
- Protein: 2g
- Cholesterol: 15mg