Halloween just isn’t complete without my Classic Chocolate Graveyard Sheet Cake stealing the show at our annual spooky bash. I’ll never forget the year I brought it to my niece’s costume party—kids and adults alike couldn’t resist digging into the chocolatey “grave dirt” and candy tombstones! What I love most is how this rich, moist cake comes together so easily, yet looks like you spent all day decorating. The best part? That first slice revealing the deep chocolate crumb while everyone oohs and aahs over your creepy creation. It’s become our must-make tradition, and now it can be yours too!
Why You’ll Love This Classic Chocolate Graveyard Sheet Cake
This cake is a total crowd-pleaser for so many reasons—here’s why it’s become my go-to Halloween dessert every year:
- Effortless to make: No fancy techniques needed—just mix, bake, and decorate. Even beginner bakers can nail it!
- Spooky yet delicious: That rich chocolate flavor shines through, making it way tastier than typical “scary” desserts.
- Moist for days: The boiling water trick keeps it incredibly soft, even if you bake it ahead.
- Decorating is half the fun: Crushed cookies become graveyard dirt, and candy tombstones let kids (or adults!) get creative.
Trust me, once you see how fast it disappears at parties, you’ll be making this every October!
Ingredients for Classic Chocolate Graveyard Sheet Cake
Gather these simple ingredients—most are probably already in your pantry—to create the richest, spookiest chocolate cake ever. I’ve learned through trial and error that quality matters here, especially with the cocoa powder (splurge on the good stuff if you can!). Here’s exactly what you’ll need:
- 2 cups all-purpose flour (I always spoon and level to avoid dense cake)
- 2 cups granulated sugar (yes, two full cups—this is a celebration cake!)
- ¾ cup unsweetened cocoa powder (sift if lumpy—it makes all the difference)
- 2 tsp baking powder (check the date—old powder won’t give you that perfect rise)
- 1½ tsp baking soda
- 1 tsp salt (I use kosher—it balances the sweetness beautifully)
- 1 cup milk (whole milk makes it extra rich, but any works)
- ½ cup vegetable oil (or melted coconut oil for subtle flavor)
- 2 large eggs (room temperature—they incorporate better)
- 2 tsp vanilla extract (the real stuff, not imitation—tastes like childhood)
- 1 cup boiling water (added last—don’t panic when the batter looks watery!)
For decorating:
- 1 batch chocolate frosting (homemade or store-bought—no judgment here!)
- Crushed chocolate cookies (Oreos work great for “grave dirt”)
- Candy tombstones or decorations (get creative with Milano cookies or white chocolate)
Pro tip from my many Halloween disasters: Measure everything before starting! That boiling water step comes fast, and you don’t want to be scrambling for ingredients mid-mix. Now let’s make some magic—er, I mean, mayhem!
Equipment Needed
Don’t worry—you don’t need any fancy tools for this graveyard masterpiece! Just grab these basics:
- 9×13-inch baking pan (metal gives the best crust, but glass works too)
- Large mixing bowl (trust me, it’ll seem small once you add the boiling water!)
- Electric mixer (hand or stand—your arms will thank you)
- Cooling rack (essential unless you like melty frosting disasters)
That’s it! Now let’s get spooky.
How to Make Classic Chocolate Graveyard Sheet Cake
Don’t let the graveyard theme fool you—this cake is alive with chocolatey goodness! Follow these simple steps, and you’ll have a spooky showstopper ready to haunt your Halloween party. Just remember: that thin batter is supposed to look that way (my first time, I nearly panicked and added more flour—disaster avoided!).
Step 1: Prep and Mix Dry Ingredients
First things first: preheat that oven to 350°F (175°C). While it heats, grab your biggest mixing bowl—I use my grandma’s old yellow one for good luck. Whisk together the flour, sugar, cocoa powder (sift it if it’s clumpy—nobody wants chocolate lumps!), baking powder, baking soda, and salt. This is where the magic starts! I like to give it about 30 good whisks to make sure everything’s evenly distributed. Pro tip: if your cocoa’s been sitting awhile, give it a quick smell test—it should smell richly chocolatey, not dusty or stale.
Step 2: Add Wet Ingredients
Now for the fun part! Pour in the milk, oil, eggs (remember—room temp eggs blend way better!), and vanilla. Here’s where that electric mixer earns its keep—beat it on medium speed for exactly 2 minutes. I set a timer because, trust me, guessing leads to overmixing. You’ll know it’s ready when the batter looks like thick chocolate pudding and pulls away from the sides slightly. The smell at this point? Absolute heaven.
Step 3: Incorporate Boiling Water
Okay, here’s where new bakers always gasp—slowly stir in that cup of boiling water. Yes, the batter will look ridiculously thin. Yes, this is normal! The water blooms the cocoa powder and creates that incredible moist texture. Just go slow to avoid hot cocoa splatters (learned that the hard way—my Halloween shirt may still have stains). The final batter should pour easily—like chocolate soup—which is perfect for that tender crumb we want.
Step 4: Baking and Cooling
Pour that liquid chocolate gold into your greased 9×13 pan and pop it in the oven. Set your timer for 30 minutes, but don’t wander off! Ovens vary, and ours is done when a toothpick comes out with moist crumbs (not wet batter) at around 33 minutes. The top should look set and spring back when lightly pressed. Now the hardest part: let it cool completely on a rack! I know it’s tempting to frost it warm, but patience prevents frosting meltdowns—literally.

Step 5: Frosting and Decorating
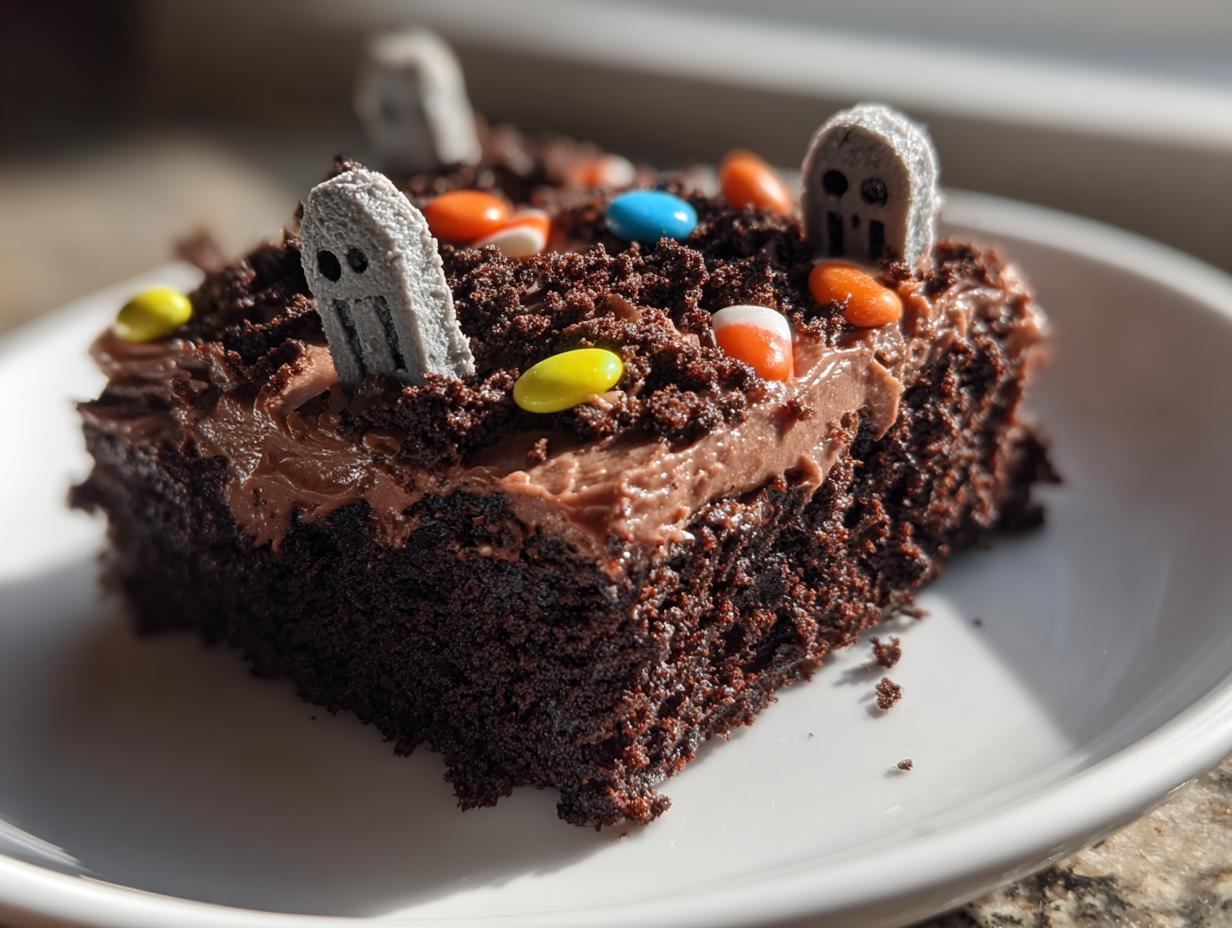
Time for the graveyard to rise! Spread your chocolate frosting with an offset spatula (a butter knife works in a pinch). For “dirt,” crush cookies in a bag—I whack them with a rolling pin while imagining my stress as the cookies. Sprinkle generously, then add tombstones (Milano cookies with RIP scribbled in frosting are my go-to). Last year I added gummy worms “digging” out—the kids went wild! The beauty? However it looks, it’ll taste incredible. Now step back and admire your deliciously creepy creation!

Tips for the Perfect Classic Chocolate Graveyard Sheet Cake
After years of perfecting this spooky dessert (and a few hilarious decorating fails), I’ve learned these game-changing tricks:
- Go Goth with cocoa: Swap half the cocoa powder for black cocoa—it gives that deep, eerie color without food dye!
- Chill your frosting: Pop it in the fridge for 20 minutes before piping tombstones—it holds its shape way better.
- Gummy worm surprise: Bury them halfway in the “dirt” so they look like they’re crawling out—total kid magnet!
- Crumb coat first: A thin frosting layer seals in crumbs before the final coat—no muddy-looking graves here.
- Day-bake secret: Bake it a day ahead—the flavors get even richer overnight (just frost before serving).
Bonus: Keep extra crushed cookies handy for “landscaping” after slicing—it covers any messy edges!
Variations and Substitutions
This Classic Chocolate Graveyard Sheet Cake is crazy flexible—here are my favorite twists when I’m feeling creative or need to swap ingredients:
- Buttermilk boost: Swap the milk for buttermilk (just add 1 tbsp vinegar to regular milk and let it sit 5 minutes). It gives the cake an extra-tender crumb!
- Gluten-free graves: Use a 1:1 gluten-free flour blend—I’ve had great results with Bob’s Red Mill.
- Coconut oil magic: Replace vegetable oil with melted coconut oil for a subtle tropical hint (kids never notice, but adults love it).
- Espresso kick: Swap boiling water for hot coffee—it deepens the chocolate flavor without tasting like coffee.
Pro tip: Whatever swaps you make, keep that boiling liquid—it’s the secret to the cake’s legendary moisture!
Serving and Storage
Here’s how to keep your Classic Chocolate Graveyard Sheet Cake tasting fresh and looking frightfully good:
- Serve at room temp: Cold cake dulls the chocolate flavor—let it sit out for 30 minutes if refrigerated decorations forced a chill.
- Airtight is key: Cover with plastic wrap or store in a cake carrier—it stays moist for 3 days (if it lasts that long!).
- Skip the fridge: Refrigeration dries out the crumb—unless your kitchen is sweltering, counter storage works best.
- Freeze for later: Wrap unfrosted cake tightly in plastic—it freezes beautifully for up to 2 months (thaw before decorating).
Pro tip: Store decorations separately if making ahead—tombstones get soggy overnight on frosting!
Classic Chocolate Graveyard Sheet Cake Nutrition
Okay, let’s be real—this is Halloween cake, not health food! But for those who like to know what they’re indulging in, here’s the scoop per slice (based on 12 servings without extra candy decorations):
- Calories: Around 380 (consider it fuel for ghost hunting!)
- Fat: 14g (hey, that’s where the rich flavor comes from)
- Carbs: 62g (worth every single one when that chocolate hits your tongue)
- Sugar: 32g (it’s a celebration—live a little!)
Now listen—these numbers can wiggle more than a zombie in a dance-off depending on your brands and how heavy-handed you get with the cookie “dirt” and frosting. And if you go wild with candy tombstones and gummy worms? Well… let’s just say the sugar goblins will be very happy. My philosophy? Enjoy a slice (or two) guilt-free—it’s Halloween!
Frequently Asked Questions
Over the years, I’ve gotten the same hilarious questions about this Classic Chocolate Graveyard Sheet Cake—usually while covered in cookie crumbs and frosting. Here’s what folks ask most:
- “Can I make this ahead?” Absolutely! The cake itself stays moist for days. I bake it up to 24 hours early, wrap it tight in plastic, then frost and decorate right before the party. The unfrosted cake even freezes beautifully for up to 2 months—just thaw overnight on the counter.
- “What’s the best frosting for piping tombstones?” Hands down, a stiff American buttercream (3 cups powdered sugar to 1 cup butter). For extra-sturdy RIP messages, chill your frosting bag for 15 minutes first. Pro tip: If it’s a hot Halloween, add 1 tbsp cornstarch to prevent tombstone sag!
- “Can I use a box mix?” Sure can—just follow the box’s directions for a 9×13 pan, but reduce baking time by 5 minutes (that boiling water trick isn’t needed with mixes). Doctor it up with 1 tsp instant coffee to the dry mix for deeper flavor. Might I suggest the “extra dark” variety? Spooky and delicious!
- “Help—my batter was super thin!” Don’t panic—mine looks like chocolate soup every time! That watery batter bakes into the most tender crumb. Resist the urge to add more flour (my 2018 Halloween cake disaster says hello).
- “Any vegan swaps?” Yup! Use flax eggs (2 tbsp ground flax + 5 tbsp water), almond milk, and coconut oil. For frosting, blend 1 cup cocoa powder with 1/2 cup melted coconut oil and maple syrup to taste. The tombstones might be trickier—try white chocolate chips sweetened with coconut milk!
Still got questions? Slide into my DMs—I’ve made every mistake possible with this cake so you don’t have to. Now go haunt that kitchen!
Print
Spooky Classic Chocolate Graveyard Sheet Cake in 5 Easy Steps
- Total Time: 55 minutes
- Yield: 12 servings 1x
- Diet: Vegetarian
Description
A rich and moist chocolate cake decorated to look like a spooky graveyard, perfect for Halloween parties.
Ingredients
- 2 cups all-purpose flour
- 2 cups granulated sugar
- 3/4 cup unsweetened cocoa powder
- 2 tsp baking powder
- 1 1/2 tsp baking soda
- 1 tsp salt
- 1 cup milk
- 1/2 cup vegetable oil
- 2 large eggs
- 2 tsp vanilla extract
- 1 cup boiling water
- 1 batch chocolate frosting
- Crushed cookies or chocolate pieces for decoration
- Candy tombstones or decorations (optional)
Instructions
- Preheat oven to 350°F (175°C). Grease a 9×13-inch baking pan.
- Mix flour, sugar, cocoa, baking powder, baking soda, and salt in a large bowl.
- Add milk, oil, eggs, and vanilla. Beat on medium speed for 2 minutes.
- Stir in boiling water (batter will be thin). Pour into the prepared pan.
- Bake for 30-35 minutes or until a toothpick comes out clean.
- Cool completely, then frost with chocolate frosting.
- Decorate with crushed cookies for dirt and candy tombstones.
Notes
- For a darker cake, use black cocoa powder.
- Use store-bought frosting if short on time.
- Add gummy worms for extra creepiness.
- Prep Time: 20 minutes
- Cook Time: 35 minutes
- Category: Dessert
- Method: Baking
- Cuisine: American
Nutrition
- Serving Size: 1 slice
- Calories: 380
- Sugar: 32g
- Sodium: 420mg
- Fat: 14g
- Saturated Fat: 3g
- Unsaturated Fat: 9g
- Trans Fat: 0g
- Carbohydrates: 62g
- Fiber: 3g
- Protein: 5g
- Cholesterol: 35mg