Is there anything more comforting than the scent of cinnamon and nutmeg wafting through the kitchen as a classic pumpkin pie bakes? This isn’t just any dessert—it’s the taste of childhood memories, holiday gatherings, and cozy autumn afternoons all in one flaky crust. My grandma always said a proper pumpkin pie should make your whole house smell like Thanksgiving morning, and boy was she right.
What makes this classic pumpkin pie so special? It’s that perfect balance of silky smooth filling spiced just right, cradled in a buttery crust that shatters beautifully with each forkful. I’ve tweaked my recipe over the years (adding an extra pinch of ginger here, using evaporated milk there), but the soul of it remains unchanged. Whether you’re continuing a family tradition or starting a new one, this pie never fails to bring people together around the table.

The magic happens quickly too—in about an hour, you can transform simple pantry staples into something truly extraordinary. Just wait until you see how the filling sets up with that signature wobble, or how the spices mellow into something even better after a night in the fridge. Trust me, once you’ve mastered this classic pumpkin pie, it’ll become your go-to for every special occasion—and maybe even some not-so-special Tuesday nights when you need a little comfort.
Why You’ll Love This Classic Pumpkin Pie
This isn’t just any pumpkin pie—it’s the one your guests will beg you to make year after year. Here’s why:
- Foolproof magic: Even novice bakers can nail this recipe on the first try (I promise!)
- Spice that’s just right: No overwhelming cinnamon here—our balanced blend lets the pumpkin shine
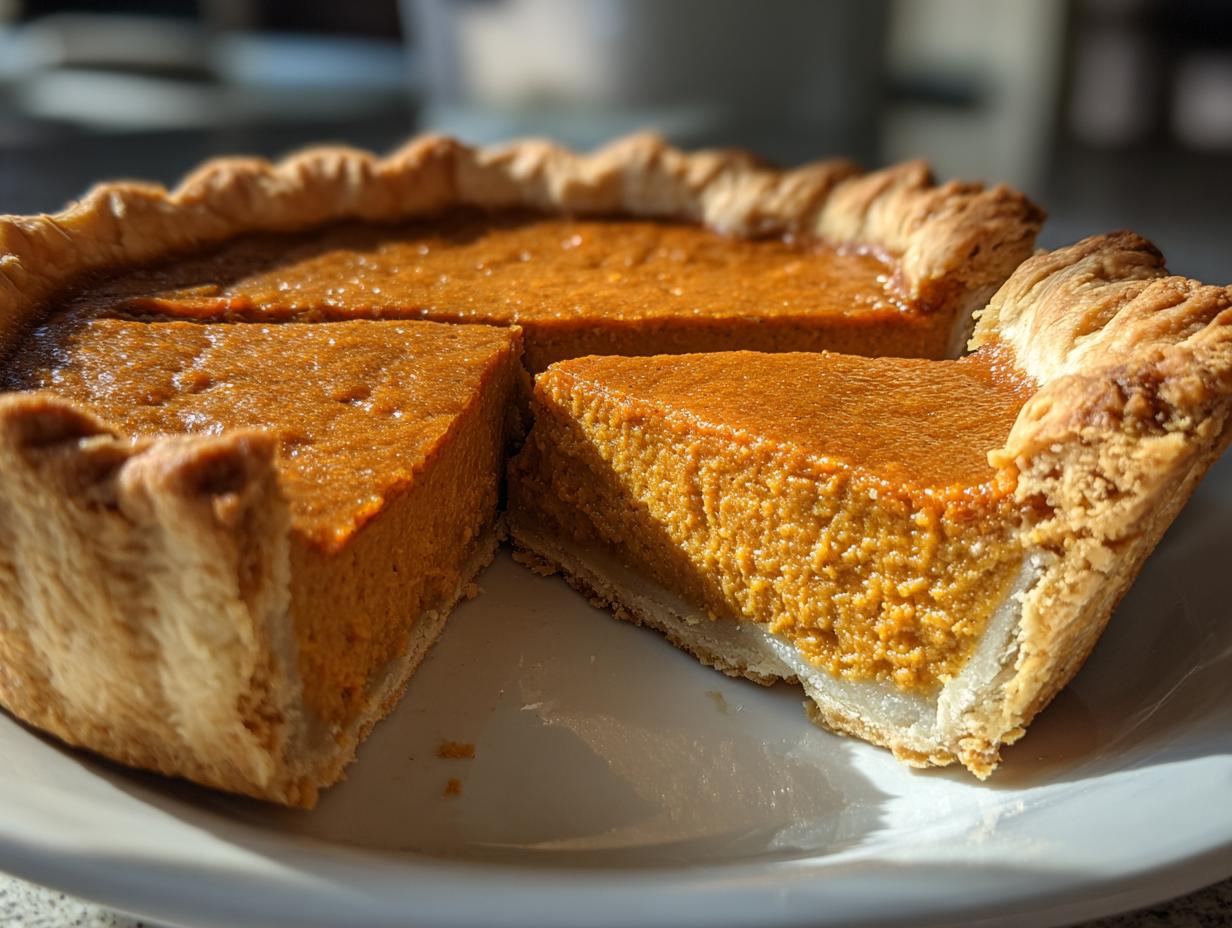
- Creamy dreamy texture: That evaporated milk trick creates the silkiest filling you’ve ever tasted
- Nostalgia in every bite: It tastes exactly like the pumpkin pie you remember from childhood holidays
- Leftovers? What leftovers: This pie disappears faster than you can say “second slice please”
The Simple Ingredients That Make Magic
Here’s the beautiful thing about classic pumpkin pie – it only needs a handful of simple ingredients to create something truly special. Don’t let that fool you though – each one plays a crucial role in creating that perfect pie we all love.
- 1 (9-inch) unbaked pie crust – Homemade is wonderful if you’ve got time, but a good store-bought crust works great too (no shame in my game!)
- 1 (15 oz) can pumpkin puree – Make sure it’s pure pumpkin, not pumpkin pie filling (big difference!)
- 3/4 cup granulated sugar – Just the right amount to let the pumpkin and spices shine without being cloying
- 2 large eggs – Room temperature is best for smooth blending
- 1 (12 oz) can evaporated milk – The secret to that ultra-creamy texture
- 1 tsp ground cinnamon
- 1/2 tsp ground ginger
- 1/4 tsp ground cloves – Just a pinch goes a long way
- 1/2 tsp salt – Balances all the sweetness
See? Nothing fancy or hard-to-find. I always double check my spice jars before starting – nothing worse than realizing your cinnamon is older than your firstborn mid-recipe!
How to Make Classic Pumpkin Pie
Alright, let’s get to the good stuff – turning those simple ingredients into pumpkin pie perfection! This is where the magic happens, and trust me, it’s easier than you think. Just follow these steps, and you’ll have a pie that’ll make your whole house smell like Thanksgiving.
Preparing the Crust
First things first – let’s talk crust. Whether you’re using homemade or store-bought (no judgment here!), you’ll want to roll it out to about 1/8-inch thickness. Gently press it into your 9-inch pie dish, making sure to get it all the way into the corners without stretching it too thin. A little trick I learned from my mom: fold any excess dough under at the edges, then crimp with your fingers or a fork for that classic homemade look. Pop it in the fridge while you make the filling – this helps prevent shrinkage during baking.
Mixing the Filling
Now for the star of the show! In a big bowl, whisk together the sugar, cinnamon, ginger, cloves, and salt first. This helps distribute those spices evenly. Then add the pumpkin puree – give it a good stir until everything’s combined. Next comes the eggs – crack them in one at a time, mixing well after each addition. Finally, slowly pour in that evaporated milk while stirring. Don’t overmix here – just get everything incorporated. The filling should be smooth and creamy, like a thick milkshake.

Baking and Cooling
Here’s where timing is everything. Preheat your oven to 425°F (220°C) – don’t skip this step! Pour the filling into your chilled crust and bake for exactly 15 minutes. This initial high heat helps set the crust. Then, reduce the heat to 350°F (175°C) and bake for another 40-45 minutes. The pie is done when the edges are set but the center still has a slight jiggle – it’ll firm up as it cools. And here’s the hardest part: let it cool completely (at least 2 hours) before slicing. I know it’s tempting, but cutting into a warm pumpkin pie is a messy disaster waiting to happen!
Secrets to Pumpkin Pie Perfection
After making this pie more times than I can count (okay, maybe I can count – it’s a lot!), I’ve picked up some foolproof tricks that’ll take your classic pumpkin pie from good to “Oh my goodness, can I get this recipe?” status.
First – that doneness test! A knife inserted near the center should come out clean, but the center should still have that slight jiggle when you nudge the pan. Overbaking is the enemy of creamy texture – it leads to cracks (though hey, whipped cream covers a multitude of sins!). Room temperature ingredients blend smoother – cold eggs can make the filling separate. And here’s my favorite hack: place your pie plate on a preheated baking sheet for extra crisp bottom crust. Works every time!
Oh, and when measuring spices? Smell them first. If they don’t make you sneeze a little, they’re probably too old to deliver that signature flavor. Trust your nose – it knows!
Ingredient Swaps That Actually Work
Don’t stress if you’re missing something – I’ve made this classic pumpkin pie with all sorts of substitutions over the years, and these are the ones that really work:
- Fresh pumpkin puree: Roast sugar pumpkin until tender, then blend. Use 2 cups per 15oz can (squeeze out extra water in cheesecloth)
- Coconut milk: The canned, full-fat kind makes a great dairy-free swap for evaporated milk
- Gluten-free crust: Your favorite GF pie crust works beautifully – just blind bake it first
- Maple syrup: Replace half the sugar with the good stuff for deeper flavor
- Pumpkin pie spice: In a pinch, use 2 tsp instead of individual spices
The secret? Whatever swaps you make, keep the liquid-to-dry ratio about the same, and your pie will still be fantastic!

Serving and Storing Classic Pumpkin Pie
Now for the best part – enjoying your masterpiece! I always think pumpkin pie tastes even better after chilling for a few hours – that cool, creamy texture just can’t be beat. Top it with a dollop of freshly whipped cream (and maybe a sprinkle of cinnamon if you’re feeling fancy). Leftovers? Just cover loosely with plastic wrap and refrigerate for up to 3 days – if it lasts that long! For longer storage, you can freeze whole pies or slices for 1-2 months. Pro tip: thaw overnight in the fridge for best texture.
Classic Pumpkin Pie Nutritional Information
Let’s be real – we’re not eating pumpkin pie for its health benefits, but here’s the scoop on what’s in each delicious slice. One serving (about 1/8th of the pie) clocks in at around 320 calories, with 12g fat (5g saturated), 45g carbs (3g fiber, 25g sugar), and 6g protein. But listen – these numbers can vary based on your exact ingredients. That fancy butter you used in the crust? Might bump up the fat a smidge. Sugar-free whipped cream topping? That’ll bring the numbers down. The important thing is enjoying every bite of this seasonal treat – nutrition labels can wait until January!
Frequently Asked Questions About Classic Pumpkin Pie
Over the years, I’ve gotten so many great questions about this classic pumpkin pie recipe – here are the ones that come up most often:
Can I use fresh pumpkin instead of canned?
Absolutely! Roast a small sugar pumpkin (not the big carving kind) until tender, scoop out the flesh, and puree it. You’ll need about 2 cups per 15oz can. Just be sure to drain any excess liquid – fresh pumpkin tends to be more watery than canned.
How do I prevent a soggy bottom crust?
This drove me crazy for years! My foolproof method: brush the unbaked crust with egg wash before adding filling, and bake on a preheated baking sheet. The extra heat helps crisp up that bottom layer beautifully.
Why does my pie have cracks?
Usually means it’s slightly overbaked. Next time, pull it when the center still has a slight jiggle – it’ll set as it cools. But hey, cracks just mean more room for whipped cream!
Can I make this ahead of time?
Pumpkin pie actually tastes better the next day! Bake it up to 2 days before serving and keep refrigerated. The flavors meld together wonderfully.

Got more questions? I’d love to hear them – drop your baking dilemmas in the comments below and I’ll help troubleshoot! And if you try this recipe, share your pie pics with me – nothing makes me happier than seeing your classic pumpkin pie successes!
Print
Irresistible Classic Pumpkin Pie Recipe in Just 1 Hour!
- Total Time: 1 hour 10 minutes
- Yield: 8 servings 1x
- Diet: Vegetarian
Description
A traditional pumpkin pie with a flaky crust and smooth, spiced filling.
Ingredients
- 1 (9-inch) unbaked pie crust
- 1 (15 oz) can pumpkin puree
- 3/4 cup granulated sugar
- 1 tsp ground cinnamon
- 1/2 tsp ground ginger
- 1/4 tsp ground cloves
- 1/2 tsp salt
- 2 large eggs
- 1 (12 oz) can evaporated milk
Instructions
- Preheat oven to 425°F (220°C).
- Roll out pie crust and place in a 9-inch pie dish.
- In a bowl, whisk pumpkin puree, sugar, cinnamon, ginger, cloves, and salt.
- Beat in eggs, then gradually stir in evaporated milk.
- Pour filling into the pie crust.
- Bake for 15 minutes, then reduce heat to 350°F (175°C) and bake for 40-45 minutes.
- Let cool before serving.
Notes
- Use homemade or store-bought pie crust.
- Check doneness by inserting a knife near the center—it should come out clean.
- Serve with whipped cream if desired.
- Prep Time: 15 minutes
- Cook Time: 55 minutes
- Category: Dessert
- Method: Baking
- Cuisine: American
Nutrition
- Serving Size: 1 slice
- Calories: 320
- Sugar: 25g
- Sodium: 320mg
- Fat: 12g
- Saturated Fat: 5g
- Unsaturated Fat: 6g
- Trans Fat: 0g
- Carbohydrates: 45g
- Fiber: 3g
- Protein: 6g
- Cholesterol: 60mg