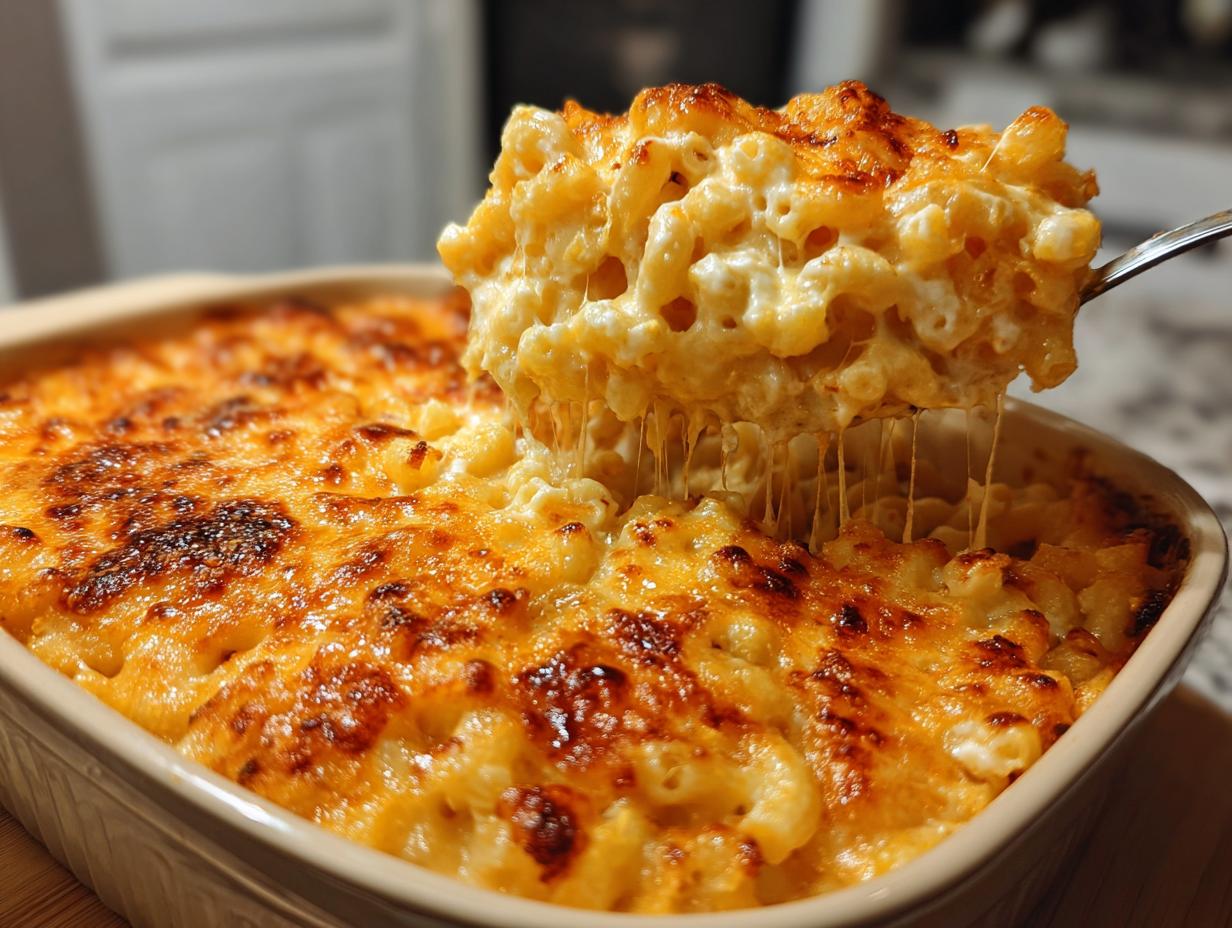
Nothing says comfort like a steaming dish of classic soul food mac and cheese bubbling straight from the oven. This recipe takes me right back to Sunday dinners at my aunt’s house, where the smell of melted cheese and buttery pasta would fill the whole kitchen. We’d all crowd around the table, forks ready, waiting for that first creamy, cheesy bite.
What makes this version special? It’s all about that perfect balance – rich enough to satisfy but not so heavy it weighs you down. The sharp cheddar gives it backbone, while the pepper jack adds just enough kick to keep things interesting. And that sauce? So velvety smooth it coats every single noodle. This isn’t just mac and cheese – it’s a warm hug in food form.

Classic Soul Food Mac and Cheese Ingredients
You’ll need these simple ingredients to make the creamiest, dreamiest mac and cheese that’ll have everyone coming back for seconds (and thirds!). I’ve learned over the years that quality matters here – this isn’t the time to skimp!
- 1 lb elbow macaroni (uncooked – trust me, the shape matters for holding all that cheesy goodness)
- 4 tbsp unsalted butter, cubed (room temperature blends into the roux better)
- 1/4 cup all-purpose flour (this is what gives our sauce that perfect thickness)
- 3 cups whole milk, room temperature (cold milk makes the sauce lumpy – learned that the hard way!)
- 2 cups shredded sharp cheddar (freshly grated melts so much better than pre-shredded)
- 1 cup shredded pepper jack cheese (my secret for a little kick!)
- 1 cup shredded mozzarella (for that beautiful stretchy pull)
- 1/2 tsp salt (adjust to taste)
- 1/2 tsp black pepper (freshly ground if you’ve got it)
- 1/4 tsp paprika (just enough for color and depth)
- 1/4 tsp garlic powder (the secret flavor booster!)
Ingredient Substitutions
Don’t stress if you’re missing something! Here’s how to adapt:
- Pasta: Any short shape works – cavatappi or shells are great alternatives
- Milk: 2% works in a pinch, but whole milk gives the creamiest results
- Cheese: Can’t find pepper jack? Add 1/4 tsp cayenne to the cheddar for heat
- Gluten-free: Use your favorite GF pasta and cornstarch instead of flour (2 tbsp cornstarch = 1/4 cup flour)
How to Make Classic Soul Food Mac and Cheese
Okay, let’s get cooking! I’m going to walk you through each step just like my grandma taught me. Don’t worry if you’ve never made a cheese sauce before – I’ll share all my little tricks to make sure your mac and cheese turns out perfect every single time. Get ready for some serious cheesy magic!
Cooking the Pasta
First things first – the pasta. Bring a big pot of salted water to a rolling boil (it should taste like the ocean!). Toss in your elbow macaroni and set your timer for about 7 minutes – we want these al dente, which means they’ll still have a tiny bite to them. They’ll finish cooking in the oven later, and nobody likes mushy macaroni. Trust me on this!
When the timer goes off, drain the pasta but don’t rinse it – that starchy coating helps the cheese sauce cling to every noodle. Give the colander a little shake to get rid of excess water, then set it aside while we make that glorious cheese sauce.

Preparing the Cheese Sauce
Here’s where the real magic happens. Grab your heaviest saucepan and melt the butter over medium heat. Once it’s bubbling slightly, sprinkle in the flour and start whisking like your life depends on it! This is our roux, and we’ll cook it for about a minute until it turns golden and smells nutty – this cooks out that raw flour taste.
Now comes the fun part – slowly whisk in the milk about 1/2 cup at a time. Don’t rush this! Adding it all at once will give you lumps, and we want silky smooth sauce. Keep whisking until it thickens enough to coat the back of a spoon (about 5 minutes). Then turn the heat down low and start adding your cheeses a handful at a time, stirring until each addition melts completely before adding more.
Baking the Mac and Cheese
Now for the grand finale! Pour that luscious cheese sauce over your cooked macaroni and stir until every single noodle is coated. Transfer it all to your greased baking dish – I like to give it a little wiggle to settle it evenly. Pop it in your preheated oven and bake for about 25 minutes until you see those beautiful bubbly edges.
Want that gorgeous golden top? Switch your oven to broil for the last 2-3 minutes (but don’t walk away – it can burn fast!). Let it rest for 5 minutes before serving – I know it’s hard to wait, but this helps the sauce set up perfectly. Then dig in and enjoy the ooey-gooey goodness!

Tips for Perfect Classic Soul Food Mac and Cheese
After making this recipe more times than I can count, I’ve learned all the little tricks that take good mac and cheese to absolutely incredible. Here are my can’t-live-without secrets:
- Grate your own cheese – I know, I know, it’s extra work. But pre-shredded cheese has anti-caking agents that make your sauce grainy. Freshly grated melts like a dream!
- Room temp is your friend – Cold milk straight from the fridge can make your sauce lumpy. Let it sit out for 30 minutes first, or microwave it for 30 seconds if you’re in a hurry.
- Undercook your pasta – That al dente texture we talked about? It’s crucial because the noodles keep cooking in the oven. Mushy pasta equals sad mac and cheese.
- Let it rest – I know it’s tempting to dive right in (that cheesy smell is irresistible!), but waiting 5 minutes lets the sauce thicken up perfectly.
- Toast your topping – If you’re adding breadcrumbs, toast them in butter first for extra crunch and flavor. Game changer!
One last pro tip from my grandma: Always make extra. This stuff disappears faster than you’d believe!
Serving Suggestions for Classic Soul Food Mac and Cheese
Oh honey, this mac and cheese deserves to be the star of the show, but it plays so well with others! Here’s how I love to serve it – just like my mama used to at our family reunions. The key is balancing all that rich, cheesy goodness with something bright or crispy.
- Fried chicken – The ultimate pairing! That crispy skin and juicy meat cut right through the richness. My aunt would always fry up a batch right before serving.
- Collard greens – A big pot of greens simmered with smoked turkey gives you that perfect salty, slightly bitter contrast.
- Cornbread – Sweet, crumbly cornbread is basically made for sopping up every last bit of cheese sauce. I like mine with a drizzle of honey.
- BBQ ribs – The tangy sauce plays so nicely with the creamy mac. Messy? Absolutely. Worth it? Every time.
- Simple green salad – When you want something lighter, a vinegary salad cuts through all that decadence beautifully.
For holidays, I go all out with a buffet of sides – candied yams, black-eyed peas, the works! But honestly? Sometimes just a big bowl of this mac and cheese with a cold glass of sweet tea is all the soul food you need.
Storing and Reheating Classic Soul Food Mac and Cheese
Let’s be real – leftovers rarely happen with this mac and cheese (my family usually scrapes the dish clean!), but when they do, you’ll want to keep that creamy texture perfect. Here’s how I store and revive it like a pro:
First, transfer any leftovers to an airtight container while they’re still slightly warm – not hot, but not fridge-cold either. This helps prevent condensation from making things soggy. Pop it in the fridge, and it’ll stay delicious for about 3 days.
Now for reheating – the microwave is my go-to for single servings, but you’ve got to do it right or you’ll end up with dry, rubbery pasta. Here’s my method:
- Scoop your portion into a microwave-safe bowl
- Add a tablespoon of milk per cup of mac and cheese
- Cover loosely with a damp paper towel (keeps steam in)
- Heat in 30-second bursts, stirring between each
For larger amounts, the oven works best. Spread the mac and cheese in an oven-safe dish, add a splash of milk, cover with foil, and bake at 350°F for about 20 minutes. Remove the foil for the last 5 minutes if you want to crisp up the top again.
One word of warning – don’t freeze it. I learned this the hard way! The dairy separates when thawed, leaving you with a grainy texture that’s just not worth it. Better to enjoy it fresh or refrigerated within those 3 golden days.
Pro tip: If you’re making this ahead for a potluck, underbake it slightly (about 5 minutes less) before refrigerating. Then finish baking it right before serving – comes out perfect every time!
Classic Soul Food Mac and Cheese FAQs
After years of making this recipe for every family gathering under the sun, I’ve heard all the questions! Here are the answers to the ones that pop up most often – straight from my cheesy experience:
Can I freeze mac and cheese?
Oh honey, I wish I could say yes – but trust me, it’s not worth it. The dairy separates when frozen, and you’ll end up with a grainy, watery mess when you thaw it. I learned this the hard way before my cousin’s baby shower (total disaster!). If you must make ahead, refrigerate for up to 3 days instead.
What’s the best cheese blend for creamy mac and cheese?
My golden ratio is 2 parts sharp cheddar to 1 part each pepper jack and mozzarella. The cheddar gives that classic tang, pepper jack adds a sneaky little kick, and mozzarella makes it gloriously stretchy. But don’t be afraid to play around! Sometimes I’ll swap in smoked gouda or gruyère for half the cheddar when I’m feeling fancy.
How do I prevent grainy cheese sauce?
Three words: freshly grated cheese. Those pre-shredded bags have anti-caking agents that make your sauce gritty. Also, keep your heat low when melting the cheese – rushing with high heat causes separation. If your sauce does break, whisk in a teaspoon of lemon juice or mustard – the acid helps bring it back together.
Can I make this recipe ahead of time?
Absolutely! Here’s my party trick: Prepare everything through combining the pasta and sauce, then refrigerate before baking. When ready, let it come to room temp for 30 minutes (cold dishes can crack in the oven!), then bake as directed adding 5-10 extra minutes. The pasta absorbs some sauce overnight, making it extra creamy!
Why does my mac and cheese dry out when baked?
Usually means either too much pasta or not enough sauce. Measure your noodles carefully – 1 lb dry should give you about 4 cups cooked. Also, don’t overbake! Once those edges bubble and the top starts browning, it’s done. Remember, it keeps cooking a bit from residual heat after you pull it out.
Got more questions? Drop them in the comments – I’ve probably run into the same issue at some point and love sharing my hard-earned mac and cheese wisdom!
Nutritional Information
Now, let’s talk numbers – but remember, this is soul food we’re talking about, not diet food! These estimates are based on my exact ingredient list, but your mileage may vary depending on the brands you use. (My grandma would wave her wooden spoon and say “Who’s counting calories when it tastes this good?” But I know some folks like to keep track!)
Here’s the breakdown per generous 1-cup serving:
- Calories: About 450 (worth every single one!)
- Fat: 22g (13g saturated – hello, glorious cheese!)
- Carbohydrates: 45g (those noodles are doing their job)
- Fiber: 2g (not much, but hey – the carrots in your side salad will help!)
- Protein: 20g (cheese and milk pack a protein punch)
- Sodium: 500mg (easy to reduce if you use low-sodium cheese)
- Sugar: 5g (mostly from the natural lactose in dairy)
A little disclaimer from my kitchen to yours: These numbers can change based on your exact ingredients. Using skim milk instead of whole? That’ll trim some fat. Adding extra cheese? Well… I won’t judge! The important thing is enjoying this comforting dish with the people you love.
Pro tip: If you’re watching portions, bake it in individual ramekins – helps with portion control and makes for adorable presentation. But between us? I usually go back for seconds anyway!
Alright, friends – now it’s your turn to bring this classic soul food mac and cheese to life in your kitchen! I can’t wait for you to experience that first cheesy, creamy bite that takes you right back to Sunday suppers and family love. Don’t be afraid to make it your own – add some crispy bacon, throw in some sautéed mushrooms, or top with those buttery breadcrumbs I mentioned. Whatever you do, just promise me you’ll enjoy every single forkful.
When you make it (and I know you will!), snap a photo and share your masterpiece in the comments below. Tell me about your twist, your family’s reaction, or how it brought back memories of your own grandma’s cooking. Nothing makes me happier than seeing how this recipe becomes part of your story. Now go preheat that oven – your perfect mac and cheese adventure starts now!
Print
Creamy Classic Soul Food Mac and Cheese Recipe in 3 Simple Steps
- Total Time: 50 minutes
- Yield: 8 servings 1x
- Diet: Vegetarian
Description
A creamy and cheesy Southern-style mac and cheese that’s rich, comforting, and perfect for any occasion.
Ingredients
- 1 lb elbow macaroni
- 4 tbsp unsalted butter
- 1/4 cup all-purpose flour
- 3 cups whole milk
- 2 cups shredded sharp cheddar cheese
- 1 cup shredded pepper jack cheese
- 1 cup shredded mozzarella cheese
- 1/2 tsp salt
- 1/2 tsp black pepper
- 1/4 tsp paprika
- 1/4 tsp garlic powder
Instructions
- Preheat oven to 350°F (175°C) and grease a 9×13-inch baking dish.
- Cook macaroni according to package instructions. Drain and set aside.
- Melt butter in a large saucepan over medium heat.
- Whisk in flour to form a roux. Cook for 1 minute.
- Gradually whisk in milk until smooth. Cook until slightly thickened.
- Stir in cheddar, pepper jack, and mozzarella cheese until melted.
- Season with salt, pepper, paprika, and garlic powder.
- Combine cheese sauce with cooked macaroni.
- Transfer to the baking dish and bake for 25 minutes until bubbly.
- Let cool slightly before serving.
Notes
- Use freshly grated cheese for best melting.
- Add a breadcrumb topping for extra crunch.
- Leftovers can be stored in the fridge for up to 3 days.
- Prep Time: 15 minutes
- Cook Time: 35 minutes
- Category: Main Dish
- Method: Baked
- Cuisine: Southern
Nutrition
- Serving Size: 1 cup
- Calories: 450
- Sugar: 5g
- Sodium: 500mg
- Fat: 22g
- Saturated Fat: 13g
- Unsaturated Fat: 7g
- Trans Fat: 0g
- Carbohydrates: 45g
- Fiber: 2g
- Protein: 20g
- Cholesterol: 60mg