Oh my goodness, let me tell you about my absolute favorite dessert – coconut cream pie! There’s just something magical about that creamy, dreamy filling paired with that flaky crust and toasted coconut topping. It’s like a tropical vacation in every bite. I’ve been making this classic American dessert for years, ever since my Aunt Margie showed me her secret technique for getting that perfect custard texture.
Now, I know what you’re thinking – “But coconut cream pie seems so fancy!” Trust me, it’s way easier than it looks. The first time I made it for a potluck, everyone went nuts asking for the recipe. The secret? Toasting the coconut just until it’s golden (not burnt!) and being patient while that filling thickens up. Once you taste that silky smooth custard with little flecks of real coconut throughout, you’ll understand why this pie has been a diner staple for generations.

What I love most is how the flavors develop as it chills. That first bite after it’s been in the fridge for a few hours? Pure heaven. The coconut flavor gets richer, the texture firms up just right, and when you top it with that cloud of fresh whipped cream… well, let’s just say I’ve been known to “accidentally” make two pies so I can keep one all to myself!
Why You’ll Love This Coconut Cream Pie
Let me count the ways this pie will steal your heart (and probably your waistline)! First off, that filling – oh my stars – it’s like velvet made from clouds and coconut dreams. The texture is just perfect, not too firm, not too loose, with little flecks of real coconut throughout.
Here’s what makes it special:
- The toasted coconut topping – That golden crunch takes every bite to the next level. I always sneak extra while no one’s looking!
- Make-ahead magic – This pie actually gets better as it chills, making it perfect for parties when you want to prep ahead.
- Crowd-pleaser alert – Even folks who swear they don’t like coconut go back for seconds. It’s happened at every potluck I’ve brought this to!
- Simple elegance – Looks fancy but comes together with basic ingredients you probably have already.
Seriously, once you try this version, you’ll never go back to those sad, store-bought pies again. The homemade difference is real!
Coconut Cream Pie Ingredients
Alright, let’s gather our cast of characters for this coconutty masterpiece! Here’s what you’ll need to make magic happen:
- 1 9-inch pie crust, baked and cooled (I use my favorite homemade recipe, but store-bought works in a pinch!)
- 1 cup shredded sweetened coconut (not packed – just lightly spoon it into your measuring cup)
- 1/2 cup granulated sugar (the sweet foundation of our custard)
- 1/4 cup cornstarch (our thickening superhero – don’t skip this!)
- 1/4 tsp salt (balances all that sweetness perfectly)
- 3 cups whole milk (trust me, the extra fat makes all the difference)
- 3 large egg yolks, lightly beaten (save those whites for meringues!)
- 2 tbsp unsalted butter (because everything’s better with butter)
- 1 tsp vanilla extract (the flavor booster)
- 1 cup heavy cream (for that dreamy cloud topping)
- 2 tbsp powdered sugar (just enough sweetness for the whipped cream)
Ingredient Notes
Now let me share some insider tips about these ingredients:
Coconut: I always use sweetened coconut because it gives that perfect balance – unsweetened can leave the pie tasting a bit flat. But if you’re watching sugar, unsweetened works too – just add an extra tablespoon of sugar to the filling.
Milk: Whole milk is non-negotiable here. That extra fat content means creamier texture and richer flavor. I’ve tried with 2% in a pinch and… well, let’s just say it wasn’t the same experience!
Cornstarch: This is what gives our pie that perfect sliceable-yet-creamy texture. Flour can work in emergencies, but you’ll get that starchy taste. Cornstarch stays neutral while doing its thickening job beautifully.
Egg yolks: Room temperature yolks blend in smoother, but honestly? I’m usually too impatient to wait and it still turns out great. Just make sure to temper them properly!
How to Make Coconut Cream Pie
Okay, let’s dive into the fun part – making this dreamy pie! I promise it’s easier than you think, but there are a few key steps where timing is everything. Follow these instructions, and you’ll have pie perfection every time.
Toasting the Coconut
First things first – let’s toast that coconut! Preheat your oven to 350°F and spread the shredded coconut in an even layer on a baking sheet. Now here’s where I learned my lesson – don’t walk away! Coconut goes from golden to burnt in what feels like seconds.
Set your timer for 5 minutes, then check every 60 seconds after that. You want it lightly golden with that amazing nutty aroma filling your kitchen. Mine usually takes about 6 minutes total, but every oven is different. When it’s ready, immediately remove it from the baking sheet so it doesn’t keep cooking. Trust me, burnt coconut ruins everything!
Making the Filling
Now for the magic – that luscious custard filling. In a medium saucepan, whisk together the sugar, cornstarch, and salt until well combined. Gradually whisk in the milk – go slow at first to avoid lumps! Once smooth, cook over medium heat, stirring constantly with a wooden spoon.
Here’s the crucial part – keep stirring until it thickens and comes to a full boil. Once it boils, set a timer for exactly 1 minute (I use my microwave timer). Remove from heat and quickly stir a small amount of the hot mixture into your beaten egg yolks to temper them. This prevents scrambled eggs in your pie – yuck!
Return the egg mixture to the saucepan and cook for 2 more minutes, stirring constantly. The filling should coat the back of your spoon thickly. Remove from heat and stir in the butter, vanilla, and 3/4 cup of your toasted coconut. The smell at this point? Absolute heaven!

Assembling the Pie
Pour the hot filling into your pre-baked pie crust. Now here’s my grandma’s trick – immediately place a piece of plastic wrap directly on the surface of the filling. This prevents that weird skin from forming. Let it cool at room temperature for about 30 minutes before refrigerating.
Here’s where patience comes in – chill for at least 4 hours, but overnight is even better. The filling needs time to set properly. When you’re ready to serve, whip the heavy cream with powdered sugar until stiff peaks form, spread it over the pie, and sprinkle with the remaining toasted coconut. Then try not to eat the whole thing in one sitting – I dare you!
Tips for Perfect Coconut Cream Pie
After making this pie more times than I can count (okay fine, I keep count – it’s 37 times!), I’ve learned all the little tricks that take it from good to “oh my goodness, what is this magic?” Here are my can’t-live-without tips:
Chill it like you mean it – That filling needs a full 4 hours in the fridge minimum to set properly. I know it’s tempting, but don’t rush this step! I once tried adding the whipped cream after just 2 hours and… well, let’s just say it turned into a coconut cream soup situation.
Cold bowl = happy whipped cream – Pop your mixing bowl and beaters in the freezer for 15 minutes before whipping the cream. Cold tools make the cream whip up faster and hold its shape better. My aunt taught me this trick when I was 12, and I’ve never looked back!
Toast extra coconut – I always toast about 1/4 cup more than the recipe calls for because: 1) Some always “disappears” while I’m cooking (oops!), and 2) It makes the prettiest garnish when serving. Sprinkle some on each slice right before serving for that wow factor.
The plastic wrap trick – Pressing plastic directly on the filling surface isn’t just for looks – it prevents that weird skin from forming. Just make sure it’s touching the entire surface with no air pockets!
Coconut Cream Pie Variations
Oh, the fun we can have with this classic! While I adore the traditional version, sometimes I like to mix things up. Here are my favorite twists that still keep that dreamy coconut flavor front and center:
Chocolate lovers’ dream – Spread a thin layer of melted chocolate (dark or milk – your call!) on the cooled crust before adding the filling. The chocolate-coconut combo is out of this world! If you love chocolate desserts, you might also enjoy my recipe for Chocolate Peanut Butter Pie.
Tropical vibes – Add a teaspoon of lime zest to the whipped cream topping. That citrusy zing cuts through the richness beautifully and makes it taste extra fresh.
Gluten-free option – Swap the regular crust for a gluten-free version made with almond flour or your favorite GF pie crust mix. The filling itself is naturally gluten-free!
The best part? These variations still give you that creamy coconut goodness we all crave – just with a little extra personality!
Serving and Storing Coconut Cream Pie
Okay, here’s the deal – this pie is best served cold, straight from the fridge. That chill makes the filling slice beautifully and lets all those coconut flavors shine. I like to take it out about 10 minutes before serving – just enough to take the edge off the cold without making it too soft.
Now, about storing – this pie keeps like a dream in the fridge for up to 3 days (if it lasts that long in your house!). Here’s my golden rule: always add the whipped cream topping right before serving. If you put it on too early, it starts to weep and lose its fluffy texture. Not cute!
I store any leftovers (ha!) by loosely covering the pie with plastic wrap or foil. The crust might soften a tiny bit by day 3, but the filling stays perfect. Pro tip: If you’re making this ahead for a party, prep everything up to the whipped cream step, then just whip and top right before your guests arrive. Works like a charm every time!
One last thing – never freeze this pie. Trust me, I learned the hard way. The filling separates and gets grainy, and the crust turns soggy. Some desserts just weren’t meant for the freezer, and this glorious coconut cream pie is one of them!
Coconut Cream Pie FAQs
Over the years, I’ve gotten so many questions about this pie – and made plenty of mistakes myself! Here are answers to the most common coconut cream pie dilemmas:
Can I use coconut milk instead of regular milk?
Oh honey, I’ve tried every variation! While coconut milk sounds like it would be amazing (and it does add extra coconut flavor), it makes the filling way too thick and rich. The best combo? Stick with whole milk for the base, then let those toasted coconut flakes bring all the tropical flavor you need.
Why is my filling runny?
Been there! Usually it’s one of three things: 1) You didn’t boil the filling long enough (that full minute is crucial!), 2) You didn’t use enough cornstarch (measure carefully!), or 3) You didn’t chill it long enough. My filling once stayed soupy because I got impatient after just 2 hours in the fridge – lesson learned!
Can I freeze coconut cream pie?
Sweetheart, don’t do it! I froze a whole pie once for a “future me” treat, and future me was devastated. The filling separates, the crust gets soggy, and the whipped cream turns into a sad, watery mess. This pie is meant to be enjoyed fresh from the fridge.
How do I prevent a soggy crust?
Here’s my foolproof method: Bake your crust until it’s golden brown (not pale!), let it cool completely before adding filling, and if you’re extra paranoid (like me), brush the inside with a little beaten egg white after baking to create a moisture barrier. Works every time! For more baking tips, check out this guide on how to make a perfect pie crust.
Can I make this pie ahead?
Absolutely! In fact, it’s better that way. The filling needs time to set, and the flavors develop beautifully overnight. Just wait to add the whipped cream topping until right before serving – that’s the only part that doesn’t hold up well over time.
Nutritional Information
Now, let’s be real – we’re not eating coconut cream pie for its health benefits! But if you’re curious about what’s in each delicious slice, here’s the breakdown. Remember, these numbers are estimates based on the exact ingredients I use – your mileage may vary depending on brands and any substitutions.
Per serving (that’s 1/8 of the pie, though I won’t judge if you go for a bigger slice!):
- Calories: 380 (worth every single one!)
- Sugar: 24g (it’s dessert, after all)
- Sodium: 220mg
- Fat: 22g (14g saturated – hello, coconut and cream!)
- Carbohydrates: 38g
- Fiber: 1g
- Protein: 5g
- Cholesterol: 110mg
A little disclaimer – I’m no nutritionist, just a pie enthusiast who likes to know what she’s eating! These numbers can change based on whether you use homemade vs store-bought crust, full-fat vs reduced-fat dairy, or sweetened vs unsweetened coconut. But let’s be honest – when that first creamy bite hits your tongue, none of these numbers really matter anyway! For general dietary guidelines, you can check out resources from the Centers for Disease Control and Prevention.
Print
Divine Coconut Cream Pie Recipe for a Creamy Slice of Heaven
- Total Time: 4 hours 40 minutes
- Yield: 8 servings 1x
- Diet: Vegetarian
Description
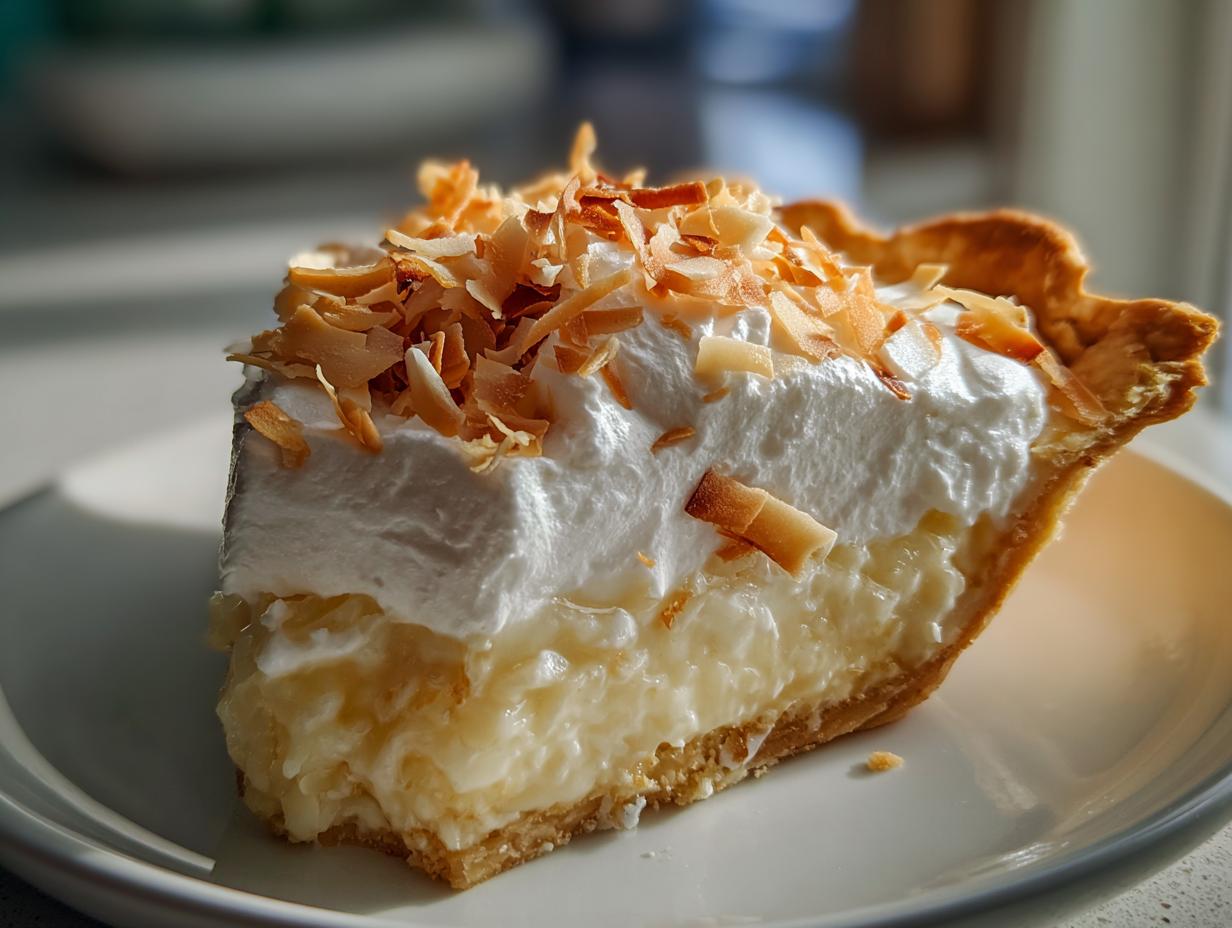
A creamy and delicious coconut cream pie with a flaky crust and toasted coconut topping.
Ingredients
- 1 9-inch pie crust, baked and cooled
- 1 cup shredded sweetened coconut
- 1/2 cup granulated sugar
- 1/4 cup cornstarch
- 1/4 tsp salt
- 3 cups whole milk
- 3 large egg yolks, lightly beaten
- 2 tbsp unsalted butter
- 1 tsp vanilla extract
- 1 cup heavy cream
- 2 tbsp powdered sugar
Instructions
- Preheat oven to 350°F. Spread shredded coconut on a baking sheet and toast for 5-7 minutes until lightly golden. Set aside.
- In a medium saucepan, whisk together sugar, cornstarch, and salt. Gradually whisk in milk until smooth.
- Cook over medium heat, stirring constantly, until mixture thickens and boils. Boil 1 minute then remove from heat.
- Stir a small amount of hot mixture into egg yolks to temper, then return egg mixture to saucepan. Cook 2 more minutes, stirring constantly.
- Remove from heat. Stir in butter, vanilla, and 3/4 cup toasted coconut. Pour into pie crust.
- Cover with plastic wrap directly on surface of filling. Refrigerate at least 4 hours until set.
- Before serving, whip heavy cream with powdered sugar until stiff peaks form. Spread over pie and sprinkle with remaining toasted coconut.
Notes
- For best results, chill the pie thoroughly before adding whipped cream topping.
- You can use unsweetened coconut if you prefer less sweetness.
- The pie keeps well refrigerated for up to 3 days.
- Prep Time: 25 minutes
- Cook Time: 15 minutes
- Category: Dessert
- Method: Stovetop, Baking
- Cuisine: American
Nutrition
- Serving Size: 1 slice
- Calories: 380
- Sugar: 24g
- Sodium: 220mg
- Fat: 22g
- Saturated Fat: 14g
- Unsaturated Fat: 6g
- Trans Fat: 0g
- Carbohydrates: 38g
- Fiber: 1g
- Protein: 5g
- Cholesterol: 110mg