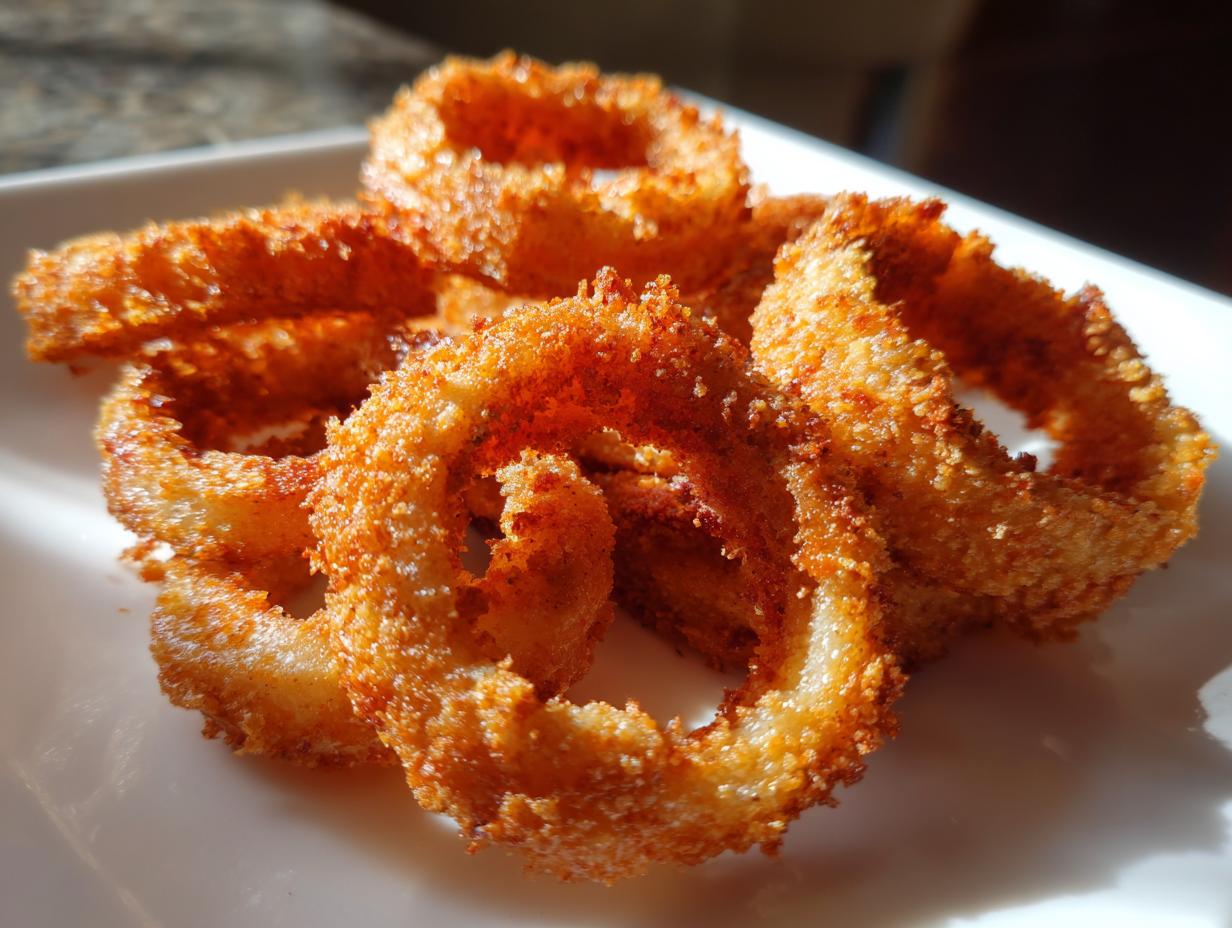
Oh, the crispy golden magic of air fryer onion rings! I still remember the first time I made them – my kitchen smelled like my favorite burger joint, but without the greasy mess. These beauties give you all that satisfying crunch with just a light spritz of oil, and they’re ready in about the time it takes to preheat your air fryer. My kids now beg for these instead of store-bought frozen rings (which, between you and me, can’t hold a candle to homemade). Whether you’re serving them with burgers, dipping them in spicy mayo, or just snacking straight from the basket, these air fryer onion rings will ruin you for any other version. And the best part? You probably have everything you need in your pantry right now!

Why You’ll Love These Air Fryer Onion Rings
Honestly, what’s not to love? These onion rings are my go-to snack when I’m craving something crispy without the deep-fryer guilt. Here’s why they’ll become your new favorite too:
- **Healthier crunch:** Just a light spray of oil gives you all that golden crispiness—no vat of frying oil needed.
- **Faster than takeout:** Ready in 20 minutes flat, even if you’re multitasking like a maniac (like I usually am).
- **Perfect texture every time:** That panko coating? It stays crunchy, not soggy—just like the diner-style rings you dream about.
- **Works for any occasion:** Game day, burger night, or “I deserve a treat” moments—they always hit the spot.
Trust me, once you try these, the frozen bagged ones will just… disappear from your life.
Ingredients for Air Fryer Onion Rings
Gather these simple ingredients – I promise you probably have most of them already! The magic happens when these basic items come together to create something spectacular. Here’s what you’ll need:
- 1 large sweet onion (peeled and sliced into ½-inch rings – trust me, thicker is better for that perfect bite!)
- 1 cup all-purpose flour (this is our first coating – it helps everything else stick)
- 2 large eggs, beaten (this is the glue that holds our crispy coating on)
- 1 cup panko breadcrumbs (my secret for extra crunch – regular breadcrumbs work too, but panko is the MVP)
- 1 teaspoon salt (don’t skip this – it brings out all the flavors)
- 1 teaspoon black pepper (freshly ground if you’ve got it)
- 1 teaspoon paprika (for that beautiful golden color and a hint of smokiness)
- Cooking spray (just a quick spritz makes all the difference)
See? Nothing fancy here – just good, honest ingredients that transform into something magical in your air fryer. Now let’s turn these into the crispiest rings you’ve ever tasted!
How to Make Air Fryer Onion Rings
Okay, let’s get down to business! Making these crispy wonders is easier than you think, but I’ve got some little tricks that make all the difference. Follow these steps, and you’ll be crunching happily in no time.
Step 1: Prep the Onions
First things first – the onions! I like using sweet onions because they’re milder, but any large onion will work. Slice off the ends, peel it, and cut into ½-inch thick rings. (Pro tip: Thinner slices can burn easily, while thicker ones stay juicy inside.) Gently separate the rings – don’t worry if a few break, we’ll use those too! For extra crispiness, some folks soak the rings in ice water for 10 minutes first (it helps remove some of the onion’s moisture), but I’m usually too impatient for that step.
Step 2: Set Up Breading Stations
Now for the fun part – creating your assembly line! Grab three shallow bowls (pie plates work great for this). In the first bowl, mix together your flour, salt, pepper, and paprika. In the second bowl, beat the eggs until they’re nice and smooth. The third bowl gets the panko breadcrumbs – this is what gives us that amazing crunch. I arrange them in order left to right: flour, eggs, breadcrumbs. This “one hand dry, one hand wet” method keeps your fingers from becoming breaded messes!
Step 3: Coat the Onion Rings
Here’s where the magic happens! Take an onion ring and dunk it in the flour mixture, shaking off any excess – too much flour makes the coating fall off later. Next, dip it in the egg, letting the excess drip back into the bowl. Finally, press it firmly into the panko crumbs, turning to coat completely. I like to really press those crumbs on there – it guarantees maximum crunch. Lay the coated rings on a plate as you go. If the crumbs aren’t sticking well, sometimes I’ll do a quick second dip in egg and crumbs for extra coverage.
Step 4: Air Fry to Perfection
Now for the grand finale! Preheat your air fryer to 375°F (190°C) for about 3 minutes – this helps get them crispy right away. Lightly spray the basket with cooking spray (don’t skip this!), then arrange the onion rings in a single layer with a little space between each one. They need room for the hot air to circulate! Cook for 8-10 minutes, flipping them halfway through with tongs. Watch for that perfect golden brown color – they’ll crisp up more as they cool slightly. And resist the urge to peek too often – every time you open that fryer, you let out precious heat!

Tips for the Best Air Fryer Onion Rings
After making these dozens of times (okay, maybe hundreds – we’re obsessed!), I’ve picked up some tricks that guarantee perfect rings every time:
- Parchment is your friend: Cut a round of parchment to fit your air fryer basket – it makes cleanup a breeze and prevents any sticking.
- Don’t skimp on the spray: That quick spritz of oil makes all the difference for golden crispiness. I hit them lightly right before cooking.
- Serve ’em hot: Like all fried foods, these are best eaten immediately – the crunch factor fades fast!
- Work in batches: Overcrowding leads to steaming instead of crisping. Patience pays off with better texture.
Follow these simple tips, and you’ll be the onion ring hero of your household!
Air Fryer Onion Rings Variations
One of my favorite things about this recipe is how easily you can switch it up! Here are some delicious twists I’ve tried (and loved) when I’m feeling adventurous:
Spice It Up
For a little kick, I’ll add ½ teaspoon of cayenne pepper to the flour mixture – just enough heat to make things interesting without overwhelming the sweet onion flavor. Garlic powder (about 1 teaspoon) is another must-try addition that gives them that irresistible “something extra” that keeps people guessing. My husband’s favorite version? A smoky blend with chipotle powder and a touch of brown sugar in the breadcrumbs!
Gluten-Free & Low-Carb Options
When my gluten-free friends come over, I simply swap the all-purpose flour for gluten-free flour and use crushed gluten-free crackers instead of panko. For a low-carb version that still delivers on crunch, almond flour works surprisingly well (though you might need an extra egg for binding). The coating won’t get quite as golden, but the flavor is fantastic!
Serving Suggestions
Oh, the possibilities! These crispy air fryer onion rings are like the perfect supporting actor – they make everything else shine. Here’s how I love to serve them:
- Burgers’ best friend: Pile them on top of your favorite juicy burger or serve alongside – they’re what takeout dreams are made of!
- Dipping sauce heaven: My family fights over the dipping options. Classic ranch is always a winner, but mix in some sriracha for kick, or blend mayo with a little BBQ sauce for something special. Try our homemade ranch dip for an extra treat!
- Salad topper: Sounds crazy, but crumbling a few over a wedge salad? Absolute game changer for texture.
- Standalone snack: Let’s be real – sometimes I “forget” to make anything else and just eat them straight from the basket. No judgment here!
The only wrong way to serve them? Not serving them at all!
Storing and Reheating Air Fryer Onion Rings
Let’s be honest – these onion rings are best eaten fresh, piping hot from the air fryer. But if you somehow end up with leftovers (which, in my house, is rare!), here’s how to handle them:
Storage Tip: Skip the fridge! The moisture will make them soggy faster than you can say “crunch.” Instead, let any cooled leftovers sit uncovered at room temperature for no more than a couple hours. For longer storage, arrange them in a single layer on a baking sheet and freeze for about 30 minutes before transferring to an airtight container – they’ll keep for up to a month this way.
Reheating Magic: That air fryer isn’t done working yet! Toss frozen or room-temp rings back in at 350°F for just 2-3 minutes – no need to thaw. The hot air will revive that beautiful crispness almost like new. I’ve tried microwaving (disaster – chewy mess) and oven reheating (better but still not great), but nothing beats the air fryer for bringing back that fresh-from-the-fryer texture.
Pro tip: If they seem a bit dry after reheating, give them a quick spritz of oil before the final minute of cooking. Works like a charm!
Air Fryer Onion Rings FAQs
I get asked about these crispy wonders all the time! Here are the answers to the questions that pop up most often in my kitchen (and my DMs):
Can I use frozen onion rings instead?
Oh honey, no – and here’s why. Frozen onion rings are already par-cooked and coated, so they’ll turn out soggy in the air fryer compared to our fresh version. Plus, you lose all that fun of customizing the seasoning! Fresh onions give you that perfect crunch and sweet flavor that makes these so special.
How do I keep them from getting soggy?
The golden rule? Don’t overcrowd that basket! Give each ring some breathing room so the hot air can circulate properly. I also swear by patting my onion rings dry before breading (especially if you did the ice water soak) and using that quick spritz of oil – it makes all the difference for crispiness.
What’s the best type of onion to use?
Sweet onions (like Vidalia or Walla Walla) are my go-to because they’re milder, but good old yellow onions work great too. Red onions can be pretty but tend to lose their color and get too strong when cooked. Whatever you choose, make sure it’s firm and fresh – soft onions equal sad, limp rings.
Why won’t my breading stick properly?
This used to drive me crazy too! The key is shaking off excess flour after the first coat (too much creates a barrier) and really pressing the crumbs on firmly. If they’re still not sticking, try chilling the breaded rings for 10 minutes before cooking – it helps everything set up nicely.
Can I make these ahead of time?
You can bread them ahead (they’ll keep in the fridge for about an hour), but they’re truly best cooked right before serving. That said, if you must prep ahead, freeze the breaded rings on a sheet pan, then cook from frozen (just add 1-2 extra minutes). The texture won’t be quite as magical, but it’ll do in a pinch!
Nutritional Information
Nutritional values are estimates and vary based on ingredients/brands. Here’s what you’re looking at per serving (about half the recipe – though I won’t judge if you eat the whole batch!):
- Calories: 180
- Fat: 3g (1g saturated)
- Carbohydrates: 30g
- Fiber: 2g
- Sugar: 2g
- Protein: 6g
- Sodium: 400mg
Compared to deep-fried versions that can clock in at 400+ calories per serving, these air fryer onion rings let you enjoy that crispy goodness without the guilt. The panko gives you that satisfying crunch while keeping things lighter – it’s a win-win!
Try this recipe and share your results in the comments!
Print
Crispy Air Fryer Onion Rings in 20 Minutes – You’ll Crave
- Total Time: 20 mins
- Yield: 2 servings 1x
- Diet: Vegetarian
Description
Crispy and golden onion rings made in an air fryer with less oil and maximum crunch.
Ingredients
- 1 large onion
- 1 cup all-purpose flour
- 2 eggs
- 1 cup breadcrumbs
- 1 tsp salt
- 1 tsp black pepper
- 1 tsp paprika
- Cooking spray
Instructions
- Peel and slice the onion into 1/2-inch rings.
- Separate the rings and set aside.
- In a bowl, mix flour, salt, pepper, and paprika.
- Beat the eggs in another bowl.
- Place breadcrumbs in a third bowl.
- Dip each onion ring into the flour mix, then the eggs, and finally the breadcrumbs.
- Preheat the air fryer to 375°F (190°C).
- Lightly spray the air fryer basket with cooking spray.
- Place onion rings in the basket in a single layer.
- Cook for 8-10 minutes, flipping halfway, until golden and crispy.
Notes
- Use sweet onions for a milder taste.
- Panko breadcrumbs yield extra crispiness.
- Do not overcrowd the air fryer to ensure even cooking.
- Prep Time: 10 mins
- Cook Time: 10 mins
- Category: Appetizer
- Method: Air Frying
- Cuisine: American
Nutrition
- Serving Size: 1/2 recipe
- Calories: 180
- Sugar: 2g
- Sodium: 400mg
- Fat: 3g
- Saturated Fat: 1g
- Unsaturated Fat: 2g
- Trans Fat: 0g
- Carbohydrates: 30g
- Fiber: 2g
- Protein: 6g
- Cholesterol: 60mg