You know that moment when you hand someone a drink and their eyes light up like it’s Christmas morning? That’s the magic of DIY edible glitter for drinks! I discovered this trick last summer when I threw a surprise birthday brunch and wanted the mimosas to sparkle—literally. Store-bought edible glitter felt overpriced and, honestly, a little dull. So I grabbed some sugar and food coloring from my pantry, and wow, did we have fun! The best part? It took minutes to make, cost pennies, and turned every glass into a tiny celebration. Trust me, once you see how easy it is to make your drinks shimmer, you’ll be sprinkling this stuff on everything from iced tea to champagne.
Why You’ll Love This DIY Edible Glitter for Drinks
This little trick is one of my favorite kitchen hacks—here’s why you’ll adore it too:
- Quick & easy: Mix, dry, crush—done! No fancy skills needed.
- Totally customizable: Match the glitter to your party theme with any food color.
- Actually edible: Unlike craft glitter, this is 100% safe to drink (and lick off the glass!).
- Budget-friendly: Costs way less than store-bought edible glitter—uses pantry staples!
- Instant party vibes: Turns ordinary drinks into something magical with zero effort.
Seriously, it’s the easiest way to make every sip feel special.
Ingredients for DIY Edible Glitter for Drinks
Here’s all you need to make your drinks sparkle (I bet you already have most of this!):
- 1/4 cup granulated sugar – Plain white sugar works best here; don’t use powdered sugar—it’ll clump too much.
- 1-2 drops gel food coloring – Gel gives richer color than liquid (I love Wilton’s brand). Pro tip: Start with one drop—you can always add more!
- 1/2 teaspoon edible luster dust (optional) – For extra ✨sparkle✨. Find it in cake decorating aisles.
- 1 teaspoon water – Add drop by drop! Too much makes sticky glitter (been there).
See? Nothing weird—just simple, safe ingredients ready to party in your pantry.
Equipment You’ll Need
Grab these basics—you probably have them already:
- Small bowl – For mixing (I use my favorite cereal bowl with the chipped edge—perfection not required!).
- Baking sheet – Any flat surface for drying (parchment paper helps with cleanup).
- Blender or fork – A quick pulse for fine glitter, or smash with a fork for chunkier sparkles.
- Airtight container – Mason jars or old spice tins work great to keep moisture out.
That’s it—no fancy gadgets needed!

How to Make DIY Edible Glitter for Drinks
Now for the fun part—turning ordinary sugar into magical drink sparkles! Follow these simple steps, and you’ll have glitter ready to glam up your next cocktail (or mocktail) in no time.
Step 1: Mix Sugar and Food Coloring
Dump that sugar into your bowl and get ready to play with color! Here’s my trick: use the back of a spoon to press the gel food coloring into the sugar. It helps distribute the color evenly without overworking it. If you’re using liquid food coloring, go easy—just a drop or two, max. Too much liquid here means sticky glitter later (learned that the hard way at my niece’s unicorn party!). Mix until every grain looks like it got dipped in rainbow dust.
Step 2: Add Water Gradually
This is where patience pays off! Add water one drop at a time, stirring between each addition. You’re aiming for damp sand at the beach—clumpy but not wet. I usually stop at about 3/4 teaspoon for 1/4 cup sugar. If it starts looking like paste, don’t panic! Just add a pinch more sugar to balance it out. The perfect texture should hold its shape when pinched but crumble easily when pressed.
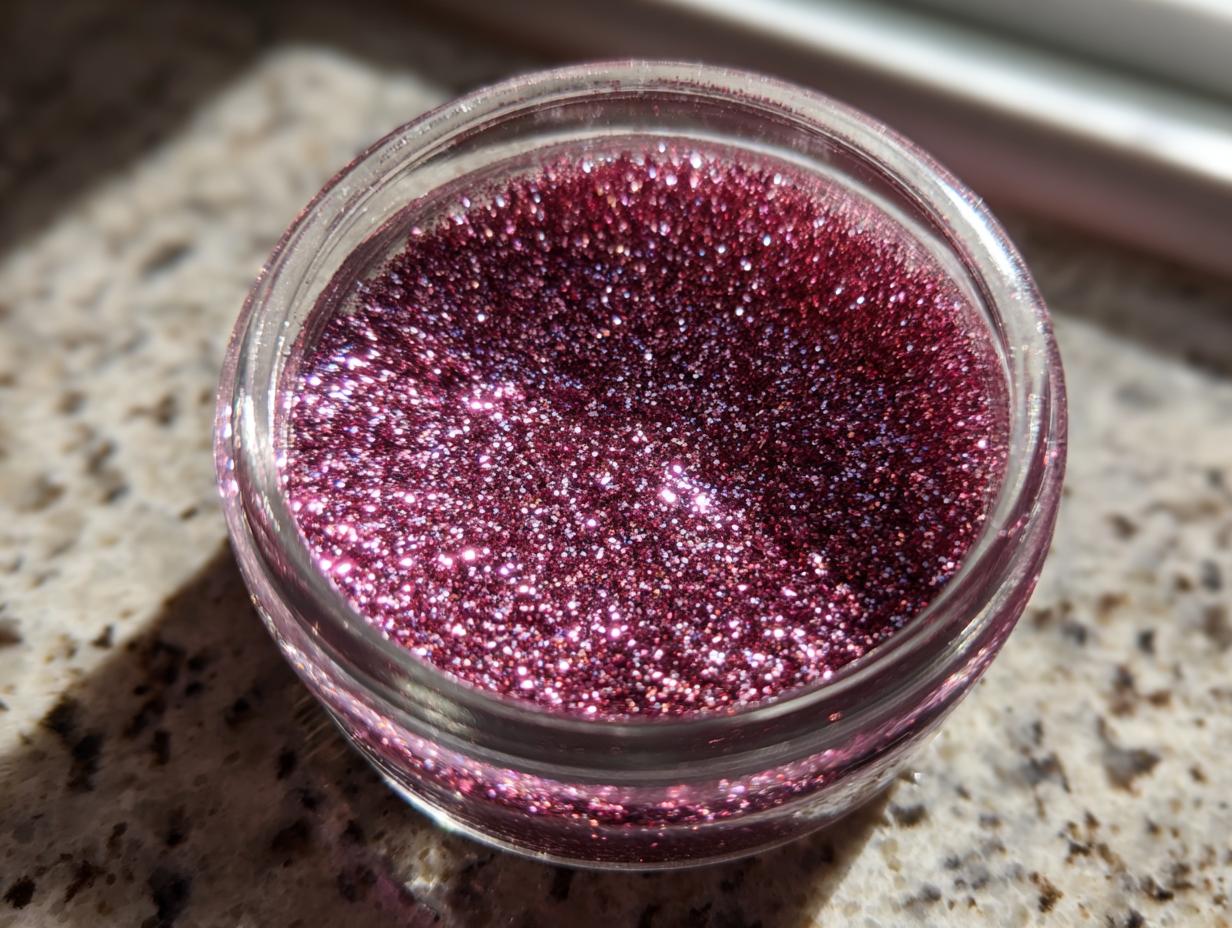
Step 3: Dry and Crush
Spread your sugary mixture thinly on a baking sheet—I like using parchment paper for easy cleanup. Let it air dry for 2-4 hours (no cheating with the oven—heat can melt the sugar!). Once it’s completely dry, the real magic happens. For fine glitter, give it a quick pulse in the blender. Want chunky glam? Crush it with a fork or your fingers for those gorgeous, irregular sparkles. Either way, you’ll end up with edible fairy dust ready to make any drink Instagram-worthy!

Tips for Perfect DIY Edible Glitter for Drinks
After making countless batches (and a few glittery messes), here are my foolproof tips for sparkle success:
- Sift it! Run your glitter through a fine mesh strainer for ultra-smooth texture—perfect for rimming glasses.
- Test colors first – Mix a tiny bit with water to check intensity before committing to the full batch.
- Layer colors – Make separate batches in different shades, then mix for custom ombre effects.
- Keep it dry – Store in an airtight container with a silica packet to prevent clumping.
- Label everything – Trust me, you won’t remember which jar is “unicorn pink” versus “mermaid teal” next month!
Little tricks that make a big difference in your glitter game!
Variations of DIY Edible Glitter for Drinks
The fun doesn’t stop at colors! Here’s how I like to mix things up:
- Flavored glitter: Add a drop of vanilla, peppermint, or citrus extract to match your drink (just skip the luster dust if using oils).
- Pre-colored sugars: Swap plain sugar for colored sanding sugar when you’re in a hurry—instant sparkle with zero mixing!
- Natural dyes: Try beet powder for pink or matcha for green when you want plant-based color.
Honestly? Half the fun is experimenting—make it your own!
How to Use DIY Edible Glitter for Drinks
Oh, the possibilities! My favorite way to use this DIY edible glitter for drinks is rimming glasses—just dip the edge in lemon juice or simple syrup, then into the glitter for instant glam. But don’t stop there! Sprinkle it over cocktails right before serving (watch it swirl like magic), dust it on frosted cupcakes, or even mix a pinch into whipped cream for unicorn-style hot cocoa. Pro tip: Add it after pouring drinks so the sparkles stay visible instead of sinking. Once you start playing with this edible glitter, you’ll find excuses to use it on everything!

Storing Your DIY Edible Glitter for Drinks
Keep that sparkle alive! Toss your glitter in an airtight jar (I repurpose old spice tins—they’re cute and keep moisture out). Stored properly, it’ll stay fresh for about a month—just keep it away from steamy kitchens or humid spots. If it clumps? A quick bake at 200°F for 5 minutes dries it right out!
Frequently Asked Questions
Got questions? I’ve got answers! Here are the most common things people ask me about DIY edible glitter for drinks:
Is this really safe to eat?
Absolutely! Unlike craft glitter, this is just sugar and food coloring—100% edible. (Though maybe don’t eat it by the spoonful—your dentist wouldn’t approve!)
Can I use natural food dyes instead?
Yes! Beet powder, matcha, or turmeric work great for natural colors. Just know they’ll be more muted than artificial dyes.
Why does my glitter clump together?
Moisture is the enemy! Always store in an airtight container with a silica packet. If it clumps, break it up with a fork or give it a quick bake at 200°F for 5 minutes.
Will it dissolve in my drink?
A little—that’s normal! But the sugar mixture dries hard enough that most sparkles will float beautifully for at least 30 minutes. For longest-lasting sparkle, rim glasses instead of sprinkling directly in liquid.
Can kids help make this?
It’s the perfect kids’ kitchen project! Just supervise the food coloring part—those little hands love squeezing bottles too hard (speaking from messy experience).
Nutritional Information
Just a quick note: These are estimates based on standard ingredients—your exact numbers might vary slightly by brand. Per teaspoon of DIY edible glitter for drinks, you’re looking at about 15 calories and 4g sugar. (But let’s be real—you’re not drinking this for the nutrition, you’re drinking it for the sparkle!)
Print
DIY Edible Glitter for Drinks: 3-Minute Sparkle Magic!
- Total Time: 4 hours (including drying)
- Yield: 1/4 cup 1x
- Diet: Vegetarian
Description
Make your drinks sparkle with this easy DIY edible glitter recipe. Perfect for parties, celebrations, or just to add fun to your beverages.
Ingredients
- 1/4 cup granulated sugar
- 1–2 drops food coloring (any color)
- 1/2 teaspoon edible luster dust (optional for extra shine)
- 1 teaspoon water
Instructions
- Mix sugar and food coloring in a small bowl until evenly distributed.
- Add water one drop at a time until the sugar clumps slightly.
- Spread the mixture on a baking sheet and let it dry for 2-4 hours.
- Once dry, break it into fine pieces or pulse in a blender for a finer texture.
- Store in an airtight container until ready to use.
Notes
- Use gel food coloring for more vibrant colors.
- Adjust water quantity carefully—too much will make it sticky.
- For a smoother texture, sift the glitter before storing.
- Prep Time: 10 minutes
- Cook Time: 0 minutes
- Category: Beverage
- Method: No-cook
- Cuisine: International
Nutrition
- Serving Size: 1 teaspoon
- Calories: 15
- Sugar: 4g
- Sodium: 0mg
- Fat: 0g
- Saturated Fat: 0g
- Unsaturated Fat: 0g
- Trans Fat: 0g
- Carbohydrates: 4g
- Fiber: 0g
- Protein: 0g
- Cholesterol: 0mg