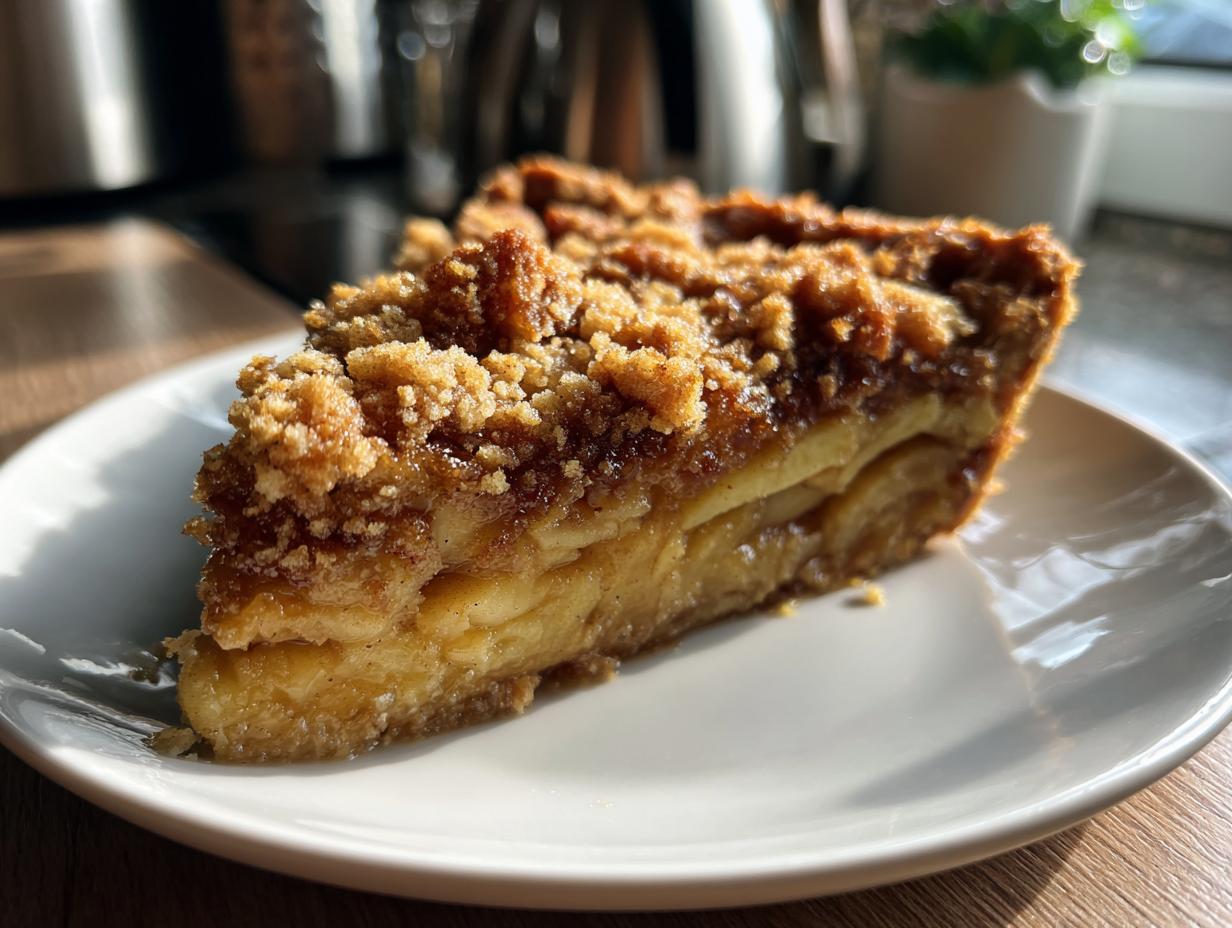
Is there anything better than walking into a kitchen filled with the warm, buttery scent of a freshly baked Dutch apple pie? That sweet cinnamon aroma mingling with tart apples gets me every time—it’s pure comfort in pie form. My grandmother taught me that the magic of this dessert lies in two things: the tender, spiced apple filling and that irresistible crumbly streusel topping. I still remember standing on a stool in her kitchen, watching her patiently slice apples while I sneaked little pieces of the streusel mixture. Now, every time I bake this pie, it brings back those cozy autumn afternoons and the sound of her laughter filling the kitchen.

Ingredients for Dutch Apple Pie
Here’s what you’ll need to make the most irresistible Dutch apple pie. Trust me, I’ve learned the hard way – getting these ingredients just right makes all the difference between a good pie and a “holy cow, I need another slice” pie.
- 6 cups peeled and sliced apples (about 6 medium apples – I always use Granny Smith for that perfect tartness)
- 3/4 cup granulated sugar (this sweetens those tart apples just right)
- 2 tbsp all-purpose flour (the secret to keeping your filling from getting soupy)
- 1 tsp ground cinnamon (because what’s apple pie without that warm spiced flavor?)
- 1/4 tsp ground nutmeg (just a pinch – it makes the cinnamon sing)
- 1/4 tsp salt (balances all those sweet flavors beautifully)
- 1 pre-made pie crust (9-inch) (no shame in store-bought – I use it when I’m short on time!)
- 1 cup all-purpose flour (for that dreamy streusel topping)
- 1/2 cup packed brown sugar (pack it in there good – this adds caramel notes to the topping)
- 1/2 cup cold unsalted butter, cubed (and I mean COLD – this is the key to perfect crumbs)
Pro tip from my grandma: measure your apples after slicing, not before! Those 6 cups should be heaping with apple slices – I like mine about 1/4-inch thick so they hold their shape but still get beautifully tender.
How to Make Dutch Apple Pie
Alright, let’s get baking! This is where the magic happens. I’ll walk you through each step just like my grandma taught me – with patience and plenty of taste-testing opportunities (the streusel topping is irresistible, I warn you).
Preparing the Apple Filling
First things first – those beautiful apple slices need some love. In that big mixing bowl (you know, the one with the slightly chipped edge that’s seen a thousand pies), toss your apple slices with the granulated sugar, flour, cinnamon, nutmeg, and salt. Don’t be shy – get your hands in there if you need to! You want every single slice coated in that sweet, spiced mixture. I like to let this sit for about 10 minutes while I work on the streusel – it gives the apples time to release some juices and become best friends with the spices.
Making the Streusel Topping
Now for the crowning glory! Grab another bowl (or wipe out that first one if you’re like me and hate dishes). Mix together the flour and packed brown sugar first – really pack that sugar in, okay? Then comes the fun part. Take your cold butter cubes and start cutting them in. I use a pastry cutter, but two knives or even your fingers work in a pinch. You’re looking for that perfect crumbly texture where it holds together when you squeeze it, but breaks apart easily. Little pea-sized chunks are perfect – they’ll bake up into those irresistible buttery pockets in the topping.

Baking the Dutch Apple Pie
Time to bring it all together! Preheat that oven to 375°F (190°C) – no cheating here, we want it nice and hot when the pie goes in. Pour your apple filling into the prepared crust – I like to mound it slightly in the center because those apples will shrink a bit. Now sprinkle that glorious streusel over the top, covering every inch. Pop it in the oven on the middle rack and let the magic happen for 45-50 minutes. You’ll know it’s done when the topping is golden brown and you see those sweet juices bubbling up around the edges. Resist the urge to cut in immediately! Let it cool on a wire rack for at least an hour – trust me, that filling needs time to set or you’ll have apple soup (been there, done that).
Tips for the Best Dutch Apple Pie
After years of making this pie (and eating my fair share of both successes and flops), I’ve gathered all my best tricks to help you nail it on the first try. These are the little things that take your Dutch apple pie from “pretty good” to “can I have the recipe?”
- Apple selection matters: Granny Smith apples are my go-to – their tartness balances the sweet streusel perfectly. But if you want to mix it up, try pairing them with Honeycrisp or Braeburn for extra flavor complexity.
- Keep everything cold: That streusel topping comes out best when your butter is straight-from-the-fridge cold. I even chill my flour and mixing bowl sometimes when my kitchen is warm.
- Slice apples evenly: About 1/4-inch thick is perfect – too thin and they’ll turn to mush, too thick and they won’t cook through properly. My grandma’s trick? Cut one slice first and use it as a guide.
- Let it cool (seriously!): I know it’s hard when your kitchen smells amazing, but waiting at least an hour lets the filling set. Otherwise you’ll end up with a delicious mess instead of neat slices.
- Serve it warm: Not hot, but gently reheated – about 15 seconds in the microwave per slice wakes up all those spices. Top with vanilla ice cream that melts into the streusel cracks… absolute heaven.
- Watch for juice bubbles: When those thick, syrupy juices start bubbling around the edges, your pie is done. If the topping browns too fast, tent it loosely with foil.
- Toast the streusel: For extra crunch, I sometimes bake the streusel topping separately on a sheet pan for 10 minutes before sprinkling it over the pie – just watch it like a hawk!
One last secret? The pie actually tastes better the next day as the flavors meld. Not that I’ve ever managed to keep one around that long…
Dutch Apple Pie Variations
Sometimes I can’t resist playing with my grandma’s perfect recipe – I like to think she’d approve of these tasty twists! Here are my favorite ways to mix things up when I’m feeling adventurous (or when my pantry demands creativity).
Nutty streusel upgrades
That buttery streusel topping practically begs for some crunch. Try mixing in ½ cup chopped pecans or walnuts with the flour and brown sugar. The nuts toast up beautifully in the oven, adding this incredible earthy depth to each bite. My cousin swears by adding ¼ cup rolled oats too – it gives the topping this rustic, almost granola-like texture that’s dangerously good.
Spice adventures
While cinnamon and nutmeg are classic, sometimes I like to shake things up. A pinch of cardamom (about ⅛ teaspoon) adds this floral, citrusy note that makes the apples taste brighter. For chilly winter nights, I’ll sometimes add ¼ teaspoon ground ginger and ⅛ teaspoon cloves – it turns the pie into this warm, spiced hug. Once, when I ran out of cinnamon, I used pumpkin pie spice instead and wow – my friends still ask for that version!
Apple mixology
Granny Smiths are perfect, but combining apples creates magic. Try half Granny Smith and half Honeycrisp – you get tartness and honeyed sweetness in every bite. For special occasions, I’ll splurge on Pink Lady apples – their floral notes make the pie taste extra fancy. And if you’re feeling wild, toss in a handful of dried cranberries with the apples for little bursts of tartness.
Boozy surprises
For adult gatherings, I’ll sometimes toss the apple slices with 1 tablespoon bourbon or dark rum before adding the other filling ingredients. The alcohol bakes off, leaving behind this incredible depth of flavor. My neighbor taught me to add ½ teaspoon vanilla extract to the streusel – it makes the whole kitchen smell like a bakery when it’s in the oven.
Remember – baking is about making it your own. My grandma always said recipes are guidelines, not rules. Just promise me one thing: whatever variations you try, don’t skip that crumbly streusel topping. That’s the soul of a Dutch apple pie!
Storing and Reheating Dutch Apple Pie
Now, let me share all my pie-preserving secrets – because as much as I’d love to pretend a whole pie disappears in one sitting (okay, sometimes it does), you’ll probably want to know how to keep your Dutch apple pie tasting fresh. My grandma had foolproof methods that I still use today.
Room temperature storage
For short-term storage (and by short-term I mean 1-2 days max in my house), just cover the pie loosely with a clean kitchen towel or place a paper towel under some plastic wrap. The towel absorbs moisture so your perfect streusel topping stays crisp. Never refrigerate a fresh-baked pie unless it’s cut – the cold turns that amazing flaky crust into something… sad.
Freezing for later
Here’s my freezer trick that’s saved many last-minute dessert emergencies: Bake and completely cool your pie first. Wrap it tightly in two layers of plastic wrap, then a layer of foil. Label with the date (because freezer mysteries are never good). It’ll keep beautifully for about 3 months. When you’re ready, thaw it overnight in the fridge, then reheat (more on that below) – it’ll taste almost fresh-baked!
Reheating like a pro
Cold pie is a crime against that gorgeous streusel topping! Here’s how I bring leftovers back to life:
- Oven method: Place slices or the whole pie on a baking sheet at 350°F (175°C) for 10-15 minutes. This restores that just-baked crispness. If the edges are browning too much, tent with foil.
- Air fryer magic: For single servings, 3-4 minutes at 325°F (160°C) makes the topping impossibly crisp again – just watch it closely!
- Microwave (in emergencies): 15-20 seconds only to take the chill off, then finish with a quick toast under the broiler to revive the topping.
Pro tip: If you plan to freeze individual slices, separate them with parchment paper first. That way you can grab just one when a late-night pie craving hits (not that I’d know anything about that).
Dutch Apple Pie FAQs
Over the years, I’ve gotten all sorts of questions about my Dutch apple pie – and made plenty of mistakes myself along the way! Here are answers to the most common head-scratchers that come up when baking this beauty.
Can I really use store-bought pie crust?
“Absolutely!” – says the busy baker who’s used more pre-made crusts than she’d like to admit. Store-bought crusts work perfectly fine, especially when you’re short on time (or patience). My only advice? Give it a quick brush with egg wash before adding the filling – it creates a barrier against sogginess. That said, homemade crust does add that extra special touch when you’ve got the time and energy.
Help! My pie bottom is soggy – how do I prevent this?
Oh, the dreaded soggy bottom – we’ve all been there! Here’s what I’ve learned: First, don’t skip the flour in the filling – it thickens those apple juices. Second, try pre-baking the crust for just 10 minutes before adding filling (we call this “blind baking”). And my secret weapon? Sprinkle a thin layer of crushed graham crackers or breadcrumbs on the crust before adding apples – they absorb extra moisture like little edible sponges!
My streusel topping melted into the pie – what went wrong?
This usually means your butter was too warm when you made the streusel. Those little cold butter chunks are what create the crumbly texture. Next time, pop your mixed streusel in the fridge for 15 minutes before sprinkling it on. Also, make sure your apples aren’t swimming in liquid – drain off any excess juice before filling the crust.
Can I make this pie ahead of time?
You bet! The filling actually gets better as it sits. Here’s my make-ahead routine: Prepare the apple mixture and streusel topping separately up to 2 days in advance (keep both refrigerated). Assemble and bake the day you plan to serve it. The baked pie holds beautifully at room temperature for a day – just reheat slices gently to bring back that fresh-baked magic.
What’s the best way to slice clean pieces?
After waiting impatiently for that agonizing cooling period (seriously, don’t skip it!), use a sharp, thin-bladed knife dipped in hot water and wiped dry between cuts. Slide the knife straight down through the streusel rather than sawing – those beautiful crumbs will thank you by staying put. For extra clean slices, chill the whole pie for 30 minutes before cutting – the filling firms up beautifully.
Still have questions? Drop them in the comments below – I check every one and might even feature your question in my next baking post! After all, we’re all just trying to make the best Dutch apple pie possible, one crumbly streusel topping at a time.
Nutritional Information
Now, I’m no dietitian (and let’s be real – we’re talking about pie here!), but I know some folks like to keep track of these things. These numbers are estimates based on the ingredients, but remember – actual counts can vary depending on your exact apple sizes or whether you go for that extra scoop of ice cream (no judgment here!).
- Serving Size: 1 slice (1/8 of the pie)
- Calories: 320
- Total Fat: 12g (16% DV)
- Saturated Fat: 7g (35% DV)
- Carbohydrates: 52g (19% DV)
- Fiber: 3g (11% DV)
- Sugars: 28g
- Protein: 2g
- Sodium: 150mg (7% DV)
A little tip from my baking adventures: If you’re watching sugar, try reducing the granulated sugar in the filling to 1/2 cup (the apples bring plenty of natural sweetness). And honestly? A small slice of properly made Dutch apple pie is worth every delicious bite – life’s too short not to enjoy the good stuff!
Ready to Bake Your Own Dutch Apple Pie?
Alright, my fellow pie enthusiast – you’ve got all my best tips, tricks, and family secrets for creating the ultimate Dutch apple pie. Now it’s your turn to roll up those sleeves and fill your kitchen with that incredible cinnamon-apple aroma! I want to hear all about your baking adventures – did the streusel topping come out perfectly crumbly? Did you try any of the fun variations? Snap a photo of your masterpiece (we all know the first slice never comes out clean!) and share your results in the comments below. Happy baking, and may your pie be as full of love as grandma’s always was!
Print
Dutch Apple Pie with Irresistible Crumbly Streusel Topping
- Total Time: 1 hour 10 minutes
- Yield: 8 servings 1x
- Diet: Vegetarian
Description
A classic Dutch apple pie with a crumbly streusel topping and a spiced apple filling.
Ingredients
- 6 cups peeled and sliced apples (about 6 medium apples)
- 3/4 cup granulated sugar
- 2 tbsp all-purpose flour
- 1 tsp ground cinnamon
- 1/4 tsp ground nutmeg
- 1/4 tsp salt
- 1 pre-made pie crust (9-inch)
- 1 cup all-purpose flour
- 1/2 cup packed brown sugar
- 1/2 cup cold unsalted butter, cubed
Instructions
- Preheat oven to 375°F (190°C).
- In a large bowl, mix sliced apples, sugar, flour, cinnamon, nutmeg, and salt.
- Place the pie crust in a 9-inch pie dish and pour the apple mixture into it.
- In another bowl, combine flour and brown sugar. Cut in butter until the mixture resembles coarse crumbs.
- Sprinkle the streusel topping evenly over the apples.
- Bake for 45-50 minutes until the topping is golden and the filling is bubbly.
- Cool on a wire rack before serving.
Notes
- Use tart apples like Granny Smith for the best flavor.
- Let the pie cool slightly before slicing to set the filling.
- Serve with vanilla ice cream or whipped cream if desired.
- Prep Time: 20 minutes
- Cook Time: 50 minutes
- Category: Dessert
- Method: Baking
- Cuisine: Dutch
Nutrition
- Serving Size: 1 slice
- Calories: 320
- Sugar: 28g
- Sodium: 150mg
- Fat: 12g
- Saturated Fat: 7g
- Unsaturated Fat: 4g
- Trans Fat: 0g
- Carbohydrates: 52g
- Fiber: 3g
- Protein: 2g
- Cholesterol: 30mg