Halloween is my favorite excuse to get creative in the kitchen, and these Skeleton Bones are the easiest, most adorable treat you’ll make this season. Just two ingredients – white chocolate and pretzels – transform into spooky-sweet bones that kids go crazy for (and let’s be honest, adults too). I’ve been making these for years because they’re foolproof, no-bake, and look so impressive on a party tray. The best part? You probably have everything you need right in your pantry right now. Trust me, once you see how simple these are, you’ll want to whip up a batch every October!
Why You’ll Love These Skeleton Bones
Seriously, what’s not to love? These adorable little skeleton bones are:
- Crazy easy – Two ingredients and zero baking? Count me in!
- Perfect for last-minute Halloween parties (we’ve all been there)
- Kid-approved – My niece calls them “spooky snack bones” and always sneaks extras
- Totally customizable – Add orange sprinkles for Halloween or go minimalist with just the white chocolate
- Impressively creepy-looking for how simple they are (bonus points if you arrange them like a real skeleton!)
I make these every October because they disappear faster than ghosts at sunrise. You’ll see!
Ingredients for Skeleton Bones
Grab just two main ingredients (plus whatever fun extras you want to toss in) for these spooky treats:
- 1 cup white chocolate chips – I always use good-quality ones—they melt smoother and taste better than bargain brands. Trust me, it makes a difference!
- 20 pretzel twists – The classic square knotted ones work best. Their shape looks just like little bones when dipped.
Optional but fun:
- Sprinkles (orange and black for Halloween, obviously)
- Edible glitter or luster dust for some ghostly shimmer
- A pinch of flaky sea salt if you like that sweet-salty combo
See? I told you this was simple! You might already have everything in your pantry right now—that’s why this recipe is my Halloween lifesaver every year.
Equipment You’ll Need
Here’s the beautiful part – you don’t need any fancy gadgets for these skeleton bones! Just grab:
- A microwave-safe bowl – Glass or ceramic works best. Plastic can get too hot and make your chocolate seize up (learned that the hard way!).
- Parchment paper – Non-negotiable unless you want chocolate-glued pretzels stuck to your tray. Wax paper works in a pinch too.
- A baking tray or plate – Anything flat where your dipped pretzels can dry without touching each other.
Bonus options if you’re feeling fancy:
- A double boiler if you’re nervous about microwaving chocolate (though I promise the microwave method is foolproof if you stir often!)
- Silicone spatula for scraping every last bit of melted chocolate
- Tweezers or chopsticks for super-precise sprinkles placement (but fingers work just fine – messy is part of the fun!)
That’s seriously it! No stand mixers, no candy thermometers – just basic kitchen stuff you definitely already own. See why this is my go-to Halloween recipe?
How to Make Skeleton Bones
Okay, let’s turn those simple ingredients into spooky skeleton bones! This is where the magic happens – and by magic, I mean a microwave and about 15 minutes of your time. Here’s exactly how I make them every Halloween (with a few “oops-I-learned-the-hard-way” tips thrown in!).
Melting the White Chocolate
First, grab your microwave-safe bowl and chocolate chips. Here’s my foolproof method: microwave in 30-second bursts, stirring well between each one. The chocolate might still look solid after the first round – that’s normal! Just keep stirring. By the second or third round, it’ll turn smooth as silk. Watch closely – overheated chocolate turns grainy faster than you can say “boo!” If needed, you can zap it for 10-second intervals at the end. When it’s fully melted, it should drizzle smoothly off your spoon.
Dipping the Pretzels
Now the fun part! Hold a pretzel by one end and dip it halfway into the melted chocolate. Give it a little wiggle to coat evenly, then gently tap the side of the bowl to shake off excess. Too much chocolate makes them look more like blobs than bones (though still delicious blobs!). Lay each dipped pretzel on your parchment-lined tray, leaving space between them so they don’t stick together. Pro tip: twist your wrist slightly as you lift for that perfect “broken bone” look!

Setting the Chocolate
Now comes the hardest part – waiting! You’ve got two options: room temperature (about 1 hour) or the fridge (15-20 minutes). I usually do fridge because I’m impatient, but room temp gives a slightly shinier finish. If you’re adding sprinkles or decorations, do it immediately after dipping – the chocolate sets fast! Once fully hardened, they’ll lift right off the parchment. Break one in half to test – it should snap cleanly with a satisfying crack!
Tips for Perfect Skeleton Bones
After making these spooky treats for years (and yes, learning from plenty of chocolate disasters), here are my absolute can’t-live-without tips for skeleton bone success:
- Splurge on good white chocolate – Cheap chips often contain oils that make them seize up or turn grainy. I swear by Ghirardelli or Baker’s brand – that extra dollar makes all the difference in smooth melting.
- Parchment paper is your best friend – Wax paper can work in a pinch, but I’ve had too many pretzels stick and lose their “bones.” Bonus: reuse the parchment for multiple batches!
- Decorate while wet – Trying to add sprinkles after 30 seconds? Too late! Have all your toppings ready before melting the chocolate so you can toss them on immediately after dipping.
- Keep your workspace cool – If your kitchen’s hot, pop the tray in the fridge between batches. Melted chocolate + warm countertops = sad, melty bones.
- Double the batch – These disappear FAST. I always make extra because someone (usually me) ends up “testing” half of them before the party starts.
See? No spooky surprises here – just simple tricks to make your skeleton bones look professional (even if it’s your first time making them!).
Variations & Decorating Ideas
Here’s where you can really let your Halloween creativity shine! These skeleton bones are like a blank (well, white chocolate) canvas just waiting for your spooky touch. My family loves testing new versions every year – here are our favorite twists:
- Classic Halloween – Toss on orange and black sprinkles right after dipping for instant festive vibes. The nonpareil kind stick best!
- Glow-in-the-dark bones – Mix a pinch of edible glow powder into the melted chocolate. Kids go nuts when the lights go out!
- Creepy drizzle – After they set, zigzag melted dark chocolate over the tops with a fork for “cracked bone” effects.
- Spooky sparkle – Dust with edible silver or black luster dust while still slightly tacky for ghostly shimmer.
- Bloody bones – Dot the ends with red candy melts or a drop of red food coloring mixed with white chocolate.
My niece invented “zombie bones” last year by smearing on green-tinted white chocolate unevenly – messy but hilarious! The beauty is there are no rules. Raid your baking cupboard and see what inspires you. Even just a pinch of coarse salt transforms them into sweet-salty perfection.

Storing Your Skeleton Bones
Here’s the good news – these little skeleton bones keep beautifully! I usually make them a day or two before Halloween parties because they actually taste even better after the chocolate fully sets. The key is storing them right so they stay crisp and delicious instead of turning into sad, sticky blobs.
First, let them cool completely – no cheating! Any lingering warmth will cause condensation in your container. Then, tuck them into an airtight container with parchment between layers if you’re stacking them. A cookie tin or glass container works better than plastic bags, which can make them lose their snap.
They’ll keep perfectly at room temperature for about a week (if they last that long!). Just keep them away from heat sources and – this is crucial – humidity. I learned this the hard way after storing a batch near my coffee maker. The steam made the chocolate sweat and the pretzels went soft. Not spooky… just sad!
Want to make them way ahead? You can actually freeze them for up to a month in that same airtight container. Let them thaw at room temp for 15 minutes before serving – the pretzel stays crisp and the chocolate stays perfect. Just don’t try to refrigerate them long-term; fridges tend to dry out the pretzels.
One last pro tip: if you’re transporting these to a party, pack them gently in a single layer with crumpled parchment paper to cushion them. Nothing worse than showing up with a container full of “skeleton crumbs” instead of bones!
Nutritional Information
Okay, let’s be real – we’re not eating skeleton bones for their health benefits! But since I know some folks like to keep track (or need to for dietary reasons), here’s the scoop on what’s in each delicious, spooky pretzel:
- Calories: About 50 per pretzel
- Fat: 2g (1g saturated)
- Carbs: 7g
- Sugar: 4g
- Sodium: 80mg
- Protein: 1g
Important note: These numbers are estimates based on standard ingredients – your exact counts might vary slightly depending on the brands you use and how much chocolate ends up on each pretzel (I won’t judge if yours are extra chocolatey!). The sprinkles and decorations add negligible amounts unless you go totally wild with them.
Personally? I say enjoy a few without guilt – they’re portion-controlled by nature and way lighter than most Halloween treats. Just maybe don’t eat all 20 in one sitting… though I won’t tell if you do!
FAQs About Skeleton Bones
I get asked these questions every Halloween – so let me save you the trouble of trial and error with my hard-earned skeleton bone wisdom!
Can I use milk chocolate instead of white?
Absolutely! Though they won’t look as bone-like, milk or dark chocolate works fine. Just know they’ll set firmer than white chocolate. For the best of both worlds, try my favorite trick: dip in white chocolate first, then drizzle with dark chocolate for “dirty bone” effects!
Why did my chocolate get clumpy?
Ah, the dreaded seize! Usually means it got too hot or a drop of water got in. Microwave in shorter bursts next time (15-20 seconds), and make sure all your tools are completely dry. If it happens, try stirring in a teaspoon of vegetable oil to smooth it out.
How long do these really last?
Properly stored (airtight at room temp), they stay crispy for 5-7 days – but let’s be honest, they rarely last that long! The pretzels might start losing their crunch after day 3 in humid climates. Pro tip: The chocolate never actually goes “bad” – it just might develop white streaks (called bloom) which are harmless.
Can kids help make these?
Heck yes! This is my #1 kid-friendly Halloween recipe. Little hands love dipping pretzels (messy but worth it). For toddlers, let them sprinkle decorations while you handle the hot chocolate. Just watch those tiny fingers around the microwave!
My chocolate won’t stick to the pretzels – help!
If it’s sliding right off, your pretzels might be too greasy. Give them a quick wipe with a dry paper towel first. Also, make sure your chocolate isn’t too thin – microwave another 10 seconds if needed. And always dip while the chocolate’s warm (not hot) for best adhesion.
Still have questions? Shoot me a message on Instagram – I love solving chocolate emergencies! #SkeletonBoneSOS
Share Your Creations
Now here’s my favorite part – seeing YOUR spooky skeleton bone creations! Every Halloween, my Instagram feed fills up with the most creative versions of this simple recipe, and it makes me giddy every time. Did you go full-on graveyard scene with yours? Maybe add some edible glitter for ghostly shimmer? However they turned out, I want to see!
Snap a photo and tag me @SpookyTreatsWithSam – I repost my favorites all October long. Bonus points if you arrange them in a skeleton shape or get kids in on the decorating action (those messy-fingered masterpieces are always the best). Use #SkeletonBonesTreat so we can all admire each other’s work!
Pro tip: Natural lighting by a window makes the white chocolate really pop in photos. And don’t stress if they’re not “perfect” – the wonky ones always have the most character (just like real skeletons, right?). Can’t wait to see what you whip up!


Spooky Skeleton Bones: 2-Ingredient Halloween Magic
- Total Time: 15 minutes
- Yield: 20 pretzels 1x
- Diet: Vegetarian
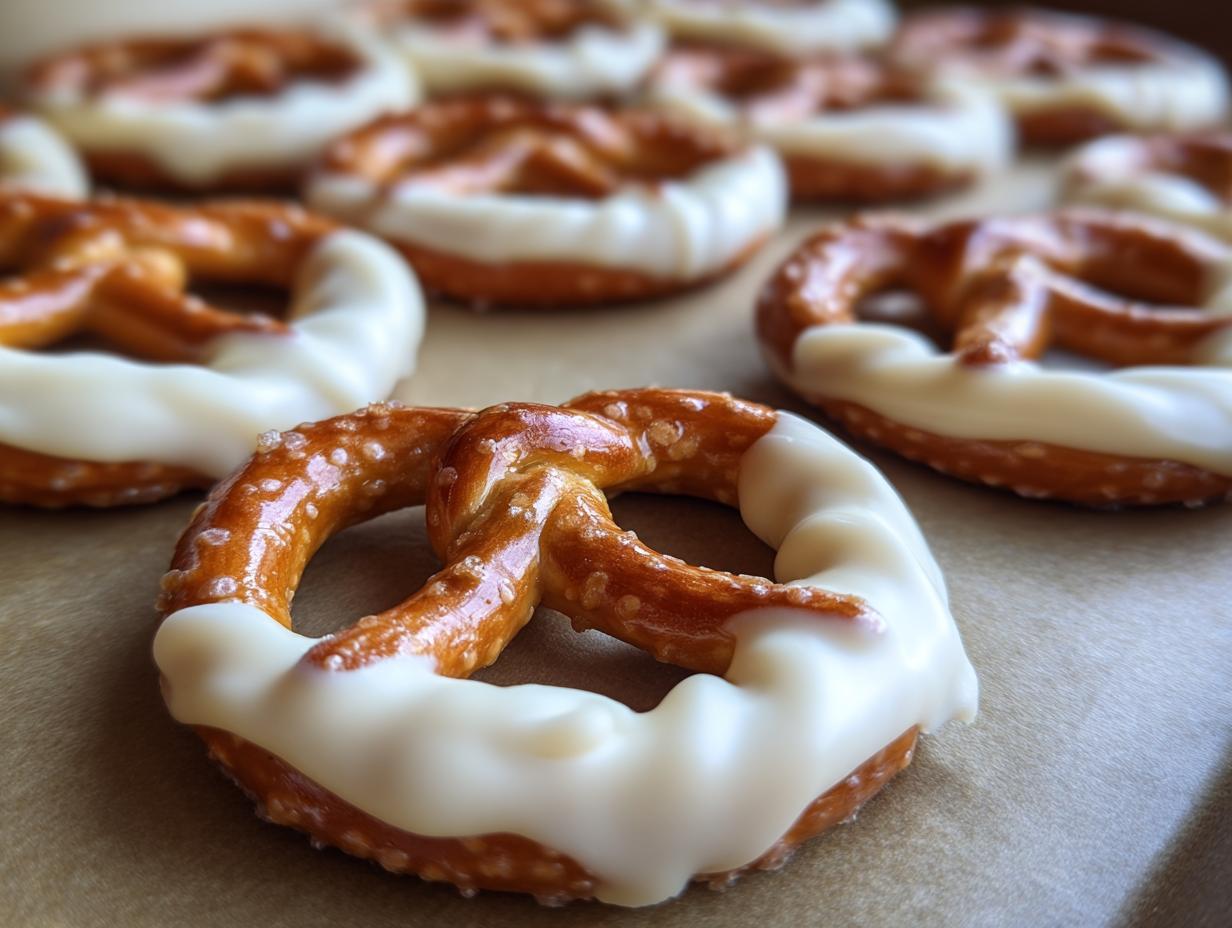
Description
A simple and delicious treat made with white chocolate-covered pretzels.
Ingredients
- 1 cup white chocolate chips
- 20 pretzel twists
Instructions
- Melt the white chocolate chips in a microwave-safe bowl in 30-second intervals, stirring between each interval until smooth.
- Dip each pretzel twist halfway into the melted white chocolate.
- Place the dipped pretzels on a parchment-lined tray.
- Allow the chocolate to set at room temperature or refrigerate for faster results.
Notes
- Store in an airtight container at room temperature for up to a week.
- Add sprinkles or toppings before the chocolate sets for extra decoration.
- Prep Time: 10 minutes
- Cook Time: 5 minutes
- Category: Dessert
- Method: No-Bake
- Cuisine: American
Nutrition
- Serving Size: 1 pretzel
- Calories: 50
- Sugar: 4g
- Sodium: 80mg
- Fat: 2g
- Saturated Fat: 1g
- Unsaturated Fat: 0.5g
- Trans Fat: 0g
- Carbohydrates: 7g
- Fiber: 0g
- Protein: 1g
- Cholesterol: 2mg