There’s nothing like the smell of freshly baked yeast rolls wafting through the house—that warm, buttery aroma that makes everyone gather in the kitchen before dinner. I remember my grandmother pulling golden, pillowy rolls from the oven, always insisting they were “just a little something extra” (even though we all knew they were the star of the meal). For years, I thought making yeast rolls from scratch was some kind of kitchen sorcery, but turns out, it’s way simpler than I imagined!

These homemade yeast rolls require just a handful of pantry staples—flour, yeast, sugar, butter—and a little patience while the dough works its magic. Don’t let the rising time intimidate you—it’s mostly hands-off! The reward? Fluffy, cloud-like rolls with a tender crumb that puts any store-bought version to shame. Whether it’s Sunday supper or holiday feasts, mastering this recipe means you’ll always have a crowd-pleaser up your sleeve (or should I say, under your tea towel?).
Why You’ll Love These Yeast Rolls from Scratch
Once you taste these homemade yeast rolls, you’ll never go back to store-bought. Here’s why they’re worth every minute of rising time:
- Cloud-like texture: That perfect balance of fluffy and tender—just like Grandma used to make (but without the mystery).
- Pantry-friendly ingredients: No fancy equipment or hard-to-find items—just flour, yeast, and a few basics you probably already have.
- Versatile magic: Dress them up with herbs for Thanksgiving, keep them simple for weeknight soups, or turn leftovers into the best mini sandwich sliders.
- Freezer goldmine: Bake a double batch and stash some for later—they reheat like a dream.
Honestly? The hardest part is waiting for them to rise—but that’s when you get to enjoy that amazing yeasty smell filling your kitchen.

Ingredients for Yeast Rolls from Scratch
Gather these simple ingredients – you might already have most in your pantry! The key is precision with measurements and temperatures:
- 4 cups all-purpose flour (spooned and leveled, please – no packed cups!)
- 1/4 cup granulated sugar (this isn’t just for sweetness – it feeds the yeast too)
- 1 teaspoon fine sea salt (trust me, don’t skip this flavor booster)
- 1 packet (2 1/4 teaspoons) active dry yeast (check that expiration date!)
- 1 cup warm milk (110°F – use that thermometer, too hot kills the yeast)
- 1/4 cup melted unsalted butter (cooled slightly so it doesn’t cook the egg)
- 1 large egg (room temperature blends in smoother)
See? Nothing fancy – just good, simple ingredients that transform into something magical.
How to Make Yeast Rolls from Scratch
Okay, let’s dive into the magic! Making yeast rolls is all about patience and love—but don’t worry, I’ll walk you through each step so you can nail it on your first try. The key is watching for those little signs that tell you the dough is happy (yes, dough talks if you listen!).
Preparing the Dough
First things first—get that yeast working! I always dissolve my yeast in warm milk (110°F is the sweet spot—too hot and you’ll kill the little guys) with a pinch of sugar. Wait 5 minutes until it gets foamy on top—this is your sign the yeast is alive and hungry! Meanwhile, whisk together your flour, sugar, and salt in a big bowl. When your yeast mixture looks like a tiny cappuccino, stir in the melted butter (cooled slightly!) and egg. Now pour this wet goodness into your dry ingredients and mix until shaggy—it’ll look messy, but that’s perfect!
Kneading and First Rise
Flour your counter generously—this dough is sticky at first, but don’t panic! Turn out the dough and start kneading with the heels of your hands, pushing away from you, then folding back. Add sprinkles of flour if needed, but don’t overdo it—you want the dough just tacky enough not to stick. After 5-7 minutes of this (great arm workout!), the dough will transform into this smooth, elastic ball that springs back when poked. Pop it in a greased bowl, cover with a damp towel, and tuck it in a warm spot (I use my oven with just the light on). Now the hardest part—waiting an hour while it doubles in size!

Shaping and Second Rise
Punch down that puffy dough (so satisfying!) and turn it out onto a lightly floured surface. Divide into 12 equal pieces—I use a bench scraper for neat portions. To shape, roll each piece into a smooth ball between your palms, tucking the edges underneath. Arrange them in a greased 9×13″ pan so they’re just touching—this helps them rise up, not out. Cover again and let them puff up for 30 minutes—they should look like little pillows and bounce back slowly when gently pressed.
Baking the Yeast Rolls
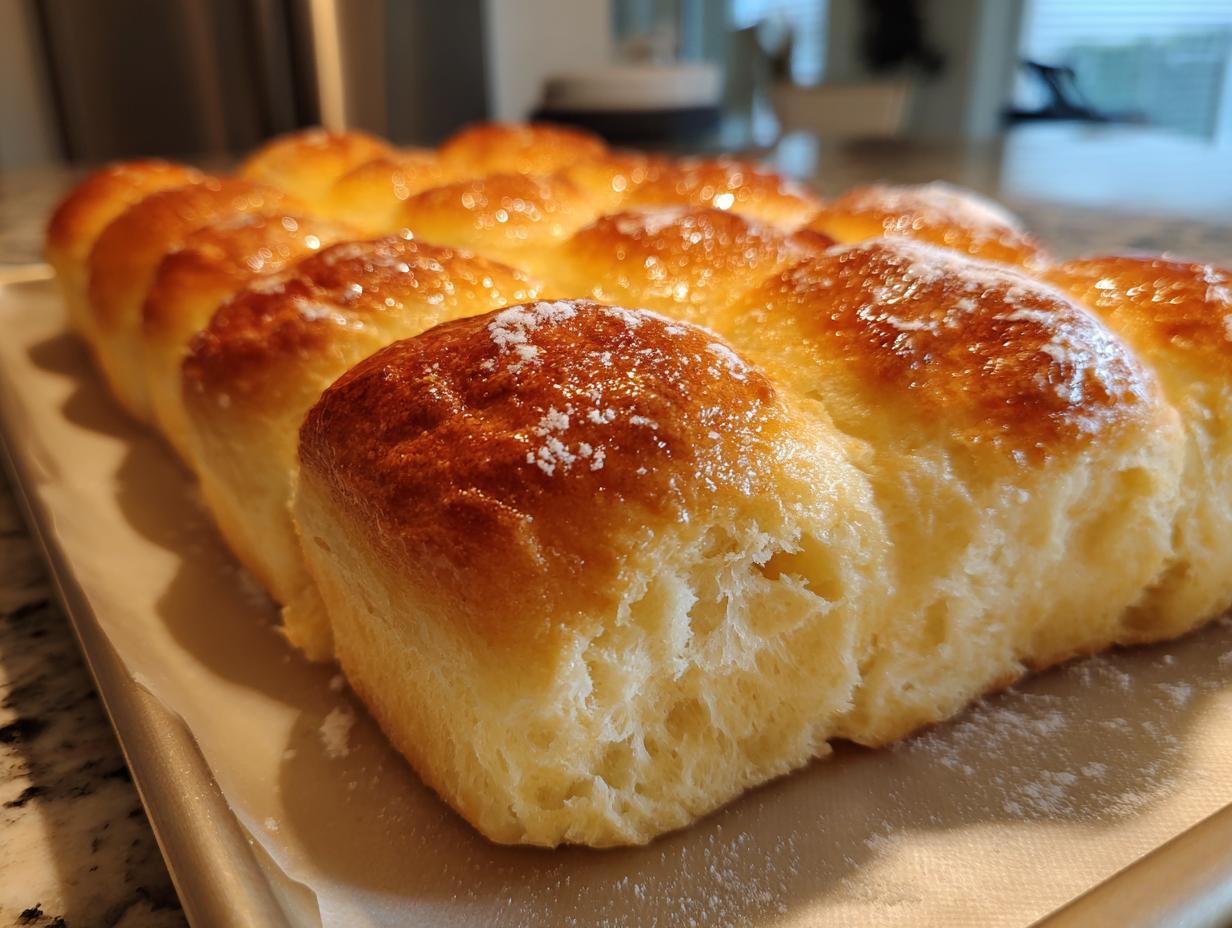
Preheat your oven to 375°F (no peeking at the rising rolls during this time!). Bake for 15-20 minutes until the tops are golden brown and the kitchen smells like heaven. The second they come out, brush them with melted butter—this gives that gorgeous sheen and keeps the crust soft. Let them cool just enough so you don’t burn your fingers, then tear into one—that first bite of warm, buttery fluffiness is pure joy!

Tips for Perfect Yeast Rolls from Scratch
After years of trial and error (and a few hockey puck rolls along the way), I’ve learned these foolproof tricks for bakery-worthy yeast rolls every time:
- Temperature matters: That milk needs to be exactly 110°F—too cold and the yeast won’t wake up, too hot and you’ll kill it. I keep a digital thermometer in my apron pocket!
- Draft-free rising: Yeast hates chilly breezes! My favorite trick? Turn the oven light on and let the dough rise inside—just make sure the oven’s off.
- Knead with love: When the dough stops sticking to your hands and springs back when poked, you’ve kneaded enough—usually 5-7 minutes by hand.
- Butter brush magic: That post-bake butter glaze isn’t just for looks—it keeps the crust soft and adds that irresistible sheen.
- Patience pays: Don’t rush the rises! Let the dough double fully both times—it makes all the difference in texture.
Trust me—once you nail these basics, you’ll be the yeast roll hero at every gathering!
Variations for Yeast Rolls from Scratch
These yeast rolls are like a blank canvas—so easy to customize! Try folding in a handful of shredded cheddar and minced garlic for savory pull-apart magic, or swap the sugar for honey in the dough and add a cinnamon swirl. My neighbor swears by stirring fresh rosemary into the butter glaze—brilliant with roasted meats. For holiday meals, I sometimes brush the shaped rolls with egg wash and sprinkle everything bagel seasoning before baking. Leftover dough? Shape it into knots or braids for fun presentation. Once you master the basic recipe, the possibilities are endless!
Serving Suggestions for Yeast Rolls from Scratch
Oh, the places these rolls will go! They’re perfect for dunking into creamy potato soup or sopping up pot roast gravy. At holidays, I pile them high in a basket lined with a checkered napkin—they disappear fast! My kids love them as sliders with leftover turkey and cranberry sauce. And honestly? They’re heavenly all on their own, still warm from the oven with just a smear of honey butter.
Storing and Reheating Yeast Rolls from Scratch
These rolls taste best fresh, but here’s how to keep that homemade magic going! Store cooled rolls in an airtight container at room temp for 2 days—just pop them in a 350°F oven for 5 minutes to revive that fresh-baked feel. For longer storage, freeze baked rolls in freezer bags (squeeze out all the air!) for up to 3 months. Thaw at room temp, then warm in the oven—they’ll taste like you just pulled them from the oven. Pro tip: Freeze shaped dough balls before the second rise, then thaw, let rise, and bake whenever the craving strikes!
Nutritional Information for Yeast Rolls from Scratch
Just so you know—nutritional values are rough estimates since ingredients vary by brand (and how generously you brush on that butter!). Each soft, pillowy roll contains a balance of carbs, protein, and a touch of sweetness from that sugar that helps the yeast work its magic. For general information on baking science, you can check out resources like the Exploratorium’s guide to bread science.
Common Questions About Yeast Rolls from Scratch
I’ve answered a zillion yeast roll questions over the years—here are the big ones that trip up beginners (and my best fixes!):
“Can I use instant yeast instead of active dry?”
Absolutely! Just skip the proofing step—mix it right in with the dry ingredients. You might need slightly less rising time, so keep an eye on that dough.
“Why didn’t my rolls rise?”
Usually means dead yeast (check that expiration date!) or milk that was too hot/cold. Next time, test your yeast first in warm water with sugar—if it doesn’t bubble within 10 minutes, toss it.
“Can I make the dough ahead?”
Yes! After the first rise, punch it down, cover tightly, and refrigerate overnight. Let it come to room temp before shaping—they might need extra rising time.
“Why are my rolls dense?”
Over-kneading or under-rising are the usual culprits. The dough should feel like a baby’s cheek when poked—soft but springy. And don’t skip that second rise! Understanding gluten development is key to avoiding dense homemade cracker textures.
“Can I freeze the baked rolls?”
Totally! Cool completely, then freeze in airtight bags. Reheat straight from frozen at 350°F for 10 minutes—good as fresh!

Fluffy Yeast Rolls from Scratch in 12 Perfect Bites
- Total Time: 2 hours
- Yield: 12 rolls 1x
- Diet: Vegetarian
Description
Make soft and fluffy yeast rolls from scratch with this simple recipe. Perfect for any meal or occasion.
Ingredients
- 4 cups all-purpose flour
- 1/4 cup sugar
- 1 tsp salt
- 1 packet (2 1/4 tsp) active dry yeast
- 1 cup warm milk (110°F)
- 1/4 cup melted butter
- 1 large egg
Instructions
- Dissolve yeast in warm milk and let sit for 5 minutes until foamy.
- Mix flour, sugar, and salt in a large bowl.
- Add melted butter, egg, and yeast mixture to the dry ingredients.
- Knead dough for 5-7 minutes until smooth and elastic.
- Cover and let rise in a warm place for 1 hour or until doubled in size.
- Punch down dough and shape into 12 rolls.
- Place rolls in a greased baking pan and let rise for 30 minutes.
- Bake at 375°F for 15-20 minutes or until golden brown.
Notes
- Use a thermometer to check milk temperature for best yeast activation.
- Let dough rise in a warm, draft-free place for best results.
- Brush rolls with melted butter after baking for extra softness.
- Prep Time: 1 hour 40 minutes
- Cook Time: 20 minutes
- Category: Bread
- Method: Baking
- Cuisine: American
Nutrition
- Serving Size: 1 roll
- Calories: 180
- Sugar: 4g
- Sodium: 200mg
- Fat: 5g
- Saturated Fat: 3g
- Unsaturated Fat: 2g
- Trans Fat: 0g
- Carbohydrates: 30g
- Fiber: 1g
- Protein: 5g
- Cholesterol: 25mg