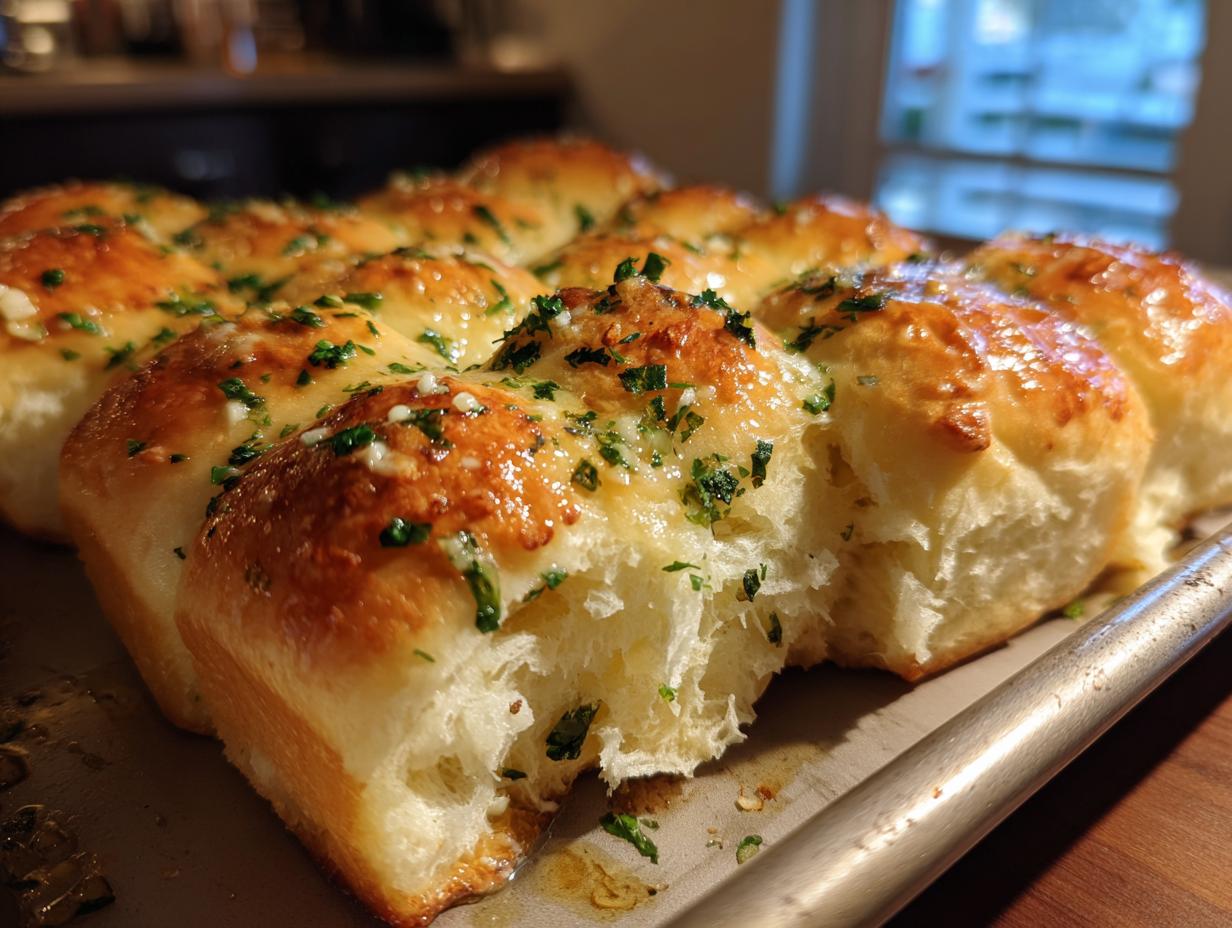
There’s something magical about pulling a tray of golden, fragrant Garlic Herb Dinner Rolls fresh from the oven. That first whiff of garlic and herbs? Absolute heaven. These rolls are my go-to for every family dinner, holiday table, or even just a cozy night in with soup. Soft, fluffy, and packed with flavor—they disappear faster than I can make them!
I’ve been baking these rolls for years, tweaking the recipe until it’s just right. The secret? A perfect balance of fresh garlic, parsley, and a hint of oregano, all kneaded into a buttery, pillowy dough. My grandma taught me to always use fresh herbs—none of that dried stuff—and trust me, it makes all the difference. The way these rolls soak up gravy or pair with a simple pat of butter? Unbeatable.

Whether you’re a seasoned baker or just starting out, this recipe is foolproof. And the best part? Your kitchen will smell like a dream. Let’s get baking!
Why You’ll Love These Garlic Herb Dinner Rolls
These rolls aren’t just good—they’re *dangerously* addictive. Here’s why:
- They’re foolproof: No fancy techniques here—just simple steps anyone can follow. Even if you’ve never baked bread before, you’ll nail these.
- That cloud-like texture: Imagine pulling apart a roll so soft it practically melts in your mouth. Yeah, that’s these.
- The garlic-herb punch: Fresh garlic and herbs kneaded right into the dough? Every bite sings with flavor—no bland rolls allowed.
- Meal magic: Soup night, holiday feasts, or even just a Tuesday dinner—they elevate *everything*. (Pro tip: Make extra for next-day turkey sandwiches.)
Seriously, once you try them, you’ll never go back to store-bought rolls again.
Ingredients for Garlic Herb Dinner Rolls
Listen, I know baking can feel like chemistry sometimes – but trust me, these rolls are way more forgiving than they seem! Here’s exactly what you’ll need (and why each ingredient matters):
The Dry Team
- 3 cups all-purpose flour – spooned and leveled, please! Packing flour leads to hockey puck rolls.
- 1 tablespoon sugar – just enough to feed the yeast without making it sweet.
- 1 teaspoon salt – brings out all the flavors.
- 1 packet active dry yeast – check the expiration date! Dead yeast = flat rolls.
The Wet Crew
- 1 cup warm milk (110°F) – test it on your wrist like baby’s milk. Too hot kills yeast, too cold won’t wake it up.
- 2 tablespoons melted butter – makes them tender. No substitutions here!
The Flavor Bomb
- 2 cloves garlic, minced – fresh only! Jarred garlic just doesn’t have the same punch.
- 1 tablespoon fresh parsley, chopped – dried parsley looks like sad green dust – go fresh.
- 1 teaspoon dried oregano – the one dried herb I allow because it holds up better than fresh oregano in baking.

See? Nothing fancy – just good ingredients handled with care. That’s the secret to rolls people will beg you to make again.
How to Make Garlic Herb Dinner Rolls
Okay, let’s get our hands doughy! Don’t worry – I’ll walk you through every step. These rolls are way easier than you think, and the smell alone is worth every minute.
Preparing the Dough
First, grab your biggest mixing bowl and whisk together all the dry ingredients – flour, sugar, salt, and that precious yeast packet. Now, slowly pour in the warm milk (remember – wrist-test warm!) and melted butter. I like to stir with a wooden spoon at first, then dive in with my hands once it starts coming together.
Here’s the fun part: knead that dough for about 5 minutes right on your counter. You’ll know it’s ready when it’s smooth, slightly tacky (but not sticky), and springs back when you poke it. Too sticky? Add a tablespoon of flour. Too dry? A teaspoon of milk. Trust your instincts!
Pop the dough back in the bowl, cover with a clean towel, and let it rise somewhere cozy for 1 hour. No drafty spots! I sometimes use my oven with just the light on for that perfect warm spot.
Adding the Garlic and Herbs
After an hour, your dough should be all puffed up – give it a satisfying punch down! Now sprinkle your minced garlic, chopped parsley, and oregano right onto the dough. Fold it over itself several times to distribute those flavors evenly. The smell at this point? Absolute heaven.
Here’s my secret trick: let the dough rest for about 5 minutes after folding – it makes shaping the rolls way easier.
Shaping and Baking the Rolls
Divide your dough into 12 equal pieces – I eyeball it, but you can weigh them if you’re feeling precise. Roll each piece into a smooth ball and arrange them in a greased baking dish, just barely touching. Cover again and let rise for another 30 minutes while your oven preheats to 375°F.
Bake for about 20 minutes until they’re golden brown on top. The best test? Tap one – it should sound hollow. Immediately brush with melted butter when they come out (this gives them that irresistible sheen). Try not to eat them all straight from the pan… though I won’t judge if you do!
Tips for Perfect Garlic Herb Dinner Rolls
After baking hundreds of batches (yes, I’m obsessed), here are my can’t-live-without tips:
- Fresh herbs or bust – dried parsley turns into little green specks of regret. That fresh, bright flavor makes all the difference.
- Find your dough’s happy place – yeast hates drafts. I use my microwave (turned off!) or oven with just the light on for the perfect cozy rise.
- Butter brush magic – don’t skip brushing them right out of the oven! It gives that glossy finish and keeps them soft for days.
- Garlic timing is everything – adding it during folding (not initially) prevents bitterness from over-baking.
Follow these, and you’ll have rolls that’ll make your grandma proud!
Serving Suggestions for Garlic Herb Dinner Rolls
Oh, the possibilities! These rolls shine brightest when they’re still warm from the oven – that’s when the garlic and herbs really sing. My family fights over them at holiday dinners (they’re incredible with roast turkey and gravy), but honestly? They’re just as perfect with a simple bowl of tomato soup on a rainy day.
Here’s how we love them:
- Soup’s best friend: Dunk them into creamy potato soup or chili – the soft centers soak up flavors like a dream.
- Holiday hero: Serve alongside your Thanksgiving spread or Christmas ham – they’ll upstage the main dish!
- Salad sidekick: Pair with a crisp Caesar salad for the ultimate comfort meal.
Pro tip: Always make extra – they disappear faster than you can say “pass the butter!”
Storing and Reheating Garlic Herb Dinner Rolls
Here’s the good news – these rolls stay delicious for days! Just let them cool completely, then tuck them into an airtight container at room temperature for up to 2 days. Need them longer? Freeze them! I wrap mine individually in foil, then pop them all in a freezer bag – they’ll keep for a month.
When you’re ready to enjoy them again, here’s my trick: spritz frozen rolls lightly with water and reheat at 350°F for about 10 minutes. They’ll come out tasting fresh-baked – crispy outside, fluffy inside. Microwave reheating? Only in emergencies – it makes them rubbery. Trust me, the oven’s worth the wait!
Garlic Herb Dinner Rolls Variations
Once you’ve mastered the basic recipe, the fun begins! Here are my favorite ways to mix things up:
- Herb swap: Try rosemary or thyme instead of oregano – just use half the amount since they’re stronger. Fresh basil makes a surprisingly delicious summer version!
- Cheese please: Fold in 1/2 cup grated parmesan or cheddar with the garlic for extra richness (my kids go crazy for these).
- Whole wheat twist: Substitute 1 cup whole wheat flour for a nuttier flavor – just add an extra tablespoon of milk since it absorbs more liquid.
The best part? No matter how you tweak them, they’ll still disappear just as fast!
Garlic Herb Dinner Rolls FAQs
I’ve gotten so many questions about these rolls over the years – here are the ones that pop up most often:
Can I use dried herbs instead of fresh?
You *can*, but I don’t recommend it for the parsley – dried parsley turns into little green specks without much flavor. The oregano works fine dried (that’s how I actually prefer it in this recipe). If you must substitute, use 1/3 the amount of dried herbs since they’re more concentrated.
How do I know if my yeast is still active?
Great question! Before mixing, proof your yeast by stirring it into the warm milk with a pinch of sugar. Wait 5-10 minutes – if it gets foamy, you’re good to go. If it just sits there looking sad? Toss it and grab a fresh packet. Dead yeast means flat rolls, and nobody wants that.
Why didn’t my rolls rise properly?
Oh no! Usually this means your milk was too hot (killed the yeast) or too cold (didn’t activate it). The sweet spot is around 110°F – warm like bathwater. Also check that your rising spot isn’t drafty – yeast loves a cozy environment!
Can I make the dough ahead and bake later?
Absolutely! After the first rise, punch it down, cover tightly, and refrigerate overnight. The next day, let it come to room temperature for about 30 minutes before shaping and doing the second rise. The cold actually develops more flavor!
My rolls came out dense – what went wrong?
Most likely you over-measured the flour or over-kneaded the dough. Remember to spoon and level your flour (no scooping!), and stop kneading when the dough is smooth and springy – about 5 minutes by hand. Overworking the dough makes tough rolls.
Nutritional Information for Garlic Herb Dinner Rolls
Now, I’m no nutritionist, but here’s the scoop on what’s in these heavenly rolls! Keep in mind these numbers can vary based on your specific ingredients – especially the butter and milk brands you use. But generally, each warm, fluffy roll comes out to about:
- 150 calories – totally worth every bite
- 4g fat (2g saturated) – thank you, delicious butter
- 25g carbs – perfect for soaking up gravy
- 4g protein – who knew bread could pack protein?
Not too shabby for something that tastes this indulgent! Just don’t ask me how many I’ve eaten in one sitting…
Print
Irresistible Garlic Herb Dinner Rolls in 90 Minutes Flat
- Total Time: 1 hour 50 minutes
- Yield: 12 rolls 1x
- Diet: Vegetarian
Description
Soft and fluffy dinner rolls infused with garlic and herbs, perfect for any meal.
Ingredients
- 3 cups all-purpose flour
- 1 tbsp sugar
- 1 tsp salt
- 1 packet active dry yeast
- 1 cup warm milk
- 2 tbsp butter, melted
- 2 cloves garlic, minced
- 1 tbsp fresh parsley, chopped
- 1 tsp dried oregano
Instructions
- Mix flour, sugar, salt, and yeast in a bowl.
- Add warm milk and melted butter, then knead into a dough.
- Let the dough rise for 1 hour in a warm place.
- Punch down the dough and fold in garlic, parsley, and oregano.
- Divide into 12 rolls and place on a baking sheet.
- Let rise for another 30 minutes.
- Bake at 375°F for 20 minutes or until golden.
Notes
- Use fresh herbs for better flavor.
- Let the dough rise in a warm, draft-free area.
- Brush rolls with melted butter after baking for extra softness.
- Prep Time: 1 hour 30 minutes
- Cook Time: 20 minutes
- Category: Bread
- Method: Baking
- Cuisine: American
Nutrition
- Serving Size: 1 roll
- Calories: 150
- Sugar: 2g
- Sodium: 200mg
- Fat: 4g
- Saturated Fat: 2g
- Unsaturated Fat: 1g
- Trans Fat: 0g
- Carbohydrates: 25g
- Fiber: 1g
- Protein: 4g
- Cholesterol: 10mg