There’s something magical about Halloween treats that look almost too spooky to eat – until you take that first irresistible bite. My ghost-topped chocolate cake has become the star of every Halloween party I’ve thrown since my disastrous (but hilarious) attempt at a zombie cake back in 2015. That year, my icing skills needed serious help, but this simple yet stunning ghost-topped chocolate cake? It’s foolproof and always disappears faster than a ghost in the night!
I’ll never forget the first time I served this cake at our neighborhood Halloween potluck. The kids went wild for the cute chocolate ghosts floating on rich chocolate cake, while the adults secretly fought over seconds. What makes this dessert special isn’t just its adorable spooky factor – it’s that incredible moist chocolate base recipe my grandma swore by, topped with easy-to-make white chocolate spirits that even decorating newbies can master.
Whether you’re hosting a haunted house party or just want to surprise your family with something fun, this ghost-topped chocolate cake brings together everything we love about Halloween – playful frights, delicious chocolate, and memories in the making. Just don’t blame me when your guests start requesting it every year!
Why You’ll Love This Ghost-Topped Chocolate Cake
This isn’t just another Halloween dessert – it’s the kind of cake that disappears before the trick-or-treaters arrive! Here’s why it’s become my go-to spooky season showstopper:
- Instant party centerpiece – Those adorable chocolate ghosts floating on rich chocolate cake? Guaranteed to make guests gasp (then immediately ask for a slice)
- Decadent chocolate flavor – My grandma’s secret cocoa blend creates a moist, fudgy crumb that even non-Halloween lovers crave
- Foolproof decorations – The white chocolate ghosts are way easier to make than they look (my 10-year-old niece can pipe them perfectly!)
- Pantry-friendly ingredients – No specialty store runs needed – just basic baking staples plus white chocolate
Trust me, once you see how simple and impressive this ghost-topped chocolate cake is, it’ll haunt your Halloween menu forever!
Ingredients for Ghost-Topped Chocolate Cake
Gathering the right ingredients makes all the difference with this ghost-topped chocolate cake. I’ve learned through trial and error (and a few melty ghost disasters!) that quality matters – especially for those spooky white chocolate decorations. Here’s exactly what you’ll need:
For the Cake Batter
The dry team first:
- 2 cups all-purpose flour (spooned & leveled)
- 2 cups granulated sugar
- 3/4 cup cocoa powder (sifted – no lumps!)
- 2 tsp baking powder
- 1.5 tsp baking soda
- 1 tsp salt
Now the wet crew:
- 1 cup milk (whole works best)
- 1/2 cup vegetable oil
- 2 large eggs (room temp – trust me on this)
- 2 tsp pure vanilla extract
- 1 cup boiling water (added last)
For the Ghost Toppings
This is where the magic (or should I say magic?) happens:
- 2 cups high-quality white chocolate chips or bars (no cheap baking chips – they won’t pipe right)
- Black gel icing (the kind in the little squeeze tubes works perfectly for ghost faces)
A quick pro tip: Splurge on the good white chocolate here. I made the mistake once with off-brand chips, and my ghosts looked more like sad marshmallow blobs than proper spirits!
Equipment Needed
Before we dive into making this ghost-topped chocolate cake, let’s gather our trusty kitchen tools! Having everything ready makes the baking process smoother – especially important when you’re dealing with melted chocolate ghosts that need quick piping. Here’s what you’ll need:
- 2x 9-inch round cake pans – These give the perfect height for stacking layers while keeping that classic cake shape
- Mixing bowls – One large one for dry ingredients and another medium-sized for wet ingredients
- Electric mixer – Handheld or stand mixer both work great for creaming everything together
- Piping bag with small round tip (#3 works perfectly) – Essential for creating those delicate ghost shapes
- Parchment paper – For piping ghosts onto and preventing sticking (plus easy transfer to the cake!)
Don’t worry if you don’t have a piping bag – a small zip-top bag with the corner snipped off works in a pinch! The key is having that small opening for clean ghost outlines.
How to Make Ghost-Topped Chocolate Cake
Now for the fun part – bringing this ghost-topped chocolate cake to life! I’ll walk you through each step, from mixing that perfect chocolate batter to creating those adorable floating ghosts. The secret is taking your time – especially when adding the boiling water and letting everything cool properly. Rushing leads to flat cakes and melty ghosts (trust me, I’ve been there!).
Preparing the Chocolate Cake Layers
First things first – preheat your oven to 350°F (175°C) and grease those cake pans. Here’s how we make the batter that’ll have everyone begging for seconds:
- Whisk together all dry ingredients in your large bowl – flour, sugar, sifted cocoa powder, baking powder, baking soda, and salt. Get it nice and uniform.
- In your medium bowl, mix the wet ingredients: milk, oil, eggs, and vanilla. Beat until everything’s well combined and slightly frothy.
- Now, pour the wet mixture into the dry ingredients. Mix on medium speed for about 2 minutes – you want it smooth but not overmixed.
- Here’s the trickiest part: slowly add the boiling water while the mixer runs on low. Go tablespoon by tablespoon at first – it’ll look weirdly thin, but that’s exactly right! The batter should pour easily when done.
- Divide the batter evenly between your prepared pans. Give them a gentle tap on the counter to release any air bubbles.
Baking and Cooling
This is where patience pays off – don’t peek too early!
- Bake for 30-35 minutes. Start checking at 30 minutes by inserting a toothpick near the center. It should come out with a few moist crumbs (not wet batter).
- When done, let cakes cool in pans for exactly 10 minutes – this helps them set. Then run a knife around edges and turn out onto wire racks.
- Here’s the hard part: let them cool completely (at least 30 minutes) before decorating. Warm cake = melty ghosts = sad Halloween vibes!

Creating the Ghost Decorations
While cakes cool, make your spooky little spirits:
- Melt white chocolate in 30-second microwave bursts, stirring between each, until smooth but not hot (about 1-1.5 minutes total).
- Transfer to piping bag fitted with small round tip (#3 works best).
- Pipe ghost shapes onto parchment paper – start with a small base, then swirl upwards into a wavy “tail.” Make various sizes for fun!
- Let set at room temp until firm (about 15 minutes). Don’t refrigerate – it can cause blooming (those white streaks).
- Once set, use black gel icing to add cute little eyes and mouths. Let these dry completely before placing on cake.

See? Those ghosts are way easier than they look! Now just carefully arrange them on your cooled cake – I like clustering them together like they’re having a little ghost party. The oohs and ahhs you’ll get make every step worthwhile.
Pro Tips for Perfect Ghost-Topped Chocolate Cake
After making this ghost-topped chocolate cake more times than I can count (and learning from all my mistakes!), here are my can’t-miss secrets for spooky success:
- Room temp is everything – Those eggs and milk? Let them sit out for 30 minutes first. Cold ingredients don’t blend as smoothly, and your cake won’t rise as nicely. I learned this the hard way with a sad, dense cake that even the ghosts avoided!
- Chocolate tempering magic – When melting white chocolate, go slow! 30-second bursts and constant stirring prevent seizing. If it gets lumpy, add a teaspoon of vegetable oil to smooth it out – my kitchen hack that saved many ghostly decorations.
- Ghost chilling time – Let your piped chocolate ghosts set fully before adding faces. I wait until they’re completely firm (about 15 minutes) – otherwise, those cute eyes smear into creepy blobs that look more nightmare than festive!
Follow these simple tips, and your ghost-topped chocolate cake will be the talk of every Halloween gathering – in the best way possible!
Serving and Storage Suggestions
Now that you’ve created this masterpiece, let’s talk about how to serve and store your ghost-topped chocolate cake like a pro! I’ve learned through many Halloweens that proper handling makes all the difference between a showstopper and a soggy mess.
For the absolute best presentation, chill your assembled cake for about an hour before serving. This helps everything set perfectly – those ghosts will stay put, and the chocolate flavors really deepen. I like to take it out about 20 minutes before serving though, so the texture is just right – cool but not fridge-cold.
When it comes to storage:
- Whole cake: Pop it in an airtight container (I use a cake carrier) in the fridge for up to 3 days. The chocolate base stays amazingly moist!
- Ghosts separately: Store your decorations in a single layer between parchment in a cool, dry place (not fridge!). Humidity makes them sweat – learned that the hard way when my ghosts “cried” black icing tears!
- Leftover slices: Wrap individual pieces tightly in plastic wrap – they freeze beautifully for up to a month. Just thaw at room temp when the Halloween sugar craving strikes again.
One last tip: if you’re transporting this to a party, assemble the ghosts on site. I once drove across town with them already on the cake, and let’s just say my spooky treats arrived looking more like ghost puddles!
Ghost-Topped Chocolate Cake Variations
Once you’ve mastered the classic version, try these fun twists on the ghost-topped chocolate cake that always impress at my Halloween parties:
- Minty spirits – Add 1 tsp peppermint extract to the batter for a cool, refreshing twist that pairs perfectly with the rich chocolate
- Graveyard scene – Press crushed Oreo crumbs around the cake base to create “dirt,” then add cookie tombstones with piped RIP messages
- Rainbow ghosts – Use gel food coloring to tint some of the white chocolate pastel shades before piping – my niece’s purple ghosts were a huge hit!
The beauty of this cake is how easily you can customize it while keeping those adorable chocolate ghosts front and center!
Nutritional Information
Now, I’m no nutritionist (and let’s be real – this is Halloween cake we’re talking about!), but I know some folks like having the numbers. These estimates are for one generous slice of ghost-topped chocolate cake with all its sweet, spooky glory:
- Calories: 420
- Fat: 18g (6g saturated)
- Carbohydrates: 65g
- Fiber: 3g
- Sugar: 45g
- Protein: 6g
- Sodium: 380mg
Keep in mind these numbers can vary based on your exact ingredients – especially if you go wild with extra ghost decorations like I sometimes do! And hey, it’s Halloween – if there was ever a time to indulge in rich chocolate cake topped with adorable sugar ghosts, this is it. Everything in moderation… including moderation, right? *wink*
Frequently Asked Questions
Over the years of making this ghost-topped chocolate cake, I’ve gotten the same questions popping up at every Halloween party. Here are the answers to everything you might be wondering (including some questions I had when I first started making it!):
Can I make this cake gluten-free?
Absolutely! I’ve successfully made it by swapping the all-purpose flour for a 1:1 gluten-free baking blend. My cousin with celiac disease swears she can’t tell the difference – and that’s saying something! Just make sure your baking powder and other ingredients are GF-certified too.
How early can I prepare the chocolate ghosts?
The ghosts keep beautifully for up to 5 days if stored properly! I like to make mine 2-3 days ahead, keeping them in an airtight container between sheets of parchment at room temperature. No fridge needed – the condensation can make them sticky. Just wait to add the black icing faces until the day you’re serving.
What’s the best white chocolate for piping ghosts?
After many trials (and a few chocolate disasters!), I’ve found Ghirardelli white chocolate baking bars melt and pipe the best. The cheap chips often have additives that make them seize up. Splurge on the good stuff – your ghosts will hold their shape better and have that perfect glossy finish.
Any fun alternative decorating ideas?
Oh, I’ve tried them all! My favorites:
– Use dark chocolate ghosts on white cake for a ghostly inversion
– Add edible glitter to the ghosts for a magical shimmer
– Pipe little witch hats using black candy melts
– Create a “haunted forest” with pretzel stick trees around the base
Final Thoughts
Now it’s your turn to create some spooky magic! I’d love to see your ghost-topped chocolate cake masterpieces – tag me on social media so I can ooh and ahh over your creations. Remember, even if your ghosts look a little “ghoulish” at first, they’ll taste delicious either way! Happy haunting… I mean, baking!
Print
Spooky-Perfect Ghost-Topped Chocolate Cake in 5 Steps
- Total Time: 55 minutes
- Yield: 12 servings 1x
- Diet: Vegetarian
Description
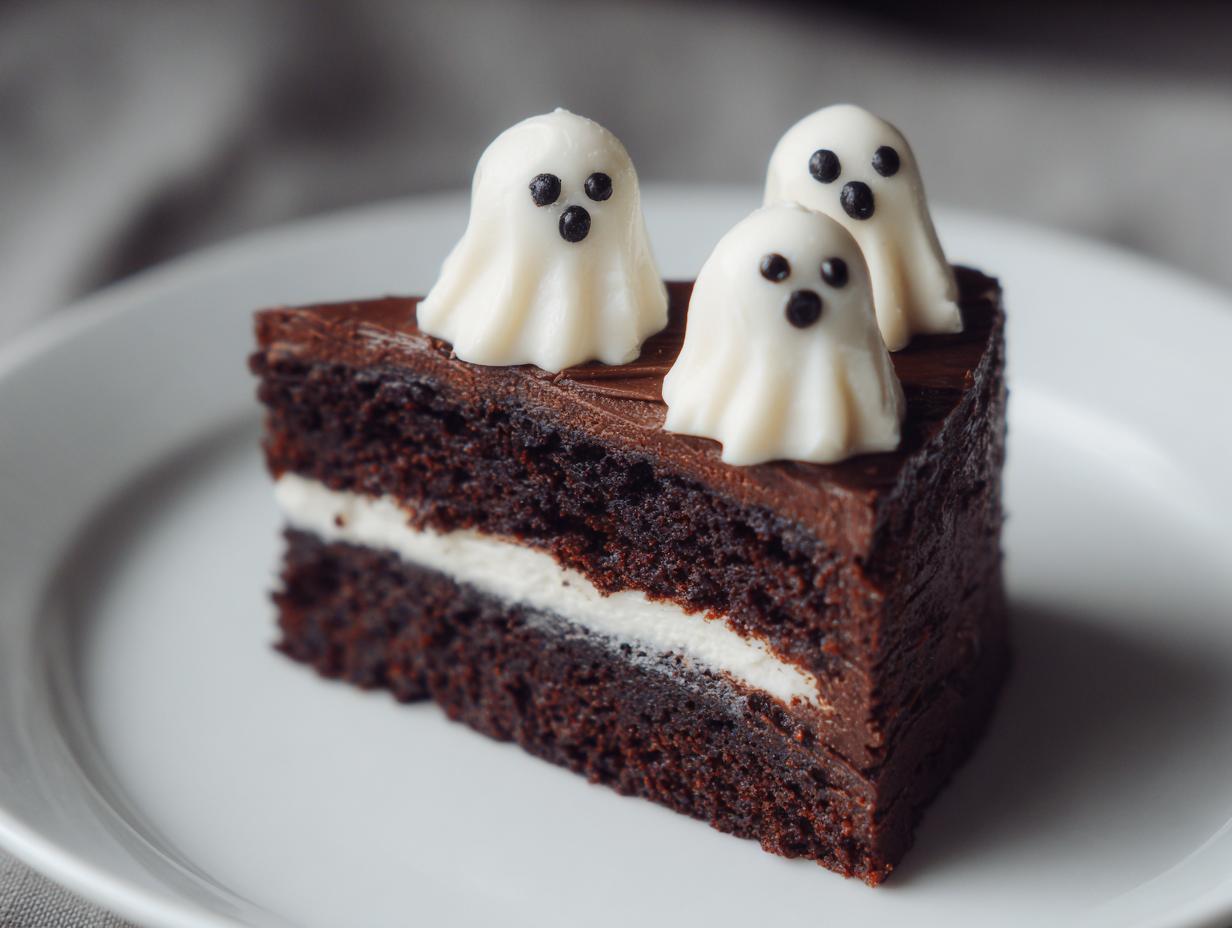
A decadent chocolate cake topped with eerie ghost-shaped decorations, perfect for Halloween or any spooky celebration.
Ingredients
- 2 cups all-purpose flour
- 2 cups sugar
- 3/4 cup cocoa powder
- 2 tsp baking powder
- 1.5 tsp baking soda
- 1 tsp salt
- 1 cup milk
- 1/2 cup vegetable oil
- 2 eggs
- 2 tsp vanilla extract
- 1 cup boiling water
- 2 cups white chocolate (for ghosts)
- Black icing (for ghost faces)
Instructions
- Preheat oven to 350°F (175°C)
- Mix dry ingredients in large bowl
- Add milk, oil, eggs and vanilla. Mix well
- Slowly add boiling water while stirring
- Pour batter into greased cake pans
- Bake for 30-35 minutes
- Let cool completely
- Melt white chocolate and pipe ghost shapes
- Add black icing faces when chocolate sets
Notes
- Cake can be made 1 day ahead
- Store ghosts separately until serving
- Use piping bag with small tip for ghost details
- Prep Time: 20 minutes
- Cook Time: 35 minutes
- Category: Dessert
- Method: Baking
- Cuisine: American
Nutrition
- Serving Size: 1 slice
- Calories: 420
- Sugar: 45g
- Sodium: 380mg
- Fat: 18g
- Saturated Fat: 6g
- Unsaturated Fat: 10g
- Trans Fat: 0g
- Carbohydrates: 65g
- Fiber: 3g
- Protein: 6g
- Cholesterol: 45mg