Nothing says holiday magic like the smell of gingerbread and the joy of building a gingerbread house together. Every year, my family gathers around the kitchen table covered in candy and laughter, but here’s the secret – the real star of the show is always the gingerbread house icing. It’s the glue that holds our sugary masterpieces together (sometimes literally when the roof starts sliding!). I’ve tried store-bought versions, but nothing beats homemade royal icing that sets firm yet stays smooth for piping those perfect details. Whether you’re creating a winter village or just one special house, this simple, sturdy icing recipe has been my go-to for over a decade of sweet holiday memories.

Why You’ll Love This Gingerbread House Icing
This isn’t just icing – it’s your gingerbread house’s best friend. Trust me, I’ve had my fair share of collapsed roofs and sliding walls before perfecting this recipe. Here’s why you’ll never go back to store-bought tubes again:
Quick and Easy to Make
Three ingredients. Ten minutes. That’s all you need! While the kids are busy unwrapping candy decorations, you can whip up a batch of this icing faster than you can say “gingerbread disaster averted.”
Holds Gingerbread Houses Firmly
This stuff sets like edible cement (but tastes way better). I once made a gingerbread castle that survived my nephew’s “earthquake test” – that’s how strong this icing is when it dries!
Perfect for Detailed Decorating
The smooth consistency pipes like a dream for snowflake details or candy cane stripes. My favorite trick? Using a toothpick to draw intricate patterns before they set – it works like edible frosting calligraphy!

Ingredients for Gingerbread House Icing
You’ll be shocked how something so simple works so perfectly! Here’s what you need for my no-fail gingerbread house icing:
- 3 large egg whites – fresh from the fridge works best, but room temp is fine too (just wash those eggs first!)
- 4 cups powdered sugar – sift it if you’ve got the time, but honestly? I often skip this step when I’m in a holiday rush
- 1/2 teaspoon cream of tartar – that secret weapon hiding in your spice cabinet that makes all the difference
See? Told you it was simple. Now let’s turn these basics into magical gingerbread glue!
Equipment You’ll Need
Grab these trusty tools before you start – they’re probably already in your kitchen! You’ll need:
- A sturdy mixing bowl (metal or glass works best)
- Electric mixer (hand or stand – your arms will thank you)
- Spatula for scraping every last bit
- Airtight container for leftovers
That’s it – no fancy gadgets required!
How to Make Gingerbread House Icing
Okay, let’s make some gingerbread magic! I’ve learned the hard way that rushing this process leads to icing disasters, so take your time with these steps – your future gingerbread architect self will thank you.
Step 1: Beat Egg Whites and Cream of Tartar
First, crack those eggs carefully – no yolk allowed! I like to separate them with my hands over a small bowl (it feels more controlled to me). Pour the whites into your mixing bowl and add the cream of tartar. Now, beat on medium speed until you get soft, foamy peaks – about 2 minutes. You’ll know it’s ready when it looks like a bubbly bubble bath that holds its shape briefly when you lift the beaters.
Step 2: Gradually Add Powdered Sugar
Here’s where patience pays off! With the mixer on low speed, add the powdered sugar about 1/2 cup at a time. I usually count to 30 between additions – it prevents that dreaded powdered sugar snowstorm all over your kitchen. The mixture will thicken dramatically, so don’t panic when it starts looking like marshmallow fluff halfway through!
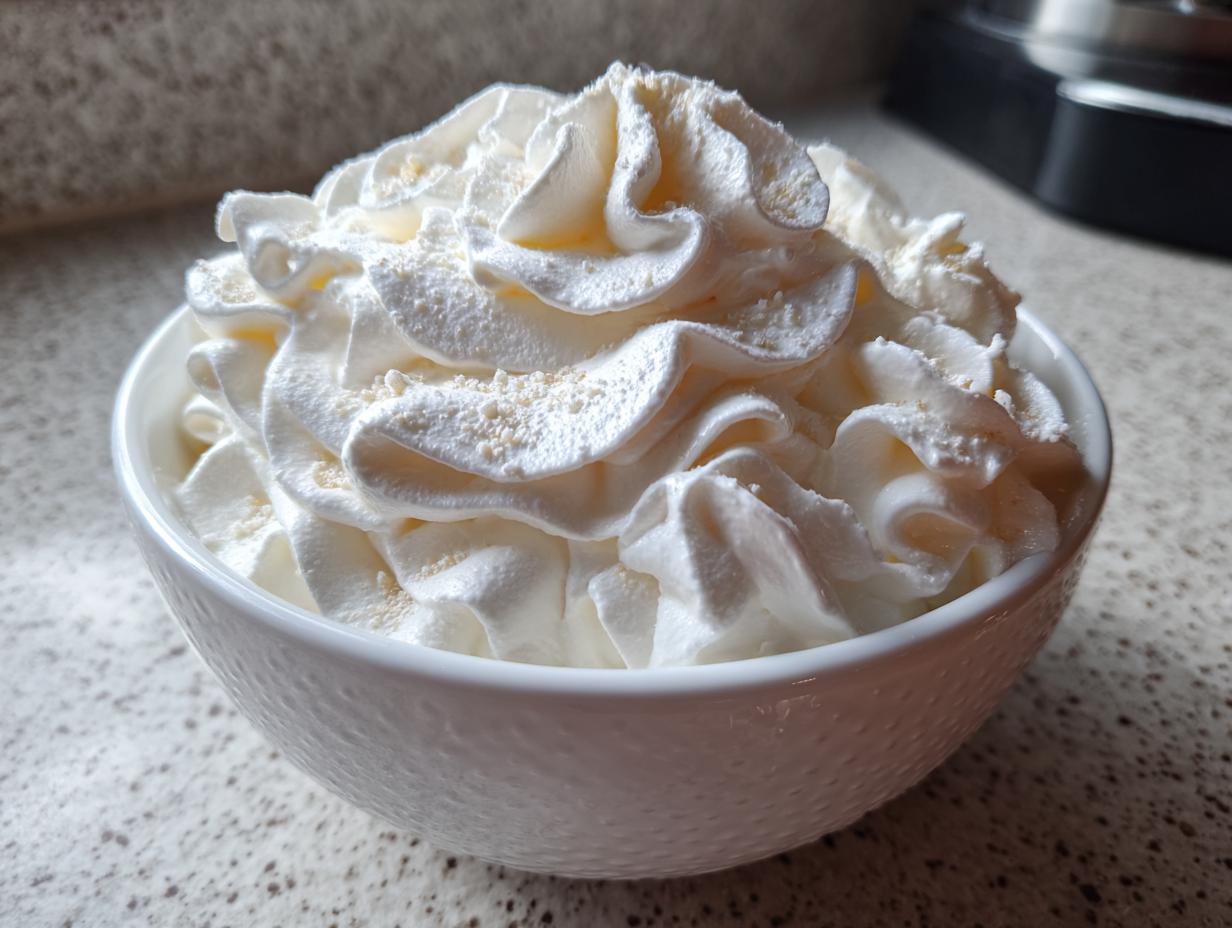
Step 3: Beat Until Stiff Peaks Form
Now crank that mixer up to medium-high and let it work for 3-4 minutes. You’re waiting for stiff peaks – when you lift the beaters, the icing should stand straight up like little snowy mountains that don’t droop at all. Pro tip: If you’re decorating in a warm kitchen, beat an extra minute – the stiffer it is, the better it holds under pressure!
Tips for Perfect Gingerbread House Icing
After years of gingerbread disasters and triumphs, I’ve learned a few tricks that make all the difference! First – always keep a damp cloth over your bowl when you’re not actively using the icing. It dries crazy fast! If it gets too thick, add water drop by drop (I use a spray bottle for control). And whatever you do, use it within an hour of making – this isn’t the kind of icing that waits around patiently! For more baking tips, check out this guide on easy cranberry jam recipe.
Storing and Reusing Gingerbread House Icing
Here’s my survival guide for leftover icing – because nobody makes the perfect amount on the first try! Scoop every last bit into an airtight container, press plastic wrap directly on the surface (this prevents crusting), and seal tight. It’ll keep for 2 days in the fridge. If it dries out, don’t panic – just beat in a few drops of warm water until it comes back to life. I’ve even revived day-old icing to fix a gingerbread chimney emergency!
Gingerbread House Icing FAQs
Can I use meringue powder instead of egg whites?
Absolutely! Swap the egg whites for 3 tablespoons meringue powder + 6 tablespoons water. It’s my go-to when baking with kids – no raw egg worries! Just mix the powder and water first, then proceed as usual.
Help! My icing is too runny – how do I fix it?
Been there! Gradually beat in more powdered sugar (1/4 cup at a time) until it holds stiff peaks. If it’s still not cooperating, let it rest 10 minutes – sometimes it just needs to think about its life choices.
How long until the icing hardens completely?
Give it 4-6 hours to fully set, but it’ll be stable enough for gentle handling after about an hour. Pro tip: Make your houses the night before decorating – the icing “glue” will be rock-solid by morning! Understanding the science behind why royal icing sets hard can be helpful; you can read more about the chemistry of sugar crystallization here.
Nutritional Information
Each tablespoon of this gingerbread house icing clocks in at about 30 calories and 7g sugar – basically fairy dust in the grand scheme of holiday treats! Remember, these are estimates – your exact counts might vary slightly depending on how generously you “test” the icing during decorating (wink!).
Share Your Gingerbread Creations
I’d love to see your gingerbread masterpieces! Snap a photo of your house and tag me – nothing makes me happier than seeing families creating sweet holiday memories together. If you need some inspiration for your next baking project, check out this recipe for easy salted caramel sauce recipe.
Print
“Unbeatable Gingerbread House Icing Recipe in Just 3 Steps”
- Total Time: 10 mins
- Yield: 2 cups 1x
- Diet: Vegetarian
Description
A simple and sturdy icing for building and decorating gingerbread houses.
Ingredients
- 3 large egg whites
- 4 cups powdered sugar
- 1/2 teaspoon cream of tartar
Instructions
- Beat egg whites and cream of tartar until frothy.
- Gradually add powdered sugar while mixing.
- Continue beating until stiff peaks form.
- Use immediately or cover with a damp cloth to prevent drying.
Notes
- Store unused icing in an airtight container.
- Add water if icing thickens too much.
- Keep covered when not in use to avoid hardening.
- Prep Time: 10 mins
- Cook Time: 0 mins
- Category: Dessert
- Method: No-Cook
- Cuisine: International
Nutrition
- Serving Size: 1 tbsp
- Calories: 30
- Sugar: 7g
- Sodium: 5mg
- Fat: 0g
- Saturated Fat: 0g
- Unsaturated Fat: 0g
- Trans Fat: 0g
- Carbohydrates: 7g
- Fiber: 0g
- Protein: 0g
- Cholesterol: 0mg