Oh my gosh, you have to try this glazed lemon bread! It’s my go-to when I need a little sunshine in my day – that perfect balance of sweet and tangy just makes my taste buds dance. I’ve been baking this recipe for years, ever since my neighbor Mrs. Thompson shared her secret with me during a summer porch visit. What I love most is how versatile it is – equally perfect with your morning coffee or as an afternoon pick-me-up.
Here’s my golden rule for this recipe: always zest your lemons before juicing them. Trust me, those bright yellow flecks of zest make all the difference in flavor! The glaze might seem simple (just powdered sugar and lemon juice), but when that citrusy sweetness soaks into the warm bread? Wow. It creates this magical crust that’s slightly crisp yet melts in your mouth. I’ve made this for baby showers, book clubs, and even just because – it never fails to disappear fast!

Why You’ll Love This Glazed Lemon Bread
This isn’t just any lemon bread – it’s my absolute favorite for so many reasons:
- Moist texture: The combo of butter and fresh lemon juice keeps every bite tender (no dry crumbs here!)
- Perfect balance: Sweet glaze meets tangy lemon zest – your taste buds won’t know whether to cheer or swoon
- Easy prep: One bowl, simple ingredients, and you’re basically done – my kind of baking!
- Versatile: Equally delicious for breakfast with tea or as a dessert with vanilla ice cream
Honestly? The hardest part is waiting for it to cool before slicing!
Ingredients for Glazed Lemon Bread
Here’s everything you’ll need to make my favorite sunshine-filled treat – measured exactly how I’ve tested it a dozen times:
- 1 1/2 cups all-purpose flour (spooned & leveled – no packing!)
- 1 teaspoon baking powder (make sure it’s fresh)
- 1/2 teaspoon salt (I use fine sea salt)
- 1/2 cup unsalted butter, softened (about 1 stick – leave it out for 30 min)
- 1 cup granulated sugar (yes, the whole cup – trust me)
- 2 large eggs (room temperature cracks better)
- 1/2 cup milk (whole milk makes it extra rich)
- 2 tablespoons lemon zest (about 2 medium lemons’ worth)
- 1/4 cup freshly squeezed lemon juice (see my trick below)
Ingredient Notes & Substitutions
Life happens – here’s how to adapt when you’re in a pinch:
- No fresh lemons? Bottled lemon juice works (3-4 tablespoons), but zest is harder to substitute – try 1/2 tsp lemon extract in the batter.
- Out of milk? Plain yogurt or buttermilk adds nice tang (same amount). Even almond milk works in a bind.
- Butter too hard? Microwave it in 5-second bursts until your finger leaves a slight indent – melted butter changes the texture.
- Want more zing? Add an extra tablespoon of zest – I often do when my lemons are particularly fragrant!

Equipment You’ll Need
Don’t worry – you don’t need any fancy gadgets for this glazed lemon bread! Here’s what I always grab from my kitchen (along with some handy alternatives if you’re improvising):
- 9×5-inch loaf pan: My trusty workhorse – if you only have an 8×4, fill it 2/3 full and bake any extra batter as muffins
- 2 mixing bowls: One for dry ingredients, one for wet (though I’ve been known to use a large measuring cup for wet when I’m feeling lazy)
- Whisk & spatula: A fork works in a pinch for whisking, but the spatula is non-negotiable for scraping every last bit of that lemony batter
- Microplane or box grater: For that perfect lemon zest – the fine holes on a cheese grater work too, just watch your knuckles!
- Cooling rack: Crucial for that glaze to set properly (if you don’t have one, prop the pan on overturned mugs works in a pinch)
My grandma used to say “Good baking comes from good tools,” but honestly? This recipe proves delicious things happen with just the basics!
How to Make Glazed Lemon Bread
Okay, let’s get baking! I’ve made this recipe so many times I could do it in my sleep, but I’ll walk you through each step carefully. The secret is in the mixing – we want tender crumbs, not tough bread!
- Prep your pan: Preheat your oven to 350°F (175°C) – no cheating here, that even heat matters! Grease your loaf pan with butter or baking spray, making sure to get into all the corners.
- Dry team: In your medium bowl, whisk together the flour, baking powder, and salt. I like to give it about 15 whisks – just until you stop seeing any flour lumps.
- Cream magic: In your larger bowl, beat the softened butter and sugar together for a good 2-3 minutes until it’s pale and fluffy. This is where the magic starts – those tiny air pockets will make your bread light!
- Egg time: Add eggs one at a time, beating well after each. Scrape down the sides – those sneaky bits of butter love to hide there!
- Lemon party: Stir in the milk, lemon zest, and lemon juice. The mixture might look a bit curdled – totally normal! The acid from the lemon juice reacts with the milk.
- Marriage of wet & dry: Gradually add the dry ingredients to the wet, mixing just until combined. I fold with a spatula at the end – overmixing makes tough bread!
- Into the oven: Pour your beautiful yellow batter into the prepared pan. Bake for 50-55 minutes until golden brown and a toothpick comes out clean. Rotate the pan halfway through for even baking.
- Cooling patience: Let it cool in the pan for 10 minutes (I know, torture!), then transfer to a wire rack. This prevents soggy bottoms!
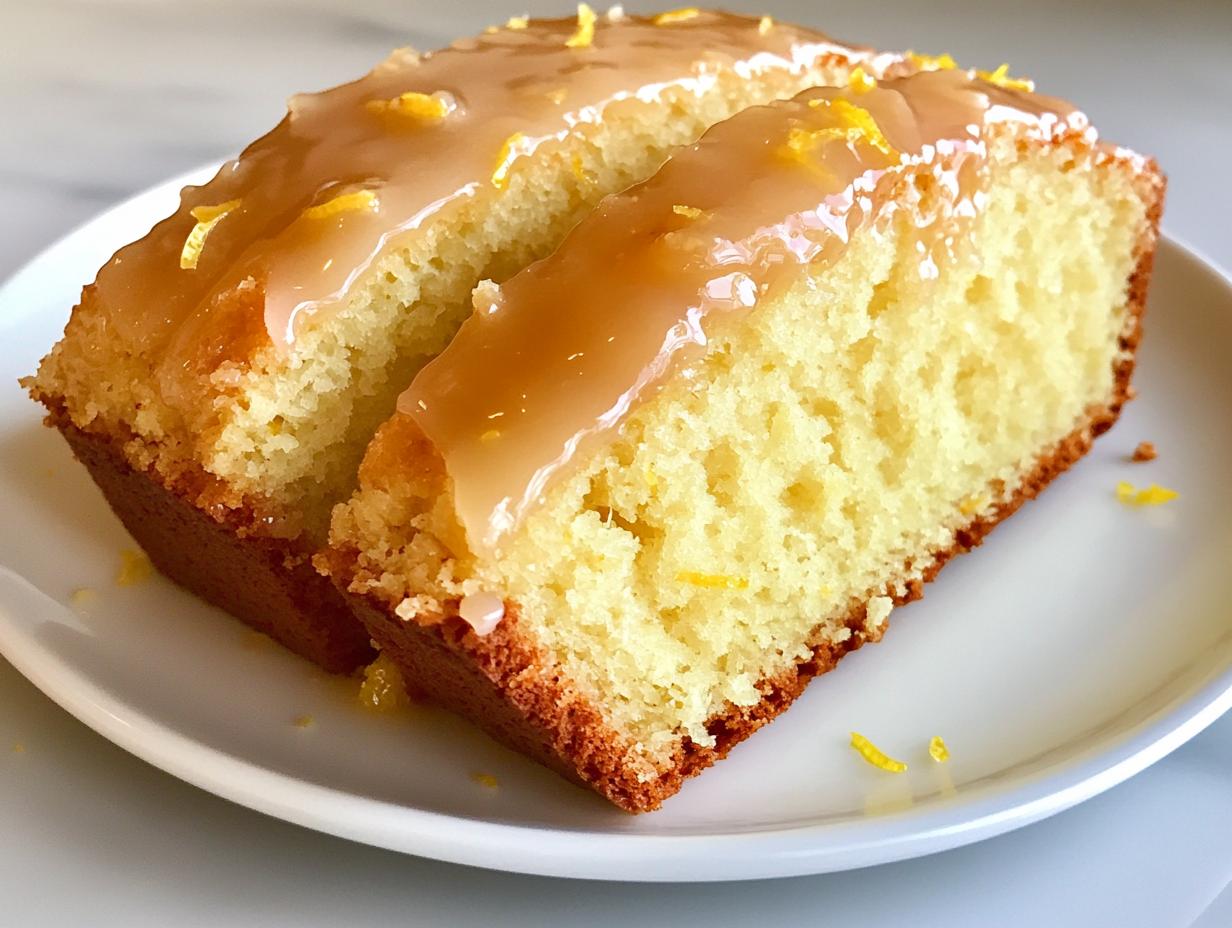
Making the Lemon Glaze
Now for the crowning glory – that sweet-tart glaze that makes this bread irresistible!
- Wait until the bread is completely cool (about 1 hour) – warm bread drinks up all the glaze too fast.
- In a small bowl, whisk together 1 cup powdered sugar and 2 tablespoons lemon juice. Start with 1 tablespoon of juice and add more gradually – you want it thick but pourable.
- Drizzle slowly back and forth across the bread with a spoon or fork. Let some drip down the sides – those crispy edges are the best part!
- Let it set for 15 minutes before slicing. The glaze forms this delicate sugary crust that cracks beautifully when you cut it.
Pro tip: If your glaze is too thin, add more powdered sugar. Too thick? A few drops of juice or water. I like mine just thick enough to slowly drip off the whisk!

Tips for Perfect Glazed Lemon Bread
After making this recipe more times than I can count (and eating all the “test batches”), I’ve learned a few tricks that take glazed lemon bread from good to “Oh my goodness, can I have the recipe?” Here are my can’t-live-without tips:
- Zest first, juice later: Always zest your lemons before juicing them – trying to zest a squeezed lemon is like wrestling a slippery fish! Those little yellow flecks pack SO much flavor. I keep a small jar of extra zest in my freezer for baking emergencies.
- The toothpick lie detector: That old toothpick test can trick you – sometimes crumbs stick even when the bread is done. I poke in a few spots and look for moist crumbs (not wet batter). The edges pulling away from the pan is another dead giveaway.
- Room temp is your friend: Cold eggs and butter don’t cream properly. If you forgot to take them out, place eggs in warm water for 5 minutes. For butter, I microwave it in 5-second bursts while singing the alphabet – stops me from overdoing it!
- Glaze timing matters: Wait until the bread is completely cool before glazing. I know it’s hard (I’ve burned my fingers testing “just how cool” it is), but warm bread absorbs the glaze instead of letting it form that perfect sugary crust.
One last secret? The bread actually tastes better the next day as the flavors meld. But let’s be real – mine never lasts that long!
Serving & Storing Glazed Lemon Bread
Oh, the best part – eating this glorious glazed lemon bread! Here’s how I like to serve it (and keep it fresh when – let’s be honest – there are actually leftovers):
Serving ideas that make it extra special:
- Warm slices straight from the microwave for 10 seconds – the glaze gets slightly melty and heavenly
- Room temperature with a dollop of whipped cream and fresh berries for a fancy-ish dessert
- Toasted lightly with butter (yes, more butter!) for breakfast – the edges get perfectly crisp
- Cut into thick slices for brunch or thin slivers with afternoon tea (my British aunt’s favorite way)
Storing your masterpiece:
- Let the glaze set completely (about 1 hour) before storing
- Tuck it into an airtight container at room temperature for up to 3 days – the lemon keeps it moist
- For longer storage, wrap unglazed bread tightly in plastic wrap, then foil, and freeze for up to 2 months (add glaze after thawing)
- Pro tip: Place a paper towel in the container to absorb any excess moisture
Fun story – I once made three loaves for a church potluck and “accidentally” forgot to bring one home. My husband still teases me about my “quality control” loaf that mysteriously disappeared from our kitchen!

Glazed Lemon Bread Nutritional Information
Now, I’m no nutritionist – I’m just a lemon bread lover who occasionally checks the labels! Here’s the estimated nutrition per slice (based on cutting the loaf into 10 generous pieces):
- Calories: About 220 (perfect for that mid-afternoon treat!)
- Sugar: 25g (mostly from that heavenly glaze we can’t resist)
- Fat: 8g (thank you, delicious butter)
- Carbs: 35g (worth every bite)
- Protein: 3g (surprisingly not bad for dessert!)
Now, let’s be real – these numbers might wiggle a bit depending on your ingredients. Did you use extra glaze like I always do? Maybe swapped in Greek yogurt? Those tiny changes add up. The important thing is enjoying every citrusy, sweet-tart bite without stressing too much!
My philosophy? A slice of this sunshine-filled bread with your morning coffee is way better than some sad “diet” muffin. Life’s too short not to enjoy the good stuff – especially when it’s homemade with love (and lots of lemon zest)! If you are looking for other citrusy baked goods, check out this recipe for easy lemon loaf cake.
Frequently Asked Questions
Q1. Can I freeze glazed lemon bread?
Absolutely! Just freeze it without the glaze. Wrap the cooled bread tightly in plastic wrap, then foil, and it’ll keep for 2 months. Thaw at room temperature, then add the glaze right before serving – tastes just-baked!
Q2. Can I use lime instead of lemon?
You bet! Lime gives a fun tropical twist – use the same amounts of zest and juice. The glaze will be slightly greener, but just as delicious. My kids call this version “lemon bread’s sassy cousin!”
Q3. Why did my bread sink in the middle?
Usually means it needed 5 more minutes baking – ovens vary! Next time, test with a toothpick near the center. If it comes out with moist crumbs (not wet batter), it’s done. Slightly underbaked bread still tastes amazing though – I call it “extra moist!”
Q4. Can I make this into muffins instead?
Yes! Fill lined muffin cups 2/3 full and bake at 350°F for 18-22 minutes. You’ll get about 12 perfect little lemon clouds. Bonus: muffins freeze beautifully and are great for lunchboxes! For another muffin option, try these lemon poppy seed muffins.
Q5. My glaze is too runny/thick – help!
No panic! Too thin? Add powdered sugar 1 tablespoon at a time. Too thick? Add lemon juice (or water) drop by drop. Aim for honey-like consistency that slowly drips off the whisk! I’ve rescued many glaze disasters this way!
Share Your Glazed Lemon Bread
Nothing makes me happier than seeing your versions of this glazed lemon bread come to life! Seriously, it makes my day when I get messages saying “I made your recipe and…” followed by all the sweet stories and kitchen adventures. Did yours turn out perfectly golden? Maybe you added a creative twist with orange zest or lavender? I want to hear all about it!
Snap a photo of your masterpiece – especially if you got that gorgeous glaze drizzle just right (we all know that’s the hardest part!). Or tell me about that moment when your kitchen filled with that incredible lemony-buttery scent. Those little baking victories are what make cooking so special. For more baking tips, you might find this article on buttery shortbread fingers helpful.
And hey – if you’ve got any brilliant tips or lessons learned from making this recipe, share those too! We’re all learning together in this delicious, flour-dusted journey. Your experience might just help another baker nail their first loaf. If you’re interested in the science behind why zest is so important, you can read more about the difference between zest and juice.
Happy baking, my fellow lemon lovers! May your bread be moist, your glaze be glossy, and your taste buds forever delighted.
Print
Irresistible Glazed Lemon Bread Recipe in 8 Easy Steps
- Total Time: 1 hour 10 minutes
- Yield: 1 loaf 1x
- Diet: Vegetarian
Description
A moist and tangy lemon bread topped with a sweet glaze. Perfect for breakfast or a snack.
Ingredients
- 1 1/2 cups all-purpose flour
- 1 teaspoon baking powder
- 1/2 teaspoon salt
- 1/2 cup unsalted butter, softened
- 1 cup granulated sugar
- 2 large eggs
- 1/2 cup milk
- 2 tablespoons lemon zest
- 1/4 cup lemon juice
- For the glaze: 1 cup powdered sugar + 2 tablespoons lemon juice
Instructions
- Preheat oven to 350°F (175°C). Grease a 9×5 inch loaf pan.
- In a bowl, whisk together flour, baking powder, and salt.
- In another bowl, beat butter and sugar until light and fluffy. Add eggs one at a time.
- Mix in milk, lemon zest, and lemon juice.
- Gradually add dry ingredients to wet ingredients until just combined.
- Pour batter into the prepared pan. Bake for 50-55 minutes or until a toothpick comes out clean.
- Cool in pan for 10 minutes, then transfer to a wire rack.
- For the glaze, whisk powdered sugar and lemon juice until smooth. Drizzle over cooled bread.
Notes
- Use fresh lemons for best flavor.
- Do not overmix the batter to keep the bread tender.
- Store leftovers in an airtight container for up to 3 days.
- Prep Time: 15 minutes
- Cook Time: 55 minutes
- Category: Dessert
- Method: Baking
- Cuisine: American
Nutrition
- Serving Size: 1 slice
- Calories: 220
- Sugar: 25g
- Sodium: 120mg
- Fat: 8g
- Saturated Fat: 5g
- Unsaturated Fat: 2g
- Trans Fat: 0g
- Carbohydrates: 35g
- Fiber: 1g
- Protein: 3g
- Cholesterol: 45mg