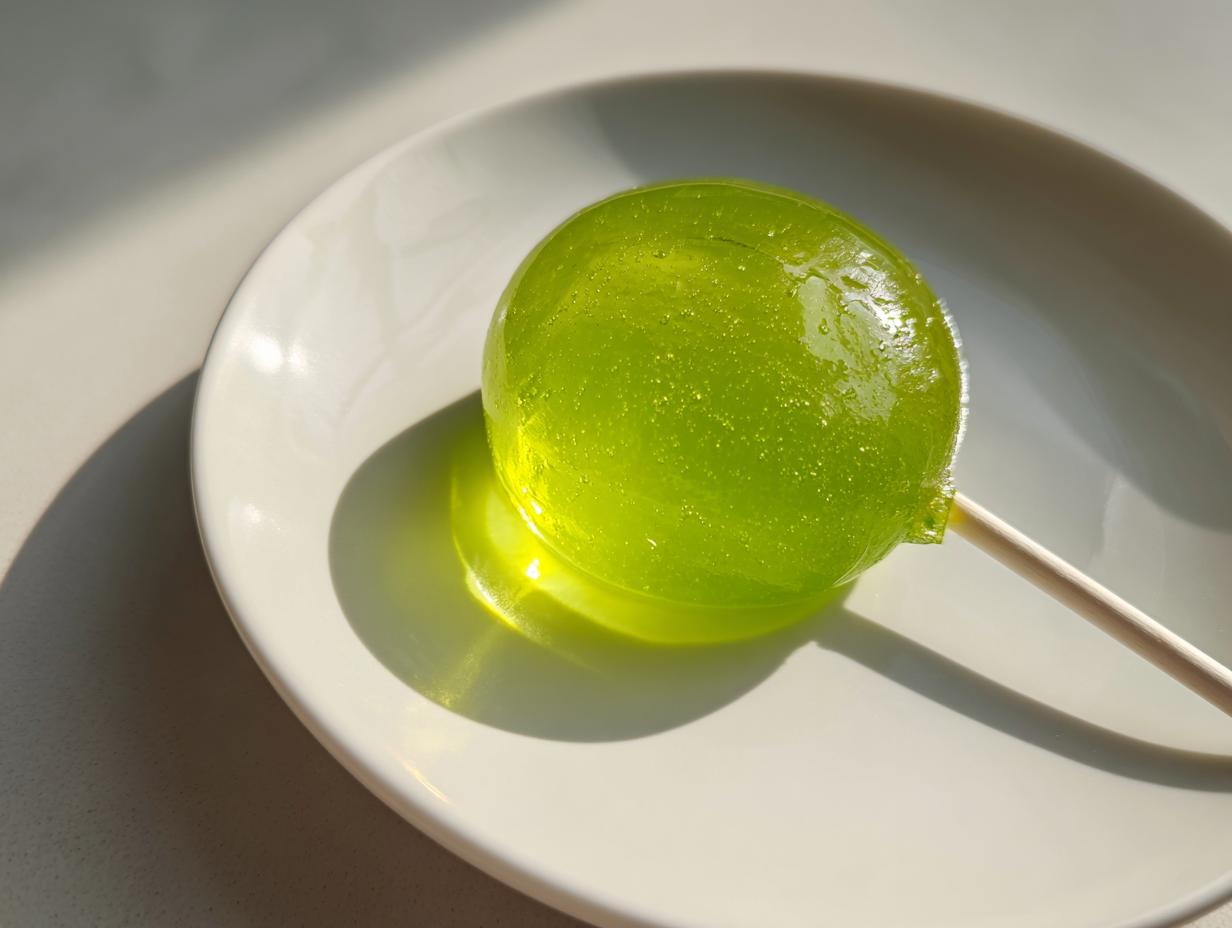
Who says candy can’t be magical? The first time I made glow-in-the-dark lollipops for my niece’s birthday party, you should’ve seen the kids’ faces light up (just like the lollies!) when we turned off the lights. That edible glow powder? Total game changer. It’s not just fun – it’s completely safe to eat, which makes these homemade treats perfect for birthdays, sleepovers, or just when you want to add some sparkle to movie night. Trust me, once you see how easy these are to make (and how cool they look glowing on the kitchen counter at midnight), you’ll be hooked just like I was!
Why You’ll Love These Glow-in-the-Dark Lollipops
Okay, real talk – these aren’t your average candies. Here’s why they’re about to become your new favorite kitchen project:
- Party magic in every bite: I’ve never seen kids (or adults!) get so excited about candy. The moment those lights go off and the glowing starts? Pure magic.
- Easier than you’d think: If you can boil water, you can make these. Seriously – just sugar, corn syrup, and that amazing glow powder does all the hard work for you.
- Totally safe glow: The special powder we use is 100% food-grade and edible. No weird chemicals – just fun that’s actually okay to eat.
- Customizable colors: Want purple glow pops? Pink? Rainbow? Add a few drops of food coloring and suddenly you’ve got a whole glowing candy rainbow.
- Perfect for gifts: Wrap these in cellophane with a cute ribbon and you’ve got the most memorable party favors ever. Trust me, nobody forgets the person who gave them glowing candy.
- Midnight snack with benefits: There’s something ridiculously fun about sneaking into the kitchen at night to grab a lollipop that lights up your whole face. Not that I’d know anything about that…
Ingredients for Glow-in-the-Dark Lollipops
Here’s the magical shopping list for your glowing candy adventure. I’ve learned through trial and error (and maybe one slightly failed batch) that these exact measurements create the perfect pop:
- 1 cup granulated sugar – Regular white sugar works beautifully here. Don’t be tempted to reduce it – this is candy, after all!
- 1/2 cup water – Just plain tap water is fine. No need for anything fancy.
- 1/3 cup light corn syrup – This keeps the sugar from crystallizing. I know some folks want to skip it, but trust me, it makes all the difference in texture.
- 1/4 teaspoon edible glow powder – This is the STAR of the show! Must be food-grade – I get mine from a specialty baking shop. The label should clearly say it’s safe for consumption.
- Food coloring (optional) – A few drops of liquid food coloring if you want colorful pops. Gel colors work too, but they’re trickier to mix in evenly.
- Lollipop sticks – You can find these at any craft store. Wooden ones work best in my experience.
- Candy thermometer – Non-negotiable. Trying to guess the temperature is how I ended up with my first batch of sticky disappointment.
Quick safety note: That glow powder MUST say “edible” and “food-grade” on the packaging. Regular glow powder isn’t safe to eat – learned that the hard way when I had to toss my first experimental batch. Now I always double-check before buying!
Equipment Needed for Glow-in-the-Dark Lollipops
You won’t need any fancy gadgets for these glowing treats – just a few basic kitchen tools that you probably already have. Here’s my go-to setup that never lets me down:
- Medium saucepan – Nothing too big, about 2-quart size is perfect. I use my trusty stainless steel one – the sugar mixture can get sticky, so nonstick isn’t necessary (but makes cleanup easier if you have it).
- Candy thermometer – My #1 must-have! That 300°F mark is crucial, and guessing just doesn’t cut it. Clip it to the side of your pan so you can monitor constantly.
- Lollipop molds OR baking sheet – Either works! I love silicone molds for perfect round pops, but a parchment-lined baking sheet lets you make fun free-form shapes too.
- Wooden spoon or heat-resistant spatula – For stirring that molten sugar mixture. Metal spoons get too hot, and plastic might melt – learned that lesson the hard way!
- Small bowls & measuring cups – For prepping your glow powder and any food coloring additions. I like to have everything measured and ready before I start cooking.
Pro tip from my many candy-making adventures: Keep a bowl of ice water nearby just in case of sugar burns. That syrup gets HOT, and trust me, you don’t want to learn about that the hard way like I did!
How to Make Glow-in-the-Dark Lollipops
Okay, let’s get to the fun part! Making these glowing beauties is easier than you think – just follow these steps exactly, and you’ll be amazed at what comes out of your kitchen. I’ve made every mistake possible so you don’t have to!
Preparing the Sugar Mixture
First things first – get your candy thermometer clipped to the side of your saucepan. Trust me, you’ll want both hands free for this part. Combine the sugar, water, and corn syrup in the pan, stirring just until everything looks wet. No need to mix it perfectly – we’re not making cake here!
Turn the heat to medium (not high – patience is key!) and resist the urge to stir constantly. Just give it an occasional gentle swirl until the sugar dissolves completely. This usually takes about 5 minutes. Now comes the waiting game – let that mixture bubble away until it hits exactly 300°F on your thermometer. This is the hard crack stage, and it’s what gives your lollipops that perfect snap. Expect this to take about 15-20 minutes total from start to finish.
Safety tip: Hot sugar is no joke! Keep kids and pets away during this part, and whatever you do, don’t stick your finger in to test it (yes, I learned this the painful way).
Adding the Glow Effect
Once your thermometer hits 300°F, immediately remove the pan from heat. Here’s where the magic happens! Quickly but carefully stir in your edible glow powder – I like to sprinkle it in gradually while stirring to prevent clumps. If you’re using food coloring, add a few drops now too.
The mixture will be crazy hot (like, lava hot), so work fast but carefully. Stir just until everything’s evenly combined – about 30 seconds max. Don’t keep stirring or the sugar might start to crystallize. And whatever you do, don’t put it back on the heat after adding the glow powder! High temps can actually reduce the glowing effect.
Pro tip: Have all your add-ins measured and ready before you start cooking. You’ll need to move quickly at this stage!
Shaping and Cooling the Lollipops
Now for the fun part! Working quickly (but carefully – that sugar is still dangerously hot), pour the mixture into your prepared molds or onto a parchment-lined baking sheet. If you’re going free-form, pour small circles about 2 inches across. Immediately insert your lollipop sticks, giving each one a little twist to make sure it’s securely embedded in the candy.

Let your creations cool completely at room temperature – no cheating with the fridge! This usually takes about 30 minutes. You’ll know they’re ready when they’re completely hard to the touch. The glow effect gets stronger as they cool completely, so resist the urge to test them early!
Once cooled, gently pop them out of molds or peel them off the parchment. Store in an airtight container until you’re ready to light up someone’s face (literally). The first time you turn off the lights and see those pops glowing? Pure magic, my friend. Pure magic.
Tips for Perfect Glow-in-the-Dark Lollipops
After making more batches of these glowing pops than I can count (some successful, some… not so much), I’ve learned all the tricks to guarantee perfect results every time. Here are my hard-won secrets:
- Move like lightning with hot sugar: That molten sugar mixture waits for no one! Have all your tools ready and work fast once it hits 300°F. I keep everything measured out in little bowls right next to the stove – glow powder, sticks, molds – so I’m not scrambling when the timer dings.
- Patience pays with cooling: I know it’s tempting to peek early, but let those pops cool completely at room temp. Rushing this step means weaker glow power. I set a timer for 30 minutes and walk away – no peeking!
- Quality glow powder matters: Not all edible glow powders are created equal. Splurge on the good stuff from reputable baking suppliers. The cheap stuff I tried once barely glowed and tasted chalky. My current favorite brand? Lights up the whole kitchen!
- Store them right: Keep your glowing treasures in an airtight container at room temp. Humidity is the enemy here – I learned this when my first batch turned sticky overnight. A ziplock bag with all the air squeezed out works in a pinch too.
- Darkness makes the magic: These pops glow brightest in complete darkness. Turn off all the lights and close the curtains for maximum wow factor. Watching kids’ faces light up brighter than the candy? Priceless.
Bonus trick I stumbled upon: Charge them under bright light for 30 seconds before serving – they’ll glow even more intensely. Who knew my kitchen flashlight would become my secret candy-making tool?
Storing and Serving Glow-in-the-Dark Lollipops
Okay, you’ve made these gorgeous glowing pops – now let’s talk about keeping them perfect until showtime! I learned the hard way that storage makes all the difference between “wow!” and “what happened?” Here’s everything I’ve figured out over countless batches:
Airtight is everything: These babies hate humidity! I store mine in glass jars with tight lids or gallon-sized ziplock bags with all the air squeezed out. That one time I left them uncovered overnight? Woke up to sticky, sad lollipops that had lost their magical glow. Not making that mistake again!
Room temp sweet spot: The fridge might seem tempting, but it actually makes the sugar sweat and ruins the texture. I keep mine in a cool, dark cupboard – just like Grandma stored her hard candies. They’ll stay perfect this way for about 2 weeks, though let’s be honest – they never last that long in my house!
Serving with maximum impact: Here’s my pro move – wait until you’re in a completely dark room before revealing them. I turn off all the lights, close the curtains, and let everyone’s eyes adjust first. Then BOOM – hand out those glowing pops and watch the magic happen. The first time I did this at my nephew’s birthday party? Kids were screaming (the good kind) and parents were asking for the recipe!
Recharging the glow: If your pops have been stored a while, just hold them under a bright light for 30 seconds before serving. It’s like giving them a fresh battery! My kitchen flashlight has become my secret weapon for instant glow power when we have surprise guests.
One last tip from my many candy experiments: Wrap extras in cellophane bags with ribbon for the cutest (and most memorable) party favors. I’ve had friends tell me years later that they still remember the glowing lollipops I gave out at my Halloween party – now that’s what I call a sweet success!

Glow-in-the-Dark Lollipops FAQs
I get asked the same excited questions every time I make these glowing treats – here’s everything you need to know from all my trial-and-error experiments!
Q1. Is the glow powder really safe to eat?
Absolutely! But ONLY if it’s specifically labeled as “edible” and “food-grade.” Regular craft glow powder is NOT safe for consumption. I learned this the hard way with my first failed batch. Now I only buy from reputable baking suppliers who clearly state it’s FDA-approved. The brand I use actually tastes slightly sweet and disappears completely into the candy.
Q2. How long does the glow effect last?
Here’s the cool part – the glow is rechargeable! In complete darkness, they’ll shine brightly for about 30 minutes after being exposed to light. The effect does fade over time with storage, but just hold them under a bright light for 30 seconds and they’ll glow like new. I’ve had pops stored for weeks that still light up beautifully after a quick “recharge.”
Q3. Can I use natural food coloring?
You can, but with a warning – natural colors (like beet powder or spirulina) might dull the glow effect slightly. I’ve had the best results with regular liquid food coloring since it’s more concentrated. If you do go natural, use powder forms rather than liquid extracts, and add just a tiny bit at a time until you get the color you want.
Q4. Why did my lollipops turn out sticky?
Ah, the sticky pop dilemma! This usually happens if either: 1) The sugar mixture didn’t reach the full 300°F hard crack stage, or 2) They were stored in humid conditions. My first humid summer batch taught me this lesson – now I always use airtight containers with silica gel packs if the weather’s muggy.
Q5. Can kids help make these?
I love getting kids involved – but only with the safe parts! They can help measure ingredients, add food coloring (once the pan is off heat), and place the lollipop sticks. The actual cooking part? Adults only. That molten sugar is no joke – I keep my kitchen strictly off-limits to little hands until everything’s completely cooled.
Nutritional Information for Glow-in-the-Dark Lollipops
Okay, let’s be real – we’re not making health food here! But if you’re curious about what’s in these glowing goodies (or need to satisfy that one friend who always asks), here’s the scoop based on my calculations. Remember, these are estimates – your exact numbers might vary slightly depending on your specific ingredients.
Per lollipop (about 1.5 inches diameter):
- Calories: 80
- Sugar: 20g
- Sodium: 5mg
- Fat: 0g
- Carbohydrates: 21g
- Protein: 0g
The glow powder adds negligible nutritional impact – we’re talking about a quarter teaspoon distributed across a whole batch! Most of what you’re getting is pure sugar magic (literally).
Important note: These values don’t account for any optional additions like food coloring or flavor extracts. If you’re watching specific dietary needs, definitely check your exact ingredient labels. But let’s be honest – when you’re eating candy that glows in the dark, nutritional info is probably not your top concern!
Pro tip from my experience: If you’re serving these at parties, I like to include a little “fun facts” card with the nutritional info – something like “Warning: May cause uncontrollable smiling and midnight glow sessions!” Because let’s face it, the real magic isn’t in the calories – it’s in those wide-eyed reactions when the lights go out.


Magical Glow-in-the-Dark Lollipops with 300°F Sweet Surprise
- Total Time: 30 mins
- Yield: 12 lollipops 1x
- Diet: Vegetarian
Description
Make your own glow-in-the-dark lollipops using edible glow powder for a fun and unique treat.
Ingredients
- 1 cup sugar
- 1/2 cup water
- 1/3 cup light corn syrup
- 1/4 teaspoon edible glow powder
- Food coloring (optional)
- Lollipop sticks
- Candy thermometer
Instructions
- Combine sugar, water, and corn syrup in a saucepan.
- Heat the mixture over medium heat until it reaches 300°F on a candy thermometer.
- Remove from heat and stir in the edible glow powder.
- Add food coloring if desired.
- Pour the mixture into lollipop molds or onto a prepared baking sheet.
- Insert lollipop sticks and let cool completely.
Notes
- Store in an airtight container.
- Glow effect works best in complete darkness.
- Use edible glow powder approved for human consumption.
- Prep Time: 10 mins
- Cook Time: 20 mins
- Category: Dessert
- Method: Stovetop
- Cuisine: American
Nutrition
- Serving Size: 1 lollipop
- Calories: 80
- Sugar: 20g
- Sodium: 5mg
- Fat: 0g
- Saturated Fat: 0g
- Unsaturated Fat: 0g
- Trans Fat: 0g
- Carbohydrates: 21g
- Fiber: 0g
- Protein: 0g
- Cholesterol: 0mg