Let me tell you a little secret—these gluten-free brownies are so rich and fudgy, no one will ever guess they’re missing the gluten! I stumbled onto this recipe after one too many dry, crumbly attempts at baking without regular flour, and let me tell you, this one’s a keeper. The texture is just right—chewy on the outside, melt-in-your-mouth soft in the middle. And the best part? They come together in no time, with simple ingredients you probably already have in your pantry. Whether you’re gluten-free by choice or necessity, these brownies will make you forget all about the traditional versions. Trust me, your taste buds are in for a treat!
Why You’ll Love These Gluten-Free Brownies
Let me count the ways these brownies will steal your heart! First off, they’re everything a brownie should be—rich, fudgy, and downright decadent. But here’s the kicker: they’re gluten-free without tasting like it. No weird aftertaste, no sad crumbly texture. Just pure chocolate bliss.

Fudgy and Decadent
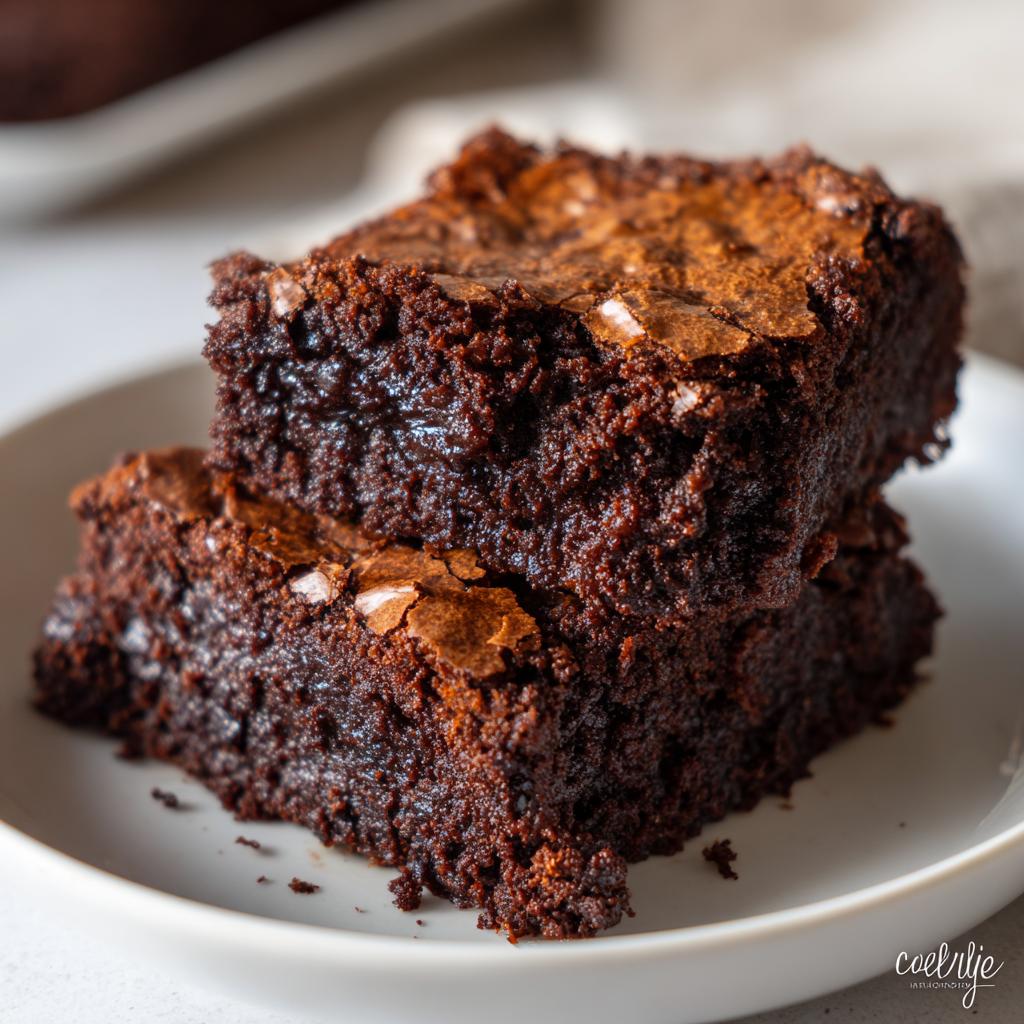
The secret? A perfect balance of melted butter and cocoa powder that creates that dreamy, melt-in-your-mouth texture. I swear, these brownies are so indulgent, you’ll forget they’re gluten-free. The edges get just slightly crisp, while the center stays gloriously gooey—exactly how brownies should be!
Quick and Simple
From bowl to oven in under 10 minutes—that’s my kind of baking! No fancy equipment needed, just a couple bowls and a spoon. Even my kids can whip these up (and believe me, they do—often). The batter comes together faster than you can preheat the oven.
Perfect for Any Occasion
Birthday party? Potluck? Midnight snack? These brownies fit every scenario. I’ve brought them to countless gatherings where they disappear before the gluten-full desserts. Pro tip: warm them slightly and add a scoop of vanilla ice cream for instant crowd-pleasing magic.
Ingredients for Gluten-Free Brownies
Gather these simple ingredients—you might already have most of them! The key here is using a good gluten-free flour blend (I swear by Bob’s Red Mill 1-to-1) for that perfect texture. And don’t skimp on the cocoa powder—quality makes all the difference.
Dry Ingredients
- 1 cup gluten-free flour blend (make sure it includes xanthan gum!)
- 1/2 cup unsweetened cocoa powder (I use the darkest I can find)
- 1/2 teaspoon fine sea salt (brings out the chocolate flavor)
- 1/2 teaspoon baking powder (just a little lift)
Wet Ingredients
- 3/4 cup unsalted butter, melted (and slightly cooled)
- 1 1/2 cups granulated sugar (yes, it’s a lot—this is dessert!)
- 2 large eggs (room temperature blends better)
- 1 teaspoon pure vanilla extract (the real stuff, please)

See? Nothing fancy! Just pantry staples that transform into something magical. Now let’s make some brownies!
How to Make Gluten-Free Brownies
Ready to whip up the easiest, fudgiest gluten-free brownies ever? Follow these simple steps—I promise, even beginner bakers can nail this recipe. Just don’t skip the cooling step (I know it’s hard to wait, but it’s crucial!).
Preheat and Prep
First things first: preheat your oven to 350°F (175°C). While it’s heating up, grab an 8×8-inch baking pan and grease it generously with butter or line it with parchment paper (my cheat for easy removal). Pro tip: If you love crispy edges, use a metal pan; for softer brownies, go with glass.
Mix Dry Ingredients
In a medium bowl, whisk together:
- 1 cup gluten-free flour blend
- 1/2 cup cocoa powder
- 1/2 teaspoon salt
- 1/2 teaspoon baking powder
Whisk until no lumps remain—this ensures your brownies won’t have weird flour pockets. Set aside.
Blend Wet Ingredients
In a large bowl, combine:
- 3/4 cup melted butter (cooled slightly so it doesn’t cook the eggs!)
- 1 1/2 cups sugar
Stir vigorously for about a minute until glossy. Then add:
- 2 eggs (one at a time, mixing well after each)
- 1 teaspoon vanilla extract
The mixture should look smooth and slightly thickened.
Combine and Bake
Now, gently fold the dry ingredients into the wet mixture. Stir just until combined—overmixing makes tough brownies! The batter will be thick and luxurious. Pour it into your prepared pan, smoothing the top with a spatula. Bake for 20-25 minutes. Start checking at 20 minutes: the edges should pull away slightly, and a toothpick inserted 1 inch from the edge should come out with moist crumbs (not wet batter).
Cool and Serve
Here’s the hardest part: let the brownies cool completely in the pan (about 1 hour) before slicing. I know, the aroma is torture, but cutting too soon causes messy crumbles! For picture-perfect squares, chill them for 10 minutes first. Then devour—or share, if you’re feeling generous.

Tips for Perfect Gluten-Free Brownies
Want bakery-worthy brownies every single time? These little tricks make all the difference—trust me, I’ve learned the hard way! Whether you’re new to gluten-free baking or a seasoned pro, these tips will take your brownies from good to “oh-my-gosh-can-I-have-the-recipe?” amazing.
Avoid Overbaking
Here’s the golden rule: pull them out before you think they’re done. The edges should be set, but the center should still look slightly underbaked (a toothpick should have moist crumbs, not clean). They’ll keep cooking as they cool, giving you that dreamy fudgy texture. Overbaking turns them cakey—and nobody wants that!
Use Quality Cocoa
Not all cocoa powders are created equal! Splurge on a good dark cocoa powder—it makes the flavor deep and rich, not just sweet. My go-to is Dutch-processed for that intense chocolate kick. And please, skip the “hot cocoa mix” stuff—it’s loaded with sugar and won’t give you the same decadent result.
Ingredient Substitutions
No need to panic if you’re missing an ingredient—I’ve tested countless swaps to keep these brownies foolproof. Gluten-free baking can be flexible if you know the right tweaks! Here are my go-to substitutions that still deliver that rich, fudgy goodness we all crave.
Flour Options
Not all gluten-free flours behave the same, but my top pick is a 1:1 baking blend (like Bob’s Red Mill or King Arthur). Almond flour works too, but it’ll make denser brownies—reduce the butter by 2 tablespoons to compensate. For nut-free folks, try oat flour (just make sure it’s certified gluten-free!). Whatever you use, sift it first to avoid grittiness.
Sweetener Swaps
Ran out of sugar? Coconut sugar works 1:1 and adds a caramel note, or use 3/4 cup maple syrup (reduce butter by 1/4 cup since it’s liquid). For a lower-glycemic option, monk fruit sweetener blends beautifully—just check the package for conversion ratios. Avoid honey though; it makes the texture too sticky. And hey, if you’re feeling wild, toss in a handful of chocolate chips for extra indulgence!
Serving Suggestions
Oh, the possibilities! These brownies shine all on their own, but here’s how I love to dress them up: warm them slightly and top with a scoop of vanilla ice cream for that classic brownie sundae. Fresh raspberries cut through the richness beautifully, or drizzle with melted peanut butter for that salty-sweet punch my family goes crazy for. For parties, I’ll dust them with powdered sugar or arrange them on a platter with a bowl of whipped cream for dipping. Honestly though? They rarely last long enough to get fancy!
Storing and Reheating Gluten-Free Brownies
These brownies stay wonderfully moist if you store them right! Let them cool completely, then keep them in an airtight container at room temperature for up to 3 days (though good luck making them last that long). For longer storage, freeze them in a single layer—just pop a frozen square in the microwave for 15 seconds and it’ll taste fresh-baked. Pro tip: Slide a slice of bread into the container to keep them extra soft—the brownies will steal just enough moisture without getting soggy!
Nutritional Information
Okay, let’s be real—these are brownies, not health food! But for those keeping track, here’s the scoop per generous square (based on cutting the pan into 12 pieces): about 180 calories, 9g fat (5g saturated), and 25g carbs with 2g fiber. The sugar content is what you’d expect from a proper dessert (18g per serving), so maybe don’t eat the whole pan in one sitting—though I won’t judge if you do! Remember, these numbers can vary based on your exact ingredients and portion sizes.
Frequently Asked Questions
Q1. Can I use regular flour instead of gluten-free flour?
Technically yes, but then they wouldn’t be gluten-free brownies, would they? The gluten-free flour blend (with xanthan gum!) gives these brownies their perfect texture—regular flour would make them too dense. If you must substitute, reduce the amount by 2 tablespoons since gluten-free flours absorb more liquid. But honestly? Try them as written first—you might convert to gluten-free baking after one bite!
Q2. How do I keep my gluten-free brownies from drying out?
Two words: don’t overbake! Pull them out when the center still looks slightly underdone. Storing them properly helps too—keep them in an airtight container with a slice of bread (sounds weird, works magic). The bread gives up its moisture to the brownies without making them soggy. They’ll stay fudgy for days!
Q3. Can I freeze these brownies?
Absolutely! These freeze like a dream—I always stash a few for emergencies. Let them cool completely, then wrap individually in plastic wrap before freezing in a zip-top bag. When that chocolate craving hits, microwave a frozen square for 15-20 seconds or let it thaw at room temperature. Pro tip: freeze them already cut so you can grab just one… or five.

Irresistible Gluten-Free Brownies in Just 25 Minutes
- Total Time: 35 minutes
- Yield: 12 brownies 1x
- Diet: Gluten Free
Description
Delicious gluten-free brownies that are rich, fudgy, and easy to make.
Ingredients
- 1 cup gluten-free flour
- 1/2 cup cocoa powder
- 1/2 teaspoon salt
- 1/2 teaspoon baking powder
- 3/4 cup melted butter
- 1 1/2 cups sugar
- 2 eggs
- 1 teaspoon vanilla extract
Instructions
- Preheat your oven to 350°F (175°C). Grease a baking pan.
- Mix gluten-free flour, cocoa powder, salt, and baking powder in a bowl.
- In another bowl, combine melted butter and sugar. Stir well.
- Add eggs and vanilla extract to the butter mixture. Mix until smooth.
- Gradually fold in the dry ingredients. Stir until combined.
- Pour the batter into the greased pan and spread evenly.
- Bake for 20-25 minutes or until a toothpick comes out clean.
- Let cool before slicing and serving.
Notes
- Use a gluten-free flour blend for best results.
- Do not overbake to keep them fudgy.
- Store in an airtight container for up to 3 days.
- Prep Time: 10 minutes
- Cook Time: 25 minutes
- Category: Dessert
- Method: Baking
- Cuisine: American
Nutrition
- Serving Size: 1 brownie
- Calories: 180
- Sugar: 18g
- Sodium: 120mg
- Fat: 9g
- Saturated Fat: 5g
- Unsaturated Fat: 3g
- Trans Fat: 0g
- Carbohydrates: 25g
- Fiber: 2g
- Protein: 2g
- Cholesterol: 45mg