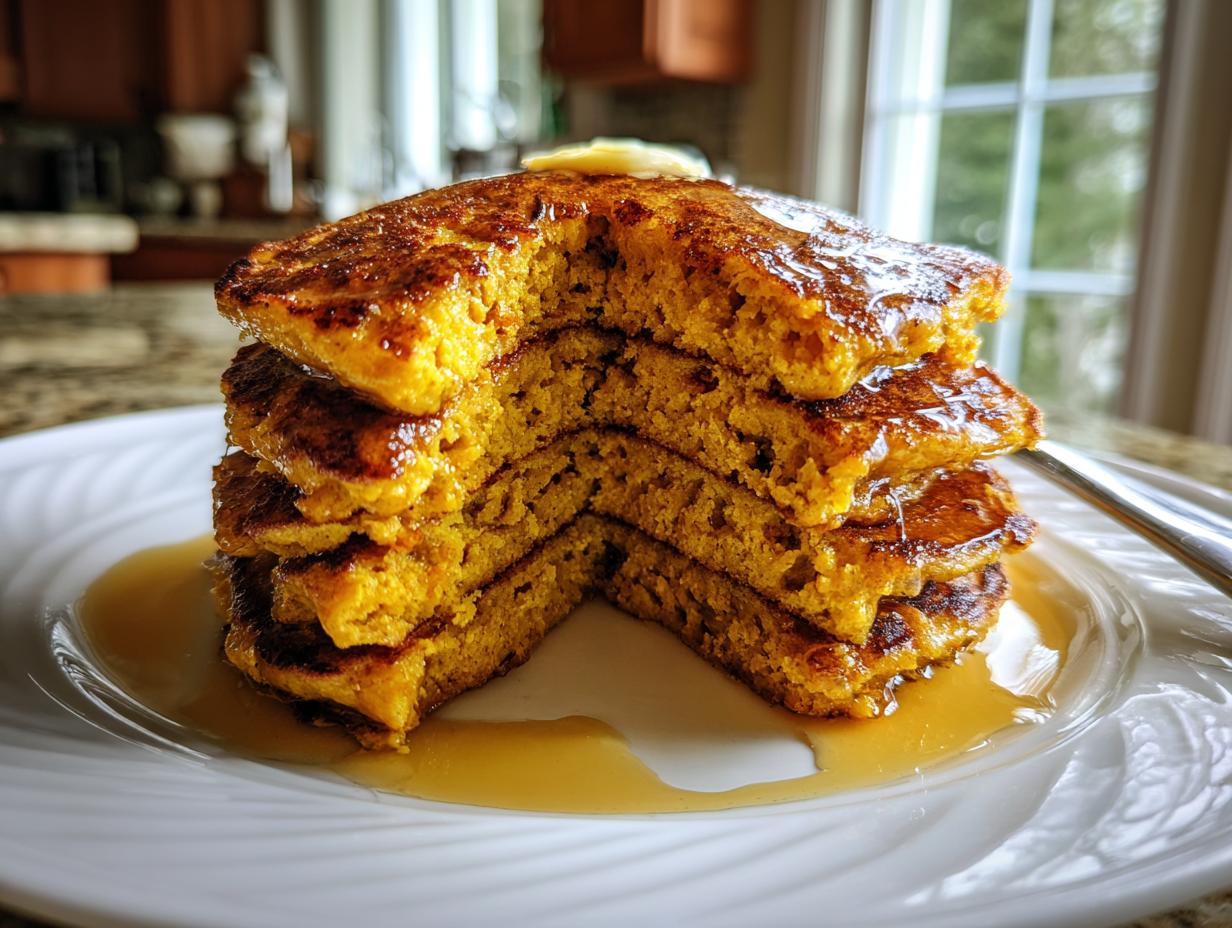
Oh my goodness, gluten-free pumpkin pancakes might just be my favorite way to welcome fall mornings! I’ve spent years perfecting this recipe after my sister went gluten-free, and let me tell you – these pancakes are so fluffy and flavorful, no one will guess they’re gluten-free. The secret? A blend of warm spices and real pumpkin puree that makes every bite taste like autumn in a pan.
I remember my first disastrous attempt at gluten-free pancakes – they came out dense and gummy. But after countless test batches (my family got very tired of pancakes for a while!), I cracked the code. These babies have that perfect golden exterior with a tender interior that’s neither too heavy nor too crumbly. The pumpkin keeps them moist while adding that rich, earthy sweetness we all crave when the leaves start turning.
What I love most is how these gluten-free pumpkin pancakes make everyone feel included at the breakfast table. Whether you’re gluten-sensitive or just craving seasonal flavors, this recipe delivers comfort food magic in every stack. Trust me, once you try them with a drizzle of maple syrup, you’ll be hooked!
Ingredients for Gluten-Free Pumpkin Pancakes
Alright, let’s gather our ingredients – this is where the magic starts! I’ve learned through trial and error that measuring carefully makes all the difference with gluten-free baking. Don’t worry, everything here is easy to find at any grocery store. Just promise me you’ll use measuring cups and spoons – no eyeballing!
Dry Ingredients
First up, the dry team – these are your foundation:
- 1 cup gluten-free flour blend (look for one with xanthan gum already in it – trust me, it matters)
- 2 tsp baking powder (make sure it’s fresh – give the can a sniff test)
- 1/2 tsp salt (I use fine sea salt)
- 1 tsp pumpkin pie spice (or make your own blend if you’re feeling fancy)
Wet Ingredients
Now for the good stuff that makes these pancakes moist and flavorful:
- 1/2 cup pumpkin puree (not pumpkin pie filling – big difference!)
- 1 large egg (room temperature works best for even mixing)
- 1 cup milk of choice (I use almond, but any milk works)
- 2 tbsp pure maple syrup (the real stuff, please!)
- 1 tbsp vegetable oil (or melted coconut oil if you prefer)
- 1 tsp vanilla extract (the good quality kind makes all the difference)
You’ll also need about 1/4 cup batter per pancake when cooking – I use an ice cream scoop for perfect portions every time!
How to Make Gluten-Free Pumpkin Pancakes
Okay, let’s get cooking! I’ve burned my fair share of pancakes over the years (who hasn’t?), so I’ll walk you through every step to make sure yours come out perfect. The key is getting your skillet ready while you mix – multitasking at its finest!
Mixing the Batter
First things first – grab two bowls. In the bigger one, whisk together all your dry ingredients until they’re completely combined. No flour lumps allowed! This ensures your baking powder gets evenly distributed so every pancake rises beautifully.
In the second bowl, whisk together all the wet ingredients – pumpkin puree, egg, milk, maple syrup, oil, and vanilla. Get it nice and smooth. Now here’s the important part: pour the wet mixture into the dry ingredients and stir gently. I mean it – gentle! Overmixing is the enemy of fluffy pancakes. A few lumps are totally fine – they’ll work themselves out while cooking.
Cooking the Pancakes
While you were mixing, your skillet should have been heating over medium heat. Test it by flicking a few drops of water – if they sizzle, you’re golden! Lightly grease the pan with butter or oil (I use a paper towel to wipe excess).
Now scoop about 1/4 cup batter per pancake onto the skillet. Watch for bubbles forming on the surface – that’s your cue to flip! Usually takes about 2-3 minutes. The edges should look set, and the bottom golden brown. Flip carefully (I use a thin spatula) and cook the other side for another minute or two until cooked through.
Pro tip: Keep finished pancakes warm in a 200°F oven while you cook the rest. And don’t press them down with the spatula – we want them fluffy, not flat!
Why You’ll Love These Gluten-Free Pumpkin Pancakes
Oh, where do I even start? These pumpkin pancakes have become my go-to for so many reasons – and I know you’ll adore them just as much as my family does. Let me count the ways:
- That perfect fluffy texture – After years of gluten-free baking fails, I finally nailed it! The combination of the right flour blend and pumpkin puree creates pancakes so light and tender, you’ll swear they’re “regular.” No more dense, gummy disasters!
- Easy to customize – Add chocolate chips for the kids, chopped pecans for crunch, or even a swirl of peanut butter if you’re feeling wild. The base recipe is like a blank canvas for your breakfast creativity.
- Pure pumpkin spice magic – That warm, cozy flavor just screams fall morning. The spices mingle with real pumpkin so beautifully – way better than any store-bought pancake mix could ever be.
- Everyone can enjoy them – Whether you’re gluten-free by necessity or choice, these pancakes mean no one gets left out at brunch. I’ve served them to skeptical pancake traditionalists who couldn’t tell the difference (don’t tell them my secret!).
Seriously, once you taste that first bite of golden, spice-kissed goodness, you’ll understand why I make triple batches every weekend. They’re that good!
Tips for Perfect Gluten-Free Pumpkin Pancakes
Listen, I’ve made every gluten-free pancake mistake in the book so you don’t have to! Here are my hard-earned secrets for pumpkin pancake perfection every single time:
Xanthan gum is your best friend
That little bit of magic in your gluten-free flour blend matters more than you’d think. If your blend doesn’t include it already, add about 1/4 teaspoon per cup of flour. It mimics gluten’s binding properties and keeps your pancakes from falling apart when you flip them. I learned this the hard way after a disastrous pancake flip that looked more like scrambled eggs!
Milk consistency makes all the difference
The batter should pour like heavy cream – not too thick, not too runny. If it’s clumping in the bowl, add a splash more milk. Too thin? Sprinkle in a tablespoon of flour. And here’s my secret: let the batter rest 5 minutes after mixing. The flour absorbs the liquid better, giving you the perfect consistency for those beautiful round pancakes.
Keep that golden glow
Nothing worse than burnt pumpkin pancakes! Medium heat is key – if your skillet’s too hot, the outside will brown before the inside cooks. I keep a test pancake going – if it browns in under a minute, dial back that heat. And don’t walk away! These cook faster than regular pancakes because of the pumpkin’s moisture. Stay close, flip quick, and you’ll get that perfect caramel color every time.
One last pro tip: wipe your skillet clean between batches. Those little burnt bits will stick to your next pancakes faster than you can say “more maple syrup!”
Ingredient Substitutions
Okay, let’s talk swaps! I know we don’t always have every ingredient on hand, and dietary needs vary. The beauty of these gluten-free pumpkin pancakes is how flexible they are. Here are all my tested-and-approved substitutions that still deliver amazing results:
Milk options galore
Regular milk works great, but honestly? I usually make these with almond milk because that’s what I keep stocked. Any non-dairy milk will do the trick – oat milk makes them extra creamy, coconut milk adds richness (just stir it well first), and even plain water works in a pinch. The key is using the same 1:1 ratio. My lactose-intolerant niece swears by cashew milk in this recipe!
Egg replacements that work
No eggs? No problem! For each egg, you can use:
- 1 tablespoon ground flaxseed + 3 tablespoons water (let it sit 5 minutes to thicken)
- 1/4 cup unsweetened applesauce (adds nice moisture)
- A commercial egg replacer following package directions
Fair warning – the texture changes slightly with egg substitutes. Flax eggs give a heartier texture while applesauce makes them extra tender. Both are delicious, just different!
Sweetener swaps
That maple syrup isn’t just for sweetness – it helps with browning too. If you’re out, try:
- Brown sugar (pack it lightly when measuring)
- Honey (warm it slightly so it mixes in easily)
- Monk fruit or other sugar substitutes (use half the amount first, then adjust)
One time I accidentally used molasses instead of syrup – not my brightest moment! The pancakes turned out edible but… let’s just say I don’t recommend that particular experiment.
The moral of the story? Don’t stress if you’re missing an ingredient. These gluten-free pumpkin pancakes are surprisingly forgiving – just stick to the same basic measurements and you’ll still end up with something delicious!
Serving Suggestions for Gluten-Free Pumpkin Pancakes
Now for the best part – dressing up your golden stack of gluten-free pumpkin pancakes! I’m all about making breakfast feel special, and these little cakes are basically a blank canvas for delicious creativity. Here’s how I love to serve them – but don’t be afraid to get creative with your own favorite toppings!
The classic maple syrup pour
Nothing beats that moment when warm maple syrup cascades down a stack of pumpkin pancakes! I always use pure maple syrup – the real stuff makes all the difference. For extra flair, try warming it gently with a cinnamon stick before serving. My kids call this “fancy restaurant syrup” and it makes ordinary breakfast feel like a celebration.
Crispy, crunchy toppings
Texture contrast takes these pancakes next-level. Some of my go-to’s:
- Toasted pecans or walnuts (toss them in a dry pan for 2 minutes until fragrant)
- Pumpkin seeds for that extra autumn touch
- Crumbled gluten-free graham crackers – trust me on this one!
- A sprinkle of granola for morning crunch
Whipped cream dreams
A dollop of whipped cream transforms these into dessert-for-breakfast territory. I whip mine with a splash of vanilla and pinch of cinnamon. For dairy-free, coconut whipped cream works beautifully too. Pro tip: If you’re feeling extra, pipe little rosettes between each pancake layer – it looks so impressive but takes seconds!
Fruit that plays nice with pumpkin
Seasonal fruits make these pancakes sing:
- Sautéed apples with a dash of cinnamon (my grandma’s favorite)
- Roasted pears with a drizzle of honey
- Fresh figs sliced thin when they’re in season
- Banana slices caramelized in the pan for 30 seconds
The possibilities are endless! Sometimes I’ll set up a pancake topping bar when friends come over – jars of nuts, fruit compotes, different syrups, and let everyone build their perfect stack. Breakfast just got way more fun!
Storing and Reheating Gluten-Free Pumpkin Pancakes
Let’s talk leftovers – because let’s be real, I always make too many of these pumpkin pancakes on purpose! Good news: they store like a dream if you know the right tricks. Here’s how I keep my gluten-free pancakes tasting fresh for days (or weeks!) after baking.
Fridge storage that keeps them fluffy
First, let your pancakes cool completely – I mean completely! Any warmth trapped in the container turns into condensation that makes them soggy. Once cooled, stack them between sheets of parchment paper (this prevents sticking) and pop them in an airtight container. They’ll stay perfect in the fridge for 3 days – though in my house, they never last that long!
Freezing for future pancake emergencies
These freeze so well! I always keep a batch in my freezer for lazy mornings. Here’s my method:
- Lay cooled pancakes in a single layer on a baking sheet
- Freeze until solid (about 1 hour – this prevents them sticking together later)
- Transfer to freezer bags with parchment between layers
They’ll keep beautifully for up to a month. Pro tip: write the date on the bag – freezer pancakes have a way of disappearing mysteriously in my house!
The best way to reheat for that just-made taste
Skip the microwave unless you like rubbery pancakes! My favorite methods:
- Toaster: Perfect for single servings – gives that crispy edge back! Use the lightest setting at first.
- Oven: 350°F for 5-8 minutes on a baking sheet. Great for big batches.
- Skillet: A quick toast in a dry pan brings back that fresh-off-the-griddle magic.
If they seem dry coming out of the fridge or freezer, don’t panic! A quick brush of milk or water before reheating works wonders. My kids swear frozen-then-toasted pancakes taste even better than fresh – something about that extra crispness!
Gluten-Free Pumpkin Pancakes Nutritional Info
Okay, let’s talk numbers – but first, a quick disclaimer! These nutritional values are estimates based on the exact ingredients I use. Your numbers might vary slightly depending on your specific flour blend, milk choice, or how generous you are with that maple syrup drizzle (no judgment here!).
Here’s the breakdown per serving (that’s 2 pancakes in our house – though my husband routinely eats double that!):
- Calories: 220 (perfect fuel for a cozy morning)
- Sugar: 8g (mostly from the maple syrup and pumpkin’s natural sweetness)
- Sodium: 320mg (that’s about 14% of your daily value)
- Fat: 7g (with only 1g saturated – thank you, healthy oils!)
- Carbs: 35g (including 3g fiber to keep you satisfied)
- Protein: 5g (not bad for pancakes!)
What I love about these gluten-free pumpkin pancakes is how nutrient-dense they are compared to regular pancakes. That pumpkin puree packs vitamin A, and using almond milk cuts down on cholesterol. Of course, if you load up on toppings, those numbers will change – but isn’t that half the fun?
Pro tip: If you’re watching specific macros, try swapping the maple syrup for sugar-free syrup or reducing it to 1 tablespoon. The pumpkin’s natural sweetness still shines through!
FAQs About Gluten-Free Pumpkin Pancakes
I get so many questions about these pumpkin pancakes – seems like everyone wants to make them just right! Here are the answers to the three most common questions I hear (and believe me, I’ve tested all these scenarios myself!):
Can I make these vegan?
Absolutely! I’ve made vegan versions for friends all the time. Just swap the egg with a flax egg (1 tbsp ground flax + 3 tbsp water, let sit 5 minutes) and use your favorite plant-based milk. They come out slightly more delicate, so flip carefully! The vegan version still gets those beautiful golden edges and spiced pumpkin flavor we all love.
How do I prevent sticking?
Oh boy, do I have pancake-sticking horror stories! Here’s what works best: First, make sure your skillet is properly heated before adding batter – I wait until water droplets dance on the surface. Use just enough oil or butter to lightly coat (wipe excess with a paper towel). And here’s my secret weapon – let the pancakes cook until the edges look dry before flipping. If they’re sticking, they’re not ready to flip yet! A thin metal spatula helps too.
Can I use fresh pumpkin?
You can, but there’s a trick to it! Roast or steam fresh pumpkin first, then puree it until completely smooth. Straining it through cheesecloth helps remove excess water – canned pumpkin is more concentrated. I’ve found fresh pumpkin makes the batter a bit wetter, so you might need an extra tablespoon or two of flour. The flavor is amazing though – especially if you use sugar pie pumpkins!
Now it’s your turn – try this recipe and share your twist in the comments! Did you add chocolate chips? Nail the perfect flip? I want to hear all about your gluten-free pumpkin pancake adventures.
Print
Amazingly Fluffy Gluten-Free Pumpkin Pancakes Ready in 20
- Total Time: 25 mins
- Yield: 8 pancakes 1x
- Diet: Gluten Free
Description
Fluffy gluten-free pumpkin pancakes perfect for a cozy breakfast. These pancakes are packed with warm spices and pumpkin flavor.
Ingredients
- 1 cup gluten-free flour blend
- 2 tsp baking powder
- 1/2 tsp salt
- 1 tsp pumpkin pie spice
- 1/2 cup pumpkin puree
- 1 large egg
- 1 cup milk (dairy or non-dairy)
- 2 tbsp maple syrup
- 1 tbsp vegetable oil
- 1 tsp vanilla extract
Instructions
- Whisk gluten-free flour, baking powder, salt, and pumpkin pie spice in a bowl.
- In another bowl, mix pumpkin puree, egg, milk, maple syrup, oil, and vanilla.
- Pour wet ingredients into dry ingredients and stir until combined.
- Heat a lightly greased skillet over medium heat.
- Pour 1/4 cup batter per pancake onto the skillet.
- Cook until bubbles form, then flip and cook for another 1-2 minutes.
- Serve warm with maple syrup.
Notes
- Use a gluten-free flour blend with xanthan gum for best texture.
- Adjust milk for thicker or thinner pancakes.
- Store leftovers in the fridge for up to 3 days.
- Prep Time: 10 mins
- Cook Time: 15 mins
- Category: Breakfast
- Method: Stovetop
- Cuisine: American
Nutrition
- Serving Size: 2 pancakes
- Calories: 220
- Sugar: 8g
- Sodium: 320mg
- Fat: 7g
- Saturated Fat: 1g
- Unsaturated Fat: 5g
- Trans Fat: 0g
- Carbohydrates: 35g
- Fiber: 3g
- Protein: 5g
- Cholesterol: 50mg