Oh my gosh, you have to try these gluten-free pumpkin truffles! I still remember the first time I whipped up a batch for my sister’s Halloween party – they disappeared faster than the kids’ candy stash. The best part? They’re ridiculously easy to make with just a handful of simple ingredients you probably already have in your pantry. No fancy equipment needed, just some mixing, rolling, and dipping. These little bites pack all the cozy pumpkin spice flavor you crave, but without any gluten or refined sugar. Trust me, once you pop one in your mouth, you won’t believe something this delicious could be so good for you too!
Why You’ll Love These Gluten-Free Pumpkin Truffles
Honestly, what’s not to love? These little bites are:
- Super simple – just mix, roll, dip, and chill (no baking required!)
- Packed with real ingredients – pumpkin, almond flour, and maple syrup make them wholesome
- Naturally sweet – no refined sugar, but still totally indulgent
- Perfect for any occasion – festive enough for holidays but easy enough for everyday cravings
Seriously, gluten-free pumpkin truffles are my go-to when I want a treat that feels fancy but takes zero effort. You’ll be hooked after one bite!
Ingredients for Gluten-Free Pumpkin Truffles
Grab these simple ingredients – I bet you’ve got most already! The magic happens when these humble pantry staples come together:
- 1 cup pumpkin puree (not pumpkin pie filling – see my note below!)
- 1/2 cup almond flour (finely ground works best for smooth texture)
- 1/4 cup maple syrup (the real stuff, not pancake syrup)
- 1 tsp cinnamon (because pumpkin and cinnamon are soulmates)
- 1/2 tsp nutmeg (freshly grated if you’re feeling fancy)
- 1/4 tsp ginger (ground is fine, but fresh grated adds zing)
- 1/4 tsp cloves (just a pinch – these little guys pack punch!)
- 1/2 cup dark chocolate chips (or chopped chocolate if you prefer)
- 1 tsp coconut oil (helps the chocolate dip smoothly)

Ingredient Notes & Substitutions
Pumpkin puree matters! Canned works great (Libby’s is my go-to), but homemade pumpkin puree makes these gluten-free pumpkin truffles extra special. If you’re nut-free, try sunflower seed flour instead of almond flour – just know it’ll change the flavor slightly. Out of maple syrup? Honey works in a pinch, but reduce by 1 tablespoon since it’s sweeter. And don’t skip the coconut oil when melting chocolate – it’s the secret to that perfect glossy coat!
How to Make Gluten-Free Pumpkin Truffles
Okay, let’s get our hands dirty – this is the fun part! Making these gluten-free pumpkin truffles is so simple, you’ll wonder why you haven’t been making them every week. Just follow these easy steps and you’ll have perfect little pumpkin bites in no time.
Step 1: Prepare the Pumpkin Mixture
First, grab a big bowl – I like to use my trusty glass mixing bowl because it makes me feel fancy. Dump in that gorgeous orange pumpkin puree, then add the almond flour, maple syrup, and all those warm spices. Don’t be shy with the cinnamon! Mix everything together until it looks like pumpkin cookie dough. You want it to hold together when you pinch it – if it’s too sticky, add a tiny bit more almond flour. Too dry? A teaspoon of pumpkin puree will fix it right up.
Step 2: Shape and Freeze the Truffles
Now for the messy fun! Scoop out about a tablespoon of the mixture and roll it between your palms. If the dough sticks to your hands (it probably will), lightly wet your fingers – it helps tremendously. Line up your little pumpkin balls on a parchment-lined tray and pop them in the freezer. This 30-minute chill is crucial – it firms them up so they’ll hold their shape when we dip them. Trust me, I learned this the hard way when my first batch turned into pumpkin puddles!
Step 3: Coat with Chocolate
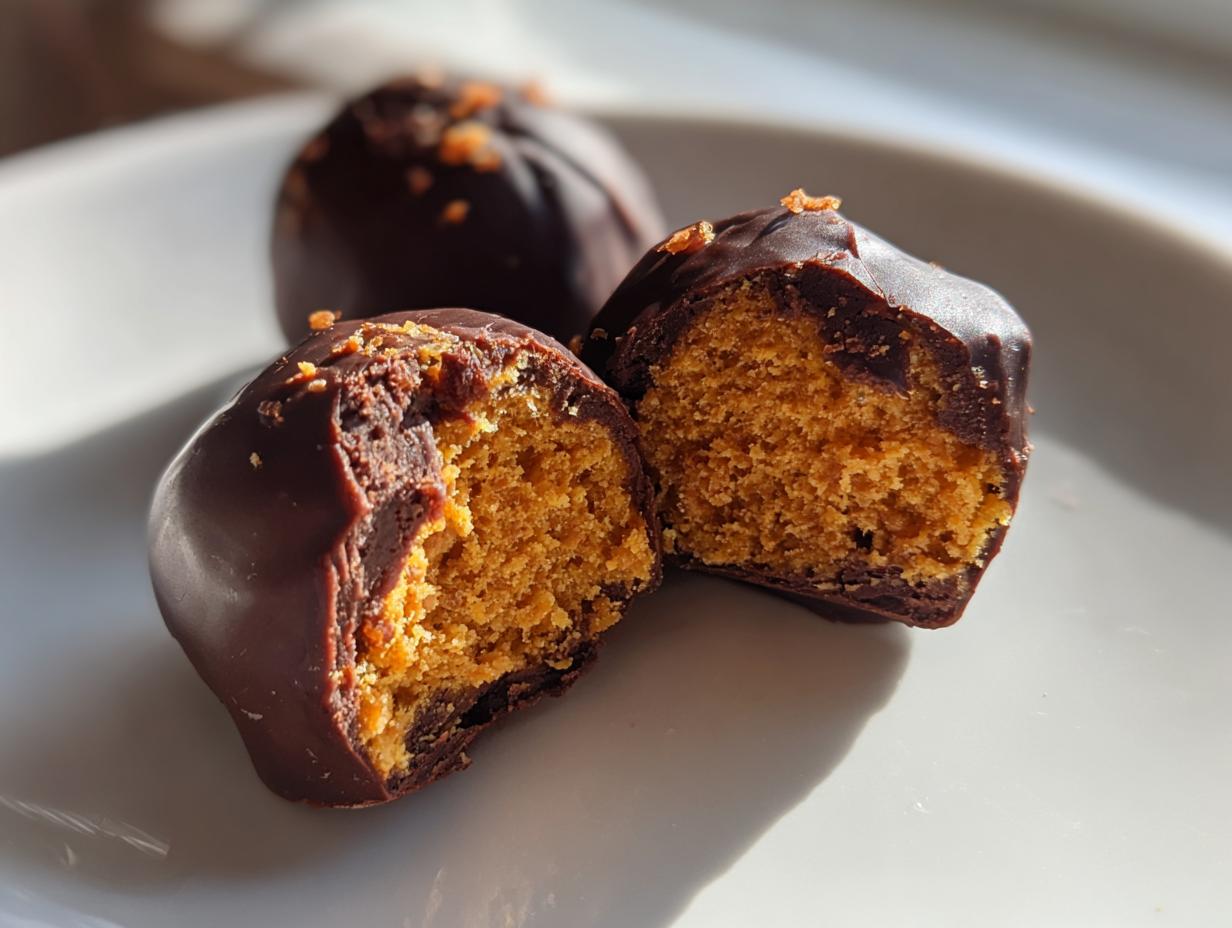
While the truffles chill, let’s make that luscious chocolate coating. Melt your chocolate chips with the coconut oil – I use a double boiler (or a heatproof bowl over simmering water) because burnt chocolate is tragic. Once it’s smooth and glossy, take your chilled truffles out of the freezer. Using a fork or dipping tool, dunk each one in the chocolate, let the excess drip off, then return them to the parchment. Work quickly but carefully – this is when those gluten-free pumpkin truffles start looking professional! If you want to get fancy, sprinkle some sea salt or cinnamon on top before the chocolate sets.

Tips for Perfect Gluten-Free Pumpkin Truffles
After making countless batches of these gluten-free pumpkin truffles (my coworkers have happily served as taste-testers!), I’ve picked up some tricks that make all the difference. These little nuggets of wisdom will take your truffles from good to “Oh my goodness, how did you make these?!”
Cookie scoop to the rescue! That tablespoon-sized ice cream scoop hiding in your drawer? It’s the secret to perfectly uniform gluten-free pumpkin truffles. Just scoop, press gently against the bowl to pack it in, then release onto your tray. No sticky fingers, no uneven sizes – just perfect little domes ready for freezing.
Texture lovers, listen up! Before freezing, try rolling your pumpkin balls in finely chopped pecans or walnuts. The nuts add this amazing crunch that contrasts beautifully with the creamy chocolate coating. My neighbor Sarah insists this version is “life-changing” – and she’s usually pretty stingy with compliments!
Chocolate too thick? If your melted chocolate starts setting up before you finish dipping, don’t panic! Just pop the bowl back over simmering water for 10-15 seconds to loosen it up again. And here’s my favorite trick – keep a toothpick handy to help nudge stubborn truffles out of the chocolate if they decide to stick to your fork.
The freezer is your friend. If your kitchen runs warm (like mine does when I’m baking up a storm), pop the tray of dipped truffles back in the freezer for 5 minutes between batches. This helps the chocolate set faster so you don’t get messy fingerprints when moving them to a container. Learned that one the messy way!
Serving and Storing Gluten-Free Pumpkin Truffles
Here’s the beautiful thing about these gluten-free pumpkin truffles – they’re just as delightful straight from the fridge as they are at room temperature! I love serving them chilled because that chocolate coating gets this satisfying little snap when you bite into it. Arrange them on a pretty plate with some cinnamon sticks for garnish, and suddenly you’ve got a dessert that looks like it came from a fancy bakery.
Now, about storing – these little guys keep beautifully in an airtight container in the fridge for up to 5 days (if they last that long!). Layer them between sheets of parchment paper so they don’t stick together. Pro tip: hide them behind the veggies if you want any chance of having leftovers – my husband has a sixth sense for finding them!
Want to get ahead? You can freeze gluten-free pumpkin truffles for up to a month! Just pop them in a freezer-safe container with parchment between layers. When that pumpkin spice craving hits, take out however many you need and let them thaw in the fridge for an hour or so. The texture stays perfect – it’s like having a secret stash of happiness waiting for you!
Nutritional Information
Now, I’m no nutritionist (just a pumpkin-obsessed home cook!), but I want to share that these gluten-free pumpkin truffles are made with ingredients that make me feel good about indulging. The almond flour gives them a protein boost, while the pumpkin puree packs vitamin A – so you’re basically eating vegetables, right? Okay, maybe not quite, but it’s certainly better than reaching for processed sweets! You can learn more about the nutritional value of pumpkin.
Keep in mind that nutritional values can vary depending on your specific ingredients – like how dark your chocolate is or whether you use homemade versus canned pumpkin. The maple syrup adds natural sweetness without refined sugar, and the healthy fats from the almond flour help keep you satisfied. But let’s be real – we’re not eating these for their nutritional profile, we’re eating them because they’re downright delicious!
As with any treat, enjoy these gluten-free pumpkin truffles in moderation. Though I won’t judge if you “accidentally” eat three in one sitting – I’ve definitely been there!
Frequently Asked Questions
Can I use honey instead of maple syrup?
Absolutely! Honey works great as a substitute in these gluten-free pumpkin truffles. Just use about 3 tablespoons instead of 1/4 cup since honey is sweeter. The flavor will be slightly different – more floral than maple’s caramel notes – but still delicious. I’ve used both and honestly can’t decide which I like better!
How long do these pumpkin truffles last?
These little beauties keep beautifully in the fridge for about 5 days in an airtight container. If you want to keep them longer (who has that kind of willpower?), they freeze wonderfully for up to a month. Just thaw in the fridge for an hour or so before serving. The chocolate might get a tiny bit dull looking after freezing, but the taste stays perfect.
Can I make these nut-free?
You sure can! My friend’s son has nut allergies, so we experimented with sunflower seed flour instead of almond flour. It works great – just know it’ll give your gluten-free pumpkin truffles a slightly earthier flavor. If you’re sensitive to seeds too, try oat flour (make sure it’s certified gluten-free if that’s important for you). The texture will be a bit different, but still yummy!
Why do my truffles keep falling apart when I dip them?
Oh honey, I’ve been there! Two likely culprits: either they didn’t freeze long enough (30 minutes minimum!), or your chocolate was too hot when dipping. Make sure those pumpkin balls are nice and firm before dipping, and let your melted chocolate cool slightly (but still be fluid). If they’re still being stubborn, try using a toothpick to hold them while dipping – just remember to patch the hole with a dab of chocolate afterward!
Can I use milk chocolate instead of dark?
Of course – make them how you love them! I prefer dark chocolate because it balances the pumpkin’s sweetness, but milk chocolate makes these gluten-free pumpkin truffles extra decadent. White chocolate works too if you want something really special. Just remember that milk chocolate sets softer, so keep them chilled until serving. My niece calls the white chocolate version “pumpkin snowballs” – too cute!

Share Your Experience
Alright, now it’s your turn! Did you make these gluten-free pumpkin truffles for a special occasion? Maybe you put your own spin on them with different spices or toppings? I’d love to hear all about it! Drop a comment below telling me how they turned out – the good, the messy, and especially the delicious. Your tips might help another home cook perfect their batch!
And hey, if you snapped a photo of your gorgeous truffles (we all know they’re Instagram-worthy), tag me so I can see your handiwork! Nothing makes me happier than seeing these little pumpkin bites bringing joy to other kitchens. Happy truffle-making, friends – can’t wait to hear your stories!
Print
Irresistible Gluten-Free Pumpkin Truffles in Just 30 Minutes
- Total Time: 45 mins
- Yield: 12 truffles 1x
- Diet: Gluten Free
Description
Easy gluten-free pumpkin truffles made with simple ingredients.
Ingredients
- 1 cup pumpkin puree
- 1/2 cup almond flour
- 1/4 cup maple syrup
- 1 tsp cinnamon
- 1/2 tsp nutmeg
- 1/4 tsp ginger
- 1/4 tsp cloves
- 1/2 cup dark chocolate chips
- 1 tsp coconut oil
Instructions
- Mix pumpkin puree, almond flour, maple syrup, and spices in a bowl.
- Roll mixture into small balls and place on a tray.
- Freeze for 30 minutes.
- Melt chocolate chips and coconut oil together.
- Dip each ball into melted chocolate.
- Place back on tray and refrigerate until set.
Notes
- Use canned or homemade pumpkin puree.
- Store truffles in the fridge.
- For extra crunch, roll truffles in chopped nuts.
- Prep Time: 15 mins
- Cook Time: 0 mins
- Category: Dessert
- Method: No-Bake
- Cuisine: American
Nutrition
- Serving Size: 1 truffle
- Calories: 90
- Sugar: 6g
- Sodium: 5mg
- Fat: 5g
- Saturated Fat: 2g
- Unsaturated Fat: 3g
- Trans Fat: 0g
- Carbohydrates: 10g
- Fiber: 2g
- Protein: 2g
- Cholesterol: 0mg