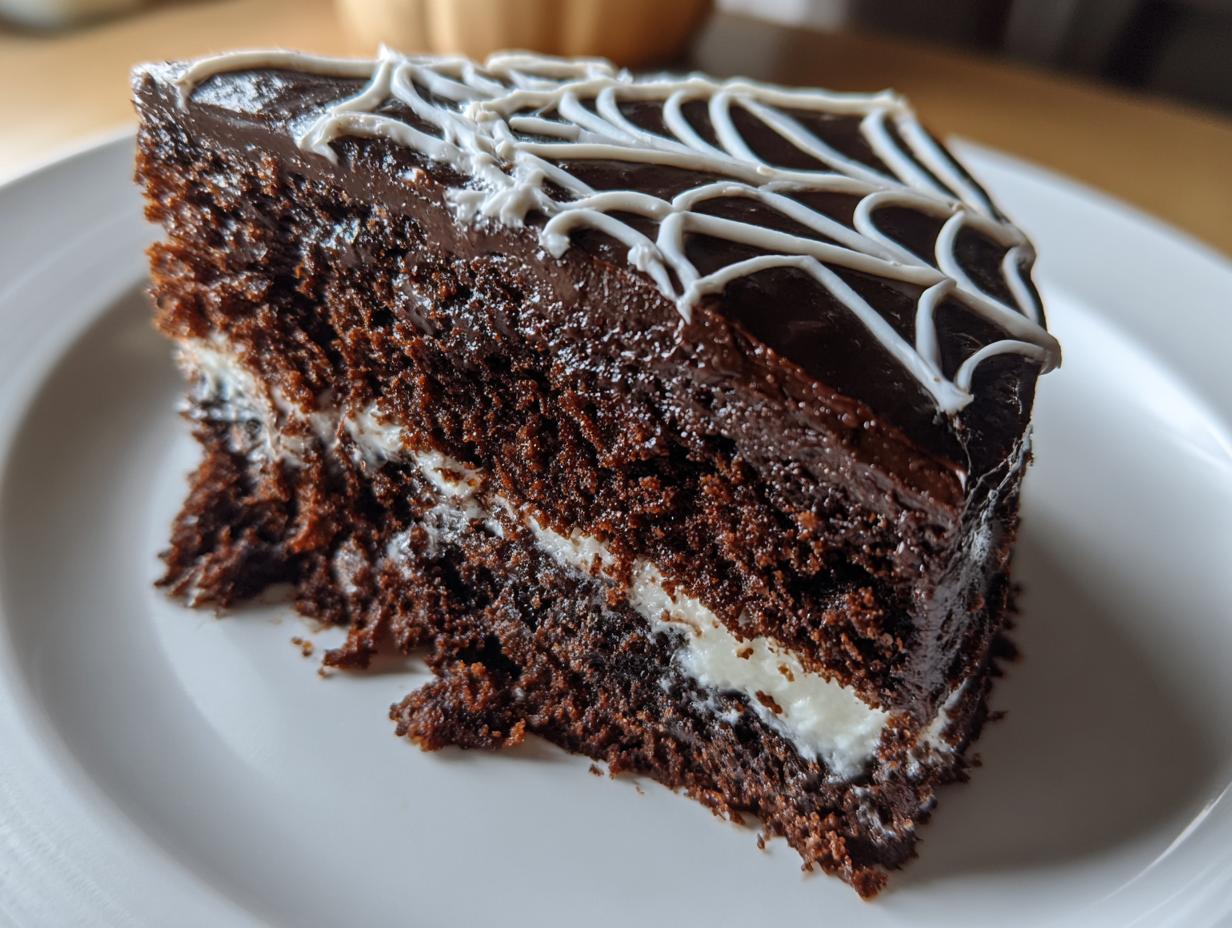
Every Halloween, my kitchen turns into a mad scientist’s lab—but instead of potions, I’m whipping up my famous Gluten-Free Spider Web Chocolate Cake! Trust me, this isn’t your average dessert. The rich chocolate flavor is so decadent, no one ever guesses it’s gluten-free. And that spooky white chocolate web? Pure magic. Last year, my niece actually screamed (the good kind!) when I unveiled it at her party. The best part? It’s shockingly easy to make—just wait until you see how that silky web comes together. Gather your ingredients, and let’s bake up some Halloween mischief!

Ingredients for Gluten-Free Spider Web Chocolate Cake
Okay, let’s raid the pantry! Here’s everything you’ll need for our spooky masterpiece. I’ve learned through trial and error (and a few chocolatey disasters) that quality ingredients make all the difference. Pro tip: measure everything before you start—trust me, you don’t want to be scrambling for cocoa powder with batter-covered hands!
- 2 cups gluten-free flour blend (my favorite is Bob’s Red Mill 1-to-1, but any good blend works)
- 1 3/4 cups sugar (yes, it’s a lot—we’re making cake, not health food!)
- 3/4 cup unsweetened cocoa powder (sift it if it’s lumpy—your batter will thank you)
- 1 1/2 tsp baking powder
- 1 1/2 tsp baking soda
- 1 tsp salt (just regular table salt—this isn’t fancy sea salt territory)
- 2 large eggs (room temperature—I leave them out for 30 minutes)
- 1 cup milk (whole milk makes it extra rich, but any kind works)
- 1/2 cup vegetable oil (or melted coconut oil if you’re feeling adventurous)
- 2 tsp vanilla extract (the real stuff—imitation vanilla is practically a crime in chocolate cake)
- 1 cup boiling water (yes, boiling! Don’t skip this—it makes the crumb super moist)
- 1 cup white chocolate chips (for our spider web—get good quality or it won’t melt smoothly)
See? Nothing too weird or hard to find. The boiling water might seem scary at first, but it’s the secret weapon in this recipe. And that white chocolate? We’ll turn it into the most impressive spider web you’ve ever seen—way better than those plastic decorations!
How to Make Gluten-Free Spider Web Chocolate Cake
Alright, let’s get our hands dirty—or in this case, chocolaty! I’ve made this cake enough times to know where beginners might panic (that thin batter stage gets everyone), so follow along closely. Don’t worry, I’ll walk you through every step like I’m right there in the kitchen with you.
Preparing the Cake Batter
First things first—preheat that oven to 350°F (175°C). While it heats up, grab your biggest mixing bowl. Here’s how I layer the ingredients for perfect mixing:
Whisk together all your dry stuff—the gluten-free flour, sugar, cocoa powder (make sure it’s lump-free!), baking powder, baking soda, and salt. I like to sift them through a fine mesh strainer if my cocoa’s being stubborn.
Now for the fun part! Add the eggs, milk, oil, and vanilla all at once. Beat with an electric mixer for a solid 2 minutes. The batter will look gloriously shiny and thick at this point—that’s when you know you’re on the right track.
Here comes the scary part that always makes first-timers nervous: slowly pour in that boiling water while mixing on low. The batter will thin out dramatically—this is totally normal! Don’t panic like I did the first time. This liquid magic gives us that ultra-moist crumb we’re after.

Baking and Cooling
Pour your now-liquid batter into the prepared pan (you did grease and flour it, right?). Slide it into the oven for 30-35 minutes. Set a timer for 30 minutes, then start checking with a toothpick. You want just a few moist crumbs clinging to it—if it comes out clean, you’ve overbaked!
When it’s done, resist the urge to dive right in. Let the cake cool in the pan for 10 minutes, then transfer to a wire rack. This next part is crucial: the cake must be completely cooled before decorating. I know it’s hard to wait, but warm cake equals melty spider webs, and nobody wants that.
Creating the Spider Web Design
Now for the pièce de résistance! Melt your white chocolate slowly—either in short microwave bursts (stirring between each) or over a double boiler. When it’s smooth as silk, transfer to a piping bag or ziplock with a tiny corner snipped off.
Here’s my pro tip: practice your web on parchment paper first. Start by drawing concentric circles (about 1 inch apart) on the cooled cake. Then, use a toothpick to drag lines from the center outwards—this creates that perfect web effect. Work quickly but carefully; chocolate sets fast!
The first time I tried this, my lines were wobbly. Don’t stress—imperfect webs look even spookier! If you mess up, just scrape it off (the chocolate peels right off cold cake) and try again. Add a plastic spider for extra drama—my nephew loves when I do this!

Tips for the Perfect Gluten-Free Spider Web Chocolate Cake
After years of Halloween baking (and a few chocolate-covered disasters), I’ve learned all the tricks to make this cake foolproof. These are my absolute can’t-skip tips—the kind I wish someone had told me when I first started baking gluten-free cakes!
- Room temperature eggs are non-negotiable – Cold eggs make your batter lumpy and can even cause the cake to sink. I leave mine out for at least 30 minutes, or place them in warm water for 10 minutes if I forget (we’ve all been there!).
- Sift that cocoa powder – Gluten-free baking is already finicky, and cocoa lumps are sneaky little devils. I run mine through a fine mesh strainer—it takes 30 seconds and makes the crumb so much smoother.
- Chill your cake before decorating – I know it’s tempting to start that spider web right away, but even slightly warm cake will melt your chocolate design. I pop mine in the fridge for 20 minutes—just enough to firm up without drying out.
- The thinner the batter, the better – When you add that boiling water and the batter looks like chocolate soup? That’s perfect! Thick batter means dense cake, and we want light, moist crumbs. Trust the process!
- Practice your web first – My first attempt looked like a spider had gotten into the wine. Now I always test my piping on parchment paper before touching the cake. Bonus? You get to eat your practice chocolate!
One last secret? Have fun with it! My webs are never perfect, and that’s what makes them look authentically spooky. Last year’s “oops” turned into a broken web with a spider “fixing” it—the kids thought it was genius!
Ingredient Substitutions
Listen, I get it—sometimes you’re halfway through a recipe and realize you’re out of something. Or maybe you’ve got dietary needs beyond just gluten-free. Don’t worry! Over the years, I’ve tested nearly every swap imaginable for this cake (some more successfully than others). Here are my tried-and-true substitutions that’ll save your Halloween baking without sacrificing flavor.
- Milk: Dairy-free? No problem! Almond milk, oat milk, or even coconut milk work beautifully here. The cake might be slightly less rich, but still delicious. My lactose-intolerant cousin swears by canned coconut milk—just shake it well first!
- Vegetable Oil: Melted coconut oil makes an excellent sub with a subtle tropical twist. For a neutral flavor, grapeseed oil works too. Just don’t use olive oil—trust me, chocolate and olive oil should not be friends in this cake.
- Eggs: For each egg, mix 1 tbsp ground flaxseed with 3 tbsp water and let it sit for 5 minutes until gloopy. It works shockingly well! My vegan friend couldn’t believe it wasn’t “real” cake.
- White Chocolate: Dairy-free white chocolate chips exist (look for brands like Enjoy Life). In a pinch? Melted coconut butter with powdered sugar makes a decent web—though it’ll taste coconutty.
- Sugar: I’ve successfully used coconut sugar cup-for-cup, though it darkens the cake’s color (bonus—looks extra spooky!). Liquid sweeteners like maple syrup throw off the balance, so stick with granulated subs.
A word of caution: gluten-free flour blends vary wildly! Stick with trusted 1:1 substitution blends unless you’re ready for a baking science experiment. That time I tried almond flour? Let’s just say it became a “spider web pudding” instead of cake.
The beauty of this recipe is how forgiving it is. My motto? As long as you’ve got cocoa powder and something sweet, you’re 90% of the way there. Now go forth and substitute with confidence!
Serving and Storing Gluten-Free Spider Web Chocolate Cake
Now comes the best part—showing off your spooky creation! Presentation is everything with this cake. I like to place it on a black cake stand (a dollar store platter spray-painted black works perfectly) surrounded by plastic spiders and those creepy cobwebs from Halloween decorations. A dusting of edible black glitter takes it to the next level—my neighbor thought I’d bought it from a fancy bakery!
When cutting slices, wipe your knife between cuts to keep those web lines crisp. Pro tip: warm the blade under hot water first for cleaner slices. Serve with a scoop of vanilla ice cream “ghost”—use mini chocolate chips for eyes—or a drizzle of raspberry coulis pretending to be blood. The kids go wild when I do this!
Now, let’s talk storage because let’s be real—this cake rarely lasts more than a day in my house! If you do have leftovers (miracle!), here’s how to keep it fresh:
- Airtight is right: Cover the cake tightly with plastic wrap or store in an airtight container. That chocolate web will stay picture-perfect for up to 3 days this way.
- Room temp vs fridge: Honestly? I keep mine at room temperature—the texture stays better. But if your kitchen runs hot, the fridge works too. Just let slices come to room temp before eating.
- Freezing option: You can freeze undecorated cake layers wrapped in plastic and foil for up to 2 months. Thaw overnight at room temp before adding your spider web masterpiece.
One Halloween, I made two cakes—one for the party and one “just in case.” That backup cake disappeared mysteriously… and by mysteriously, I mean my husband confessed at midnight with chocolate still on his face. Moral of the story? Bake extra!
Nutritional Information
Okay, let’s be real—you’re not eating spider web cake for the health benefits! But since we’re all grown-ups here (even if we’re baking for kids), here’s the nutritional breakdown per slice. Remember, these numbers are estimates—your actual counts might dance up or down depending on the exact brands you use. I’ve included both the good news (hey, there’s fiber!) and the “let’s not think about this too hard” stuff.
- Serving Size: 1 generous slice (because who are we kidding with tiny portions?)
- Calories: Around 320 (worth every single one!)
- Sugar: 25g (it’s a celebration—live a little!)
- Sodium: 380mg
- Fat: 12g (7g unsaturated, 3g saturated)
- Carbs: 48g (with 3g fiber—see? Healthy!)
- Protein: 5g
- Cholesterol: 45mg
Important note: These values assume you’re using all the ingredients exactly as listed. Swap in almond milk? The numbers shift. Use coconut sugar? Different ballgame. Even the cocoa powder brand can tweak these numbers—I once compared three brands and got wildly different results!
My philosophy? Halloween comes once a year. Enjoy that slice (or two—no judgment here) and maybe take an extra walk with the kids while trick-or-treating. Balance, right? Now go enjoy your deliciously spooky creation!
FAQs About Gluten-Free Spider Web Chocolate Cake
Over the years, I’ve gotten so many questions about this cake—usually while covered in cocoa powder mid-baking frenzy! Here are the answers to the most common panic-inducing questions (we’ve all been there).
Can I use regular all-purpose flour instead of gluten-free?
Absolutely! Just swap in the same amount of regular flour if gluten isn’t an issue. The texture will be slightly different—gluten-free cakes are often more tender—but still delicious. My sister does this when she’s out of my fancy flour blend and no one notices!
Help! My white chocolate seized up—how do I fix it?
Oh honey, I’ve been there—nothing worse than grainy chocolate when you’re trying to pipe delicate webs! If it’s just slightly thick, stir in a teaspoon of coconut oil or vegetable oil. For full-on cement situation? Start over, but this time melt the chocolate slowly (50% power in microwave, stirring every 15 seconds) and keep all water away—even a drop can ruin it!
Why is my batter so thin? Did I mess up?
Nope—you’re right on track! That boiling water makes the batter look like chocolate soup, but it’s the secret to the moistest cake ever. I promise you’ll be shocked when it bakes up perfectly. My first time, I almost threw it out thinking I’d failed—thank goodness I didn’t!
Can I make this cake ahead of time?
You bet! Bake it up to 2 days before and store at room temp (well wrapped). But wait to add the spider web until the day of—the design stays sharper. For ultimate convenience, I’ll sometimes bake and freeze layers weeks ahead, then decorate Halloween morning while the kids are at school.
My spider web lines keep breaking—any tricks?
A few pro tips from my many “artistic” disasters: 1) Make sure your chocolate isn’t too thick (add a smidge of oil if needed) 2) Pipe slowly and steadily—no jerky movements 3) If a line breaks, just connect it and pretend it’s a “realistic broken web” (this is now my signature style!). Practice on wax paper first—it’s a game changer!
Remember—imperfect webs look more authentically spooky! The kids at my nephew’s party last year thought my “messy” web was done on purpose to look haunted. Now I call all my mistakes “artistic choices”!
Share Your Creations
Nothing makes me happier than seeing your spooky cake masterpieces! Seriously, I live for those midnight kitchen adventures where you’re covered in cocoa powder, piping questionable web designs (we’ve all been there). Snap a photo of your Gluten-Free Spider Web Chocolate Cake—even if the web looks more like abstract art than geometry—and tag me @SpookyBakerExtraordinaire. I promise to ooh and aah over every single one!
Last year, one reader sent me a photo of her “spider web” that had morphed into what her toddler proudly called “a ghost holding a lollipop”—it was absolute perfection. Another fan created a whole spider family scene with extra chocolate. These creative twists make my day! Bonus points if you include your kitchen disaster shots too—my first attempt looked like a chocolate pancake with scribbles, and we all start somewhere.
Pro tip: Natural lighting shows off those web details best. Morning light through your kitchen window? Chef’s kiss! And don’t stress about presentation—some of my favorite cakes are served on paper plates with plastic forks. It’s the Halloween spirit that counts, not Pinterest perfection.
Can’t wait to see what spooky magic you create in your kitchen this year. Tag your photos with #GlutenFreeSpiderWebCake so we can all admire your handiwork. Who knows—your creation might just inspire next year’s Halloween cake trend!
Print
Spooky Gluten-Free Spider Web Chocolate Cake in 5 Easy Steps
- Total Time: 50 mins
- Yield: 1 cake (8 servings) 1x
- Diet: Gluten Free
Description
A spooky and delicious gluten-free chocolate cake decorated with a spider web design, perfect for Halloween.
Ingredients
- 2 cups gluten-free flour blend
- 1 3/4 cups sugar
- 3/4 cup unsweetened cocoa powder
- 1 1/2 tsp baking powder
- 1 1/2 tsp baking soda
- 1 tsp salt
- 2 eggs
- 1 cup milk
- 1/2 cup vegetable oil
- 2 tsp vanilla extract
- 1 cup boiling water
- 1 cup white chocolate, melted (for decoration)
Instructions
- Preheat your oven to 350°F (175°C). Grease and flour a round cake pan.
- Mix gluten-free flour, sugar, cocoa powder, baking powder, baking soda, and salt in a bowl.
- Add eggs, milk, oil, and vanilla. Beat for 2 minutes.
- Stir in boiling water. The batter will be thin.
- Pour into the pan and bake for 30-35 minutes. Let it cool.
- Melt white chocolate and use a piping bag to draw spider web lines on the cake.
Notes
- Use a gluten-free flour blend for best results.
- Let the cake cool completely before decorating.
- Store leftovers in an airtight container.
- Prep Time: 15 mins
- Cook Time: 35 mins
- Category: Dessert
- Method: Baking
- Cuisine: American
Nutrition
- Serving Size: 1 slice
- Calories: 320
- Sugar: 25g
- Sodium: 380mg
- Fat: 12g
- Saturated Fat: 3g
- Unsaturated Fat: 7g
- Trans Fat: 0g
- Carbohydrates: 48g
- Fiber: 3g
- Protein: 5g
- Cholesterol: 45mg