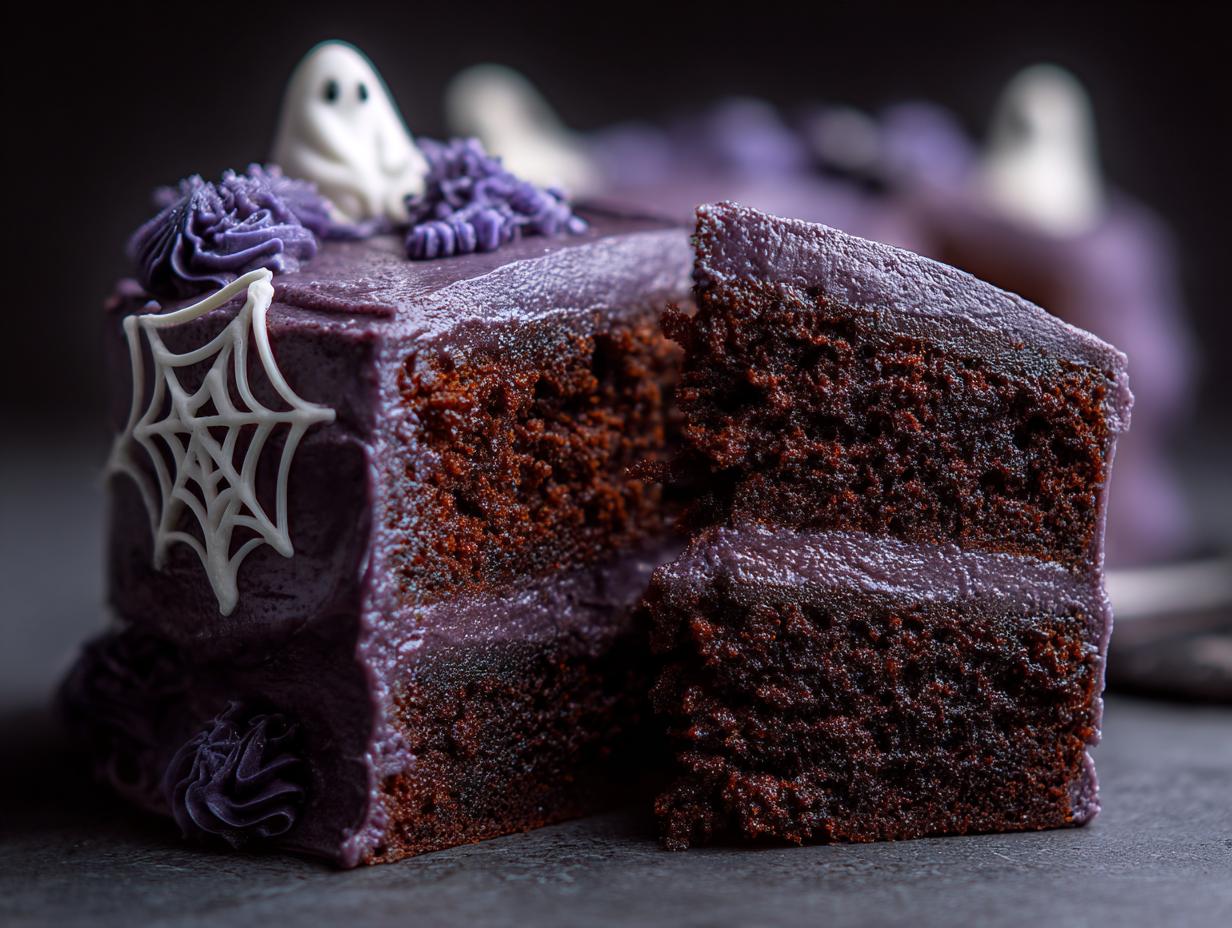
There’s something magical about Halloween baking – that moment when ordinary ingredients transform into something delightfully spooky. My Haunted House Layer Cake became a legend in our neighborhood after one particularly epic Halloween party. The kids still talk about how the dark chocolate layers looked like crumbling haunted mansion walls, draped in eerie purple frosting and topped with edible cobwebs.
What makes this cake special isn’t just its creepy-cool appearance (though that’s definitely part of the fun). It’s how shockingly simple it is to create showstopping Halloween magic with basic pantry ingredients. I’ve been perfecting this recipe since my first disastrous attempt years ago – when my “haunted house” more closely resembled a mud puddle. Now I’ll share all my hard-earned tricks for making a cake that’s equal parts delicious and delightfully terrifying.

Why You’ll Love This Haunted House Layer Cake
This isn’t just any Halloween cake – it’s the kind of dessert that makes people gasp when you bring it out. Here’s why it’s become my go-to spooky season showstopper:
- Instant Halloween vibes: That deep black-purple color looks straight out of a haunted mansion, and you can customize decorations to match your party theme
- Surprisingly simple: Uses basic cake ingredients with just a few spooky twists (boiling water makes the batter extra moist!)
- Crowd-pleaser magic: Rich chocolate flavor wins over both kids and adults – the decorations are scary, but the taste is pure comfort
- Forgiving to decorate: Messy icing? Crooked walls? It just adds to the creepy charm!
Ingredients for Haunted House Layer Cake
Gathering your ingredients is the first step to baking magic – and I promise, nothing here is too spooky to find! I’ve broken everything down so you can quickly check your pantry before starting. Trust me, the boiling water might sound odd, but it’s the secret to that perfectly moist crumb that makes this cake special.
Dry Ingredients
- 2 cups all-purpose flour (spooned and leveled – don’t pack it!)
- 1 1/2 cups granulated sugar
- 3/4 cup unsweetened cocoa powder (I prefer Dutch-process for deeper color)
- 1 1/2 teaspoons baking powder
- 1 1/2 teaspoons baking soda
- 1 teaspoon fine sea salt
Wet Ingredients
- 2 large eggs, at room temperature (cold eggs make batter curdle)
- 1 cup whole milk, slightly warmed
- 1/2 cup vegetable oil (canola works great)
- 2 teaspoons pure vanilla extract
- 1 cup boiling water (yes, really boiling – I use my electric kettle)
For Spooky Decorating
- Black or deep purple gel food coloring (liquid makes frosting runny)
- Your favorite chocolate frosting (about 3 cups)
- Optional: Fondant for ghosts/goblins, edible glitter, candy eyeballs
Pro tip: Measure everything before starting – once that boiling water hits the batter, you’ll want to work quickly! And don’t panic when the batter looks too thin – that’s exactly how it should be.
Equipment You’ll Need
Don’t worry – you won’t need any haunted mansion gadgets for this cake! Just gather these simple tools before you start (I promise, you probably have most already):
- Two 9-inch round cake pans – The key to those perfect haunted house layers (grease them well, or use my trusty cake goop trick!)
- Mixing bowls – One large for dry ingredients, medium for wet
- Hand mixer or stand mixer – Though I’ve made this whisking by hand when desperate – just channel your inner witch!
- Rubber spatula – For scraping every last bit of that delicious batter
- Wire cooling racks – Patience is hard, but cooling properly prevents crumbling
- Offset spatula – My secret weapon for smooth frosting application
- Cake turntable (optional but oh-so-helpful) – Makes decorating way easier
That’s it! No fancy equipment needed. Though if you want to get really creative, cookie cutters for ghost shapes or a piping tip for spiderweb designs can take your decorations next-level spooky.
How to Make Haunted House Layer Cake
Alright, let’s get spooky! I’ll walk you through each step of creating your haunted masterpiece. Don’t let the layers intimidate you – this is easier than it looks, especially when you follow my “oops-proof” method that’s survived many Halloween baking frenzies.
Preparing the Cake Batter
First things first – preheat your oven to 350°F (175°C). While it heats up, let’s make magic happen:
- Whisk dry ingredients: In your large bowl, sift together flour, sugar, cocoa powder, baking powder, baking soda, and salt. I know sifting seems fussy, but it prevents lumps in your haunted walls!
- Mix wet ingredients: In another bowl, beat eggs lightly, then whisk in milk, oil, and vanilla until smooth. Pro tip: If your milk and eggs are cold, warm them slightly – they’ll blend better.
- Combine carefully: Pour wet ingredients into dry and mix just until combined. The batter will be thick – that’s normal. Now the fun part – slowly stir in that boiling water. Yes, it’ll look alarmingly thin (like chocolate soup!), but trust the process. This gives the cake its famously moist texture.
Baking and Cooling
Here’s where your haunted house starts taking shape:
- Divide and bake: Pour batter evenly into your prepared pans. They should be about 2/3 full. Bake for 30-35 minutes – no peeking for the first 25 minutes or your cakes might collapse!
- Test for doneness: Insert a toothpick near the center. It should come out with a few moist crumbs (not wet batter). The edges should pull slightly from the pan.
- Cool properly: Let cakes cool in pans for 10 minutes (this prevents sticking), then turn out onto wire racks to cool completely – about 1 hour. I know it’s tempting to frost warm cake, but patience prevents crumbly disasters!

Decorating Your Haunted House Cake
Now for the best part – turning this into a Halloween showstopper!
- Level layers (optional): If your cakes domed, slice off the tops with a serrated knife for flat layers. Save scraps for a cook’s treat!
- Color your frosting: Stir black or purple gel food coloring into your chocolate frosting. Add color gradually – you can always go darker!
- Assemble: Place first layer on cake stand. Spread with 3/4 cup frosting. Top with second layer. Frost entire cake with thin “crumb coat,” chill 15 minutes, then apply final frosting layer.
- Get creative: Use a fork to create “wood grain” texture on the sides for haunted house walls. Add fondant ghosts, piped spiderwebs, or candy eyeballs. The messier it looks, the spookier!
Remember – there are no mistakes in haunted house decorating, only “happy accidents” that make your cake uniquely terrifying. The first time I made this, my crooked frosting job looked so creepy it won compliments!
Tips for the Perfect Haunted House Layer Cake
After countless Halloween baking sessions (and a few frosting disasters!), I’ve learned these tricks that guarantee haunted house cake success every time:
Secret Weapons for Flawless Layers
- Grease like a ghost: Use my “cake goop” trick – equal parts flour, oil, and shortening mixed into a paste. Brush it onto pans for foolproof release.
- The toothpick knows: Test multiple spots when checking doneness – ovens can have hot spots that leave underbaked patches.
- Freeze for clean slices: Wrap cooled cake layers in plastic and freeze for 30 minutes before leveling. They’ll cut like butter!
Frosting That Stays Put
- Crumb coat magic: That thin first layer of frosting isn’t optional – it traps crumbs so your final layer stays smooth and spooky.
- Chill between steps: After crumb coating, refrigerate for 15 minutes. Cold cake = easier decorating.
- Gel colors only: Liquid food coloring makes frosting runny. Gel gives intense haunted hues without sacrificing texture.
Spooky Decorating Shortcuts
- Texture is your friend: Drag a fork through frosting for instant “weathered wood” effects – imperfections add creepy charm!
- Edible glitter hack: Lightly spray frosted cake with water before dusting with glitter – it sticks better without smudging.
- Candy melt cobwebs: Melt white candy wafers, drizzle over a fork, then quickly drag strands across cake for easy edible webs.
My biggest tip? Have fun with it! Some of my best decorations came from happy accidents – like the year my “failed” drip frosting looked eerily like melting haunted house walls.
Variations for Your Haunted House Layer Cake
One of my favorite things about this recipe is how easily it adapts to different diets and Halloween themes. Over the years, I’ve tested countless variations – some born from pantry emergencies, others from last-minute party theme changes. Here are my favorite twists that still deliver that perfect haunted house magic:
Ingredient Swaps for Different Diets
- Gluten-free ghosts: Swap the all-purpose flour for a 1:1 gluten-free blend (I like Bob’s Red Mill). Add 1/2 teaspoon xanthan gum if your blend doesn’t include it – this helps the cake hold together.
- Dairy-free danger: Use almond or oat milk instead of regular milk, and coconut oil in place of vegetable oil. For the frosting, try a dairy-free chocolate buttercream.
- Eggless eeriness: Replace each egg with 1/4 cup applesauce or 1 tablespoon ground flaxseed mixed with 3 tablespoons water. The texture will be slightly denser but still deliciously spooky.
Creative Decorating Alternatives
- Graveyard smash: Skip the haunted house theme and crumble chocolate cookies over the top to create a “dirt” effect, then add tombstone-shaped cookies.
- Witch’s brew vibes: Tint the frosting green instead of black/purple, and pipe “bubbles” using white chocolate chips or mini marshmallows.
- Spider surprise: Press black licorice ropes into the sides for spider legs, then add a chocolate spider body on top. Kids LOVE finding these creepy crawlies!
- Monster mash: Use different colored frostings for each layer to create a Frankenstein’s monster effect – green, purple, and black look especially spooky together.
Flavor Twists That Still Feel Spooky
- Mocha madness: Add 2 teaspoons instant espresso powder to the dry ingredients for a grown-up haunted house cake with depth.
- Orange you scary: Mix orange zest into the frosting and decorate with black chocolate shards for a Halloween color explosion.
- Peanut butter phantom: Swirl peanut butter into the chocolate batter before baking, then use peanut butter cups as “bricks” in your haunted house decor.
Remember – Halloween is all about creativity, so don’t be afraid to experiment! Last year I ran out of cocoa powder and used black cocoa instead (the kind used in Oreos). The result was a cake so dark it looked like it came straight from a witch’s kitchen – total happy accident!
Serving and Storing Haunted House Layer Cake
After all your hard work creating this spooky masterpiece, you’ll want to serve and store it like a pro. Trust me – I’ve learned these lessons the hard way after one too many dried-out cakes and frosting meltdowns!
How to Serve for Maximum Spook Factor
- Temperature matters: Let refrigerated cake sit at room temperature for 30 minutes before serving – the flavors really pop when it’s not ice-cold.
- Slice cleanly: Wipe your knife with hot water between cuts for perfect, crumb-free haunted house slices.
- Light it up: For extra drama, place battery-operated tea lights around the cake stand – the flickering glow makes decorations look eerily alive!
Keeping Your Cake Fresh (If There’s Any Left!)
- Room temperature: Covered with a cake dome, it’ll stay fresh for 2 days (great for party prep!).
- Refrigerator: Store in an airtight container for up to 5 days. The frosting actually helps keep it moist!
- Freezer magic: Wrap unfrosted layers tightly in plastic, then foil. They’ll keep for 3 months – just thaw overnight in the fridge before decorating.
One Halloween, I made three cakes ahead and froze them – when unexpected guests arrived, I just thawed, frosted, and had instant spooky dessert ready. Total lifesaver!
Haunted House Layer Cake FAQs
Over the years of making this cake for every Halloween party imaginable, I’ve gotten the same questions again and again. Here are the answers to everything you might be wondering – straight from my haunted kitchen to yours!
Can I make the cake layers ahead of time?
Absolutely! In fact, I always bake my cake layers 1-2 days before decorating. Once cooled, wrap them tightly in plastic wrap and store at room temperature or freeze for up to 3 months (thaw overnight in fridge before frosting). The flavors actually deepen and become richer – like a fine wine, but way spookier!
Help! My frosting color isn’t dark enough. What do I do?
First – don’t panic! Dark colors can be tricky. Here’s my foolproof method: Start with chocolate frosting (it gives a darker base), then add black gel food coloring gradually. If it’s still not quite haunted-house-black, mix in a tiny bit of purple gel color – this creates depth. Still too light? A spoonful of extra cocoa powder can help deepen the shade without affecting texture.
How do I prevent my decorations from sliding off?
Ah, the great Halloween cake slide-off! Here’s what works for me: Chill your frosted cake for 15 minutes before adding heavy decorations. For fondant pieces, dab a tiny bit of frosting on as “glue.” Edible glue works too (mix a pinch of powdered sugar with water). And if you’re using candy eyeballs or sprinkles, press them in gently but firmly – they’ll stick to the slightly tacky frosting.
Can kids help decorate this cake?
Please do involve them! Some of my favorite decorations have come from little hands. Set up a “decoration station” with pre-portioned frosting in piping bags (no sharp tips needed), pre-made fondant shapes, and bowls of safe toppings like crushed cookies (for “dirt”) or colored sprinkles. I put down parchment paper to catch the mess and let their imaginations run wild. Their proud faces when the cake is revealed? Priceless.
What’s the best way to transport this cake?
After losing part of my first haunted house cake to a sudden car brake (RIP, top turret!), I learned these tricks: First, chill the cake thoroughly so the frosting firms up. Place it on a non-slip mat (a rubber shelf liner works great) on your cake carrier or box. If it’s tall, insert toothpicks strategically to support layers, then cover loosely with plastic wrap. And drive like you’re transporting a sleeping ghost – slow and steady!

Nutritional Information
Now, I’ll be honest – when I’m making a haunted house cake, I’m not exactly counting calories (who does on Halloween?). But I know some folks like to keep track, so here’s the general nutritional breakdown – just remember these are estimates and can change based on your specific ingredients and decorations. After all, those extra candy eyeballs and spiderwebs add up!
- Serving size: 1 slice (1/12 of cake)
- Calories: 320
- Total fat: 12g (3g saturated)
- Cholesterol: 35mg
- Sodium: 300mg
- Total carbohydrates: 50g
- Dietary fiber: 3g
- Sugars: 25g
- Protein: 5g
A little nutrition tip from my kitchen – if you want to lighten things up, you can swap the whole milk for low-fat buttermilk (it actually makes the cake extra tender!) or use a sugar substitute blend. But hey, it’s Halloween – sometimes you just need that full sugar-and-chocolate experience for maximum spooky enjoyment!


Scary-Good Haunted House Layer Cake for Halloween
- Total Time: 55 minutes
- Yield: 1 cake (12 servings) 1x
- Diet: Vegetarian
Description
A spooky-themed layer cake perfect for Halloween parties, featuring dark colors and eerie decorations.
Ingredients
- 2 cups all-purpose flour
- 1 1/2 cups sugar
- 3/4 cup cocoa powder
- 1 1/2 tsp baking powder
- 1 1/2 tsp baking soda
- 1 tsp salt
- 2 eggs
- 1 cup milk
- 1/2 cup vegetable oil
- 2 tsp vanilla extract
- 1 cup boiling water
Instructions
- Preheat oven to 350°F (175°C). Grease and flour two 9-inch cake pans.
- In a large bowl, mix flour, sugar, cocoa, baking powder, baking soda, and salt.
- Add eggs, milk, oil, and vanilla. Beat for 2 minutes.
- Stir in boiling water (batter will be thin). Pour into pans.
- Bake for 30-35 minutes. Cool completely before frosting.
Notes
- Use black or purple food coloring for a spooky effect.
- Decorate with edible spider webs or ghost-shaped fondant.
- Prep Time: 20 minutes
- Cook Time: 35 minutes
- Category: Dessert
- Method: Baking
- Cuisine: American
Nutrition
- Serving Size: 1 slice
- Calories: 320
- Sugar: 25g
- Sodium: 300mg
- Fat: 12g
- Saturated Fat: 3g
- Unsaturated Fat: 7g
- Trans Fat: 0g
- Carbohydrates: 50g
- Fiber: 3g
- Protein: 5g
- Cholesterol: 35mg