There’s something magical about Halloween baking – the spooky shapes, the playful colors, the way a simple cookie can become a tiny edible masterpiece. My haunted house scene cookies have been a Halloween tradition ever since my niece squealed with delight at her first “spooky cookie house” years ago. These aren’t just treats; they’re edible storytelling canvases where crooked chimneys, ghostly window shapes, and orange-dripping “cobwebs” come to life. What I love most is how these cookies turn kitchen time into a creative adventure – whether you’re baking with kids or just embracing your inner Halloween enthusiast.
Why You’ll Love These Haunted House Scene Cookies
These cookies aren’t just delicious – they’re a Halloween experience! Here’s why they’ve become my go-to spooky treat year after year:
- So simple to make: The dough comes together in minutes (really!), and even if you’re not artistic, the haunted house shapes do most of the spooky work for you.
- Instant Halloween spirit: Nothing gets my kitchen feeling festive faster than the smell of vanilla cookies and the sight of those little edible haunted houses lining my counter.
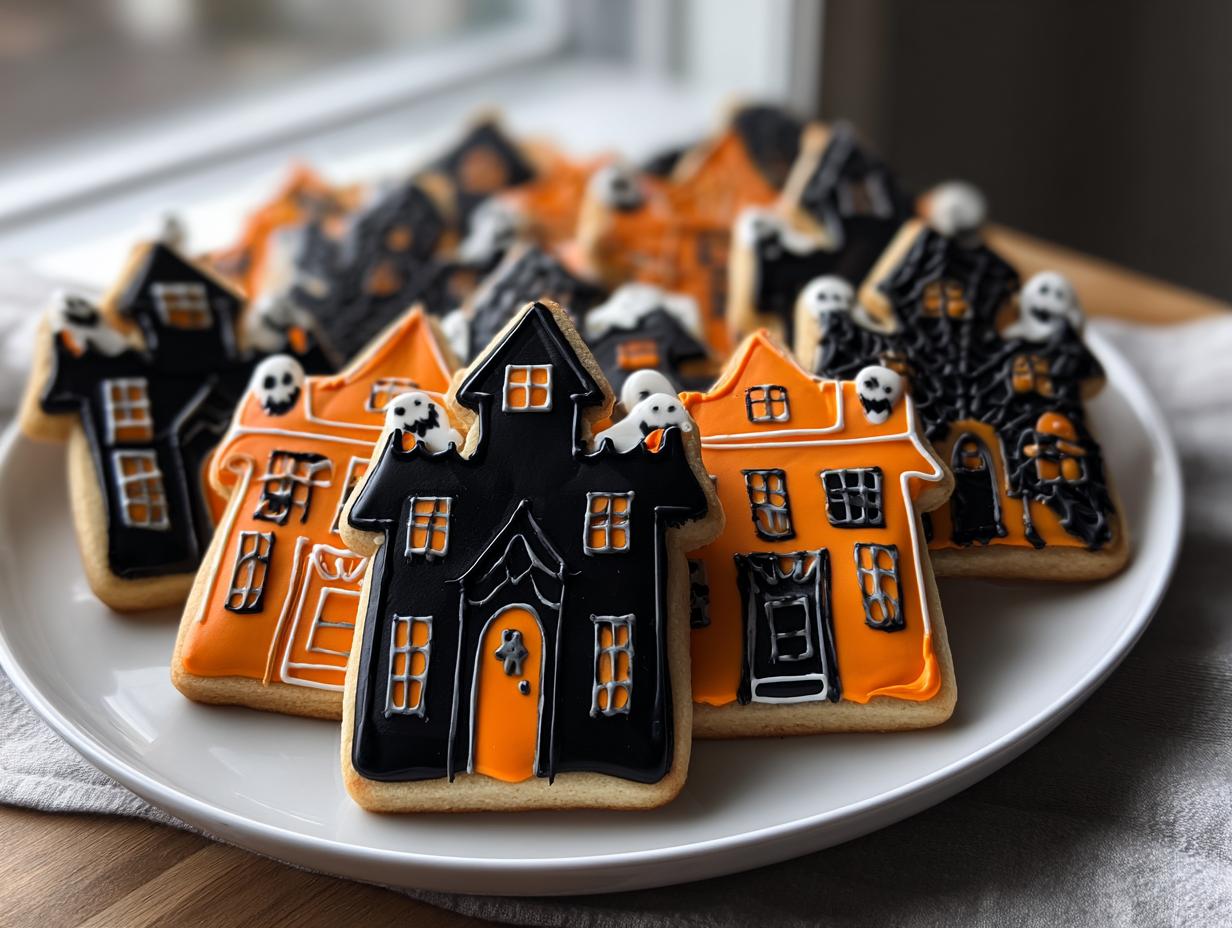
- Endless decorating fun: From “boo!” messages in the windows to orange-iced pumpkins by the door, every cookie becomes your mini haunted masterpiece. My niece once made one with 12 ghosts – no rules here!
- Crowd-pleasers: Kids adore them at parties, but I’ve caught plenty of adults sneaking extras when they think no one’s looking.
Ingredients for Haunted House Scene Cookies
Here’s everything you’ll need to bring your spooky cookie houses to life – trust me, these simple ingredients work absolute magic together:
- 2 1/4 cups all-purpose flour (spooned and leveled – no packing it down!)
- 1/2 teaspoon baking powder – our secret for cookies that hold their haunted shapes
- 1/4 teaspoon salt – just enough to balance the sweetness
- 3/4 cup unsalted butter, softened (leave it out for 30 minutes – you should be able to press your finger in easily)
- 3/4 cup granulated sugar – the perfect amount for crispy edges and soft centers
- 1 large egg – room temperature blends best
- 1 teaspoon vanilla extract – pure vanilla makes all the difference
- Black and orange icing – for decorating your haunted masterpieces (store-bought works fine, but homemade royal icing gives you control)
Pro tip: Double check your butter’s softness – too hard and your dough won’t come together smoothly; too melted and your haunted houses might spread into ghostly blobs!
Equipment You’ll Need
Don’t worry – you probably already have most of this in your kitchen! Here’s what you’ll need to create your haunted house masterpieces:
- Haunted house cookie cutters (or a steady hand and sharp knife for freehand cutting – crooked edges add character!)
- Rolling pin – my grandma’s wooden one works best, but any will do
- Mixing bowls – one large, one medium
- Baking sheets – lined with parchment paper to prevent ghostly sticking
- Piping bags or ziplock bags – for those spooky icing details
That’s it! No fancy gadgets needed – just basic tools and a little Halloween creativity.
How to Make Haunted House Scene Cookies
Ready to turn your kitchen into a mini haunted bakery? Follow these simple steps – I promise, even first-time cookie decorators can create spooky masterpieces!
Step 1: Prepare the Dough
First, whisk together your flour, baking powder, and salt in a medium bowl. In a large bowl, cream that softened butter and sugar until it’s light and fluffy – about 2 minutes with a hand mixer. Beat in the egg and vanilla just until combined. Now, gradually add your dry ingredients, mixing until the dough just comes together. Overmixing is the enemy here! If the dough feels sticky, wrap it in plastic and chill for 30 minutes – cold dough holds those haunted house shapes beautifully.
Step 2: Cut and Bake the Cookies
Preheat your oven to 350°F (175°C) and line baking sheets with parchment. Roll the dough to 1/4-inch thickness on a lightly floured surface – any thicker and your houses won’t crisp up nicely. Press your haunted house cutters firmly, or use a knife to cut freehand shapes (wonky edges add charm!). Bake for 10-12 minutes until the edges just start turning golden. They’ll firm up as they cool, so don’t wait for them to brown!

Step 3: Decorate Your Haunted House Scene Cookies
Let cookies cool completely – icing on warm cookies melts into spooky puddles! Pipe black icing for crooked windows and doors, then add orange details like jack-o’-lanterns or “dripping” roofs. Pro tip: Let base layers dry 15 minutes before adding ghosts or writing “BOO!” My nephew loves adding edible glitter for extra haunt-factor!

Tips for Perfect Haunted House Scene Cookies
After years of making these spooky treats, I’ve learned a few tricks to make your haunted houses truly spectacular:
- Chill your dough for 30 minutes if it feels sticky – cold dough holds those sharp haunted house edges beautifully when cutting.
- Use gel food coloring for icing – the colors stay vibrant without thinning your icing like liquid dyes do.
- Let cookies cool completely before decorating – warm cookies turn icing into ghostly puddles!
- Pipe thicker icing outlines first, then “flood” with thinner icing – this keeps your spooky details crisp.
Remember – crooked windows and “broken” fences just add haunted charm!

Ingredient Substitutions and Variations
No need to run to the store if you’re missing something – these haunted houses are super flexible! For gluten-free versions, swap in your favorite 1:1 gluten-free flour blend (I’ve had great results with Bob’s Red Mill). Margarine works in place of butter, though your cookies might spread slightly more. Want extra flavor? Try almond or maple extract instead of vanilla – they add a deliciously eerie depth. For chocolate lovers, replace 1/4 cup flour with cocoa powder for “midnight black” haunted houses!
Storing and Serving Haunted House Scene Cookies
These spooky little houses stay fresh in an airtight container at room temperature for up to a week – if they last that long! I like layering them between parchment paper to protect the decorations. They’re perfect for Halloween parties, but honestly, I’ve been known to enjoy them with my morning coffee as a festive treat. Just be warned – once you set out a plate, they disappear faster than ghosts at sunrise!
Haunted House Scene Cookies Nutritional Information
Just a quick note – these nutrition estimates can vary based on your specific ingredients and decorations! While our haunted house cookies are definitely a treat, they’re made with simple, wholesome ingredients you probably already have in your pantry.
Frequently Asked Questions
Over the years, I’ve gotten so many great questions about these haunted house scene cookies – here are the answers to the ones that pop up most often!
Can I freeze the dough for later?
Absolutely! Wrap the dough tightly in plastic and freeze for up to 3 months. When ready to bake, thaw in the fridge overnight, then let it sit at room temp for 15 minutes before rolling. The cold dough actually holds those spooky shapes even better!
How do I prevent my cookies from spreading?
Three tricks: 1) Make sure your butter is softened but not melted, 2) Chill the dough if your kitchen is warm, and 3) Don’t skip the baking powder – it helps them keep shape while baking.
Can kids help decorate?
Yes! The haunted house shapes are perfect for little hands. I put icing in squeeze bottles for younger kids and let them go wild with sprinkles. The “messier” they look, the more haunted they appear!
What’s the best icing for decorations?
Royal icing dries hard and is perfect for detailed work, but a simple powdered sugar glaze works too. For beginners, store-bought black and orange icing tubes are totally fine – we won’t tell!


Spooky 12-Ingredient Haunted House Scene Cookies That Wow
- Total Time: 32 mins
- Yield: 24 cookies 1x
- Diet: Vegetarian
Description
Spooky cookies shaped like haunted houses for Halloween.
Ingredients
- 2 1/4 cups all-purpose flour
- 1/2 teaspoon baking powder
- 1/4 teaspoon salt
- 3/4 cup unsalted butter, softened
- 3/4 cup granulated sugar
- 1 large egg
- 1 teaspoon vanilla extract
- Black and orange icing for decoration
Instructions
- Preheat oven to 350°F (175°C).
- Whisk flour, baking powder, and salt in a bowl.
- Cream butter and sugar until fluffy.
- Beat in egg and vanilla.
- Gradually mix in dry ingredients.
- Roll dough to 1/4-inch thickness.
- Cut into haunted house shapes.
- Bake for 10-12 minutes.
- Cool completely before decorating.
Notes
- Chill dough for 30 minutes if too soft.
- Use cookie cutters or a knife for shapes.
- Store in an airtight container.
- Prep Time: 20 mins
- Cook Time: 12 mins
- Category: Dessert
- Method: Baking
- Cuisine: American
Nutrition
- Serving Size: 1 cookie
- Calories: 120
- Sugar: 8g
- Sodium: 35mg
- Fat: 5g
- Saturated Fat: 3g
- Unsaturated Fat: 2g
- Trans Fat: 0g
- Carbohydrates: 16g
- Fiber: 0g
- Protein: 1g
- Cholesterol: 20mg