Let me tell you about the first time I made homemade pie crust – what a mess! Flour everywhere, butter melting in my warm hands, and a crust that came out tougher than shoe leather. But that disastrous attempt led me to discover the secrets of truly flaky, buttery perfection. This homemade pie crust guide will save you from making my mistakes.
There’s just something magical about biting into a pie with that perfect crisp-yet-tender crust that shatters delicately. Store-bought versions can’t compare to the rich flavor you get from real butter and that satisfying crunch between your teeth. Once you master this simple recipe, you’ll never go back to the frozen section again!

Why You’ll Love This Homemade Pie Crust Guide
This recipe changed my baking game forever, and here’s why it’ll do the same for you:
- That flaky texture – When done right, you get those beautiful buttery layers that practically sing when you take a bite
- Just 4 simple ingredients – No weird additives, just flour, butter, salt and water working their magic
- Works for ANY pie – Sweet apple, savory quiche, you name it – this crust is your perfect canvas
- Way better than store-bought – The flavor difference will make you wonder why you ever bought those frozen discs
Ingredients for Homemade Pie Crust
You’d be amazed what magic you can create with just four simple ingredients – but the details matter! Here’s exactly what you’ll need:
- 1 1/4 cups all-purpose flour – Spoon it lightly into your measuring cup and level it off for perfect accuracy
- 1/2 teaspoon salt – Just enough to enhance all the flavors without making it taste salty
- 1/2 cup unsalted butter – Chilled and cubed (I pop mine in the freezer for 15 minutes before starting)
- 3-4 tablespoons ice water – Seriously, use actual ice water – it makes all the difference!
See? Nothing fancy – just quality ingredients handled with care. That cold butter is your secret weapon for flakiness, so don’t skip the chilling step!
Equipment You’ll Need for Homemade Pie Crust
Don’t worry – you don’t need fancy gadgets for perfect pie crust! Just grab these kitchen essentials:
- A trusty mixing bowl – I like a wide, shallow one so I can really see what’s happening with my dough
- Pastry cutter or two forks – Grandma always used her fingers, but I find tools help keep the butter colder
- Rolling pin – Mine’s an old wooden one with sentimental value, but any kind will work
- Plastic wrap – For wrapping that precious dough disk before its fridge nap
- Measuring cups and spoons – Precision matters with just 4 ingredients!
That’s it! No special equipment required – just basic tools most home cooks already have.
Step-by-Step Homemade Pie Crust Instructions
Alright, let’s get our hands floury! Follow these steps and you’ll have perfect pie crust that’ll make your grandma proud. The key? Keep everything cold and don’t overwork that dough!
Mixing the Dough
First things first – wash your hands in cold water to keep everything chilled. Trust me, warm hands are the enemy here! Whisk together your flour and salt in that wide bowl, then toss in your ice-cold butter cubes. Now, work quickly with your pastry cutter (or forks) until the mixture looks like coarse crumbs with some pea-sized butter bits remaining. Those butter pockets are what create our flaky layers!
Adding Water and Shaping
Here’s where patience pays off. Drizzle in your ice water one tablespoon at a time, gently tossing with a fork after each addition. Stop the moment the dough starts to clump together when pressed – you might not need all the water! Turn it out onto a clean surface, give it 3-4 quick kneads just to bring it together, then flatten into a disk about 1-inch thick. Wrap it in plastic like you’re tucking in a baby and chill for at least 30 minutes (up to 2 days).
Rolling and Transferring
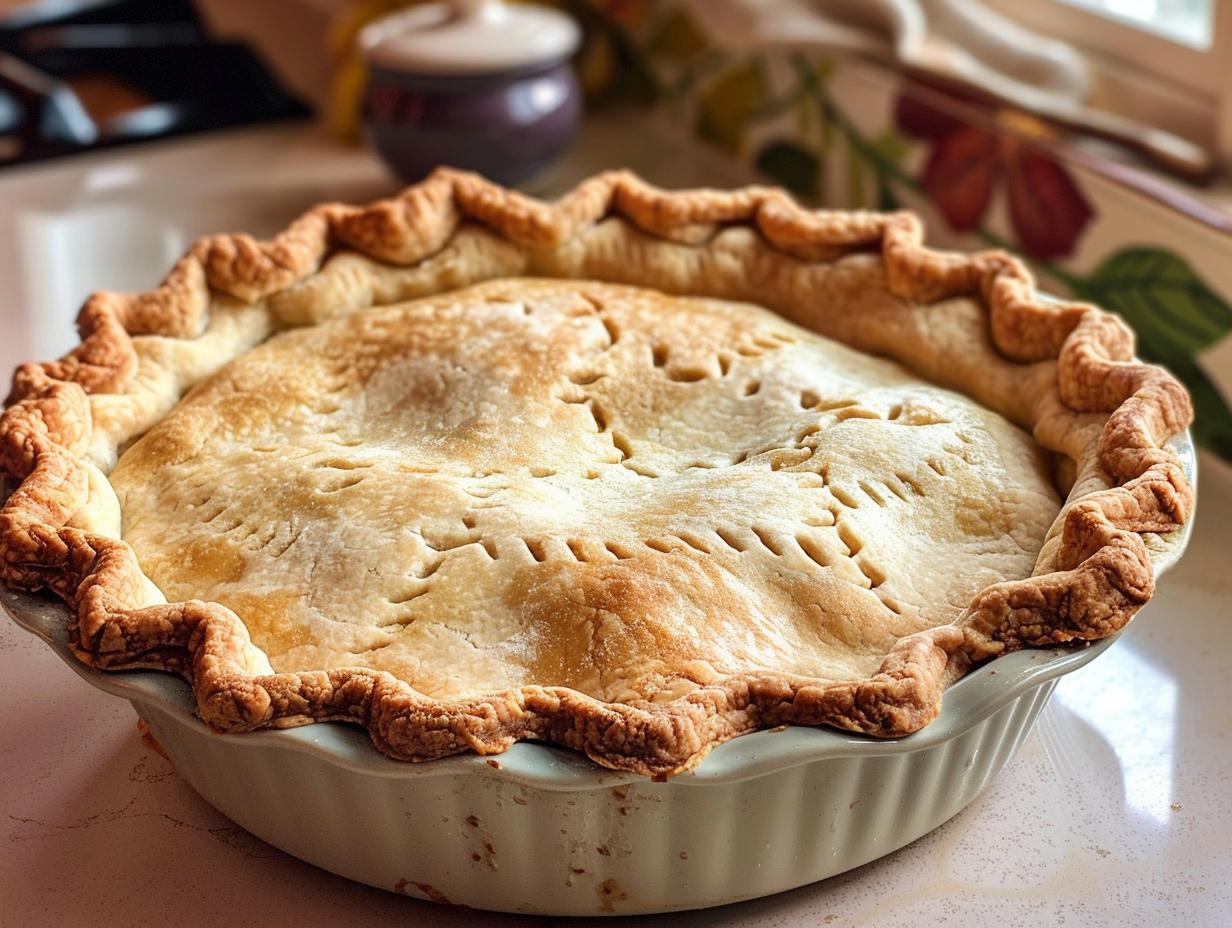
Lightly flour your surface and rolling pin – but don’t go overboard! Start from the center and roll outward, turning the dough a quarter turn after each roll to prevent sticking. Aim for about 1/8-inch thickness and 2 inches wider than your pie plate. To transfer, gently fold the dough in quarters, move to your pie plate, then unfold. Trim the edges leaving about 1-inch overhang, tuck that under, and crimp however you like. Now it’s ready for filling or blind baking! If you are looking for a great apple pie recipe to use this crust with, check out this link.
Pro Tips for Perfect Homemade Pie Crust
After years of trial and error (mostly errors at first!), here are my golden rules for pie crust perfection:
- Keep everything cold, cold, cold! I even chill my flour and bowl sometimes. Warm butter equals tough crust.
- Handle with care – Overworking the dough develops gluten, making it tough instead of tender.
- The water test – Pinch some dough; if it holds together without crumbling, stop adding water!
- Rest is best – That 30-minute chill relaxes the gluten and firms up the butter for easier rolling.
Remember: Pie crust isn’t bread dough. The less you mess with it, the better it turns out! For more general baking tips, you can check out resources on how to make pie crust.
Homemade Pie Crust Variations
Once you’ve mastered the basic recipe, have fun playing with variations! For savory pies, I love adding a teaspoon of fresh thyme or rosemary to the flour. My Southern friends swear by replacing half the butter with lard for extra flakiness. Feeling fancy? A tablespoon of grated Parmesan adds wonderful depth to quiche crusts.
Storing and Freezing Homemade Pie Crust
Here’s the beautiful thing about this dough – you can make it ahead and stash it for pie emergencies! The wrapped dough disk keeps happily in the fridge for 2-3 days. For longer storage, freeze it up to 3 months (I double-wrap in plastic then foil). Thaw overnight in the fridge when ready to use – never at room temp or that precious butter will weep!
Homemade Pie Crust Nutritional Information
Here’s the scoop on what’s in each slice – but remember, these are just estimates! Your exact numbers might dance around a bit depending on your specific ingredients. One eighth of this crust clocks in at about 120 calories with 8g of that heavenly butterfat. It’s not health food, but oh, is it worth every delicious bite!
Homemade Pie Crust FAQs
Can I use margarine instead of butter?
Oh honey, I know it’s tempting, but please don’t! Margarine has more water and won’t give you those beautiful flaky layers we’re after. If you must substitute, try high-quality shortening – but real butter’s flavor just can’t be beat.
Why did my crust turn out tough?
You probably overworked the dough (been there!). Remember – pie crust is like a delicate friendship. Handle it gently and don’t overmix, or it’ll get defensive and tough on you. Also check that your ingredients were cold enough!
Can I make this dough in a food processor?
Absolutely! Just pulse until it resembles coarse crumbs – about 10 quick pulses usually does it. But I find hand-mixing gives me better control to stop before overworking. Either way, keep an eye on that texture!
How thin should I roll the dough?
Aim for about 1/8-inch thick – like two stacked quarters. Too thin and it’ll tear; too thick and it won’t cook through properly. Pro tip: Roll from the center out and rotate frequently for even thickness.
Share Your Homemade Pie Crust Experience
Did you try this recipe? I’d love to hear how it turned out! Leave a comment below or snap a photo of your flaky masterpiece – nothing makes me happier than seeing your pie crust successes! If you’re looking for a great lemon loaf cake recipe to serve alongside your pie, check this out.
Print
Perfect Homemade Pie Crust Recipe with 4 Magical Ingredients
- Total Time: 40 minutes
- Yield: 1 pie crust (9-inch) 1x
- Diet: Vegetarian
Description
Learn how to make a flaky, buttery homemade pie crust from scratch with simple ingredients and easy steps.
Ingredients
- 1 1/4 cups all-purpose flour
- 1/2 teaspoon salt
- 1/2 cup unsalted butter, chilled and cubed
- 3–4 tablespoons ice water
Instructions
- Mix flour and salt in a bowl.
- Cut in butter until mixture resembles coarse crumbs.
- Add ice water, 1 tablespoon at a time, until dough comes together.
- Shape into a disk, wrap in plastic, and chill for 30 minutes.
- Roll out dough on a floured surface and transfer to a pie dish.
- Trim edges and crimp as desired.
Notes
- Keep ingredients cold for best results.
- Handle dough as little as possible to avoid toughness.
- Use immediately or freeze for later.
- Prep Time: 10 minutes
- Cook Time: 0 minutes
- Category: Baking
- Method: Hand-mixed
- Cuisine: American
Nutrition
- Serving Size: 1/8 of crust
- Calories: 120
- Sugar: 0g
- Sodium: 75mg
- Fat: 8g
- Saturated Fat: 5g
- Unsaturated Fat: 3g
- Trans Fat: 0g
- Carbohydrates: 10g
- Fiber: 0g
- Protein: 2g
- Cholesterol: 20mg