There’s something almost magical about homemade whipped cream—the way it transforms a simple dessert into something unforgettable. I still remember the first time I made it myself, watching those soft peaks form and realizing just how easy it is compared to the store-bought stuff. With just three ingredients—cold heavy cream, a touch of powdered sugar, and a splash of vanilla—you can whip up (literally!) the lightest, creamiest topping for pies, hot cocoa, or fresh berries. It’s one of those little kitchen skills that feels fancy but couldn’t be simpler. Once you try it, you’ll never go back to the canned version.

Why You’ll Love This Homemade Whipped Cream
Listen, once you’ve tasted real whipped cream—the kind you make yourself—there’s no going back. Here’s why this little kitchen trick is a game-changer:
- It’s ridiculously easy. Three ingredients, one bowl, and five minutes—that’s it. No weird stabilizers or mystery ingredients.
- Customize to your heart’s content. Swap vanilla for almond extract, add cocoa powder, or drizzle in honey. The flavor possibilities are endless.
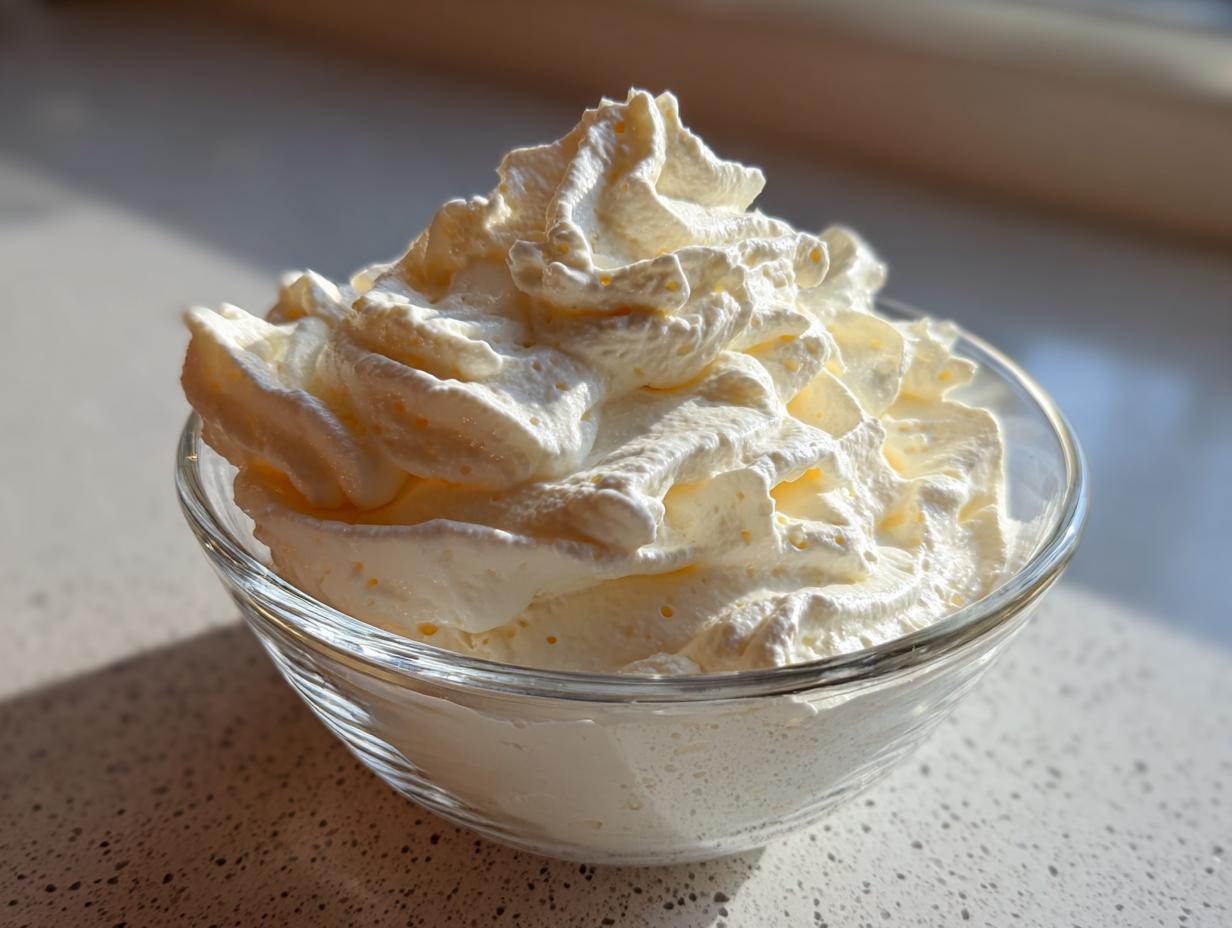
- Light as air texture. Unlike the dense, overly-sweet stuff from a can, this melts on your tongue like a cloud.
- Instant dessert upgrade. Pile it on pies, berries, or even your morning coffee—everything tastes fancier with a dollop of the real deal.
Ingredients for Homemade Whipped Cream
Here’s the beautiful simplicity of it—you only need three things to make magic happen:
- 1 cup cold heavy cream (seriously, don’t skip the “cold” part—it whips up so much better when chilled)
- 2 tablespoons powdered sugar (or more if you like it sweeter—I sometimes sneak in an extra spoonful)
- 1 teaspoon vanilla extract (the good stuff, if you’ve got it)
Ingredient Notes & Substitutions
Now, let’s talk tweaks—because sometimes you’re out of an ingredient, or you just want to play around:
- Powdered sugar swap: Maple syrup or honey work in a pinch (start with 1 tablespoon and adjust to taste). Granulated sugar can work, but it might leave a slight graininess.
- Vanilla alternatives: Almond extract gives it a lovely nutty twist, or try a splash of bourbon for a grown-up version.
- Cream warning: Don’t even think about using low-fat or half-and-half—it just won’t whip up right. Heavy cream or bust!
How to Make Homemade Whipped Cream
Okay, let’s get whisk-deep into making this dreamy topping—it’s easier than you think, but a few key steps make all the difference:
- Chill everything. Pop your mixing bowl and beaters (or whisk attachment) into the freezer for about 10 minutes. Cold tools = happy whipped cream.
- Pour and sweeten. Add your cold heavy cream to the chilled bowl, then sprinkle in the powdered sugar and vanilla. (Pro tip: sift the sugar to avoid lumps!)
- Start slow, then go steady. Begin beating on low speed to combine, then bump it up to medium. You’ll see the cream thicken—this is where the magic starts.
- Watch for soft peaks. Stop the mixer when the cream holds its shape but still droops slightly at the tip when you lift the beater. Think “gentle waves,” not “stiff mountains.”
- Don’t walk away! Seriously, set a timer if you need to. Overbeating turns cream into butter (which, while delicious, is not the goal here).

Pro Tips for Perfect Homemade Whipped Cream
After making this more times than I can count—and yes, occasionally turning it into butter—here’s what I’ve learned:
- Cold is non-negotiable. Warm cream? It’ll weep and slack. If your kitchen’s hot, chill the bowl longer—even 15 minutes helps.
- Undermix, don’t overmix. When in doubt, stop early. You can always beat it a bit more, but you can’t undo overbeaten cream.
- Use a deep bowl. Shallow bowls = splatters everywhere. Save yourself the cleanup.
- Hand-whisking works too. No mixer? A whisk and some elbow grease will get you there—just expect an arm workout!
Serving Suggestions for Homemade Whipped Cream
Oh, the places this whipped cream can go! Here are my absolute favorite ways to use it—trust me, once you start dolloping, you’ll find excuses to put it on everything:
- Dessert MVP: Pile it high on pies (my apple pie would be naked without it), cakes, or brownies still warm from the oven. It melts just enough to create a dreamy swirl.
- Coffee’s best friend: Stir a spoonful into hot cocoa or float it on iced coffee for an instant café vibe at home.
- Fruit’s fancy sidekick: Take berries from snack to dessert by adding a cloud of cream—add a drizzle of honey if you’re feeling extra.
- Breakfast rebel: Who says whipped cream is just for dessert? Top pancakes, waffles, or even oatmeal (don’t judge—it’s delicious).
- Parfait layer: Alternate with yogurt and granule for a quick fancy-looking treat.
Honestly? I’ve been known to eat it straight from the bowl with a spoon. No shame.
Storing Homemade Whipped Cream
Here’s the bittersweet truth about homemade whipped cream—it’s absolutely glorious when freshly made, but it doesn’t hold up for days like the stabilizer-packed store stuff. But don’t worry, I’ve got the scoop on keeping it happy (and how to revive it if needed):
The golden rule: Use it within 2 hours of whipping for peak fluffiness. After that, it starts to deflate and weep (like a sad little cloud). If you must store it, pop it in the fridge covered with plastic wrap pressed directly against the surface—this helps prevent a crust from forming.
Revival tricks: If your whipped cream slumps after chilling, give it a quick 10-second whip to bring back its volume. But beware! Over-whipping at this stage turns it grainy. If that happens, fold in a tablespoon of fresh cold cream to smooth it out.
Why fresh is best: Unlike commercial versions with preservatives, ours is just cream, sugar, and love—which means it’ll separate faster. I always whip mine right before serving (it takes 5 minutes!) or at most an hour ahead. Pro tip: Keep the bowl cold in the fridge until the last minute if prepping for a party.
Fun fact: That “weeping” liquid is actually sweetened heavy cream—so if your whipped cream collapses, just stir it back in for a delicious pourable topping on berries or pancakes!
Homemade Whipped Cream FAQs
I get asked these questions ALL the time—here’s the real talk on whipped cream dilemmas, straight from my messy kitchen to yours:
Can I use granulated sugar instead of powdered?
Yes, but it’ll be grainier. Powdered sugar dissolves instantly and gives that smooth texture we love. In a pinch? Blitz regular sugar in a blender for 10 seconds to make your own powdery version.
Help! I overbeat my cream—now it looks like butter!
Oops! We’ve all been there. If it’s just slightly overbeaten, fold in a splash of fresh cold cream gently. If it’s full-on butter? Congrats—you just made sweet butter! Spread it on toast and start over.
Any vegan substitutes that actually work?
Coconut cream is your best bet—chill a can overnight, scoop out the thick part (leave the watery bit behind), and whip it just like dairy cream. Pro tip: Add a pinch of cornstarch to help it hold shape.
Why does my whipped cream keep deflating?
Usually means your bowl/cream wasn’t cold enough, or your kitchen’s too warm. Try this: Next time, freeze your bowl for 20 minutes and keep the cream in the fridge until the last second. Stability magic!
Can I make this ahead for a party?
Kinda. It lasts 2 hours max before weeping. Better to prep everything else and whip the cream just before serving. Need to cheat? Stabilize it with 1/4 tsp cornstarch per cup of cream while whipping—shh, I won’t tell!
Nutritional Information for Homemade Whipped Cream
Okay, let’s be real—whipped cream isn’t exactly a health food, but when you make it yourself, you know exactly what’s going into it (no weird stabilizers or mystery ingredients!). Here’s the lowdown per 2-tablespoon serving—because let’s face it, who stops at just one spoonful?
Per serving (approx.):
52 calories | 5g fat (3g saturated) | 2g sugar | 0.5g protein
A few things to note: These numbers can shift slightly depending on your exact ingredients—like if you use maple syrup instead of powdered sugar or go heavy on the vanilla. And hey, compared to store-bought versions? Ours often has less sugar since we control the sweetness. Pro tip: For a lighter option, you can reduce the sugar to 1 tablespoon—it’ll still whip up beautifully!
Fun fact: That rich texture comes almost entirely from the cream’s natural fat content (that’s why low-fat versions just won’t whip right). So embrace the indulgence—this is dessert, after all! My philosophy? A little of the real stuff beats a mountain of fake “light” toppings any day.
Print
3-Ingredient Homemade Whipped Cream Recipe That’s Heavenly
- Total Time: 15 mins
- Yield: 2 cups 1x
- Diet: Vegetarian
Description
Learn how to make homemade whipped cream with just a few simple ingredients. Perfect for desserts, coffee, or fruit toppings.
Ingredients
- 1 cup heavy cream
- 2 tablespoons powdered sugar
- 1 teaspoon vanilla extract
Instructions
- Chill a mixing bowl and beaters in the freezer for 10 minutes.
- Pour the heavy cream into the chilled bowl.
- Add powdered sugar and vanilla extract.
- Beat on medium speed until soft peaks form.
- Stop beating once the cream holds its shape.
- Serve immediately or refrigerate for up to 2 hours.
Notes
- For best results, use cold heavy cream.
- Avoid overbeating to prevent the cream from turning into butter.
- Adjust sugar to taste.
- Prep Time: 10 mins
- Cook Time: 5 mins
- Category: Dessert
- Method: Whipping
- Cuisine: International
Nutrition
- Serving Size: 2 tablespoons
- Calories: 52
- Sugar: 2g
- Sodium: 5mg
- Fat: 5g
- Saturated Fat: 3g
- Unsaturated Fat: 1.5g
- Trans Fat: 0g
- Carbohydrates: 2g
- Fiber: 0g
- Protein: 0.5g
- Cholesterol: 17mg