Oh my gosh, let me tell you about the first time I made maple walnut fudge – I was hooked! It was a snowy December afternoon, and I had this crazy craving for something sweet but not too chocolatey. I rummaged through my pantry and found a bottle of real maple syrup from my last Vermont trip and some walnuts that were begging to be used. That’s when the magic happened!
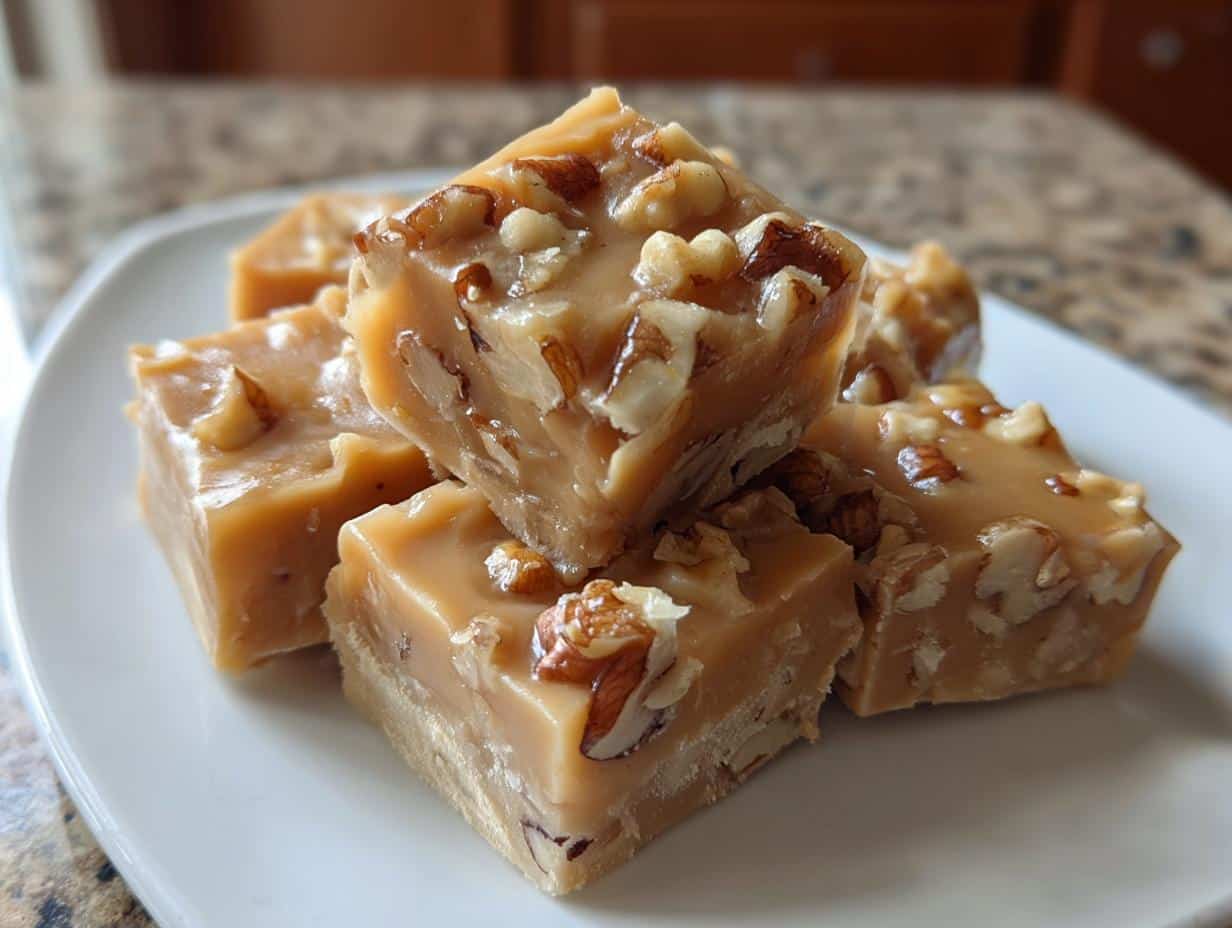
This maple walnut fudge is like a little square of happiness – rich, creamy, and with that perfect crunch from toasted walnuts. The maple flavor isn’t overpowering, just this wonderful, woodsy sweetness that makes you close your eyes and savor every bite. What I love most is how it makes my whole kitchen smell like a cozy cabin in the mountains while it’s cooking.

Trust me, once you try this fudge, you’ll understand why I make batch after batch every holiday season. It’s become my signature treat for cookie exchanges, and my neighbors actually start dropping hints around Thanksgiving! The best part? It’s surprisingly simple to make – no fancy skills needed, just some patience (and maybe a good candy thermometer).
Why You’ll Love This Maple Walnut Fudge
Oh, where do I even start? This fudge has that dreamy, melt-in-your-mouth creaminess that makes you want to hide the whole batch for yourself. But here’s the real magic – it comes together with just a few simple steps (yes, even if you’ve never made candy before).
And the maple! Pure maple syrup gives it this incredible depth of flavor that’s miles better than those overly sweet fudges. The walnuts add this perfect crunch that makes each bite so satisfying. Plus, wrapped in pretty parchment, it makes the most thoughtful homemade gift – I’ve seen grown adults do a little happy dance when they receive a box!
Maple Walnut Fudge Ingredients
Okay, let’s talk ingredients – because this is where the magic starts! First rule: no shortcuts with the maple syrup. You must use pure maple syrup (the real stuff from trees, not pancake syrup) or the flavor just won’t be right. I learned that the hard way when I tried to substitute once – never again!
Here’s what you’ll need:
- 2 cups granulated sugar – plain white sugar works best here
- 1/2 cup pure maple syrup – splurge on the good Grade A stuff
- 1/2 cup heavy cream – take it out of the fridge about 30 minutes before you start
- 1/4 cup unsalted butter – cut it into cubes and keep it cold until you need it
- 1 tsp vanilla extract – the real deal, not imitation
- 1/2 tsp salt – just a pinch to balance all that sweetness
- 1 cup chopped walnuts – toast them first if you want that extra nutty flavor (I always do!)

Pro tip from my many fudge experiments: measure everything before you start cooking. Once that sugar starts boiling, you won’t have time to chop nuts or measure vanilla. Trust me – I’ve had some panicked moments reaching for ingredients with one hand while stirring with the other!
Equipment You’ll Need
Don’t worry – you don’t need any fancy gadgets for this fudge! Just gather these basics before you start:
- A heavy-bottomed saucepan (trust me, thin pans burn the sugar)
- A candy thermometer – non-negotiable for perfect texture
- Parchment paper (for easy fudge removal – no sticking!)
- An 8-inch square pan
- A sturdy rubber spatula (wooden spoons work too)
That’s it! Now let’s make some fudge magic happen.
How to Make Maple Walnut Fudge
Alright, let’s dive into the fun part – making the actual fudge! I promise it’s easier than you think, especially if you follow these steps. Just take your time and enjoy the process (and that amazing maple scent filling your kitchen!).
Step 1: Prepare the Pan
First things first – line that 8-inch square pan with parchment paper, leaving about 2 inches hanging over each side. This little “overhang” will be your best friend later when you need to lift the fudge out. I like to lightly butter the pan first to make the parchment stick – no sliding around!
Step 2: Cook the Sugar Mixture
Now, grab your heavy saucepan and combine the sugar, maple syrup, and heavy cream. Stir constantly over medium heat until the sugar dissolves completely – no gritty bits! Then, stop stirring (this is important!) and let it boil until your candy thermometer hits exactly 238°F. This is the “soft-ball stage” – the magic temperature for perfect fudge texture. Resist the urge to stir during boiling!

Step 3: Add Butter and Vanilla
Remove the pan from heat and let it cool for about 5 minutes (no cheating – I’ve learned this the hard way!). Then, gently stir in your cubed butter, vanilla, and salt. The butter will melt into this gorgeous, glossy mixture. If you add it too soon, the fats can separate and you’ll get greasy fudge – not what we want!
Step 4: Beat and Fold in Walnuts
Here’s where the arm workout comes in! Let the mixture cool another 10 minutes, then beat vigorously with a wooden spoon until it thickens and loses its shine – about 5-7 minutes. When it starts looking like thick frosting and holds its shape, fold in those beautiful toasted walnuts gently. Don’t overmix now – we want those nutty bits distributed evenly!
Step 5: Set and Slice
Pour your glorious fudge into the prepared pan and smooth the top. Now, the hardest part – walk away for 2 hours! No peeking! When it’s fully set, use the parchment overhang to lift it out. Cut into small squares with a sharp knife (wiping it between cuts makes cleaner edges). Pro tip: warm the knife under hot water for the first cut – makes it so much easier!
Maple Walnut Fudge Tips for Success
After making more batches than I can count (and yes, a few disasters along the way), here are my can’t-live-without tips for perfect maple walnut fudge every single time:
- Test your thermometer first! Boil water – it should read 212°F. If not, adjust your cooking temperature accordingly. Nothing worse than under or overcooked fudge because your thermometer lied to you.
- Hands off the spoon once it boils! Stirring after the sugar mixture reaches boiling point causes crystallization. Just let it do its thing until it hits 238°F.
- Toast those walnuts! 5 minutes in a 350°F oven transforms them from “nice” to “OH MY GOSH WHAT IS THIS MAGIC.” The nutty depth it adds is unreal.
Follow these three simple rules, and you’ll be the maple fudge hero of your next potluck – guaranteed!
Maple Walnut Fudge Variations
Oh, the fun we can have with this basic recipe! My favorite lazy swap? Pecans instead of walnuts – they bring this buttery richness that pairs stunningly with maple. For a fancy twist, sprinkle flaky sea salt on top right after pouring into the pan – the sweet-salty combo is addictive!
Feeling adventurous? Try adding a handful of dried cranberries with the nuts for tart contrast, or swap half the walnuts with toasted coconut flakes for tropical vibes. Last Christmas, I even stirred in crumbled bacon (yes, bacon!) for my brother-in-law – he still raves about it!

Storing Maple Walnut Fudge
Here’s the beautiful thing about this fudge – it keeps like a dream! Just pop those precious squares into an airtight container at room temperature, and they’ll stay creamy and delicious for up to a week. If you’re like me and like to stash some away (because let’s be honest – it never lasts that long!), layer them between parchment in a freezer bag. They freeze perfectly for up to 2 months. Pro tip: Thaw frozen fudge at room temperature for about 30 minutes – it tastes just like freshly made!
Maple Walnut Fudge FAQs
Can I use honey instead of maple syrup? Oh honey, no! (Pun totally intended.) While honey is delicious, it has a completely different sugar structure that’ll give you a weird, grainy texture. Stick with pure maple syrup – it’s the heart and soul of this recipe!
Why did my fudge crystallize? Ah, the dreaded sugar crystals! This usually happens when you stir after the boiling starts or if sugar crystals stick to the pan sides. My trick? Brush the pan sides with a wet pastry brush before boiling to dissolve any rogue sugar.
Can I omit nuts? Absolutely! The fudge will still be delicious, just smoother in texture. If you’re nut-free, try stirring in crushed pretzels for salty crunch or mini marshmallows for fun texture contrast. My cousin swears by adding freeze-dried strawberries!
Nutritional Information
Now, I’m no nutritionist, but let’s be real – we’re making fudge here, not a salad! These numbers are rough estimates per piece, and they’ll vary depending on your exact ingredients (especially how generous you are with those walnuts!). It’s a treat, meant to be enjoyed in moderation – though good luck stopping at just one piece!
Tag us if you make this maple walnut fudge! I’d love to see your creations and hear about any fun twists you tried. There’s nothing more rewarding than seeing someone take a bite and get that “oh wow” look on their face – that’s when you know you’ve made fudge magic!
Print
“10-Minute Maple Walnut Fudge: The Irresistible Treat!”
- Total Time: 2 hours 30 mins
- Yield: 16 pieces 1x
- Diet: Vegetarian
Description
A rich and creamy fudge made with maple syrup and walnuts for a sweet and nutty treat.
Ingredients
- 2 cups granulated sugar
- 1/2 cup maple syrup
- 1/2 cup heavy cream
- 1/4 cup unsalted butter
- 1 tsp vanilla extract
- 1/2 tsp salt
- 1 cup chopped walnuts
Instructions
- Line an 8-inch square pan with parchment paper.
- In a saucepan, combine sugar, maple syrup, and heavy cream. Stir over medium heat until sugar dissolves.
- Bring to a boil and cook until the mixture reaches 238°F on a candy thermometer.
- Remove from heat and stir in butter, vanilla, and salt.
- Let cool slightly, then beat until thick and creamy.
- Fold in chopped walnuts.
- Pour into the prepared pan and let set at room temperature for 2 hours.
- Cut into squares and serve.
Notes
- Use a candy thermometer for accuracy.
- Store in an airtight container for up to a week.
- Prep Time: 10 mins
- Cook Time: 20 mins
- Category: Dessert
- Method: Stovetop
- Cuisine: American
Nutrition
- Serving Size: 1 piece
- Calories: 180
- Sugar: 22g
- Sodium: 75mg
- Fat: 8g
- Saturated Fat: 3g
- Unsaturated Fat: 4g
- Trans Fat: 0g
- Carbohydrates: 28g
- Fiber: 0.5g
- Protein: 1g
- Cholesterol: 15mg