Every Halloween, my kitchen turns into a candy workshop, and these Mini Candy Witch Hat Bites are always the star of the show! I remember the first time my niece and I made them—her tiny hands carefully pressing chocolate kisses onto cookies while I tried (and failed) to keep the frosting off everything. These adorable treats are perfect for last-minute Halloween parties because they come together in minutes with no baking required. Just a few simple ingredients transform into the cutest little witch hats you’ve ever seen. Trust me, once you make a batch, they’ll vanish faster than a black cat in the night!
Why You’ll Love These Mini Candy Witch Hat Bites
These little witch hats aren’t just adorable—they’re seriously addictive for so many reasons. Here’s why they disappear every time I make them:
- Lightning fast: You’ll have a whole coven of witch hats ready in 15 minutes flat. No baking, no waiting, just instant Halloween magic!
- Kid-approved magic: Little hands love helping assemble these – pressing on the chocolate kisses is the perfect job for tiny fingers (though you might need to rescue a few from sneaky taste-testers).
- No oven needed: When October gets crazy busy, these no-bake treats are my secret weapon. No heating up the kitchen means more time for costume finishing touches!
- Endless creativity: Switch up frosting colors, add googly candy eyes, or sprinkle on edible glitter. Every batch becomes its own spooky masterpiece.
Honestly? The hardest part is keeping them around long enough to actually serve at your party!
Ingredients for Mini Candy Witch Hat Bites
Here’s the magical little shopping list for these adorable witch hats – simple ingredients that come together to create something truly spellbinding! I’ve made these enough times to know exactly what works best:
- 24 chocolate kisses – Unwrapped, of course! I like using the classic milk chocolate ones, but the dark chocolate variety gives a nice grown-up twist.
- 24 round shortbread cookies (1.5-inch diameter) – The perfect hat base! I’ve found the store-bought shortbread rounds work beautifully, just make sure they’re not too thick or the proportions get wonky.
- 1/2 cup orange or black frosting – Your choice! I use store-bought for speed, but homemade buttercream works great too if you’re feeling fancy. Pro tip: The orange really pops against the chocolate!
- 24 mini candy eyeballs (optional) – Because witch hats with eyes are way more fun! The 1/4-inch size works perfectly for these little guys.
That’s it! Just four simple ingredients (five if you count the optional eyes) and you’re ready to conjure up some Halloween magic. I always buy a few extra kisses though… purely for quality control testing, of course!
How to Make Mini Candy Witch Hat Bites
Alright, let’s get to the fun part – turning those simple ingredients into the cutest little witch hats you ever did see! I’ve made so many batches of these that I could probably do it in my sleep now, but here’s the step-by-step that’ll have you making them like a pro on your first try.

Assembling the Hats
First, lay out all your cookies flat side up – this is your hat brim waiting to happen. Take about 1/4 teaspoon of frosting (I just eyeball it) and plop it right in the center of each cookie. Now here comes the magic – press a chocolate kiss pointy-side down onto that frosting blob. Don’t push too hard or you’ll crack the cookie (been there, done that!), just enough to make it stick.
Wait, wait – before you move on, check that your hat isn’t doing the Leaning Tower of Pisa impression! Gently straighten any wonky ones. I usually do this in batches of 6 at a time so the frosting doesn’t dry out before I can decorate.
Decorating Tips
Now for my favorite part – the decorating! Load your remaining frosting into a piping bag with a small round tip (or snip the corner off a plastic bag if you’re going rogue). Pipe a cute little ring around the base of each chocolate kiss to create the hat’s brim. You can make it neat and tidy or go for a purposely messy, “witchy” look – both are adorable!
If you’re using those candy eyeballs (and seriously, you should – they’re hilarious), gently press two onto each hat’s “brim” so they peek out. Sometimes I’ll even pipe tiny eyebrows for extra character! For a fancy touch, try alternating orange and black frosting between hats, or dust them with edible glitter while the frosting’s still wet.

Let your finished witch hats set for about 10 minutes before serving – just long enough for the frosting to firm up a bit. And voila! You’ve just created the easiest, most adorable Halloween treat that’ll have everyone under your spell.
Mini Candy Witch Hat Bites Variations
Once you’ve mastered the basic witch hat magic, it’s time to get creative! These little treats are like a blank cauldron just waiting for your personal potion of ideas. Here are some of my favorite twists that always impress at Halloween parties:
Cookie Swaps for Different Flavors
Shortbread is classic, but Oreos make the most dramatic witch hats! The black cookies with orange frosting look super spooky. Just gently twist apart the Oreos and use the frosted halves – bonus, you get to eat the other sides! Vanilla wafers work great too for a lighter flavor, and ginger snaps add a nice spice that grown-ups love.
Kiss Alternatives for Color Pops
White chocolate kisses turn these into ghostly witch hats – perfect for a haunted house vibe! For Halloween colors, look for those seasonal candy-coated kisses in orange and purple. And here’s a secret – sometimes I’ll dip regular kisses in colored candy melts if I’m feeling extra crafty. Just let them dry completely before assembling.
Extra Sparkle and Spook
Edible glitter makes these look straight out of a fairy tale witch’s kitchen. You can also roll the frosting brim in colored sprinkles before it sets – the crunch is amazing! For a midnight magic effect, brush the hats with black sanding sugar. And if you really want to wow people, pipe tiny spiderwebs between the eyes with black frosting.

The best part? There’s no wrong way to do these! Every variation I’ve tried has been a hit, so don’t be afraid to experiment with whatever Halloween candy you have on hand. Last year I even used candy corn as little hat decorations, and they disappeared faster than you can say “double double toil and trouble!”
Storing and Serving Mini Candy Witch Hat Bites
Okay, here’s the deal – these little witch hats are best when they’re fresh, but with my tricks, you can keep them looking spellbinding for days! I learned the hard way after one batch turned into a squished mess at the bottom of my treat bag. Now I follow these simple rules to keep them perfect:
First things first – always store them in a single layer in an airtight container. I line mine with parchment paper just to be safe. Those candy eyeballs and frosting details are delicate, so stacking is a big no-no unless you want your witch hats to look like they’ve been through a haunted house!
They’ll stay fresh at room temperature for about 3 days. If your kitchen runs warm though, pop them in the fridge – just let them come back to room temp before serving so the chocolate doesn’t sweat. For parties, I arrange them on a spooky platter with little signs warning guests “Caution – magical hats may disappear!”
Pro tip from my many Halloween mistakes: If you’re transporting these, place toothpicks between layers in your container. It creates just enough space so the hats don’t smoosh together during the ride. And whatever you do, don’t leave them in a hot car – those chocolate kisses will melt faster than a witch in a rainstorm!
Mini Candy Witch Hat Bites Nutritional Information
Okay, let’s be honest – we’re not eating witch hats for their health benefits! But since I know some folks like to keep track (or are making these for school parties with allergy concerns), here’s the nutritional breakdown per hat. Remember, these are just estimates – your exact numbers will vary depending on which cookies or frosting brands you use!
- Serving Size: 1 witch hat bite (because who can stop at just one?)
- Calories: About 60 per hat – not bad for such a happy little treat!
- Sugar: 5g (mostly from that delicious chocolate kiss and frosting combo)
- Fat: 3g (shortbread cookies bring the buttery goodness)
- Carbs: 8g (worth every bite if you ask me)
- Protein: Just 1g (but tons of magical properties, obviously)
Now for the fine print: These numbers assume you’re using standard store-bought ingredients. Homemade frosting? Different cookie brand? Your mileage may vary. The candy eyeballs add negligible nutrition (but maximum fun factor!). For gluten-free versions, check out my substitution tips in the FAQs. And remember – it’s Halloween! A little magical indulgence never hurt anyone.
Mini Candy Witch Hat Bites FAQs
Over the years, I’ve gotten all sorts of questions about these adorable little witch hats – and I’ve made every possible mistake so you don’t have to! Here are the answers to the most common things people ask me:
Can I use melted chocolate instead of frosting?
Absolutely! I actually did this last Halloween when I ran out of frosting mid-party panic. Just melt some chocolate chips (or candy melts for color) and use it like edible glue. Pro tip: Let it cool slightly so it’s thick enough to hold the kiss in place. The chocolate sets firmer than frosting too, which is great if you’re transporting these little hats.
How far in advance can I make these?
They’re best fresh, but you can assemble them up to 3 days ahead if you store them properly. Here’s my secret – wait to add the candy eyeballs until just before serving! The frosting can make them bleed color if they sit too long. If I’m doing a big batch for a party, I’ll prep all the components separately (cookies frosted, kisses ready to go) and assemble the day of.
Are these gluten-free?
They can be! Just swap the shortbread cookies for your favorite gluten-free rounds – I’ve had great success with Schär’s gluten-free shortbread. Double check that your chocolate kisses and frosting are gluten-free too (most are, but some brands vary). My friend’s daughter has celiac disease, and these became her favorite safe Halloween treat!

Got more witchy questions? Just ask! After making literally hundreds of these over the years, I’ve probably encountered every possible variation and disaster (ever seen a witch hat with a melting chocolate point? Not pretty). Happy to share all my tricks to make your batch perfect!
Share Your Creations
Nothing makes me happier than seeing all the creative twists you come up with for these little witch hats! Every Halloween, my kitchen wall becomes a gallery of photos friends and readers send me – from gothic black-and-purple hat armies to ones decorated with tiny fondant spiders. I swear, some of you are way more creative than I’ll ever be!
If you make these (and I really hope you do!), I’d love to see your spooky masterpieces. Snap a pic of your witch hat crew before they mysteriously disappear (we all know where they really go – straight into someone’s belly!). Tag me on Instagram or Facebook so I can ooh and aah over your decorating skills. Maybe your creation will inspire next year’s batch in my kitchen!
P.S. Bonus points if you catch your cat trying to steal one – my tabby once swiped a whole hat right off the counter, and the photo of her looking guilty with chocolate on her whiskers still makes me laugh!
Print
5-Minute Mini Candy Witch Hat Bites
- Total Time: 15 minutes
- Yield: 24 pieces 1x
- Diet: Vegetarian
Description
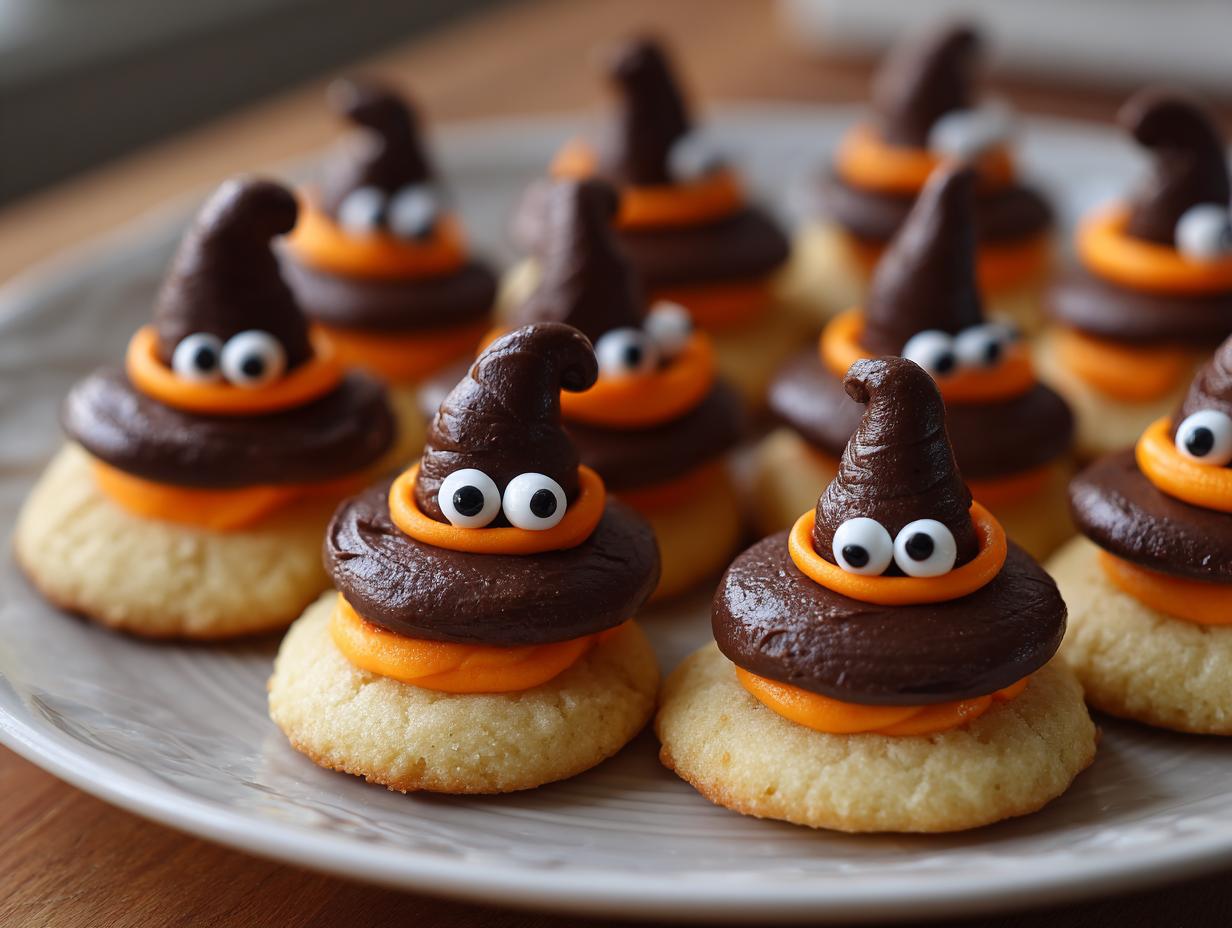
Mini Candy Witch Hat Bites are fun, bite-sized treats perfect for Halloween. They combine chocolate kisses with cookies and frosting for a festive look.
Ingredients
- 24 chocolate kisses
- 24 round shortbread cookies
- 1/2 cup orange or black frosting
- 24 mini candy eyeballs (optional)
Instructions
- Place a dab of frosting on the flat side of a cookie.
- Press a chocolate kiss onto the frosting to secure it.
- Pipe a ring of frosting around the base of the kiss to create the hat’s brim.
- Add mini candy eyeballs if desired.
- Repeat with remaining ingredients.
- Let set before serving.
Notes
- Store in an airtight container for up to 3 days.
- Use different frosting colors for variety.
- Prep Time: 15 minutes
- Cook Time: 0 minutes
- Category: Dessert
- Method: No-Bake
- Cuisine: American
Nutrition
- Serving Size: 1 piece
- Calories: 60
- Sugar: 5g
- Sodium: 20mg
- Fat: 3g
- Saturated Fat: 1.5g
- Unsaturated Fat: 1g
- Trans Fat: 0g
- Carbohydrates: 8g
- Fiber: 0g
- Protein: 1g
- Cholesterol: 0mg