Oh my gosh, you guys – Halloween baking season is my absolute favorite time of year! There’s nothing quite like the joy of creating spooky treats that make both kids and adults smile. These Mummy Face Cupcakes have been my go-to for years because they’re ridiculously fun to make and even more fun to eat. I’ll never forget the first time I made them with my niece – her eyes lit up when she saw those little candy eyes peeking through the “bandages.”
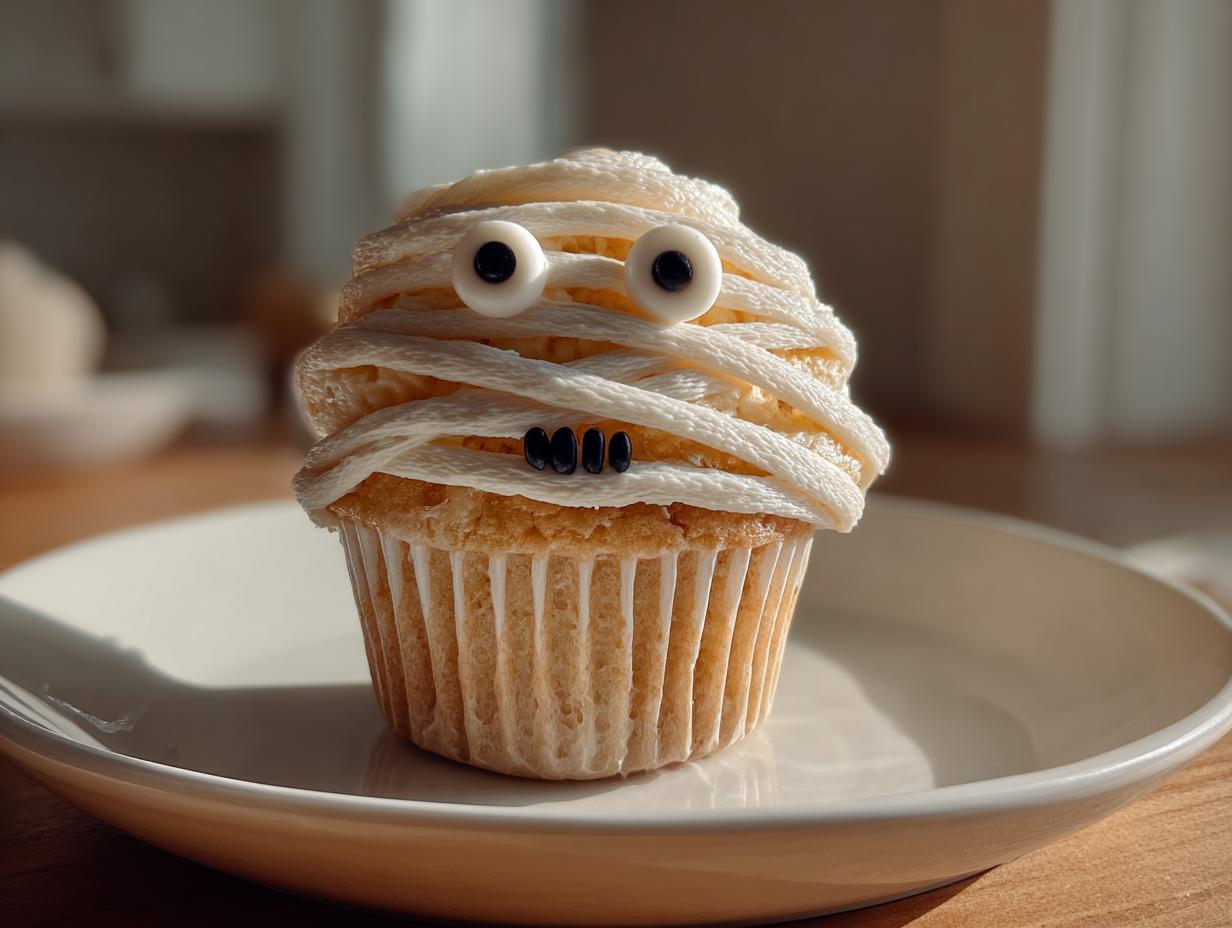
What I love most about these cupcakes is how simple they are to throw together, yet they look so impressive on a Halloween party table. The vanilla cake base is soft and sweet, while the white frosting “bandages” and googly candy eyes give them that perfect blend of cute and creepy. Whether you’re hosting a monster mash or just want to surprise your coworkers with a festive treat, these mummy cupcakes always steal the show!

Ingredients for Mummy Face Cupcakes
Okay, let’s gather our mummy-making supplies! The beauty of this recipe is you probably have most of these ingredients in your pantry already. I always use a boxed vanilla cake mix because – let’s be real – it makes life so much easier when you’re juggling Halloween costumes and party prep. But don’t worry, we’re going to doctor it up with some simple additions to make these cupcakes extra special.
- 1 box vanilla cake mix (I prefer the “extra moist” varieties)
- 1 cup water
- ½ cup vegetable oil
- 3 large eggs (room temperature works best)
- 2 cups white frosting (the kind that comes in a can is perfect for piping)
- ¼ cup black decorating gel (this stuff is magic for creating mummy mouths!)
- 24 candy eyes (you’ll find these in the baking aisle – get extra because someone will snack on them)
Pro tip: If you’re feeling fancy, you can absolutely use homemade vanilla cupcakes and frosting. But between you and me, the box mix works like a charm and lets you focus on the fun part – making those adorable mummy faces!
How to Make Mummy Face Cupcakes
Alright, let’s get those ovens fired up! Making these adorable mummy cupcakes is seriously a breeze – I promise even first-time bakers can pull this off. The key is taking it step by step, and before you know it, you’ll have a whole army of cute little mummies ready to party!
Baking the Cupcakes
First things first – preheat that oven to 350°F (175°C). While it’s heating up, grab a big mixing bowl and toss in your cake mix, water, oil, and eggs. I like to use a hand mixer for about 2 minutes until everything’s smooth and shiny – no lumps allowed! The batter should be thick enough to slowly fall off the beaters when you lift them.
Now for the liners – I always use Halloween-themed ones for extra festive flair! Fill each one about 2/3 full (a cookie scoop makes this super easy). Trust me, you don’t want to overfill or you’ll get muffin tops instead of nice flat cupcake tops perfect for decorating.
Pop them in the oven for 18-20 minutes. Do the toothpick test – when it comes out clean, they’re done! Let them cool completely in the pan for about 5 minutes, then transfer to a wire rack. And here’s my golden rule: NEVER try to frost warm cupcakes. I learned that the hard way when my first batch turned into a melted mummy mess!

Decorating Like a Mummy
This is where the real magic happens! Grab your white frosting – if it’s stiff, give it a quick stir to loosen it up. I like to use a piping bag with a small round tip (about #3 size), but a ziplock bag with the corner snipped off works in a pinch.
Start piping squiggly lines across each cupcake to look like mummy bandages. The trick is leaving little gaps so the “skin” (aka the cupcake) peeks through. Don’t worry about being perfect – the messier, the more mummy-like! Just make sure to leave space near the top for those adorable eyes.
Now for the best part – gently press two candy eyes into each cupcake. They’ll stick right into the frosting. Then take your black gel and draw a little mouth or scar underneath. Sometimes I’ll add an extra squiggle or two if I want them to look extra spooky!
Pro decorating tip: If your frosting starts to get too soft, just pop it in the fridge for 10 minutes. And keep a damp paper towel handy to clean up any gel mistakes – we’ve all made a mummy with a lopsided mouth at some point!
Tips for Perfect Mummy Face Cupcakes
After making dozens (and dozens!) of these mummy cupcakes over the years, I’ve picked up some tricks that’ll help yours turn out absolutely spooktacular every time. Here are my tried-and-true tips for mummy cupcake success:
- Cooling is key: I know it’s tempting to start decorating right away, but resist! Let those cupcakes cool completely – at least an hour – before you even think about frosting. Warm cupcakes make for melty mummies, and nobody wants droopy bandages.
- Piping bag power: While you can spread frosting with a knife, a piping bag gives you those perfect “mummy bandage” lines. No piping bag? No problem! A ziplock bag with the corner snipped off works nearly as well.
- Eye placement matters: Position the candy eyes close together near the top of the cupcake – this gives them that cute, startled mummy look. Press them gently but firmly so they don’t slide off.
- Store them right: Keep your finished mummies in an airtight container at room temperature. They’ll stay fresh for up to 3 days – if they last that long!
- Practice your piping: If you’re new to piping frosting, try your bandage designs on a plate first. You’ll quickly get the hang of making those perfect uneven mummy wraps.
Remember – these cupcakes are supposed to be fun, not perfect! Even if your first mummy looks more like he got into a tangle with his bandages, he’ll still taste delicious. The imperfections just add to the charm!
Ingredient Substitutions and Notes
Listen, I get it – sometimes you’re mid-recipe and realize you’re out of something, or maybe you need to accommodate dietary restrictions. No worries! These mummy cupcakes are super flexible. Here are all my favorite swaps and notes after years of making them for every kind of Halloween gathering:
When You Want to Go Homemade
That boxed cake mix is totally fine (I use it all the time!), but if you’re feeling ambitious, you can absolutely use your favorite vanilla cupcake recipe instead. Just make sure it yields about 24 standard-sized cupcakes. My go-to homemade version uses 2 1/2 cups flour, 2 cups sugar, 1 cup milk, and 1/2 cup butter – you know, the classic stuff. The decorating method stays exactly the same!
Frosting Free-for-All
The canned white frosting works like a dream, but here’s the thing – any white frosting will do! Try cream cheese frosting for a tangy twist (just chill it a bit first so it pipes better). Need dairy-free? Many grocery stores carry vegan frostings now, or whip up a simple powdered sugar glaze with non-dairy milk. The key is getting it to pipe-able consistency – not too stiff, not too runny.
Eye Alternatives (Because Candy Eyes Can Be Sneaky!)
Can’t find candy eyes? Been there! Try mini marshmallows with a tiny dot of black gel for pupils. Chocolate chips work too – just place them pointy-side down. One year I even used white chocolate chips with mini chocolate chip pupils (desperate times!). For a totally different look, pipe two small white frosting circles and add black gel dots. Improvise – that’s the Halloween spirit!
Other Handy Swaps
Out of vegetable oil? Melted butter or even applesauce works in the cake batter. No black gel? Melt some chocolate chips and use a toothpick to draw mouths. And if you’re really in a pinch, those “bandages” can be made with melted white chocolate drizzled from a spoon – messy but effective!
My biggest piece of advice? Don’t stress about perfection. Some of my most memorable mummy cupcakes were the ones where I had to improvise. Halloween baking should be fun, not fussy – and these little guys are pretty hard to mess up. Now go raid your pantry and make some mummy magic happen!
Storing and Serving Mummy Face Cupcakes
Okay, let’s talk about keeping these little mummies fresh and fabulous until showtime! The great news is these cupcakes actually hold up really well – if you can resist eating them all in one sitting, that is. Here’s everything I’ve learned about storing and serving them over years of Halloween baking.
First rule of mummy cupcake club: keep them at room temperature in an airtight container. I swear by those plastic cupcake carriers with the snap-on lids – they stack nicely and keep the frosting from getting smooshed. No container? Just use a regular airtight tin with a sheet of parchment between layers. They’ll stay fresh for up to 3 days this way.
Now, what not to do? Don’t refrigerate them unless your kitchen is super warm. The fridge tends to dry out the cupcakes and can make the frosting sweat. And whatever you do, keep them away from direct sunlight or heat sources – melted mummy faces are a Halloween tragedy we all want to avoid!
When it’s time to serve, these cuties are perfect for any spooky occasion. I love putting them on a cake stand with some fake spiderwebs for a Halloween party. They disappear fast at school parties too – just pack them carefully in a shallow container so the decorations don’t get damaged in transit. Pro tip: Bring extra candy eyes in case any pop off during transport (it happens!).
For an extra special touch at grown-up gatherings, I sometimes serve them with a side of chocolate “dirt” (crushed Oreos) for dipping. The kids go wild when I bring these to classroom parties, and teachers always appreciate that they’re not messy to eat. Just watch those candy eyes – they have a funny way of disappearing before the cupcakes even get served!
Mummy Face Cupcakes Nutritional Information
Now, I know what you’re thinking – “These adorable mummies can’t possibly be good for me!” And you’re right, they’re treats after all. But since we’re all trying to be a little more mindful (even during Halloween), here’s the scoop on what’s in each cupcake. Keep in mind these are estimates based on standard ingredients – your exact numbers might vary slightly depending on brands and how generous you are with the frosting!
- Calories: About 180 per cupcake
- Fat: 8g (2g saturated)
- Carbohydrates: 25g
- Protein: 2g
- Sugar: 15g
- Sodium: 120mg
Now, let’s be real – no one eats just one mummy cupcake at a Halloween party! But the good news is, since they’re individually portioned, it’s easier to keep track than with a whole cake. I like to think of the candy eyes as my daily dose of vitamin… fun? Okay, maybe not, but everything in moderation, right? Especially when it comes to these irresistibly spooky treats!
Remember, these numbers are just guidelines. If you’re using sugar-free frosting or a different cake mix, your nutritional info will change. But honestly, when those little mummy faces are staring up at you with their candy eyes, the numbers kind of go out the window anyway. Happy Halloween indulgence!
Frequently Asked Questions
I’ve gotten so many questions about these Mummy Face Cupcakes over the years – here are answers to the ones that pop up most often!
Can I make these with chocolate cake instead of vanilla?
Absolutely! While the white vanilla cupcakes give that classic “bandaged mummy” look, chocolate works great too. The dark cake peeking through the white frosting looks extra spooky – like old, tattered bandages! Just be sure to use a lighter colored frosting so the contrast still shows up well.
How far in advance can I make these cupcakes?
These keep beautifully! You can bake the cupcakes 2-3 days ahead and store them unfrosted in an airtight container. The decorating is best done the day you plan to serve them though – the candy eyes stay freshest that way. If you must decorate ahead, store them very carefully so the frosting doesn’t get smushed!
What if I can’t find candy eyes?
No worries – we’ve all been there! Mini marshmallows with a black gel pupil work great, or try halved white chocolate chips. For a super simple fix, pipe two small white dots of frosting and add a black gel center. Honestly, kids think any kind of eyes are hilarious!
Can I freeze these mummy cupcakes?
You sure can! Freeze the unfrosted cupcakes in a single layer first, then transfer to freezer bags once solid. Thaw at room temperature before decorating. The frosting doesn’t freeze well though, so always add that fresh. They’ll keep frozen for up to 2 months – perfect for getting a head start on Halloween baking!
Why do my frosting bandages keep breaking when I pipe them?
Ah, the classic frosting frustration! If your lines keep snapping, your frosting might be too cold. Let it sit at room temp for 10-15 minutes. Still breaking? Try adding a teaspoon of corn syrup or milk to loosen it up. And remember – uneven, messy bandages just make your mummies look more authentic!
Ready to Make Some Spooky Magic?
Well there you have it – everything I’ve learned about making the most adorable (and delicious!) Mummy Face Cupcakes over years of Halloween baking. From that first time I made them with my niece to all the classroom parties and spooky soirees since, these little guys never fail to bring smiles and spooky fun.
Now it’s your turn! Whip up a batch of these mummy cupcakes for your next Halloween bash – whether it’s a costume party, school event, or just because Tuesday deserves some frightful treats. Trust me, they’re easier than they look and so much fun to decorate. The kids especially love helping with the candy eyes (though you might lose a few to snack attacks along the way!).
Don’t forget to snap some photos of your mummy creations – I’d love to see how they turn out! Tag me or use #MummyCupcakeMadness so we can all admire your handiwork. And if you come up with any clever twists on the recipe, please share – I’m always looking for new ways to make these even more spooktacular!
Happy baking, and may all your Halloween treats be delightfully creepy!
Print
Spooky-Yet-Yummy 24 Mummy Face Cupcakes That’ll Wow Guests!
- Total Time: 35 minutes
- Yield: 24 cupcakes 1x
- Diet: Vegetarian
Description
Mummy Face Cupcakes are a fun and spooky treat perfect for Halloween. These cupcakes feature a cute mummy face design using frosting and candy eyes.
Ingredients
- 1 box of vanilla cake mix
- 1 cup of water
- 1/2 cup of vegetable oil
- 3 eggs
- 2 cups of white frosting
- 1/4 cup of black decorating gel
- 24 candy eyes
Instructions
- Preheat the oven to 350°F (175°C).
- Mix the cake mix, water, oil, and eggs in a bowl until smooth.
- Pour the batter into cupcake liners, filling each about 2/3 full.
- Bake for 18-20 minutes or until a toothpick comes out clean.
- Let the cupcakes cool completely.
- Frost each cupcake with white frosting, leaving small gaps to resemble mummy bandages.
- Place two candy eyes on each cupcake.
- Use black decorating gel to draw a small mouth or other details.
Notes
- Store cupcakes in an airtight container for up to 3 days.
- For a homemade touch, use your favorite vanilla cupcake recipe instead of a mix.
- Adjust the amount of candy eyes or frosting based on your preference.
- Prep Time: 15 minutes
- Cook Time: 20 minutes
- Category: Dessert
- Method: Baking
- Cuisine: American
Nutrition
- Serving Size: 1 cupcake
- Calories: 180
- Sugar: 15g
- Sodium: 120mg
- Fat: 8g
- Saturated Fat: 2g
- Unsaturated Fat: 5g
- Trans Fat: 0g
- Carbohydrates: 25g
- Fiber: 0g
- Protein: 2g
- Cholesterol: 25mg