You know those party snacks that disappear faster than you can blink? That’s classic deviled eggs for you—simple, creamy, and impossible to resist. I swear, every time I bring a tray to gatherings, folks hover around them like they’re gold! My grandma used to make them for every family reunion, and now I’ve got her little tricks down pat.
What’s not to love? They’re quick to whip up with just a handful of pantry staples, yet they feel fancy enough for holidays or potlucks. Plus, that creamy yolk filling with a hint of tang from mustard and vinegar? Absolute magic. Whether it’s Easter brunch, a summer picnic, or just because you’re craving something nostalgic, these little bites deliver every time.
Trust me, once you master the basics (and oh, you will), you’ll see why classic deviled eggs are the ultimate crowd-pleaser. Let’s get cracking!
Why You’ll Love These Classic Deviled Eggs
These little bites of heaven check all the boxes for the perfect appetizer. Here’s why they never disappoint:
- Effortless elegance: With just eggs, mayo, and mustard, you can whip up a tray that looks far fancier than the effort required.
- Crowd magnet: I’ve yet to meet anyone who can resist popping one (or three) of these creamy delights into their mouth.
- Time traveler’s dream: They taste just like grandma used to make, with that perfect balance of creamy, tangy, and slightly peppery.
- Prep ahead magic: Make them the night before – the flavors actually improve after chilling.
- Endlessly adaptable: Dress them up or down with different garnishes to match any occasion.
Honestly? I keep hard-boiled eggs in my fridge at all times just in case deviled egg inspiration strikes. They’re that good.

Classic Deviled Eggs Ingredients
Gather these simple staples – chances are you’ve got most in your kitchen right now:
- 6 large eggs (fresh ones peel easier after boiling)
- 1/4 cup mayonnaise (full-fat makes the creamiest filling)
- 1 teaspoon yellow mustard (the classic tangy touch)
- 1/2 teaspoon white vinegar (just a splash brightens everything up)
- Salt & pepper to taste (I use about 1/4 tsp each)
- Paprika for garnish (that pretty red dusting makes all the difference)
See? Nothing fancy needed – just good old-fashioned ingredients that work magic together. Pro tip: Let your eggs sit at room temperature for about 15 minutes before boiling – helps prevent cracking! Want a twist on egg salad?
How to Make Classic Deviled Eggs
Alright, let’s get to the fun part – turning those simple ingredients into irresistible deviled eggs! Don’t worry if you’re new to this – I’ve got all the little tricks that’ll make yours turn out perfect every time.
Boiling and Peeling the Eggs
First things first – the eggs! Place them in a single layer in a saucepan and cover with cold water by about an inch. Bring to a rolling boil, then immediately turn off the heat, cover, and let sit for exactly 10 minutes (set a timer!). This method gives you perfectly cooked yolks without that gray ring.
Now the secret to easy peeling: shock them in an ice bath for at least 5 minutes. The rapid cooling stops the cooking and helps separate the membrane from the egg white. When peeling, gently tap all over and roll between your palms – the shell should slip right off under running water. Check out this avocado variation!
Preparing the Filling
Slice those beauties lengthwise and pop the yolks into a bowl. Mash them with a fork until they’re nice and crumbly – no lumps! Now add your mayo, mustard, vinegar, salt and pepper. Mix until silky smooth. Want it creamier? Add a smidge more mayo. Need more tang? A tiny extra splash of vinegar does wonders.
Here’s my favorite trick: pipe the filling through a zip-top bag with the corner snipped off for picture-perfect swirls. Or if you’re feeling rustic (like me most days), just spoon it in – tastes just as amazing!
Assembling Classic Deviled Eggs
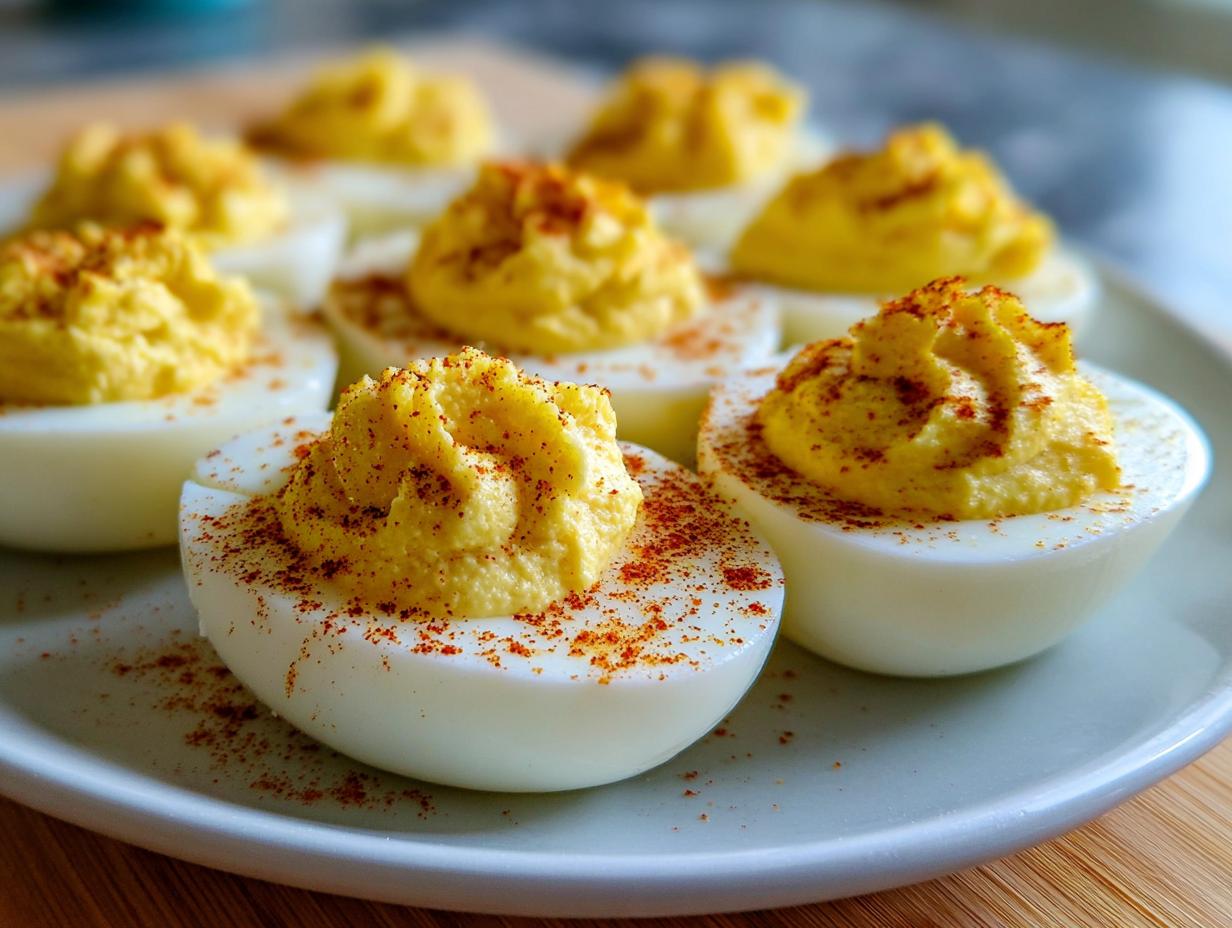
Now for the satisfying part – filling those egg white “boats.” Spoon (or pipe) your creamy yolk mixture generously into each half. Don’t be shy! Then comes the finishing touch – a light dusting of paprika. It’s not just pretty, that smoky flavor plays so nicely with the creamy filling.
Arrange them on a pretty platter and watch them disappear! Pro tip: if you’re making these ahead, wait to add the paprika until just before serving so it stays vibrant.

Storage and Reheating
Here’s the beautiful thing about classic deviled eggs – they actually taste better after chilling for a bit! Just pop them in an airtight container with some paper towels underneath to absorb any moisture. They’ll keep happily in your fridge for up to 2 days (though let’s be real – they never last that long in my house).
Important note: never freeze these beauties! The filling turns watery and the whites get rubbery – total tragedy. If you’ve got leftovers (ha!), just enjoy them cold straight from the fridge. Trust me, they’re still delicious!
Classic Deviled Eggs Variations
Once you’ve mastered the basic recipe, the fun begins! Here are my favorite ways to jazz up classic deviled eggs when I’m feeling adventurous:
- Southern Style: Mix in a tablespoon of sweet pickle relish and sprinkle with crispy bacon bits – pure comfort food magic!
- Spicy Kick Kick: Add 1/4 teaspoon of hot sauce to the filling and garnish with sliced jalapeños for those who like it fiery.
- Everything Bagel:: Swap paprika for everything bagel seasoning on top – the onion and sesame flavors work shockingly well.
- Avocado Twist: Replace half the mayo with mashed avocado for a creamy, healthier version (add lime juice to prevent browning).
The possibilities are endless! Sometimes I’ll even make two batches with different flavors when hosting – keeps things interesting. If you love avocado, try this guacamole!
Serving Suggestions
Classic deviled eggs shine on any spread! I love pairing them with crisp crudités for contrast, or arranging them next to buttery crackers for easy nibbling. They’re perfect as the star of a brunch buffet alongside fresh fruit and mini quiches. Just be prepared to make extra – they vanish fast!
Classic Deviled Eggs FAQs
Over the years, I’ve gotten all sorts of questions about making perfect deviled eggs. Here are answers to the ones that pop up most often!
Can I make deviled eggs ahead of time?
Absolutely! In fact, I recommend it. Prepare them up to 24 hours in advance – the flavors meld beautifully in the fridge. Just wait to add the paprika garnish until right before serving so it stays vibrant.
Why do my yolks get lumpy?
Ah, the dreaded yolk lumps! The trick is to mash those yolks thoroughly before adding wet ingredients. I push mine through a fine mesh strainer for ultra-smooth filling every time. A fork works too – just keep at it until no chunks remain.
How do I keep my egg whites from tearing?
Fresh eggs peel easiest – try using ones that are about 7-10 days old. The ice bath shock after boiling is crucial! And when peeling, gently roll them on the counter to crackle the shell all over before removing it under running water. For more on egg safety and freshness, check out this resource.
Can I use something besides mayo?
Sure thing! Greek yogurt or sour cream work in a pinch (though the texture will be tangier). For a dairy-free version, mashed avocado with a squeeze of lemon makes a surprisingly delicious alternative.
Why are mine always watery?
If your filling seems runny, you might be adding too much mayo. Start with less – you can always add more. Also, make sure your boiled eggs are completely cooled before mixing – warm yolks can break down the mayo.
Share Your Results!
Nothing makes me happier than hearing how your classic deviled eggs turned out! Did they disappear at your party faster than you expected? Maybe you tried one of the fun variations or came up with your own twist (I’d love to hear about it!). Drop a comment below with your experience – the good, the messy, the “oh wow” moments.
I still remember my first batch where I went overboard with the vinegar (oops!) and another time when I accidentally doubled the mustard (actually… kinda loved it). Cooking’s all about those little adventures, right? Whether yours turned out picture-perfect or deliciously imperfect, share your story – we’re all learning together in the kitchen!
Print
5 Secrets to Perfect Classic Deviled Eggs Every Time
- Total Time: 25 minutes
- Yield: 12 deviled eggs 1x
- Diet: Low Lactose
Description
Classic deviled eggs are a simple and tasty appetizer. They are perfect for parties, picnics, or snacks.
Ingredients
- 6 large eggs
- 1/4 cup mayonnaise
- 1 teaspoon mustard
- 1/2 teaspoon vinegar
- Salt and pepper to taste
- Paprika for garnish
Instructions
- Boil eggs for 10 minutes, then cool and peel.
- Cut eggs in half lengthwise and remove yolks.
- Mash yolks with mayonnaise, mustard, vinegar, salt, and pepper.
- Spoon mixture back into egg whites.
- Sprinkle with paprika before serving.
Notes
- Use fresh eggs for easier peeling.
- Adjust mustard and vinegar to taste.
- Chill before serving for best flavor.
- Prep Time: 15 minutes
- Cook Time: 10 minutes
- Category: Appetizer
- Method: Boiling
- Cuisine: American
Nutrition
- Serving Size: 1 deviled egg
- Calories: 60
- Sugar: 0.2g
- Sodium: 70mg
- Fat: 5g
- Saturated Fat: 1g
- Unsaturated Fat: 3g
- Trans Fat: 0g
- Carbohydrates: 0.5g
- Fiber: 0g
- Protein: 3g
- Cholesterol: 95mg