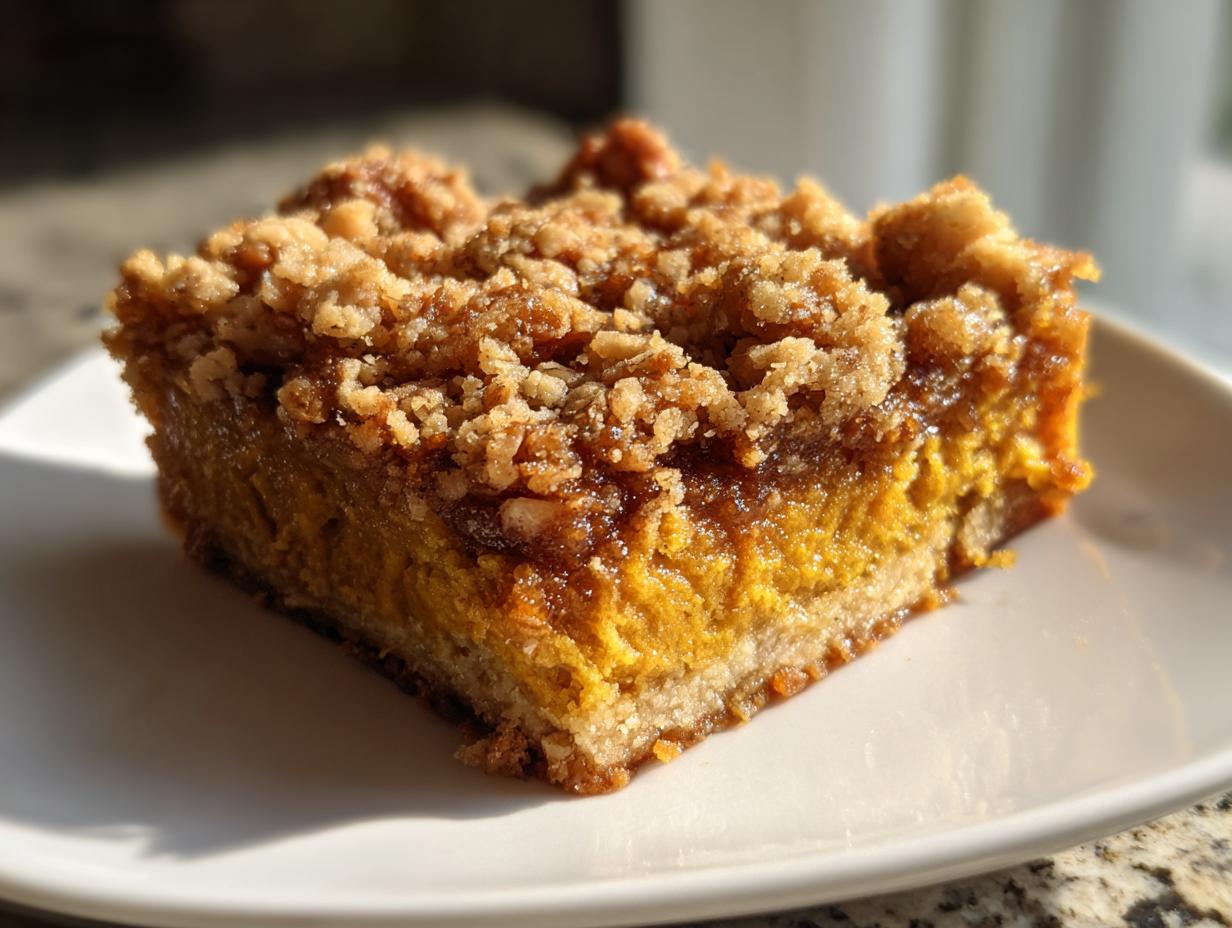
Oh, friends, let me tell you about my absolute favorite fall dessert – these pumpkin pie bars with streusel topping! They’ve been the star of every family gathering since my daughter was in kindergarten (she’s in college now, if that tells you how long this recipe’s been in rotation). What I love is how they give you all that cozy pumpkin spice flavor you crave, but in the easiest, most shareable form. No fussing with pie crusts here – just a buttery shortbread base, creamy pumpkin filling, and that irresistible crunchy streusel on top. One bite and you’ll be transported to your favorite autumn memories, I promise!

Why You’ll Love These Pumpkin Pie Bars with Streusel Topping
Listen, I’ve made these pumpkin pie bars so many times I’ve lost count, and here’s why they’re always a hit:
- Easiest pumpkin dessert ever: No rolling out pie dough or worrying about soggy bottoms—just press the crust into the pan and go!
- That magical texture contrast: Creamy pumpkin filling meets buttery crust, all topped with that addictive crunchy streusel (I sneak bites of the topping mix every time).
- Feeds a crowd: One 9×13 pan means plenty to share at potlucks—though fair warning, people always ask for seconds.
- Better than pie (don’t tell grandma): All the cozy spice flavors you love, but in perfect portable squares that hold their shape.
- Secret weapon ingredient: That splash of evaporated milk makes the filling impossibly silky—trust me on this.
Honestly? These might just replace your traditional pumpkin pie. They did in our house!
Ingredients for Pumpkin Pie Bars with Streusel Topping
Gather these goodies—I promise you probably have most in your pantry already! Here’s what makes these pumpkin pie bars so special:
- 1 1/2 cups all-purpose flour (spoon and leveled, please—no packed flour!)
- 1/2 cup granulated sugar for that perfect sweet base
- 1/4 teaspoon salt to balance all that sweetness
- 1/2 cup unsalted butter, cold and cubed (I pop mine in the freezer for 10 minutes—trust me, cold is key)
- 1 can (15 oz) pumpkin puree (not pie filling—we’ll get to that in a sec)
- 1 can (12 oz) evaporated milk (the secret to ultra-creamy filling)
- 2 large eggs at room temperature (take ’em out when you prep the crust)
- 3/4 cup brown sugar, packed (that molasses flavor is everything)
- 1 teaspoon ground cinnamon (I usually add an extra pinch—no judgment)
- 1/2 teaspoon ground ginger + 1/4 teaspoon each ground cloves and nutmeg (hello, cozy spices!)
- 1/2 cup rolled oats for that craveable crunch
- 1/4 cup chopped pecans (optional, but oh-so-worth it)
Ingredient Notes and Substitutions
A few pro tips from my many, many batches:
Pumpkin puree vs. pie filling: This is crucial! Pie filling has added sugars and spices—we’re adding our own, so grab the plain puree. Libby’s is my go-to brand.
Nut-free option: Skip the pecans or swap with pepitas for crunch. Or go wild with toasted coconut flakes!
Butter matters: Cold cubes create the perfect crumbly crust. In a pinch? Frozen grated butter works too (my lazy winter hack).
Spice it your way: Out of cloves? A dash of allspice works. No fresh nutmeg? A smidge more cinnamon never hurt anyone.
Equipment You’ll Need
Okay, let’s talk tools—nothing fancy here, just the basics from your kitchen that’ll make these pumpkin pie bars a breeze:
- 9×13-inch baking pan (my trusty Pyrex has seen hundreds of batches)
- Mixing bowls (one for crust, one for filling—I use my grandma’s old stoneware)
- Pastry cutter or fork (for that perfect crumbly crust texture)
- Whisk (to blend the pumpkin filling silky smooth)
- Measuring cups/spoons (because eyeballing spices never ends well for me!)
That’s it—no mixer, no special gadgets. Just good old-fashioned baking the way Grandma would’ve done it!
How to Make Pumpkin Pie Bars with Streusel Topping
Alright, let’s dive into the magic! I’ve made these pumpkin pie bars so many times I could probably do it in my sleep, but I’ll walk you through each step like I’m right there in your kitchen with you. Ready to make some autumnal magic?
Step 1: Prepare the Crust
First things first – that buttery shortbread crust! In a large mixing bowl, whisk together your flour, granulated sugar, and salt. Now grab those cold butter cubes (remember, COLD is key!) and start cutting them in. I use a pastry cutter, but two forks or even your fingers work too. You’re looking for that perfect sandy texture where the butter is about pea-sized – it should look like little golden nuggets throughout the flour. Once it’s crumbly, dump it into your greased 9×13 pan and press it firmly into an even layer. I use the bottom of a measuring cup to really pack it down tight – this prevents crumbling later!
Step 2: Bake the Crust
Pop that beautiful crust into your preheated 350°F oven for exactly 15 minutes. Set a timer! You want it just barely starting to turn golden at the edges – this quick pre-bake keeps the crust from getting soggy when we add the pumpkin filling. While it bakes, you can start on the filling (multitasking for the win!).
Step 3: Mix the Pumpkin Filling
In another bowl (I use my biggest one for this!), whisk together the pumpkin puree, evaporated milk, eggs, brown sugar, and all those gorgeous spices. Whisk vigorously for a full minute – you want it completely smooth with no eggy streaks. Pro tip: If you’ve got lumps, run the mixture through a fine mesh strainer. The filling should be the color of a perfect pumpkin spice latte when it’s ready!
Step 4: Add the Streusel Topping
Now for the crowning glory! In a small bowl, mix together your oats and chopped pecans (I usually add a pinch of cinnamon here too, because why not?). When your crust comes out of the oven, carefully pour the pumpkin filling over the hot crust – it’ll sizzle slightly, which helps set the layers. Then sprinkle your oat-pecan mixture evenly across the top. I use my fingers to distribute it – some big clumps, some smaller bits – for maximum texture contrast!

Step 5: Final Bake and Cooling
Back into the oven it goes for 40-45 minutes. The center should jiggle just slightly when you nudge the pan – like a perfectly set custard. Resist the urge to cut in right away! Let it cool completely on a wire rack (about 2 hours) for clean slices. I know, the waiting is torture, but trust me – rushing this leads to pumpkin soup bars (ask me how I know!). For extra neat squares, chill in the fridge for an hour before cutting with a sharp knife wiped clean between cuts.
Tips for Perfect Pumpkin Pie Bars
After making these pumpkin pie bars every fall for fifteen years, I’ve picked up some game-changing tricks you’ll wanna steal:
- Pumpkin matters: Always use 100% pure pumpkin puree – that pie filling stuff will make your bars way too sweet. Libby’s never lets me down.
- Patience pays off: Let those bars cool completely! I know it’s hard (I’ve burned my tongue more times than I’ll admit), but cutting too soon turns them into pumpkin pudding squares.
- Spice hack: If your spices have been sitting awhile, toast them in a dry pan for 30 seconds first – it’ll wake up their flavor like magic.
- Clean cuts: Run your knife under hot water between slices – those layers will stay picture-perfect for serving.
- Make-ahead win: These actually taste even better the next day when the flavors marry. Just cover tightly!
Follow these and you’ll get perfect bars every single time – my family can vouch for that!
Serving and Storage Suggestions
Oh honey, let me tell you how we serve these pumpkin pie bars in my house! A dollop of fresh whipped cream with a sprinkle of cinnamon on top takes them over the moon. For extra fancy occasions, I’ll drizzle with caramel sauce – total showstopper! Leftovers (ha – as if!) keep beautifully in the fridge for 3 days sealed tight. They’re even delicious cold straight from the fridge – though my husband insists on warming his up for 10 seconds first. Your call!
Nutritional Information
Now, I’m no nutritionist, but here’s the scoop on these pumpkin pie bars – each delicious square comes in around 280 calories. The values will dance a bit depending on your exact ingredients (you know I always add extra pecans!). These are estimates only, sweetheart, so enjoy that second bar guilt-free – it’s practically a vegetable, right?
FAQs About Pumpkin Pie Bars with Streusel Topping
Over the years, I’ve gotten so many questions about these pumpkin pie bars – here are the ones that pop up most often with my tried-and-true answers:
Can I freeze these bars?
Absolutely! Wrap cooled bars tightly in plastic wrap, then foil, and freeze for up to 2 months. Thaw overnight in the fridge – they’ll taste just-baked when you’re ready to serve.
What can I use instead of evaporated milk?
In a pinch, whole milk or half-and-half works (just reduce by 2 tablespoons), but the evaporated milk gives that signature creamy texture. For dairy-free, coconut milk (the canned kind) is my go-to swap.
My streusel sunk into the filling – help!
No worries! Next time, let the pumpkin layer set for 5 minutes after baking the crust before adding topping. And don’t overmix the filling – those air bubbles are sneaky floaters!
Can I make these gluten-free?
You bet! Swap the all-purpose flour for a 1:1 gluten-free blend in both the crust and streusel. My neighbor swears by almond flour for extra nutty flavor.
Why is my crust crumbly?
Three likely culprits: butter wasn’t cold enough, didn’t press firmly into pan, or cut the bars too soon. Fix any of these and you’ll get perfect slices every time!

Perfect Pumpkin Pie Bars with Streusel Topping in 5 Simple Steps
- Total Time: 60 mins
- Yield: 12 bars 1x
- Diet: Vegetarian
Description
Delicious pumpkin pie bars with a crunchy streusel topping, perfect for fall gatherings.
Ingredients
- 1 1/2 cups all-purpose flour
- 1/2 cup granulated sugar
- 1/4 teaspoon salt
- 1/2 cup unsalted butter, cold and cubed
- 1 can (15 oz) pumpkin puree
- 1 can (12 oz) evaporated milk
- 2 large eggs
- 3/4 cup brown sugar
- 1 teaspoon ground cinnamon
- 1/2 teaspoon ground ginger
- 1/4 teaspoon ground cloves
- 1/4 teaspoon nutmeg
- 1/2 cup rolled oats
- 1/4 cup chopped pecans
Instructions
- Preheat oven to 350°F (175°C). Grease a 9×13-inch baking pan.
- In a bowl, mix flour, granulated sugar, and salt. Cut in butter until crumbly. Press into the pan to form the crust.
- Bake crust for 15 minutes.
- In another bowl, whisk pumpkin puree, evaporated milk, eggs, brown sugar, cinnamon, ginger, cloves, and nutmeg. Pour over the crust.
- Mix oats and pecans, then sprinkle evenly over the pumpkin layer.
- Bake for 40–45 minutes until set. Let cool before slicing.
Notes
- Use pure pumpkin puree, not pumpkin pie filling.
- Let bars cool completely for clean slices.
- Store in the refrigerator for up to 3 days.
- Prep Time: 15 mins
- Cook Time: 45 mins
- Category: Dessert
- Method: Baking
- Cuisine: American
Nutrition
- Serving Size: 1 bar
- Calories: 280
- Sugar: 22g
- Sodium: 120mg
- Fat: 12g
- Saturated Fat: 6g
- Unsaturated Fat: 4g
- Trans Fat: 0g
- Carbohydrates: 38g
- Fiber: 2g
- Protein: 5g
- Cholesterol: 55mg