I can’t count how many times I’ve whipped up a batch of hummus at home – it’s my go-to when friends drop by unexpectedly or when I need a quick, healthy snack. But let me tell you, once I discovered the magic of roasted garlic hummus, there was no going back to plain versions! That deep, caramelized garlic flavor takes this Middle Eastern staple to a whole new level. I’ll never forget the first time I made it – my kitchen smelled like heaven, and the bowl was scraped clean before I could even put out the pita bread.
What I love most about this recipe is how it turns simple pantry ingredients into something extraordinary. The roasted garlic adds this incredible richness that balances perfectly with the creamy chickpeas and nutty tahini. It’s become such a favorite that my sister now requests it for every family gathering. And honestly? I never get tired of making it because that first taste always feels like a warm hug from the Mediterranean.

Roasted Garlic Hummus Ingredients
Okay, let’s talk ingredients – because the magic of this hummus starts with what you put in it! I’ve made this recipe dozens of times, and I’ve learned that exact measurements matter here. Trust me, you don’t want to eyeball the tahini (been there, done that, ended up with hummus cement). Here’s everything you’ll need:
- 1 can (15 oz) chickpeas, drained and rinsed (save that liquid – we’ll talk about why later)
- 1 whole head roasted garlic (about 10-12 cloves – yes, a whole head! It mellows beautifully when roasted)
- 3 tbsp tahini (the good stuff – check that it’s pourable and not separated)
- 2 tbsp fresh lemon juice (please, please use fresh – bottled just doesn’t give that bright pop)
- 2 tbsp olive oil plus more for drizzling (extra virgin for maximum flavor)
- 1/2 tsp salt (I use kosher – adjust to taste)
- 1/4 tsp cumin (just enough to whisper in the background)
- 3-4 tbsp water (or that reserved chickpea liquid if you’re feeling fancy)
Now here’s my little secret for ultra-smooth hummus – take the extra few minutes to peel those chickpeas. Yes, it’s tedious, but wow does it make a difference in texture! Pop them between your fingers and the skins slip right off. Put on some music and make it therapeutic.
Oh! And don’t toss that garlic roasting oil – it’s liquid gold for drizzling over the finished hummus. I keep a little jar of it in my fridge just for this recipe.

How to Make Roasted Garlic Hummus
Alright, let’s get to the good part – turning those simple ingredients into the creamiest, most flavorful roasted garlic hummus you’ve ever tasted! I’ve broken it down into easy steps because trust me, once you smell that garlic roasting, you’ll want everything to go smoothly. This recipe has become my party trick – people always ask how something so simple can taste so incredible!
Roasting the Garlic
First things first – we need to transform that sharp raw garlic into sweet, caramelized goodness. Here’s how I do it (and trust me, I’ve roasted enough garlic to fill a bathtub at this point):
- Preheat your oven to 400°F (200°C). While it’s heating, grab a whole head of garlic and slice about 1/4 inch off the top to expose the cloves. No need to peel them – we’ll squeeze out the soft goodness later!
- Place the garlic on a piece of foil, drizzle with about 1 teaspoon of olive oil, and wrap it up like a little present. The oil helps the garlic caramelize instead of dry out.
- Roast for 30-35 minutes until the cloves are golden brown and butter-soft. You’ll know they’re ready when you can easily pierce a clove with a knife – no resistance means perfect roasting!
- Let it cool just until you can handle it, then squeeze the cloves out from their papers. Watch out – this smells amazing and you’ll be tempted to eat them straight (no judgment if you sneak one!).
Blending the Hummus
Now for the magic! I use my trusty food processor for this – a blender works too, but you might need to stop and scrape more. Here’s my foolproof method:
- First, add the roasted garlic cloves to the processor and give them a quick pulse. This ensures no big chunks sneak through.
- Add the chickpeas, tahini, lemon juice, olive oil, salt, and cumin. Process for about 1 minute until it starts coming together.
- Now here’s the key – with the processor running, slowly drizzle in 3-4 tablespoons of water (or that reserved chickpea liquid) through the feed tube. Add just enough until it reaches that perfect creamy consistency. I usually stop to scrape down the sides about halfway through.
- Keep blending for a full 2-3 minutes – yes, that long! This is what makes it ultra-smooth rather than grainy. Taste and adjust salt or lemon if needed.
Pro tip: If your hummus seems too thick, add water 1 tablespoon at a time. Too thin? Add a spoonful more tahini. I’ve saved many a batch this way! The perfect hummus should be creamy enough to dip but thick enough to hold its shape.
When it’s just right, transfer to a bowl and make those pretty swirls on top with a spoon. Drizzle with your best olive oil (or that garlic-infused oil if you’re fancy) and watch it disappear before your eyes!

Why You’ll Love This Roasted Garlic Hummus
Okay, let me count the ways this hummus will steal your heart (and probably become your new obsession). I’ve converted so many hummus skeptics with this recipe – there’s just something magical about that roasted garlic!
- Creamy dreamy texture – Unlike store-bought versions, this hummus is luxuriously smooth thanks to our peeling trick and that extra blending time. It practically melts on your tongue!
- Deep, mellow garlic flavor – Roasting transforms sharp raw garlic into sweet, caramelized goodness that permeates every bite without overpowering. It’s garlicky but sophisticated.
- Crazy versatile – Beyond dipping, I use this as a sandwich spread, dollop it on salads, even thin it with lemon juice for a killer salad dressing. My kids eat it straight from the spoon!
- Packed with good-for-you stuff – Chickpeas give you protein and fiber, tahini adds healthy fats, and garlic? Well, that’s practically medicine in my book!
- Makes you look like a kitchen rockstar – Seriously, the compliments you’ll get when people taste this? Worth every minute of roasting time.
The best part? It tastes even better the next day as those flavors really get to know each other. I always make extra because somehow it disappears faster than I can say “roasted garlic hummus”!
Expert Tips for Perfect Roasted Garlic Hummus
After making more batches of this hummus than I can count (and learning from all my mistakes), I’ve gathered some game-changing tips that’ll take your roasted garlic hummus from good to “Oh my gosh, how did you make this?!” good.
Getting the Texture Just Right
Here’s the thing about hummus – it’s all about that smooth, creamy texture. My biggest aha moment? Don’t be afraid to blend longer than you think. That food processor needs a good 2-3 minutes to work its magic. If it starts getting warm, just pause for a minute before continuing.
And about those chickpea skins – yes, peeling them makes a difference, but here’s my lazy-girl trick: give the drained chickpeas a quick rub in a clean kitchen towel. About half the skins will come right off with minimal effort. Every little bit helps!
Ingredient Swaps That Work (And Some That Don’t)
Out of tahini? Plain Greek yogurt can work in a pinch, but start with half the amount – it’s thinner. No lemons? A splash of apple cider vinegar can provide that needed acidity.
But please, whatever you do, don’t skip roasting the garlic. Raw garlic will overpower everything and leave that harsh aftertaste. If you’re truly in a time crunch, you can roast a bunch of garlic heads ahead and freeze the cloves in oil.
The Water Trick Nobody Tells You
Here’s my secret weapon for perfect consistency: use ice water instead of room temp. The cold helps keep everything light and fluffy as you blend. Add it slowly – you can always add more, but you can’t take it out once it’s too thin!
And if your hummus does get too runny? Chill it for an hour. The tahini and chickpeas will absorb some of that extra moisture, and you can always adjust again after.
Serving Like a Pro
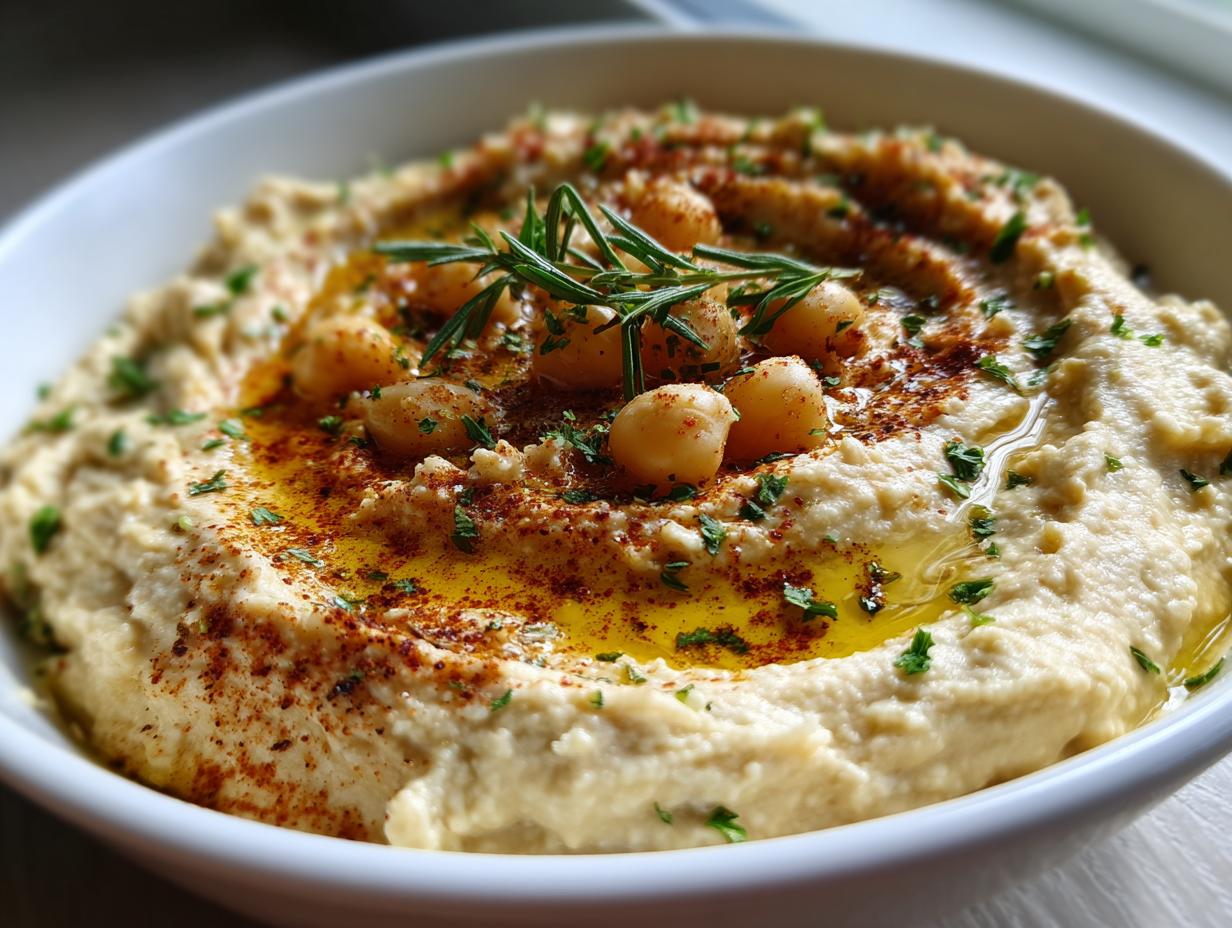
Presentation matters! I always swirl the hummus with the back of a spoon to create little valleys that catch the olive oil. Then sprinkle with smoked paprika and fresh parsley right before serving – the colors pop against the creamy beige.
One last pro tip: let it sit at room temp for 30 minutes before serving. The flavors open up beautifully, and that chilled-from-the-fridge thickness relaxes into perfect dipping consistency.
Roasted Garlic Hummus Variations
Now that you’ve mastered the basic roasted garlic hummus (and trust me, it’s perfect as-is), let’s have some fun playing with flavors! One of the best things about hummus is how adaptable it is. Here are my favorite twists – tried, tested, and approved by my hummus-obsessed friends:
Spicy Kick
For those who like it hot, blend in 1-2 tablespoons of harissa paste or 1 teaspoon of smoked paprika with the other ingredients. My daring cousin swears by adding a deseeded jalapeño while blending – gives it a fresh heat that sneaks up on you!
Roasted Red Pepper Beauty
Add half a jar of roasted red peppers (about 4 oz, drained) for gorgeous color and sweet smokiness. Bonus? This version looks stunning swirled with the regular hummus in one bowl – instant party centerpiece!
Herb Garden Fresh
<
When my garden’s overflowing, I toss in a handful of fresh parsley, dill, or basil. The herbs keep their vibrant color and give the hummus this amazing fresh-from-the-market taste. Works wonders with a sprinkle of za’atar on top too.
Lemon Lover’s Dream
If you’re like me and can’t get enough citrus, increase the lemon juice to 3 tablespoons and add 1 teaspoon of lemon zest. Bright, tangy, and perfect for summer gatherings.
Thin It Out
Want salad dressing? Thin the hummus with extra lemon juice and water until pourable. My go-to ratio is about 1/4 cup hummus to 2 tablespoons liquid. Drizzle over grain bowls or greens – it’s life-changing!
Remember, these variations all start with our amazing roasted garlic base. The possibilities are endless – I’d love to hear what creative twists you come up with!
Serving Suggestions for Roasted Garlic Hummus
Oh, the places this roasted garlic hummus can go! I’ve served it a hundred different ways, and let me tell you – it never gets old. Here are my absolute favorite ways to enjoy it (though honestly, a spoon works just fine when no one’s looking).
The Classic Dippers
First up – the obvious stuff:
- Warm pita bread – Tear it into wedges or toast it into chips. My trick? Brush with olive oil and sprinkle with za’atar before toasting for extra flavor.
- Fresh veggies – Crunchy cucumbers, sweet bell peppers, and crisp carrot sticks are my go-tos. The cool crunch against the creamy hummus? Perfection.
- Pita chips – Store-bought works, but homemade is next-level. Just cut pita into triangles, spray with oil, bake at 375°F until crisp – about 10 minutes.
Beyond the Bowl
But wait – this hummus isn’t just for dipping! Here’s how I use it in everyday meals:
- Sandwich spread – Swap mayo for hummus on your next turkey or veggie sandwich. Game changer.
- Breakfast toast – Slather on whole grain bread, top with sliced avocado and everything bagel seasoning. You’re welcome.
- Grain bowl base – Swipe a spoonful on the bottom before adding quinoa, roasted veggies, and protein. It makes every bite better.
Party-Perfect Presentation
When I’m entertaining, I go all out with the garnishes:
- Make those pretty swirls with the back of a spoon to catch the olive oil
- Dust with smoked paprika for color and a hint of smokiness
- Sprinkle with chopped parsley or toasted pine nuts for texture
- Add a few whole roasted garlic cloves on top as a tasty garnish
- Drizzle with garlic-infused oil (that leftover roasting oil!)
My favorite party trick? Serve it in a shallow bowl surrounded by all the dippers – it disappears faster than you can say “more pita please!” And don’t be surprised when guests ask for the recipe – it happens every time.
Storing and Reheating Roasted Garlic Hummus
Alright, let’s talk storage – because let’s be real, you’ll probably want to keep some of this roasted garlic hummus around (if it lasts that long!). I’ve learned a few tricks the hard way to keep it fresh and delicious. Nothing worse than opening the fridge to find your beautiful hummus has turned into sad, dried-out paste!
First rule: always use an airtight container. I’m partial to glass jars with tight lids – they keep the hummus from absorbing other fridge smells. Press a piece of plastic wrap directly on the surface before sealing to prevent that weird skin from forming. Trust me, it works!
In the fridge, your hummus will stay perfect for about 5 days – but honestly? Mine never lasts that long. The garlic flavor actually gets better after a day or two as everything melds together. Just give it a good stir before serving to bring back that creamy texture.
Now, about freezing – I know some recipes say you can freeze hummus, but I don’t recommend it for this roasted garlic version. The texture changes when thawed, getting kind of grainy and separated. The tahini and olive oil just don’t play nice after freezing. If you absolutely must freeze it, stir vigorously after thawing and add a splash of fresh lemon juice to perk it up.
One last pro tip: if your refrigerated hummus thickens up too much (which it tends to do), just stir in a teaspoon of warm water at a time until it’s back to that perfect dippable consistency. No need to reblend unless you’re super picky about texture like me!
And please – never microwave hummus to warm it up! It can make the oils separate. Just let it sit at room temp for 30 minutes before serving. The flavors will wake right up, and you’ll have that creamy texture you loved when it was first made.
Roasted Garlic Hummus Nutrition Information
Okay, let’s talk numbers – but remember, these are just estimates because let’s be honest, who actually measures exactly 2 tablespoons when they’re scooping up this deliciousness? (Not me!) But here’s the nutritional breakdown per serving to give you an idea of what you’re enjoying:
- Serving Size: 2 tablespoons (about the size of a ping pong ball – but who stops at one?)
- Calories: 80 (totally worth every one!)
- Fat: 5g (the good kind from olive oil and tahini)
- Saturated Fat: 0.7g
- Carbohydrates: 7g
- Fiber: 2g (thanks to those mighty chickpeas!)
- Sugar: 0.5g (just the natural stuff)
- Protein: 2.5g (not bad for a dip, right?)
- Sodium: 120mg (you can always reduce the salt if needed)
Now here’s what those numbers don’t tell you – this hummus packs a nutritional punch way beyond the basics. Chickpeas give you plant-based protein and fiber to keep you full, tahini provides healthy fats, and garlic? Well, let’s just say it’s been used medicinally for centuries! Plus, when you compare it to store-bought versions, you’re skipping all those preservatives and stabilizers.
My philosophy? Enjoy it guilt-free – whether you’re scooping up veggies for a healthy snack or indulging with warm pita bread. Food this good shouldn’t come with stress!
Common Questions About Roasted Garlic Hummus
After sharing this recipe with so many friends, I’ve heard every question imaginable about roasted garlic hummus. Here are the ones that come up most often – along with the answers I’ve discovered through lots of trial and (delicious) error!
Can I use raw garlic instead of roasted?
Oh honey, I wouldn’t recommend it! Raw garlic has such a harsh, pungent flavor that’ll overpower everything else in the hummus. Roasting transforms it into that sweet, mellow goodness we love. If you’re in a pinch, try sautéing minced garlic in olive oil until golden – it’s not quite the same, but closer than raw!
My hummus turned out grainy – how do I fix it?
Been there! Grainy hummus usually means one of three things: not blending long enough (give it a full 3 minutes!), unpeeled chickpeas (those skins!), or not enough liquid. Try adding another tablespoon of water or lemon juice and blend, blend, blend. Worst case? Pass it through a fine mesh strainer – a little fussy but it works!
Can I make this without tahini?
You can, but… it won’t be quite the same. Tahini gives that signature nutty depth. If you must substitute, try plain Greek yogurt (start with half the amount) or almond butter (use sparingly – it’s stronger). But honestly? A good tahini is worth tracking down – it keeps forever in your pantry!
Why does my hummus taste bitter?
Ah, the tahini strikes again! Some brands can be naturally bitter. Next time, try toasting your tahini lightly before using – just warm it in a dry pan until fragrant. Also check your garlic isn’t burned from roasting (those dark brown bits turn bitter). A pinch more salt or lemon juice can help balance bitterness too.
How can I make it extra creamy like store-bought versions?
Here’s my secret weapon: ice-cold water instead of room temp! The cold helps emulsify everything beautifully. Also, don’t skip peeling those chickpeas – I know it’s tedious, but that’s why restaurant hummus is so smooth. And blend longer than you think necessary – I aim for at least 3 full minutes.
Got more questions? Just ask! I’ve made every hummus mistake possible so you don’t have to. Now go enjoy that roasted garlic goodness!
I can’t wait to hear how your roasted garlic hummus turns out! There’s nothing I love more than getting messages from friends telling me they’ve made this recipe – it makes all my kitchen experiments worth it. Did you add any fun twists? Maybe an extra sprinkle of smoked paprika or a handful of fresh herbs? I’m always looking for new ideas to try!
If you loved this recipe as much as I do (and I’m betting you will), would you do me a huge favor? Take a quick second to rate it or leave a comment below. Your feedback helps me know what recipes to share more of, and it helps other home cooks decide if they should try it too. Plus, I read every single note – they make my day!
Oh! And if you snap a photo of your beautiful hummus creation, tag me on Instagram @[YourHandle]. I love seeing your kitchen adventures and sharing them in my stories. Nothing makes me happier than seeing this roasted garlic magic spread to more tables and parties. Now go enjoy that creamy, garlicky goodness – you’ve earned it!


Creamy Roasted Garlic Hummus Recipe with 10 Cloves
- Total Time: 40 minutes
- Yield: 2 cups 1x
- Diet: Vegetarian
Description
Creamy roasted garlic hummus perfect for dipping or spreading.
Ingredients
- 1 can (15 oz) chickpeas, drained and rinsed
- 1 head roasted garlic
- 3 tbsp tahini
- 2 tbsp lemon juice
- 2 tbsp olive oil
- 1/2 tsp salt
- 1/4 tsp cumin
- 3–4 tbsp water
Instructions
- Preheat oven to 400°F (200°C). Cut the top off a head of garlic, drizzle with olive oil, wrap in foil, and roast for 30 minutes.
- Squeeze roasted garlic cloves into a food processor.
- Add chickpeas, tahini, lemon juice, olive oil, salt, and cumin.
- Blend until smooth, adding water 1 tbsp at a time until desired consistency is reached.
- Taste and adjust seasoning if needed.
- Serve with a drizzle of olive oil.
Notes
- Store in an airtight container for up to 5 days.
- For smoother hummus, peel chickpeas before blending.
- Double the recipe for parties.
- Prep Time: 10 minutes
- Cook Time: 30 minutes
- Category: Appetizer
- Method: Blending
- Cuisine: Middle Eastern
Nutrition
- Serving Size: 2 tbsp
- Calories: 80
- Sugar: 0.5g
- Sodium: 120mg
- Fat: 5g
- Saturated Fat: 0.7g
- Unsaturated Fat: 4g
- Trans Fat: 0g
- Carbohydrates: 7g
- Fiber: 2g
- Protein: 2.5g
- Cholesterol: 0mg