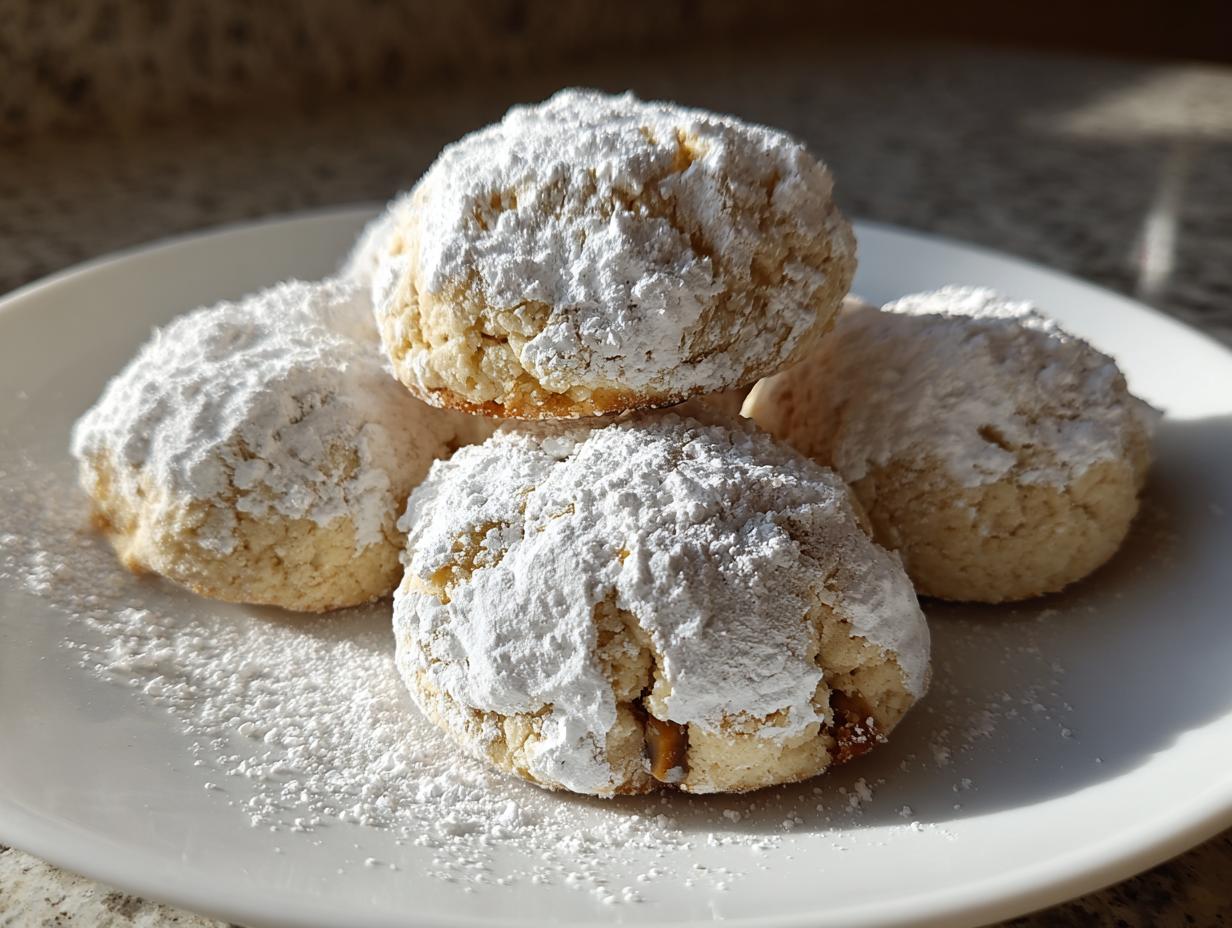
Nothing says “holidays” quite like the first bite of a Russian tea cake—that magical moment when buttery, nutty goodness dissolves into snowy powdered sugar on your tongue. My grandma always made these melt-in-your-mouth cookies every December, and the smell of toasted pecans and vanilla still transports me straight back to her cozy kitchen. I remember sneaking bites of dough when she wasn’t looking (don’t tell!). These little snowball cookies may go by different names—Mexican wedding cakes, snowdrops—but our family’s Russian tea cake recipe, with its perfect balance of crunch and tenderness, has been my go-to holiday gift for years.

Why You’ll Love These Russian Tea Cakes
Let me tell you why these little snowballs of joy have stolen my heart (and probably will steal yours too):
- That melt-in-your-mouth texture—one bite and the buttery crumb practically dissolves into sweet, nutty heaven
- Impossibly easy to make—just mix, roll, and bake (no fancy equipment needed!)
- They look like festive little snowballs, making them perfect for cookie swaps or gifting
- The crowd-pleasing flavor—I’ve never met anyone who could resist reaching for just one more
Trust me, once you try these, you’ll understand why my grandma made them every single holiday season!
Ingredients for Russian Tea Cakes
Gather these simple ingredients—you probably have most in your pantry already! The magic happens when these basic components come together just right.
- 1 cup (2 sticks) unsalted butter, softened – This is the heart of the recipe! Take it out 1-2 hours before baking
- 1/2 cup powdered sugar, plus extra for rolling – The secret to that snowy coating
- 1 teaspoon pure vanilla extract – Use the good stuff, not imitation
- 2 1/4 cups all-purpose flour – Spoon and level it to avoid dense cookies
- 3/4 cup finely chopped nuts – Walnuts or pecans are traditional (I’m team pecan!)
- 1/4 teaspoon salt – Balances the sweetness perfectly
Ingredient Substitutions & Notes
No pecans? Walnuts work great too. For gluten-free, use a 1:1 substitute flour. Butter should be soft but still cool—if it gets greasy, pop it in the fridge for 5 minutes. And don’t skip the second sugar coating—it makes all the difference!

How to Make Russian Tea Cakes
Okay, let’s get to the fun part! Making these little snowballs is easier than you think, but there are a few tricks I’ve learned over the years to make them absolutely perfect. Follow these steps, and you’ll be rewarded with melt-in-your-mouth cookies that disappear faster than you can say “holiday baking!”
Step 1: Cream Butter & Sugar
First, preheat your oven to 350°F (175°C) – this gives it time to reach the right temperature while you prep. Now, grab that softened butter (remember, cool but yields to gentle pressure) and beat it with the powdered sugar until it’s light and fluffy. This takes about 2-3 minutes with a hand mixer. Don’t rush this step! You want it pale and creamy – this creates those air pockets that make the cookies tender.
Step 2: Mix Dry Ingredients
Here’s my grandma’s trick: whisk the flour, nuts and salt together first. Then add it to the butter mixture about 1/2 cup at a time, mixing just until combined after each addition. This prevents lumps and keeps the dough tender. When it starts to come together, that vanilla goes in – its aroma will make your kitchen smell amazing!
Step 3: Shape & Bake
Roll tablespoon-sized portions (about 1-inch balls) between your palms. If the dough gets sticky, pop it in the fridge for 15 minutes. Place them on ungreased baking sheets about 2 inches apart – they won’t spread much. Bake 10-12 minutes until the bottoms are lightly golden and tops look set but not browned. Overbaking makes them crumbly!
Step 4: Sugar Coating
Here comes the magic! Let cookies cool just until you can handle them (3-4 minutes), then roll in powdered sugar while still warm. This first coat will melt slightly into the cookies. After they cool completely, roll them again – this gives that classic snowy look and extra sweetness. Pro tip: sift your powdered sugar first for the smoothest coating!

Tips for Perfect Russian Tea Cakes
After years of making these (and eating way too many test batches!), here are my can’t-live-without tips:
- Chill sticky dough for 15 minutes—it makes rolling those perfect little balls so much easier
- Use a small cookie scoop for uniform size—they’ll bake evenly and look bakery-worthy
- Sift your powdered sugar before rolling—it gives that flawless snowy finish
- Bake until just set—the bottoms should be barely golden, not brown (they firm up as they cool)
- Let them cool slightly before the first sugar coat—warm cookies absorb that sweetness beautifully
Follow these, and you’ll have melt-in-your-mouth cookies every single time!
Storing & Serving Russian Tea Cakes
These little snowballs keep beautifully in an airtight container at room temperature for up to 2 weeks (though ours never last that long!). For gifting, pack them in festive tins layered with parchment – they make the most charming holiday presents. Always serve at room temperature so that powdered sugar coating stays perfectly snowy!
Russian Tea Cakes Nutrition Info
Here’s the nutritional breakdown per cookie (based on 36 cookies per batch). Keep in mind these are estimates—actual numbers may vary slightly depending on specific ingredients used:
- Calories: 80
- Total Fat: 6g
- Saturated Fat: 3g
- Trans Fat: 0g
- Cholesterol: 10mg
- Sodium: 15mg
- Total Carbohydrates: 7g
- Dietary Fiber: 0g
- Sugars: 3g
- Protein: 1g
FAQ About Russian Tea Cakes
Over the years, I’ve gotten so many questions about these little snowball cookies! Here are answers to the ones that pop up most often:
Can I freeze Russian tea cakes?
Absolutely! These cookies freeze beautifully. Just cool them completely after the second sugar coating, then store in an airtight container with parchment between layers. They’ll keep for up to 3 months. Thaw at room temperature—no need to re-roll in sugar unless some rubbed off.
Why did my cookies turn out crumbly?
Oh no! They probably baked a minute or two too long. These delicate cookies are done when they’re just set—the bottoms should have the faintest golden hue, not brown. Also, check that you measured your flour correctly (spoon and level method!) as too much flour makes them dry.
What are the best nuts to use?
My grandma swore by pecans—they have this buttery sweetness that melts perfectly with the dough. But walnuts are traditional too! Just make sure to chop them finely (but not to dust) so you get little crunchy bits in every bite. I’ve even used hazelnuts for a fun twist!
Can I make the dough ahead?
Yes! The dough balls freeze wonderfully before baking. Shape them, freeze on a tray until solid, then transfer to a bag. When ready, bake straight from frozen—just add 1-2 extra minutes. Perfect for holiday prep!
Why do we roll them in sugar twice?
That first roll while they’re warm creates this magical melt-in layer of sweetness, while the second coat gives that picture-perfect snowy look. Trust me—it’s worth the extra step!

Did you make these? Tag me in your photos! I’d love to see your snowy creations. And if you loved them as much as I do, leave a rating below—it helps other bakers find this family recipe!
Print
3-Decadent Russian Tea Cakes That Melt in Your Mouth
- Total Time: 27 mins
- Yield: 36 cookies 1x
- Diet: Vegetarian
Description
Russian tea cakes are buttery, nutty cookies rolled in powdered sugar. They melt in your mouth and are perfect for holidays or any occasion.
Ingredients
- 1 cup unsalted butter, softened
- 1/2 cup powdered sugar
- 1 teaspoon vanilla extract
- 2 1/4 cups all-purpose flour
- 3/4 cup finely chopped nuts (walnuts or pecans)
- 1/4 teaspoon salt
- Additional powdered sugar for rolling
Instructions
- Preheat oven to 350°F (175°C).
- Cream butter and powdered sugar until light and fluffy.
- Mix in vanilla extract.
- Gradually add flour, nuts, and salt until well combined.
- Shape dough into 1-inch balls and place on ungreased baking sheets.
- Bake for 10-12 minutes until set but not browned.
- Cool slightly, then roll warm cookies in powdered sugar.
- Cool completely and roll again in powdered sugar before serving.
Notes
- Use room-temperature butter for easier mixing.
- Chill dough if it becomes too soft.
- Store in an airtight container for freshness.
- Prep Time: 15 mins
- Cook Time: 12 mins
- Category: Dessert
- Method: Baking
- Cuisine: Russian
Nutrition
- Serving Size: 1 cookie
- Calories: 80
- Sugar: 3g
- Sodium: 15mg
- Fat: 6g
- Saturated Fat: 3g
- Unsaturated Fat: 2g
- Trans Fat: 0g
- Carbohydrates: 7g
- Fiber: 0g
- Protein: 1g
- Cholesterol: 10mg