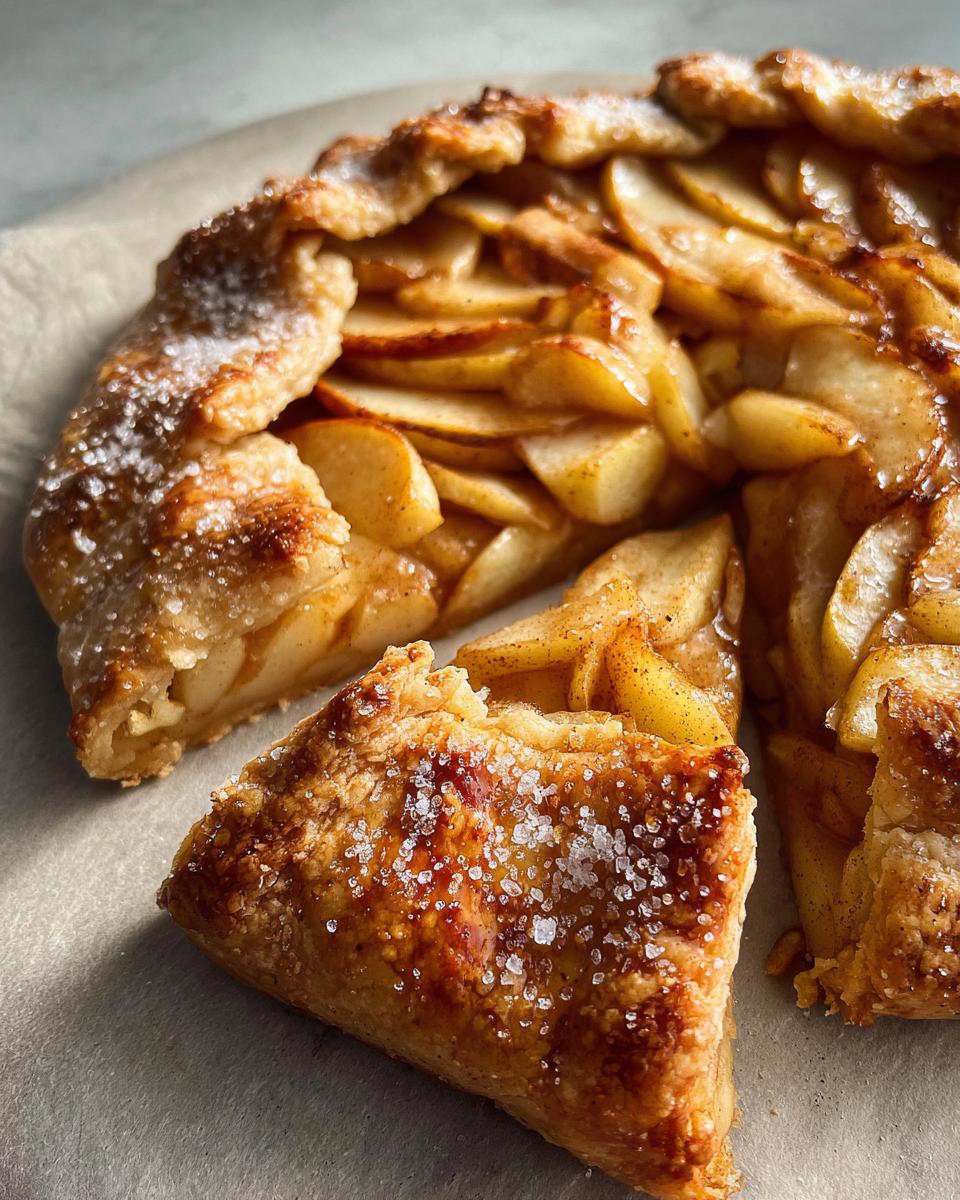
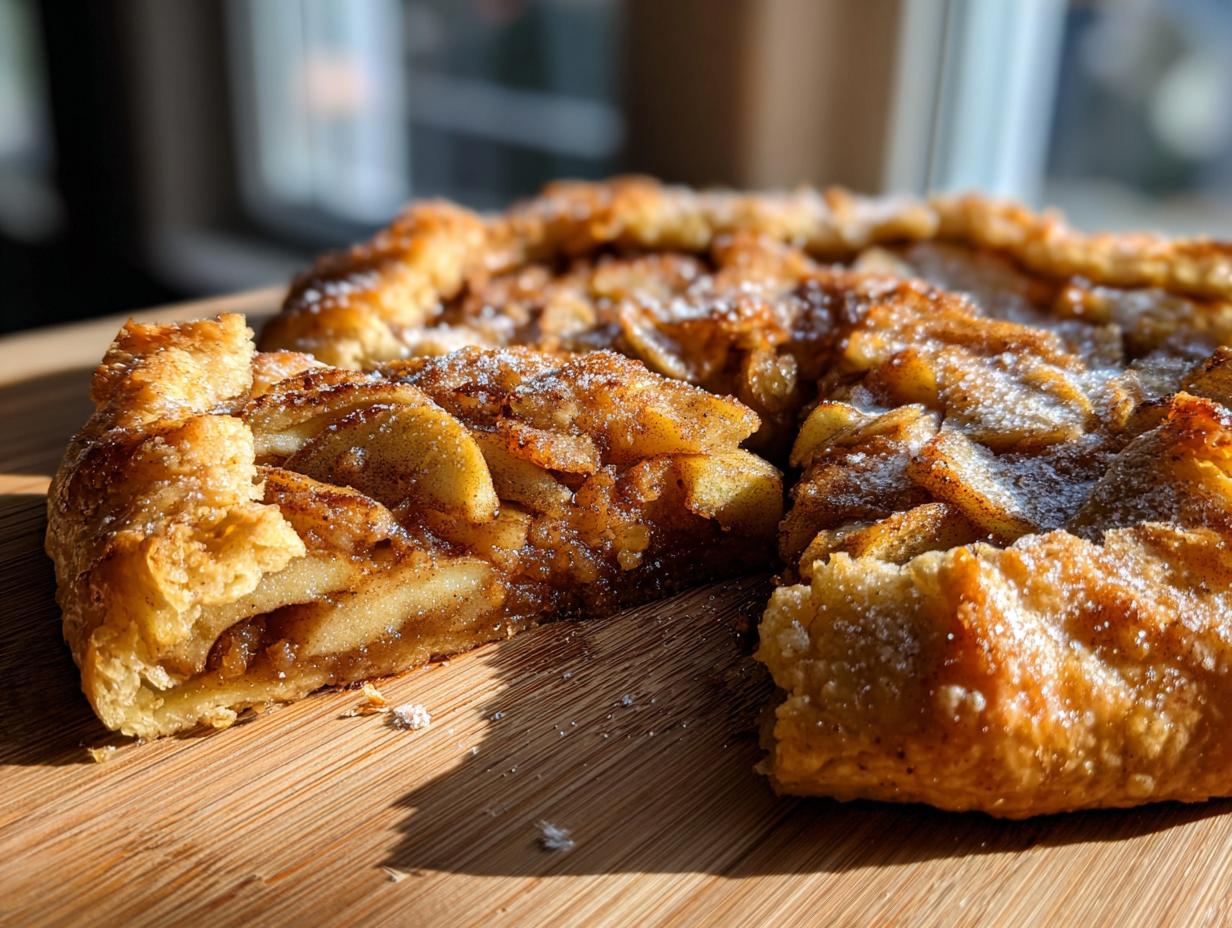
There’s something magical about the smell of apples and cinnamon filling the kitchen on a crisp fall afternoon. My love affair with this rustic apple galette started years ago when I first attempted to make pie from scratch—and let’s just say it wasn’t pretty. That’s when I discovered the beauty of free-form galettes. No perfect crimping required, just buttery, flaky crust hugging sweet spiced apples in that wonderfully imperfect way that says “homemade with love.” It’s become my go-to dessert when I want apple pie vibes without all the fuss. The best part? That golden, sugar-crusted edge that shatters when you take the first bite—pure heaven. Trust me, once you try this rustic apple galette, you’ll never stress about pie crust again.
Why You’ll Love This Rustic Apple Galette
This galette stole my heart (and my family’s dessert plates) for so many reasons – let me count the ways!
- Effortless elegance: No fancy crimping needed – those imperfect folds are part of its charm
- Crust dreams: Buttery, flaky layers that shatter beautifully with each bite
- Apple bliss: Just the right balance of sweet-tart apples with warm cinnamon spice
- Weekend warrior: Hands-on time is under 30 minutes – perfect for lazy baking days
- Crowd pleaser: Looks gorgeous but feels homey – like a hug on a plate
Honestly? It’s the dessert I make when I want all the glory of pie with half the stress. Your kitchen will smell like an autumn dream!
Ingredients for Rustic Apple Galette
Gather these simple ingredients – quality matters here! I’ve made this so many times I can recite this list in my sleep:
- For the crust: 1 1/2 cups all-purpose flour (spooned and leveled), 1/2 teaspoon fine sea salt, 1/2 cup cold unsalted butter (cubed and chilled again), 3-4 tablespoons ice water
- For the filling: 3 medium apples (peeled, cored, and sliced 1/4″ thick), 1/4 cup granulated sugar, 1 teaspoon ground cinnamon, 1 tablespoon fresh lemon juice
- For finishing: 1 egg (beaten, for that golden crust), 1 tablespoon coarse sugar (demerara or turbinado works great)
That’s it! Simple pantry staples come together for something magical. Now, let’s talk specifics…
Ingredient Notes & Substitutions
Here’s what I’ve learned through trial and error (mostly error at first!):
Apples: I swear by a mix of Granny Smith and Honeycrisp – tart and sweet in perfect harmony. But use what you’ve got! Just avoid super-juicy varieties that might make the crust soggy.
Butter: Yes, it must be cold! If you’re dairy-free, chilled coconut oil works in a pinch (but the flavor changes slightly).
Sugar swaps: Coconut sugar works instead of granulated, but your filling will be darker. For the coarse sugar topping? Try cinnamon sugar for extra warmth!
Secret weapon: That lemon juice isn’t just for flavor – it keeps your apples from browning while you work. Clever, right?
How to Make Rustic Apple Galette
Alright, let’s get our hands dirty! This is where the magic happens – transforming simple ingredients into that gorgeous, golden beauty. Don’t worry if it’s not perfect – that’s the whole point of “rustic,” right? Follow these steps, and you’ll be a galette pro in no time.
Step 1: Prepare the Dough
First things first – that flaky crust starts with cold butter and gentle hands. In a large bowl, whisk together your flour and salt. Now for the fun part – take those chilled butter cubes and start working them into the flour with your fingertips. You’re aiming for pea-sized crumbs – some bigger butter pieces are totally fine! That’s what creates those beautiful flaky layers.
Drizzle in ice water, 1 tablespoon at a time, mixing gently with a fork until the dough just comes together. Here’s my trick: squeeze a handful – if it holds together without crumbling, you’re golden. Form it into a disk (don’t overwork it!), wrap in plastic, and chill for at least 30 minutes. Patience, my friend – this makes all the difference!
Step 2: Roll and Assemble
Time to roll! Lightly flour your surface and rolling pin (I use a wine bottle in a pinch – no judgment here!). Roll that chilled dough into about a 12-inch circle – no need for perfection here. Transfer it to a parchment-lined baking sheet – the parchment is your best friend for easy cleanup.
Now, those beautiful apples! Toss them with sugar, cinnamon, and lemon juice – watch how the lemon keeps them looking fresh. Arrange them in the center, leaving about 2 inches bare around the edges. Here’s my secret: slightly overlap the slices and pile them higher in the center – they’ll settle as they bake.
The folding is the fun part! Lift one section of the dough edge up and over the apples, then continue around, pleating as you go. It’s okay if some juices escape – that’s caramelization waiting to happen! Brush the crust with egg wash (this gives that beautiful golden shine) and sprinkle generously with coarse sugar for that irresistible crunch.

Step 3: Bake to Perfection
Into the oven it goes at 375°F (190°C) – middle rack is best for even baking. Set your timer for 35 minutes, but start peeking around 30. You’re looking for golden-brown crust edges and bubbling apple juices – that’s when you know it’s done.
Resist cutting in right away! Let it cool for about 15 minutes (I know, torture!) so the juices can set. This waiting period is crucial unless you want apple soup (been there!). The wait is worth it – that first bite of warm, flaky crust with tender spiced apples? Pure autumn magic on a plate.
Tips for the Best Rustic Apple Galette
After making more galettes than I can count (and learning from all my mistakes!), here are my foolproof tips for absolute perfection:
- Chill twice: Don’t skip chilling the dough before and after rolling – cold butter = flaky layers!
- Thickness matters: Roll dough to 1/4″ thick – too thin and it’ll tear, too thick and it won’t crisp properly
- Juice control: Pat apple slices dry with a towel to prevent sogginess – trust me on this one
- Egg wash magic: Use the whole egg (not just whites) for that deep golden color
- Baking sheet hack: Place a second sheet underneath to catch any rogue drips (learned this the hard way!)
- Slice smart: Let it cool 15-20 minutes – warm is heavenly, but piping hot = messy slices
The best part? Even your “mistakes” will taste amazing – that’s the beauty of rustic baking!
Serving and Storing Rustic Apple Galette
Oh, the joy of serving this beauty! I always let it cool just enough so the juices set – about 15 minutes – then slice it warm with a scoop of vanilla ice cream melting into all those buttery layers. That hot-cold contrast? Absolute perfection. For extra decadence, drizzle with caramel sauce or a dusting of powdered sugar.
Leftovers (if you’re lucky enough to have any!) keep well at room temp for about 3 days – just loosely tent with foil. To revive that crispy crust, pop slices in a 350°F oven for 5-7 minutes. Honestly? I think it tastes even better the next day – the flavors mingle and deepen overnight. Just don’t refrigerate it unless you want a soggy crust – learned that lesson the hard way!
Rustic Apple Galette FAQs
I get asked these questions all the time – here are the answers straight from my galette-making adventures!
Q1: Can I use frozen apples for this galette?
Technically yes, but fresh is better! Frozen apples release too much liquid when thawing, which can make your crust soggy. If you must use frozen, thaw completely first and pat the slices super dry with paper towels. You might also need to reduce the sugar since frozen apples tend to be sweeter.
Q2: My crust turned out soggy – what went wrong?
Oh honey, I’ve been there! Usually it’s from not chilling the dough enough or overloading with juicy apples. Next time, try these fixes: chill dough twice (before and after rolling), pat apple slices dry, sprinkle a thin layer of breadcrumbs or crushed cookies on the dough before adding apples (they’ll absorb excess juice).
Q3: Can I make this galette ahead of time?
Absolutely! Prepare the dough and filling separately up to 2 days in advance. Keep dough wrapped in fridge and apples tossed with lemon juice in an airtight container. Assemble and bake when ready – the fresh-from-the-oven crispness is worth waiting for!
Q4: What’s the best way to reheat leftover galette?
Skip the microwave unless you want mush! For that just-baked texture, reheat slices in a 350°F oven for 5-7 minutes. Pro tip: place them directly on the oven rack (with a sheet below to catch drips) for maximum crispiness.
Nutritional Information
Here’s the scoop on what’s in each glorious slice of this rustic apple galette (based on 6 servings): about 250 calories, 12g fat, 32g carbs, and 3g protein. But let’s be real – we’re here for the buttery crust and cinnamon-kissed apples, not numbers! Just remember: nutrition varies depending on your exact ingredients and brands. These are estimates to give you a general idea of what you’re enjoying. Now go savor every delicious bite without guilt!
Share Your Creation
Nothing makes me happier than seeing your galette creations! Snap a photo of that gorgeous golden crust and tag me on Instagram – I might just feature your masterpiece. Or leave a review below telling me how it turned out! Every fold tells a story, and I’d love to hear yours.
Print
Rustic Apple Galette
- Total Time: 1 hour 30 minutes (includes chilling)
- Yield: 6 servings 1x
- Diet: Vegetarian
Description
A simple, rustic apple galette with a flaky crust and sweet, spiced apple filling.
Ingredients
- 1 1/2 cups all-purpose flour
- 1/2 teaspoon salt
- 1/2 cup unsalted butter, chilled and cubed
- 3–4 tablespoons ice water
- 3 medium apples, peeled and thinly sliced
- 1/4 cup granulated sugar
- 1 teaspoon cinnamon
- 1 tablespoon lemon juice
- 1 egg, beaten (for egg wash)
- 1 tablespoon coarse sugar (for sprinkling)
Instructions
- Mix flour and salt in a bowl. Cut in butter until mixture resembles coarse crumbs.
- Add ice water, 1 tablespoon at a time, until dough comes together. Shape into a disk, wrap in plastic, and chill for 30 minutes.
- Preheat oven to 375°F (190°C). Roll dough into a 12-inch circle on a floured surface.
- Toss apples with sugar, cinnamon, and lemon juice. Arrange slices in the center of the dough, leaving a 2-inch border.
- Fold edges of dough over the apples, pleating as needed. Brush dough with egg wash and sprinkle with coarse sugar.
- Bake for 35-40 minutes until crust is golden and apples are tender. Cool slightly before serving.
Notes
- Use a mix of sweet and tart apples for balanced flavor.
- Chill dough before rolling to prevent sticking.
- Serve warm with vanilla ice cream or whipped cream.
- Prep Time: 20 minutes
- Cook Time: 40 minutes
- Category: Dessert
- Method: Baking
- Cuisine: French
Nutrition
- Serving Size: 1 slice
- Calories: 250
- Sugar: 15g
- Sodium: 100mg
- Fat: 12g
- Saturated Fat: 7g
- Unsaturated Fat: 4g
- Trans Fat: 0g
- Carbohydrates: 32g
- Fiber: 3g
- Protein: 3g
- Cholesterol: 45mg


