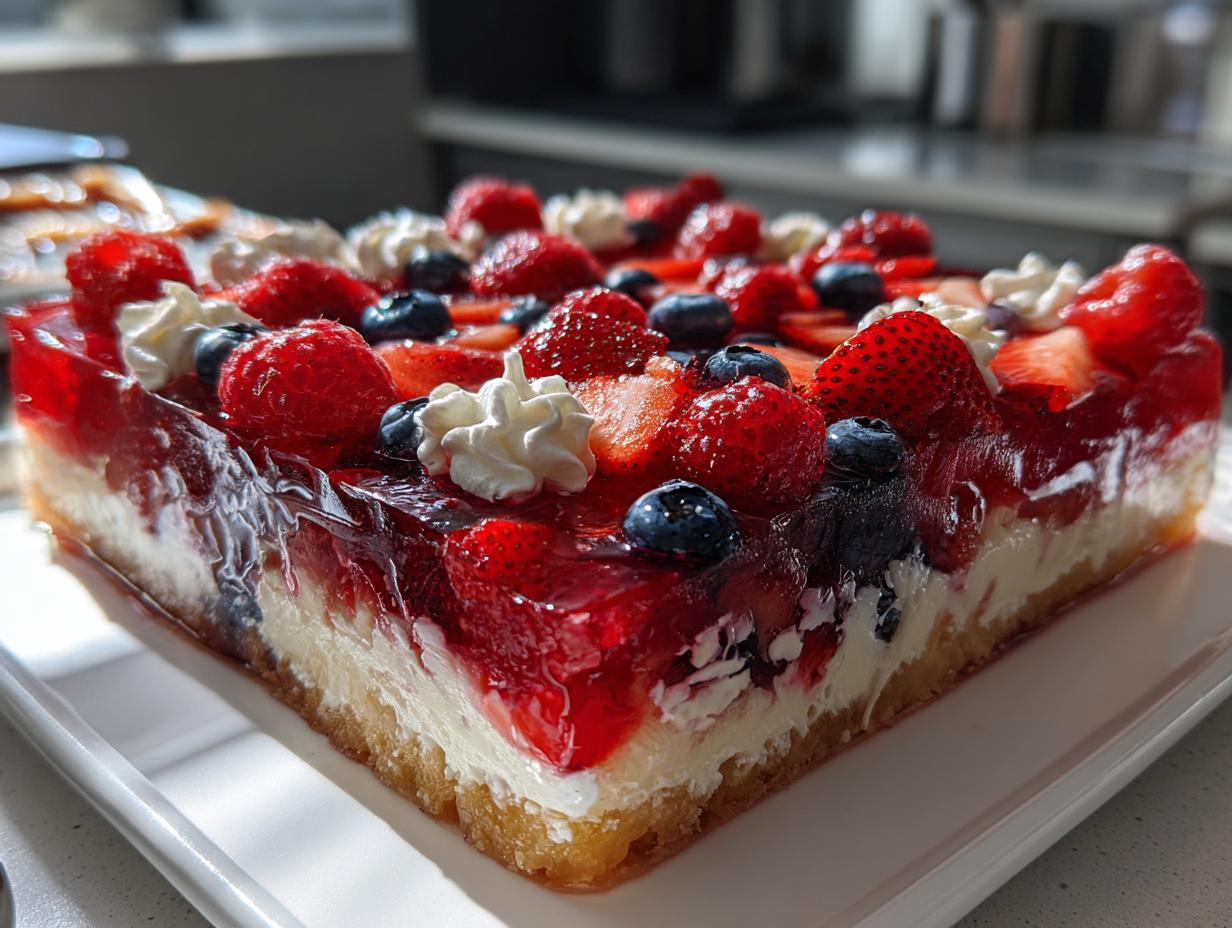
Nothing says summer like a cool, colorful dessert that disappears faster than kids running through a sprinkler! My Summer Berry Jello Lasagna has been the star of every backyard BBQ and family reunion since my aunt first whipped it up during a heatwave years ago. Picture this: layers of wobbly strawberry and blueberry gelatin hugging a creamy vanilla filling, all topped with a confetti of fresh berries. It’s like eating summer sunshine! When that first bite hits your tongue – the sweet-tart berries, the cloud-like cream cheese layer, the refreshing jiggle – you’ll understand why this no-bake beauty became our family’s go-to celebration dessert. Best part? You can make it with the kids, then let the fridge do all the work while you enjoy the party.
Why You’ll Love This Summer Berry Jello Lasagna
Trust me, this dessert is about to become your summer MVP. Here’s why everyone at my potlucks begs for the recipe:
- Cool as a cucumber: When it’s too hot to turn on the oven, this no-bake beauty saves the day. The jiggly layers are like edible air conditioning!
- Look at those colors: The vibrant red, white, and blue layers (especially perfect for Fourth of July!) make it almost too pretty to eat. Almost.
- Party superhero: It feeds a crowd with zero last-minute fuss. Just pull it from the fridge when guests arrive – I always get “oohs” when I carry it out.
- Texture magic: That creamy middle layer against the fruity jello? Pure bliss. Even picky kids go wild for the fun layers.
- Berry versatile: Use whatever berries are ripest (or on sale). My neighbor swaps in peaches sometimes – genius!
Seriously, this dessert checks all the boxes. Light yet satisfying, simple but impressive, and it somehow tastes like childhood summers and grown-up parties all at once.

Ingredients for Summer Berry Jello Lasagna
Here’s everything you’ll need to create this jiggly masterpiece. I like to group ingredients by their layers – it makes prepping so much easier!
For the Gelatin Layers:
- 1 box (3 oz) strawberry gelatin – the classic red makes the bottom layer pop!
- 1 box (3 oz) blueberry gelatin – or any berry flavor you love
- 2 cups boiling water – divided
- 1 cup cold water – divided
Cream Cheese Cloud Layer:
- 8 oz cream cheese, softened – leave it out for 30 minutes first
- 1/4 cup sugar – granulated works best here
- 1 tsp vanilla extract – the good stuff!
- 1 cup whipped topping – thaw if frozen
Berry Topping:
- 2 cups mixed berries – strawberries, blueberries, raspberries – your choice!
Ingredient Notes & Substitutions
Don’t stress if you need to swap things – I’ve tested all kinds of variations:
- Gelatin: Sugar-free works fine if you’re watching carbs. Just use the same amounts listed.
- Berries: Frozen berries thaw beautifully (pat them dry first). Blackberries would be lovely too!
- Cream cheese: Full-fat gives the creamiest texture, but reduced-fat works in a pinch.
- Whipped topping: Fresh whipped cream is amazing if you’ve got it – beat 1/2 cup heavy cream with 1 tbsp sugar.
- Dietary swaps: For dairy-free, use vegan cream cheese and coconut whipped topping.
Pro tip: If your strawberries are huge, slice them thin so they don’t poke through the top gelatin layer. Learned that one the messy way!
Equipment You’ll Need
No fancy gadgets required here – just a few basics from your kitchen. Here’s what I always grab when making my Summer Berry Jello Lasagna:
- 9×13-inch baking dish: Glass shows off those pretty layers best, but any pan this size works.
- 2 mixing bowls: One for gelatin, one for the creamy filling – medium size is perfect.
- Whisk: For dissolving that gelatin smoothly – no lumps allowed!
- Electric mixer: Makes the cream cheese layer dreamily fluffy (but a strong arm and spoon works too).
- Measuring cups: For water and sugar – precision matters with gelatin.
- Spatula: My trusty rubber one spreads the cream layer like a dream.
That’s it! Well, besides a fridge – but I’m guessing you’ve got one of those. Now let’s get to the fun part!
How to Make Summer Berry Jello Lasagna
Okay, let’s dive into making this gorgeous dessert! I’ll walk you through each step just like I do when teaching my niece – simple, clear, and with all my favorite tricks along the way. Just remember: patience with the chilling times makes all the difference between good and perfect layers.
Preparing the Strawberry Gelatin Layer
First up – that vibrant strawberry base! Here’s exactly how I nail it every time:
- Boil 1 cup of water (I use a kettle) and pour it into your mixing bowl. Sprinkle in the strawberry gelatin powder and whisk like crazy for 2 full minutes – no lazy stirring here! Those granules need to completely disappear.
- Add 1/2 cup cold water and whisk again. Tip: If your kitchen’s hot, pop the bowl in the fridge for 5 minutes to cool slightly before the next step – this prevents condensation on your finished layer.
- Pour into your 9×13 dish – tilt it to spread evenly. Slide it carefully into the fridge (middle shelf works best) and let it set until firm, about 2 hours. Test by lightly touching the center – it should bounce back without sticking to your finger.
Pro tip: If you’re short on time, spread the dish on a freezer-safe tray and chill for 1 hour (check every 15 minutes!). But honestly? The slow chill gives the cleanest layers.
Making the Cream Cheese Filling
While the strawberry layer sets, let’s whip up that dreamy middle cloud:
- Beat the softened cream cheese in a clean bowl with your mixer on medium until it’s completely smooth – about 1 minute. Scrape down the sides! Lumps now mean lumps forever.
- Add sugar and vanilla and beat another 30 seconds until fluffy. The mixture should look like frosting – if it’s stiff, add 1 tbsp milk or berry juice to loosen it up.
- Gently fold in whipped topping with a spatula using big, sweeping motions. Don’t overmix! We want this light as air.
- Spread over your set strawberry layer – I dollop spoonfuls across the surface first, then connect them with my offset spatula. Aim for about 1/2 inch thickness.
Secret trick: Chill this layer for 15 minutes before adding the blueberry gelatin – it helps prevent the colors from bleeding!
Assembling the Blueberry Layer and Berries
Final stretch! Here’s how we add that gorgeous top:
- Repeat the gelatin process with the blueberry flavor: boil 1 cup water, dissolve powder thoroughly, then mix in 1/2 cup cold water. Here’s the key – let it cool on the counter for 10 minutes (stir occasionally) so it’s slightly thickened but still pourable.
- Arrange your berries evenly over the cream cheese layer. I like to press them in gently so they stay put when the liquid hits. For prettiest results, alternate colors – think strawberry slices pointing outward like little sun rays!
- Slowly pour the blueberry gelatin over the berries – use the back of a spoon to deflect the stream and prevent berry displacement disasters (learned from experience!).
- Chill for at least 4 hours, preferably overnight. The wait is torture, but trust me – slicing into firm, perfectly set layers is worth it!
Bonus tip: For clean cuts, run your knife under hot water and wipe dry between slices. The gelatin won’t stick, and you’ll get Instagram-worthy pieces every time!

Tips for Perfect Summer Berry Jello Lasagna
After making this dessert dozens of times (and yes, learning from plenty of mistakes!), here are my can’t-miss secrets for Summer Berry Jello Lasagna perfection:
- Chill out – literally: Impatient bakers beware! Each layer needs its full chilling time. That strawberry base should be firm enough to hold a fingerprint without sticking, and the cream layer benefits from a quick pre-chill before the berry topping. Overnight chilling gives the cleanest slices – I know it’s hard to wait!
- Berry prep matters: Toss those berries onto paper towels and gently pat them dry before arranging. Wet berries = weepy gelatin layers. If using frozen, thaw them first in a strainer to drain excess juice. Pro tip: Smaller berries work best – halve big strawberries so they don’t poke through.
- Hot knife magic: Want those picture-perfect slices? Fill a tall glass with steaming water. Dip your knife in, wipe dry, then cut cleanly through the layers. Repeat between each slice – the warm blade glides through like butter. Bonus: it prevents that frustrating gelatin stickiness!
- Room temp cream cheese is non-negotiable: I’ve tried shortcuts here – microwaving, skipping softening time – and always regret it. Truly softened cream cheese (left out 30-45 minutes) blends smoothly without lumps. Cold-from-the-fridge cheese will leave you with little white specks throughout your creamy layer.
One last trick: If your kitchen is extra warm, place a baking sheet under your dish while chilling. It helps distribute the cold evenly for smoother setting. Now go make some jiggly magic!

Serving and Storage
Here’s how to make your Summer Berry Jello Lasagna shine when it’s showtime – plus my tried-and-true storage tricks to keep it perfect for days (if it lasts that long!):
Presentation perfection: I love adding a few fresh mint leaves right before serving – the green makes those berry colors pop even more! For special occasions, I’ll sprinkle edible flowers or a dusting of coconut flakes around the edges. Kids go nuts when I serve it with a dollop of whipped cream and rainbow sprinkles. Honestly though? The dessert is so gorgeous it hardly needs any dressing up – just slice and watch the compliments roll in!
Storage smarts: Cover the pan tightly with plastic wrap (press it right against the surface to prevent condensation) and it’ll keep beautifully in the fridge for 3 days. If you used fresh whipped cream instead of whipped topping, aim to eat it within 2 days. Freezing? Don’t do it – gelatin weeps and the texture turns grainy when thawed (learned this the hard way after saving a “special piece” for myself).
Make-ahead magic: This is my secret weapon for stress-free entertaining! I’ll assemble it the night before, then just pull it out 10 minutes before serving to take the chill off slightly. The flavors actually improve as they mingle overnight. Pro tip: Add any delicate garnishes like mint leaves right before serving so they stay perky.
One last serving thought: Use a thin metal spatula to transfer slices to plates – it slides under those jiggly layers like a dream. Now grab a fork and enjoy that perfect bite of creamy, fruity summer heaven!
Summer Berry Jello Lasagna Variations
One of my favorite things about this recipe is how easily you can twist it into new delicious versions! Here are the flavor combos I’ve tested that got rave reviews from my taste-testers (aka my very opinionated book club ladies):
- Tropical Sunset: Swap the strawberry gelatin for mango or peach flavor, use lime gelatin instead of blueberry, and layer with kiwi slices and pineapple chunks. For the cream layer, fold in a tablespoon of toasted coconut flakes – tastes like vacation!
- Berry-Lemonade: Use lemon gelatin for the bottom layer (trust me, that tangy bite cuts the sweetness perfectly!) and raspberry gelatin on top. Mix a teaspoon of lemon zest into the cream cheese filling for extra zing. Blackberries make a stunning topping here.
- Creamsicle Dream: Orange gelatin base with vanilla pudding instead of the cream cheese layer (just whisk 1 small box of instant vanilla pudding with 1 cup milk until thick, then fold in whipped topping). Top with mandarin orange segments and blueberries – tastes just like those ice cream pops we loved as kids!
Pro tip: When experimenting, keep the liquid ratios the same – just switch up the flavors. My neighbor made a “grown-up” version with champagne gelatin layers and sugared raspberries that was dangerously good! What flavors would you try?

Nutritional Information
Now, I’m no nutritionist (just a dessert enthusiast!), but here’s the scoop on what’s in each glorious slice of Summer Berry Jello Lasagna. Keep in mind – these numbers can change based on your exact ingredients. Used sugar-free gelatin? Swapped in coconut cream? Your totals will be different than mine!
Per serving (1 piece, based on 12 servings):
- Calories: ~180
- Sugar: 22g
- Sodium: 85mg
- Fat: 7g
- Carbs: 27g
- Protein: 3g
My philosophy? Life’s too short not to enjoy dessert – especially when it’s packed with real fruit! I balance it out by serving smaller slices alongside fresh berries for those watching their sugar. Or hey, just take an extra lap around the backyard while the kids play – that counts as balance, right?
FAQs About Summer Berry Jello Lasagna
I’ve answered so many questions about this recipe over the years – here are the ones that pop up most often at family gatherings. Consider this your troubleshooting guide for jello lasagna success!
Can I use sugar-free gelatin in this recipe?
Absolutely! I’ve made this for my diabetic aunt using sugar-free strawberry and blueberry gelatin with perfect results. The texture sets just the same, though the flavor will be slightly less sweet. My trick? I add an extra 1/4 teaspoon of vanilla to the cream cheese layer to round out the taste. Just be sure to still use the same amounts of boiling and cold water listed – the ratios matter more than the sugar content.
How far in advance can I make Summer Berry Jello Lasagna?
This is my go-to make-ahead dessert! The full lasagna keeps beautifully in the fridge for up to 3 days when tightly covered. In fact, I actually prefer making it the night before because the flavors meld together even better. The gelatin layers firm up perfectly, and that cream cheese middle stays dreamy. Just hold off on adding any fresh garnishes like mint until right before serving so they don’t wilt.
Why do my layers sometimes get soggy?
Ah, the dreaded sog! Three common culprits: First, not letting each layer set completely before adding the next – that strawberry base should be firm to a gentle touch (about 2 hours). Second, wet berries – always pat them dry! Third, pouring warm gelatin over the cream layer. Let that blueberry mixture cool until it’s syrupy (about 10 minutes) so it doesn’t melt the creamy middle. My “spoon test”? When the gelatin coats the back of a spoon thickly but still drips off slowly, it’s ready.
Bonus tip: If you’re transporting this to a party, place the chilled dish on a cookie sheet lined with ice packs in your cooler. The layers stay picture-perfect even in summer heat!
Share Your Summer Berry Jello Lasagna!
I live for the moment when someone tries this recipe for the first time – that wide-eyed “wow” as they take that first jiggly bite is everything! Now it’s your turn to spread the joy. Did your family go crazy for it? Spot any genius variations I should try? I want to hear all about your Summer Berry Jello Lasagna adventures!
Snap a photo of your gorgeous creation (especially if you nailed those perfect layers!) and tag #BerryJelloLasagna on Instagram – I feature my favorite reader versions every Friday. Or leave a rating below to let others know what you loved. Pro tip: The comments are gold for swapping ideas – last week someone suggested adding a thin graham cracker crust layer that was pure genius!
Most importantly? Enjoy every sweet, wobbly bite. Life’s too short for boring desserts – now go make some memories (and maybe save me a slice?).
Print
Summer Berry Jello Lasagna: The Ultimate 4-Layer Dessert Craze
- Total Time: 6 hours 20 minutes
- Yield: 12 servings 1x
- Diet: Vegetarian
Description
A refreshing and colorful dessert perfect for summer gatherings.
Ingredients
- 2 cups mixed berries (strawberries, blueberries, raspberries)
- 1 box (3 oz) strawberry gelatin
- 1 box (3 oz) blueberry gelatin
- 2 cups boiling water
- 1 cup cold water
- 1 cup whipped topping
- 8 oz cream cheese, softened
- 1/4 cup sugar
- 1 tsp vanilla extract
Instructions
- Dissolve strawberry gelatin in 1 cup boiling water. Stir in 1/2 cup cold water. Pour into a 9×13-inch dish and refrigerate until set (about 2 hours).
- Beat cream cheese, sugar, and vanilla until smooth. Fold in whipped topping. Spread over the set strawberry gelatin layer.
- Dissolve blueberry gelatin in 1 cup boiling water. Stir in 1/2 cup cold water. Let cool slightly, then pour over the cream cheese layer.
- Arrange mixed berries on top. Refrigerate until fully set (about 4 hours).
Notes
- Use fresh or frozen berries.
- Chill each layer completely before adding the next.
- Cut into squares before serving.
- Prep Time: 20 minutes
- Cook Time: 0 minutes
- Category: Dessert
- Method: No-Bake
- Cuisine: American
Nutrition
- Serving Size: 1 piece
- Calories: 180
- Sugar: 22g
- Sodium: 85mg
- Fat: 7g
- Saturated Fat: 4g
- Unsaturated Fat: 2g
- Trans Fat: 0g
- Carbohydrates: 27g
- Fiber: 1g
- Protein: 3g
- Cholesterol: 20mg