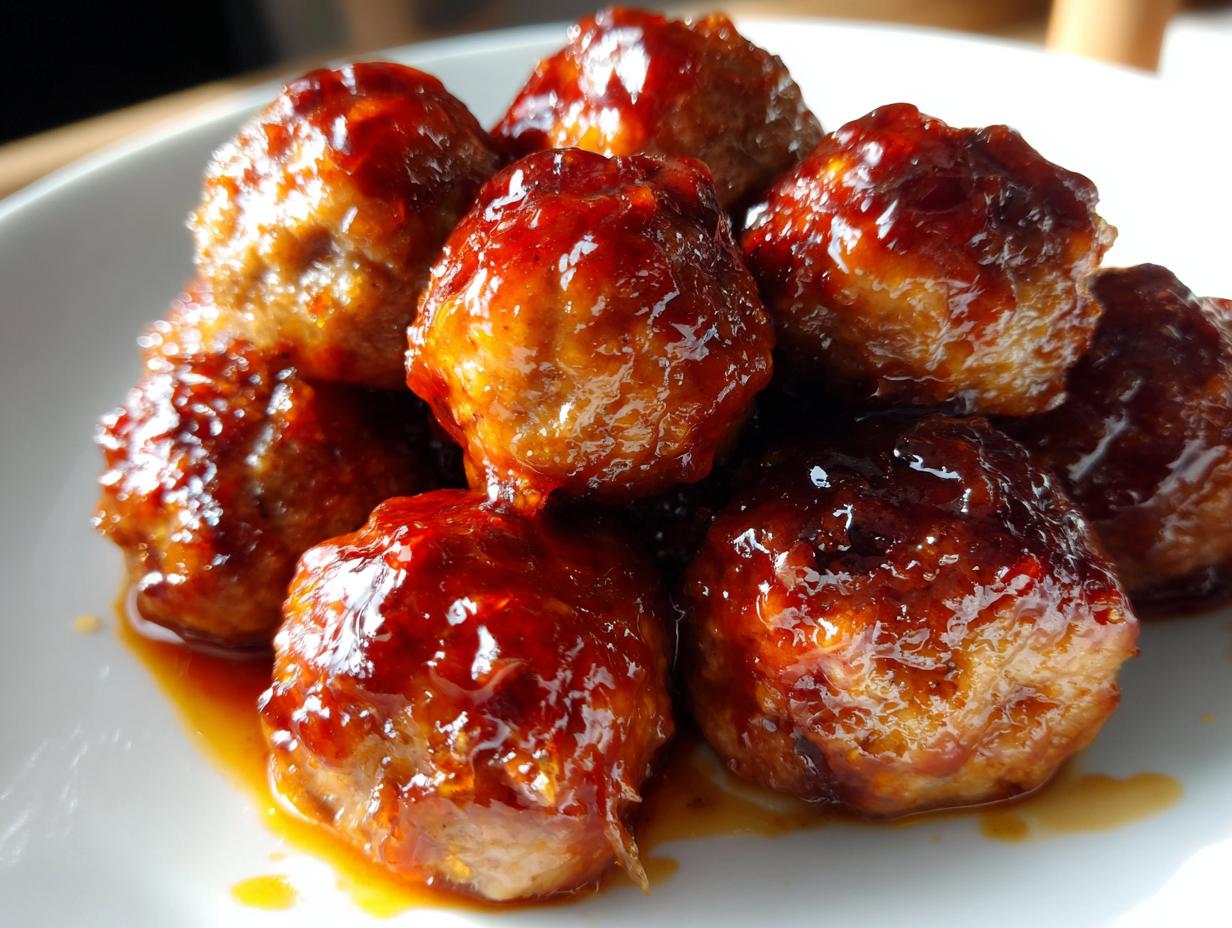
Oh my gosh, you HAVE to try these Sweet and Sour Mummy Meatballs! They’re the perfect mix of spooky and delicious, just like those Halloween nights when I was a kid, sneaking treats between trick-or-treating. The tangy sauce clings to every bite of the juicy meatballs, and the best part? They’re so easy to whip up! I love how the sweet-and-sour combo makes everyone go back for seconds – even the grown-ups can’t resist. Trust me, these will become your new go-to Halloween dish, whether you’re feeding hungry ghosts and goblins or just craving something fun on a cozy fall night.
Why You’ll Love These Sweet and Sour Mummy Meatballs
Let me tell you why these meatballs are about to become your new obsession:
- So easy a zombie could make them – Just mix, shape, bake, and toss in that irresistible sauce. No fancy skills needed!
- The perfect sweet-tangy balance – That sticky-sweet sauce with just enough vinegar kick will have you licking your fingers.
- Total crowd-pleaser – Kids go wild for the fun “mummy” presentation, while adults secretly sneak extras.
- Super adaptable – Swap meats, adjust sweetness, or make them gluten-free without losing any flavor.
- Works for any occasion – Halloween party? Check. Weeknight dinner? Check. Potluck? Absolutely!
Seriously, these little flavor bombs disappear faster than candy on Halloween night!
Ingredients for Sweet and Sour Mummy Meatballs
Okay, let’s gather our goodies! I’ve separated everything so you won’t get confused between the meatballs and that glorious sauce. Pro tip: measure everything before you start mixing—it saves so much chaos when your hands are all meaty!
For the Meatballs:
- 1 pound ground beef (the 80/20 blend gives perfect juiciness)
- 1/2 cup plain breadcrumbs (panko works great too!)
- 1 large egg (straight from the fridge is fine)
- 1 teaspoon salt (I use kosher—it distributes better)
- 1/2 teaspoon black pepper (freshly cracked if you’re fancy)
- 1/2 teaspoon garlic powder (not garlic salt—we already added salt!)
For That Magical Sauce:
- 1/2 cup ketchup (basic supermarket brand is perfect)
- 1/4 cup packed brown sugar (dark gives richer flavor, light works too)
- 2 tablespoons white vinegar (apple cider vinegar adds fun tang)
- 1 tablespoon soy sauce (low-sodium if you’re watching salt)
See? Nothing weird or hard-to-find—just pantry staples that transform into something amazing. Now let’s get messy!
Equipment You’ll Need
Don’t worry—no fancy gadgets required here! Just grab these basics from your kitchen:
- Large mixing bowl (for getting your hands into that meatball mixture)
- Rimmed baking sheet (trust me, you want those edges to catch any drips)
- Medium saucepan (for simmering that addictive sweet and sour sauce)
- Measuring cups/spoons (eyeballing it never works with sauces!)
That’s it! If you’ve got parchment paper or foil for the baking sheet, even better—cleanup will be a breeze.
How to Make Sweet and Sour Mummy Meatballs
Okay, let’s get cooking! I promise this is way easier than wrapping an actual mummy—and much tastier too. Just follow these simple steps, and you’ll have the most addictive little meatballs ready in no time.
Preparing the Meatballs
First things first—preheat that oven to 375°F (190°C) so it’s nice and hot when we’re ready to bake. Now, grab your big mixing bowl and toss in all the meatball ingredients: the ground beef, breadcrumbs, egg, salt, pepper, and garlic powder. Here’s my secret—use your hands to mix it all together! It might feel weird at first, but trust me, this is the best way to get everything evenly combined without overworking the meat.
Now, scoop out about a tablespoon of mixture at a time and roll it into balls. Aim for about 1-inch diameter—think ping pong ball size. Pro tip: if you wet your hands slightly, the mixture won’t stick as much. Arrange them on your prepared baking sheet with a little space between each one so they cook evenly. Pop them in the oven for about 20 minutes, until they’re golden brown and cooked through.

Making the Sweet and Sour Sauce
While those beauties are baking, let’s make that magic sauce! Combine the ketchup, brown sugar, vinegar, and soy sauce in your saucepan over medium heat. Stir it constantly as it comes to a gentle simmer—you’ll see tiny bubbles forming around the edges. Keep it going for about 3-5 minutes until it thickens slightly. Careful! If the heat’s too high, it can splatter (ouch!) or reduce too much. You want it to coat the back of a spoon nicely—not too runny, not too thick.
Combining and Serving
When your meatballs are done baking, transfer them to a big bowl. Pour that gorgeous sauce over them and gently toss until every meatball is perfectly coated. I like to use a rubber spatula for this—it’s gentle on the meatballs but gets the job done. For presentation, sprinkle with sesame seeds or chopped green onions if you’re feeling fancy. These look amazing served in a spooky cauldron for Halloween, or just piled high on a platter with toothpicks for easy grabbing!

Tips for Perfect Sweet and Sour Mummy Meatballs
Want to take these from good to ghoulishly great? Here are my tried-and-true tricks:
- Chill before baking – Pop shaped meatballs in the fridge for 15 minutes—they’ll hold their shape better!
- Taste your sauce – Adjust sweetness with extra brown sugar or tang with vinegar before adding to meatballs.
- Don’t overcrowd – Space meatballs at least 1 inch apart on the baking sheet for even browning.
- Double the sauce – Trust me, you’ll want extra for drizzling over rice or dipping!
Oh, and wear an apron—that red sauce stains like crazy when you’re taste-testing (not that I’d know…).
Variations and Substitutions
One of the best things about these meatballs? You can tweak them to fit exactly what you’ve got in the fridge or what your crew prefers! Here are my favorite swaps that still give you that perfect sweet-and-sour magic:
- Meat options: Ground turkey or chicken work great for a lighter version (just add an extra tablespoon of breadcrumbs to keep them moist).
- Gluten-free: Use gluten-free breadcrumbs or crushed rice cereal instead of regular breadcrumbs—nobody will know the difference!
- Sauce sweeteners: Swap brown sugar for honey or maple syrup if you’re out (though you might need a touch less vinegar to balance it).
- Extra veggies: Sneak in finely grated carrots or zucchini to the meat mixture—my kids never notice!
The moral? Don’t stress if you’re missing an ingredient—this recipe is practically foolproof!
Serving Suggestions
These sweet and sour mummy meatballs are crazy versatile! For a full meal, pile them over steamed rice or noodles—that sticky sauce makes the best glaze. Party time? Stick toothpicks in them and watch them vanish from your spookiest serving platter. Halloween twist: arrange them in a “mummy” shape with thin strips of mozzarella cheese draped across like bandages! Kids go wild when I serve them in mini cauldrons with dry ice for extra drama. Honestly? They disappear no matter how you present them!

Storing and Reheating Sweet and Sour Mummy Meatballs
Here’s the scoop on keeping these meatballs tasting fresh—if you have any leftovers, that is! Store them in an airtight container in the fridge for 3-4 days. When reheating, I like to pop them in the microwave at 30-second intervals, stirring gently between each. You can also warm them in a saucepan over low heat with a splash of water to keep the sauce from getting too thick. Pro tip: Don’t freeze them after adding the sauce—it makes the texture weird. Just freeze plain baked meatballs, then sauce them fresh when you’re ready to serve!
Frequently Asked Questions
Can I make these meatballs ahead of time?
Absolutely! The meatballs themselves can be baked up to 2 days in advance—just store them separately from the sauce in the fridge. When you’re ready to serve, warm them gently and toss with freshly made sauce. The flavors actually get better as they sit!
How spicy is the sweet and sour sauce?
Not spicy at all—it’s got that perfect kid-friendly balance of sweet and tangy. If you want some heat, try adding a pinch of red pepper flakes or a dash of sriracha to the sauce while it simmers. My husband always does this for our “grown-up” batch!
Can I use frozen meatballs instead?
Sure can! Just bake or heat frozen meatballs according to package directions first, then toss them in the homemade sauce. The sauce is what makes these special, so I’d still recommend making it fresh rather than using jarred versions.
What’s the best way to keep these warm for a party?
I love using a mini slow cooker on the “warm” setting—it keeps the sauce from getting too thick while maintaining perfect serving temperature. No slow cooker? A regular baking dish covered with foil in a 200°F oven works too!
Nutritional Information
Now, I’m no nutritionist, but here’s the scoop on what’s in these tasty little mummy meatballs! Each serving (about 5-6 meatballs) clocks in around 320 calories with 20g of protein to keep those trick-or-treaters energized. The sauce adds about 15g of sugar per serving – consider it part of the Halloween fun! Remember, these numbers are just estimates since we all make our meatballs slightly different sizes. Whether you’re counting carbs or just counting how many you can eat before the kids notice, these are totally worth every delicious bite!


Irresistible Sweet and Sour Mummy Meatballs in 30 Minutes
- Total Time: 35 minutes
- Yield: 4 servings 1x
- Diet: Low Lactose
Description
A delicious and fun twist on classic meatballs with a sweet and sour sauce, perfect for Halloween or any occasion.
Ingredients
- 1 pound ground beef
- 1/2 cup breadcrumbs
- 1 egg
- 1 teaspoon salt
- 1/2 teaspoon black pepper
- 1/2 teaspoon garlic powder
- 1/2 cup ketchup
- 1/4 cup brown sugar
- 2 tablespoons vinegar
- 1 tablespoon soy sauce
Instructions
- Preheat oven to 375°F.
- Mix ground beef, breadcrumbs, egg, salt, pepper, and garlic powder in a bowl.
- Shape into small meatballs and place on a baking sheet.
- Bake for 20 minutes or until cooked through.
- Mix ketchup, brown sugar, vinegar, and soy sauce in a saucepan.
- Heat the sauce over medium heat until it thickens.
- Toss the meatballs in the sauce before serving.
Notes
- You can use ground turkey instead of beef.
- For extra flavor, add chopped onions to the meat mixture.
- Serve with rice or as an appetizer.
- Prep Time: 15 minutes
- Cook Time: 20 minutes
- Category: Main Dish
- Method: Baking
- Cuisine: American
Nutrition
- Serving Size: 1 serving
- Calories: 320
- Sugar: 15g
- Sodium: 800mg
- Fat: 12g
- Saturated Fat: 4g
- Unsaturated Fat: 6g
- Trans Fat: 0g
- Carbohydrates: 30g
- Fiber: 1g
- Protein: 20g
- Cholesterol: 80mg