There’s something truly magical about giving a homemade gift—especially one as simple yet luxurious as vanilla extract. I’ll never forget the first time I made a batch for friends one holiday season. Their eyes lit up when they unwrapped those little amber bottles, and even more when they tasted the rich, fragrant vanilla in their baking. Turns out, making your own Vanilla Extract DIY Gift is ridiculously easy—just vanilla beans, vodka, and patience—but the payoff is huge. No store-bought extract compares to the deep, complex flavor you get from doing it yourself. Over the years, I’ve tweaked my method (and maybe snuck a few extra beans into the jars), but the joy of gifting something handmade never gets old.

Why You’ll Love This Vanilla Extract DIY Gift
Trust me, once you try making your own vanilla extract, you’ll wonder why you ever bought the store-bought stuff! Here’s why this little project steals my heart every time:
- So easy a kid could do it – Seriously, just split beans, pour vodka, and wait. The hardest part is remembering to shake it weekly!
- Way cheaper than fancy bottles – Good quality extract costs a fortune, but homemade? Pennies per teaspoon.
- Totally customizable – Love bourbon? Swap it for vodka. Want extra vanilla punch? Toss in another bean.
- Flavor that blows store brands away – The depth you get from fresh beans steeping for weeks? Unbeatable.
Plus, it makes you look like a kitchen wizard when you casually say “Oh this? I made it myself.”
Ingredients for Vanilla Extract DIY Gift
Gather just three simple things—quality matters here, especially with the vanilla beans. I learned the hard way that cheap beans give weak flavor, so splurge a little! Here’s what you’ll need:
- 5 vanilla beans (plump, fragrant ones—split them lengthwise to unleash all those tiny flavor-packed seeds)
- 1 cup vodka (80 proof or higher—the alcohol’s job is to extract flavor, so skip the fancy stuff)
- 1 clean glass jar with an airtight lid (mason jars work perfectly, but any sealable glass container will do)
That’s it! No obscure ingredients, no weird tools—just patience and good beans. Pro tip: Buy extra beans if you’re making multiple gifts. You’ll want to keep some for yourself!

Equipment Needed for Your Vanilla Extract DIY Gift
No fancy gadgets required here—just a few basics you probably already have in your kitchen:
- A sharp knife (for splitting those vanilla beans without squashing them)
- A measuring cup (to pour the vodka without spillage drama)
- Small glass bottles with lids (for gifting—I save cute jam jars throughout the year for this!)
See? Told you it was simple. Now let’s get to the fun part—making magic happen!
How to Make Vanilla Extract DIY Gift
Okay, let’s get brewing—I promise this is so easy you’ll laugh. Here’s exactly how I make mine (with a few “oops-learned-the-hard-way” tips mixed in):
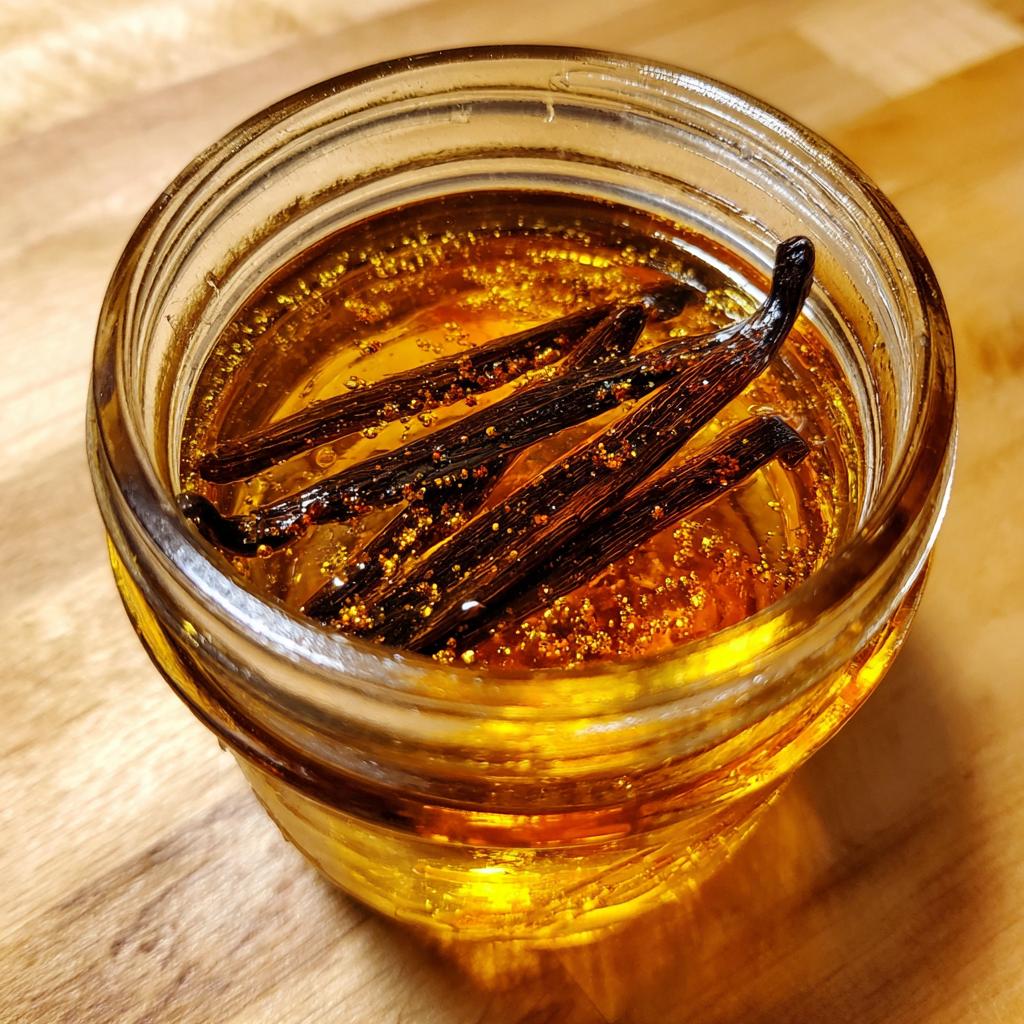
- Split those beans like a pro – Lay each vanilla bean flat and run a sharp knife down the middle lengthwise, but don’t cut all the way through. You want to expose those tiny, fragrant seeds inside without splitting the bean in half.
- Tuck them into their boozy bed – Drop the split beans into your clean glass jar. I like to curl them slightly so they fit snugly—no fancy arranging needed!
- Drown them in vodka – Pour the vodka over the beans until they’re fully submerged. If they float (annoying, but normal!), just press them down with a clean spoon—they’ll sink eventually.
- Seal it tight and stash it – Screw the lid on firmly and tuck the jar into a cool, dark cupboard. No peeking for at least 8 weeks! (I know, the waiting is torture.)
- Shake it like a Polaroid picture – Once a week, give the jar a gentle swirl to redistribute the flavors. No vigorous shaking—we’re not making martinis here.
- Decant your liquid gold – After 2 months (longer is even better!), strain the extract if you prefer, or leave the beans in for ongoing flavor. Pour into cute bottles for gifting, and boom—you’ve just made something extraordinary.
Tips for the Best Vanilla Extract DIY Gift
Want to take your extract from “good” to “give-me-all-your-baking-recipes” level? Here’s what I’ve learned over years of trial and error:
- Madagascar beans are my MVP – Their rich, creamy flavor beats all others for extract. Splurge on Grade B—they’re cheaper and more flavorful for steeping!
- Darkness is your friend – Store your jar in the back of a cupboard, not on the counter. Light degrades the delicate flavors.
- Label with love – Write the date on your jar with a grease pencil (trust me, Sharpie rubs off). Bonus: Add “Shake me weekly!” to remind yourself.
- Patience pays – That 8-week minimum isn’t a suggestion. At 3 months? Pure vanilla velvet.
Storing and Gifting Your Vanilla Extract DIY Gift
Okay, here’s the beautiful part—this stuff basically lasts forever if you treat it right! Store your finished extract in a cool, dark place (that same cupboard works great) and it’ll stay potent for at least a year. The flavor actually gets deeper over time—mine’s going on 18 months and still magical. For gifting, I raid my stash of pretty glass bottles (old spice jars work wonders) and tie them up with twine or ribbon. Add a handwritten label with the date and a note like “Shake before use—made with love!” and watch your friends swoon. Pro tip: Make extra—you’ll regret not keeping some for yourself!

Vanilla Extract DIY Gift Variations
Want to jazz things up? Try these fun twists I’ve tested over the years:
- Bourbon vanilla – Swap vodka for bourbon and get deeper caramel notes (my neighbor still raves about this version!)
- Citrus kick – Add a strip of orange or lemon zest for a bright, unexpected twist (remove after 2 weeks to avoid bitterness)
- Spiced vanilla – Toss in a cinnamon stick or two whole cloves for holiday gifting (just don’t overdo it!)
The beauty? You can’t mess this up—just taste as you go! If you are looking for other DIY gift ideas, check out this DIY Hot Chocolate Mix Gift Recipe.
Vanilla Extract DIY Gift FAQ
I get asked these questions all the time—here’s the scoop from my years of vanilla extract experiments!
Can I use rum instead of vodka?
Absolutely! Rum makes a richer, slightly sweeter extract (I love it in holiday baking). Just stick with 80+ proof—the alcohol’s necessary for proper extraction.
How long does homemade vanilla last?
Practically forever if stored properly! The alcohol preserves it indefinitely, though flavor peaks around 1 year. Just keep it in a dark cupboard.
Why won’t my vanilla beans sink?
Totally normal—they’ll float at first. Press them down weekly; they’ll eventually stay submerged as they absorb liquid.
Can I reuse the beans?
You bet! After decanting, top the same beans with fresh vodka for a second batch—just steep longer (the flavor weakens each time).
Why grade B beans?
They’re cheaper and more flavorful for extracts—the “imperfect” appearance doesn’t matter when they’re steeping in booze! For baking inspiration once your extract is ready, try these Egg-Free Sugar Cookies Recipe.
Nutritional Information
Let’s be real – we’re not drinking this by the shot glass! Since vanilla extract is used in tiny amounts, the nutritional impact is minimal. Values are rough estimates and will vary slightly based on your specific ingredients. A teaspoon contains about 12 calories, zero sugar, and (obviously) comes with a side of pure deliciousness! For more information on food science and extraction methods, you can check out resources on American Chemical Society.
Share Your Vanilla Extract DIY Gift
I wanna see your beautiful creations! Snap a photo of your vanilla extract in progress (or those gorgeous finished bottles) and tag me—I’ll feature my favorites. Trust me, nothing makes me happier than seeing your DIY vanilla adventures. Now go make magic!
Print
5-Ingredient Vanilla Extract DIY Gift – Magical & Simple
- Total Time: 8 weeks (includes steeping time)
- Yield: 1 cup 1x
- Diet: Vegetarian
Description
Make your own vanilla extract at home to gift to friends and family. This simple DIY project requires minimal effort and yields a high-quality, flavorful extract.
Ingredients
- 5 vanilla beans
- 1 cup vodka (80 proof or higher)
- 1 clean glass jar with lid
Instructions
- Split the vanilla beans lengthwise with a knife.
- Place the beans in the glass jar.
- Pour vodka over the beans, ensuring they are fully submerged.
- Seal the jar tightly and store in a cool, dark place.
- Shake the jar gently once a week for at least 8 weeks.
- Strain the extract if desired, or leave the beans in for continued flavor.
- Transfer to smaller bottles for gifting.
Notes
- Use high-quality vanilla beans for the best flavor.
- The longer the extract sits, the stronger the flavor becomes.
- Label your jars with the date of preparation.
- Prep Time: 10 minutes
- Cook Time: 0 minutes
- Category: DIY Gift
- Method: No-Cook
- Cuisine: International
Nutrition
- Serving Size: 1 teaspoon
- Calories: 12
- Sugar: 0g
- Sodium: 0mg
- Fat: 0g
- Saturated Fat: 0g
- Unsaturated Fat: 0g
- Trans Fat: 0g
- Carbohydrates: 0g
- Fiber: 0g
- Protein: 0g
- Cholesterol: 0mg