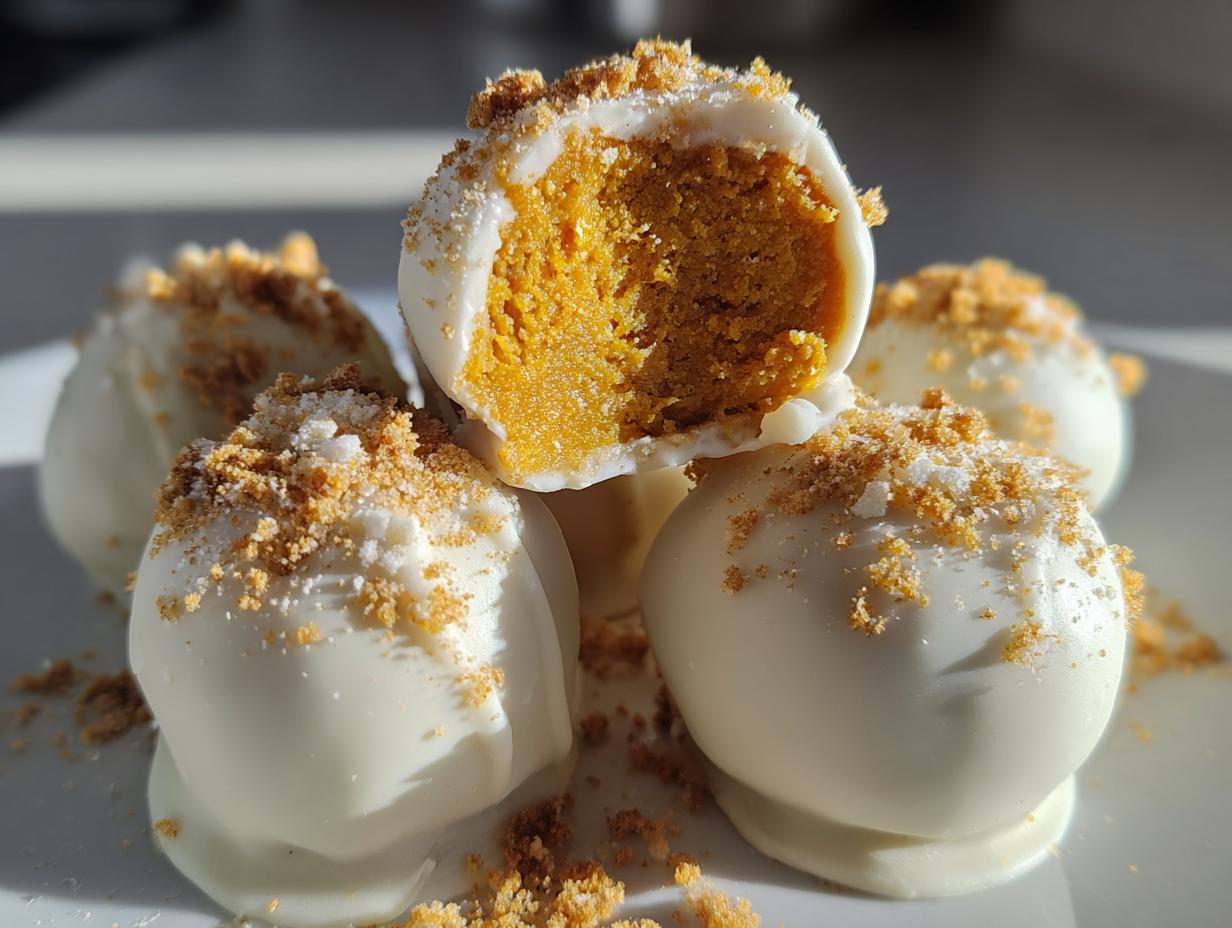
You know those little bites of happiness that disappear way too fast at parties? That’s exactly what these pumpkin truffles are—creamy, spiced pumpkin centers hugged by a coat of dreamy white chocolate. And here’s the best part: they’re embarrassingly easy to make. No oven, no fuss, just a bowl and a freezer doing most of the work. I first whipped these up for a last-minute Halloween potluck, and now my friends demand them year-round. The secret’s in the balance: the pumpkin and cream cheese filling is just sweet enough, with cinnamon and nutmeg warming every bite, while the white chocolate adds this luxurious, melt-in-your-mouth finish. Trust me, one tray of these, and you’ll be the hero of any gathering.
Why You’ll Love These Pumpkin Truffles
Oh, where do I even start? These little pumpkin truffles are like tiny bites of autumn magic. Here’s why they’ll become your new go-to treat:
- No-bake bliss: Skip the oven altogether! Just mix, roll, freeze, and dip—perfect for those days when you want something fancy without the hassle.
- Festive flavor bomb: That cozy blend of pumpkin, cinnamon, and nutmeg tastes like a sweater-weather hug, while the white chocolate adds a sweet, creamy contrast.
- Foolproof texture: The cream cheese keeps the filling luxuriously smooth, and the freezer does the heavy lifting to make dipping a breeze.
- Party-ready in minutes: They look like you spent hours, but they come together faster than you can say “second helping.” (And yes, they will disappear fast.)
Seriously, these truffles are the ultimate crowd-pleaser—whether you’re gifting them, serving them at a party, or just sneaking one (or three) from the fridge.
Ingredients for Pumpkin Truffles
Okay, let’s gather our pumpkin truffle squad! Here’s everything you’ll need to make these dreamy little bites. I’m a stickler for a few key ingredients—don’t worry, I’ll tell you when you can improvise and when you shouldn’t mess with perfection.
- 1 cup pumpkin puree (unsweetened) – This is the heart of our truffles! Make sure it’s pure pumpkin, not pumpkin pie filling (that stuff’s already sweetened and spiced). If you’re feeling fancy, homemade puree works great too.
- ½ cup cream cheese, softened – Full-fat, please! This gives that luscious texture. Leave it on the counter for 30 minutes before mixing—cold cream cheese is the enemy of smooth truffle filling.
- ¼ cup powdered sugar – Sift it if yours is lumpy. You can add an extra tablespoon if you like things sweeter, but trust me, the white chocolate coating brings plenty of sweetness.
- 1 tsp cinnamon – The cozy backbone of our spice mix. Freshly ground if you’re fancy, but store-bought works perfectly.
- ½ tsp nutmeg – Just enough to make things interesting without overpowering. I grate mine fresh—the difference is magical.
- ¼ tsp ginger – This little zinger makes all the spices pop. Ground works fine, but if you’ve got fresh ginger, a tiny pinch of grated stuff is next-level.
- 1 cup white chocolate chips – Quality matters here! Cheap white chocolate can be waxy. I prefer Ghirardelli or Guittard for that melt-in-your-mouth feel.
- 1 tsp coconut oil – Our secret weapon for silky-smooth dipping. You won’t taste it, but it makes the chocolate perfectly fluid.
- ¼ cup crushed graham crackers (optional) – For that nostalgic pumpkin pie crust crunch on top. Skip if you’re keeping things simple, but wow does it add texture!
See? Nothing too crazy! Just simple, quality ingredients that come together to make something ridiculously delicious. Now let’s get mixing!
How to Make Pumpkin Truffles
Alright, let’s turn these ingredients into little pumpkin-spiced miracles! I’ll walk you through each step—it’s so easy, you’ll wonder why you haven’t been making these every week. Just follow along, and in less than an hour, you’ll have truffles that look like they came from a fancy chocolatier.
Mixing the Pumpkin Filling
First things first: grab a big bowl and let’s make that dreamy pumpkin filling. Here’s how I do it without a single lump (we’re going for silky-smooth, not lumpy pumpkin surprise!):
- Dump that softened cream cheese into your bowl and give it a good stir with a spatula to loosen it up. No one likes stubborn cream cheese chunks!
- Add the pumpkin puree and mix until they’re completely combined. Scrape down the sides—those rogue streaks of cream cheese love to hide there.
- Sprinkle in the powdered sugar, cinnamon, nutmeg, and ginger. Now mix, mix, mix! I like to use a hand mixer on low for about 30 seconds just to make sure everything’s perfectly smooth, but a strong arm and a spatula work too.
The mixture should be thick but still scoopable—like the consistency of cookie dough. Too runny? Add another tablespoon of powdered sugar. Too stiff? A teaspoon of milk will loosen it right up.
Shaping and Freezing
Time to turn that gorgeous orange mixture into perfect little truffle balls. Here’s my no-fuss method:
- Line a baking sheet with parchment paper (trust me, you’ll thank me later when nothing sticks).
- Scoop about 1 tablespoon of the mixture and roll it between your palms to form a ball. Pro tip: lightly damp hands prevent sticking! I aim for about 1-inch diameter—big enough to feel indulgent, small enough to pop in your mouth whole.
- Arrange all the balls on the baking sheet, then pop them in the freezer for 30 minutes. This is crucial! They need to be firm enough to hold their shape when we dip them later. No cheating on the time—set a timer!
While they’re chilling, lick the bowl (I won’t tell) and get your dipping station ready. Because next comes the magic part…
Coating with White Chocolate
This is where our pumpkin balls transform into elegant truffles. Don’t be intimidated—I’ve got all the tricks to make your coating smooth and flawless:
- Combine white chocolate chips and coconut oil in a microwave-safe bowl. Microwave in 30-second bursts, stirring well between each one. Stop when it’s almost melted—the residual heat will finish the job. Overheating is the enemy of smooth chocolate!
- Let the chocolate cool slightly (about 5 minutes) so it’s not scorching hot but still fluid. Test it by dipping a spoon—it should coat smoothly without being too runny.
- Working quickly, drop one frozen pumpkin ball into the chocolate. Use a fork to roll it around, then lift it out, tapping gently to let excess chocolate drip off. The freezer time ensures they won’t fall apart!
- Place each coated truffle back on the parchment paper. Immediately sprinkle with crushed graham crackers if using—the chocolate sets fast!
If the chocolate starts thickening, just pop it back in the microwave for 10 seconds. And don’t stress about perfection—a few swirls and drips just make them look homemade (which is part of the charm, right?).
Tips for Perfect Pumpkin Truffles
After making these pumpkin truffles more times than I can count (okay fine, I may have a slight addiction), I’ve picked up some game-changing tricks that’ll take yours from good to “oh-my-goodness-I-need-another-one” amazing. Here’s my hard-earned wisdom:
- Sift that powdered sugar! I know it feels like an extra step, but lumpy sugar equals lumpy truffles. Takes two seconds and makes all the difference for that velvety smooth texture we’re after.
- The freezer is your best friend. Don’t rush the freezing step—those 30 minutes are non-negotiable. If the centers aren’t firm enough, they’ll melt into your chocolate coating and make a mess. (Ask me how I know…)
- Fork-dipping method for the win. Instead of fingers (which inevitably end up coated in chocolate), use a fork to dip! Roll the truffle on the tines, then let excess chocolate drip through the gaps before sliding it onto parchment paper with a gentle shake.
- Room temp cream cheese mixes better. Cold cream cheese = lump city. Let it soften completely before mixing—it should feel like very soft butter when you poke it.
- Double-dip if you dare. For an extra-thick chocolate shell, after the first coat sets (about 15 minutes), give them a quick second dip. It creates this satisfying “snap” when you bite into them!
And my golden rule? Always make extra. These disappear faster than you can say “pumpkin spice”—especially if you have sneaky family members lurking in the kitchen!
Variations of Pumpkin Truffles
One of my favorite things about these pumpkin truffles is how versatile they are! Once you’ve mastered the basic recipe (which is perfect as-is, don’t get me wrong), it’s so fun to play around with different flavors and textures. Here are some of my go-to twists—some I’ve tested dozens of times, others dreamed up during late-night pumpkin-spiced brainstorming sessions:
Crunchy Add-Ins for Texture Lovers
If you’re like me and live for that satisfying crunch, try folding these into your pumpkin mixture before rolling:
- Toasted pecans or walnuts: Chop them fine—about 2 tablespoons mixed right in adds this incredible nutty contrast to the creamy filling. Bonus: toast them with a pinch of cinnamon first for extra warmth!
- Graham cracker crumbs: Not just for topping! Mixing in ¼ cup gives that nostalgic pumpkin pie crust vibe throughout every bite.
- Crystallized ginger: Finely mince about a tablespoon for little bursts of spicy-sweet zing that cut through the richness.
Chocolate Swaps That Change the Game
While I adore the white chocolate coating, sometimes I mix it up depending on who I’m baking for:
- Dark chocolate coating: Use high-quality 70% dark chocolate instead of white for a more sophisticated, bittersweet balance. It’s incredible with the pumpkin spice—like autumn in truffle form!
- Chocolate drizzle: After the white chocolate sets, zigzag some melted dark chocolate over the tops for a bakery-worthy finish.
- White chocolate with orange zest: Stir the zest of one orange into the melted white chocolate—the citrus brightens all the warm spices beautifully.
Boozy Pumpkin Truffles (For Adults Only!)
When I’m making these for holiday parties, sometimes I’ll add:
- A splash of bourbon or rum: Just 1-2 teaspoons mixed into the pumpkin filling adds this deep, grown-up flavor. Not enough to taste alcoholic—just enough to make people wonder what your secret is!
- Grand Marnier dip: Mix ½ teaspoon into the melted white chocolate for an orange-kissed coating that pairs magically with the spices.
The best part? You can mix and match these ideas! Last Thanksgiving I did half batch with pecans and bourbon, half with dark chocolate drizzle—both disappeared before dessert was even served. Whatever variation you choose, remember: it’s hard to mess these up. As long as you keep that creamy pumpkin center and some kind of chocolate hug, you’re golden.
Serving and Storing Pumpkin Truffles
Okay, you’ve made these gorgeous little pumpkin truffles—now let’s talk about keeping them perfect until showtime! Nothing worse than going through all that effort only to have them turn into a melty mess. Here’s everything I’ve learned about storing, serving, and making them look as good as they taste.
Storing Your Pumpkin Truffles Like a Pro
These babies are happiest in the fridge—that cream cheese filling needs to stay cool. Here’s my storage routine:
- Airtight is key: Once the chocolate coating sets (about 1 hour at room temperature), transfer them to an airtight container with layers separated by parchment paper. This prevents sticking and keeps odors out.
- Fridge lifespan: They’ll stay fresh for up to 5 days in the refrigerator. After that, the texture starts to change (though let’s be real—they never last that long in my house!).
- Freezer option: For longer storage, freeze them in a single layer first, then stack in a container once solid. They’ll keep beautifully for up to 2 months! Thaw in the fridge overnight when cravings strike.
One warning: don’t leave them out at room temperature for more than 2 hours—that cream cheese center isn’t fond of warmth. If you’re serving them at a party, nestle the serving tray in a larger dish of ice to keep them chilled.
Presentation That Wows
Now for the fun part—making them look as irresistible as they taste! My go-to serving tricks:
- The tiered approach: Arrange them on a cake stand at different heights—it makes even a small batch look abundant. I sometimes use upside-down teacups as risers for visual interest.
- Fall-themed plating: Scatter some cinnamon sticks, whole star anise, or autumn leaves (food-safe ones!) around the platter for instant seasonal charm.
- Mini cupcake liners: These aren’t just cute—they prevent chocolate smudges on your nice servingware and make them easy to pick up.
- Dusting magic: Right before serving, I love giving them a light dusting of cocoa powder or cinnamon through a fine sieve—it adds that professional bakery touch.
And here’s my favorite serving tip: always have extra napkins handy. That white chocolate coating tends to leave evidence on fingers (and faces!), but honestly? Seeing those chocolate smiles is half the fun.
Pumpkin Truffles Nutritional Information
Okay, let’s talk numbers—but remember, these are just estimates! Exact nutrition can vary based on your specific ingredients and how generous you are with that chocolate coating (no judgment here). Here’s the breakdown per truffle, assuming you get about 20 from the batch:
- Calories: 80
- Total Fat: 4g (2g saturated)
- Cholesterol: 5mg
- Sodium: 15mg
- Total Carbohydrates: 10g
- Fiber: 1g
- Sugar: 6g
- Protein: 1g
Important note: These values are calculated using standard supermarket ingredients. If you use homemade pumpkin puree, swap in low-fat cream cheese, or adjust any quantities, your numbers will differ. Nutrition apps like MyFitnessPal can help you recalculate based on your exact ingredients—just plug them in!
And let’s be real—while it’s good to be informed, these pumpkin truffles are treats meant to be enjoyed in the moment. I figure the pumpkin counts as a vegetable, right? (Kidding… mostly.)
FAQs About Pumpkin Truffles
I get asked about these pumpkin truffles all the time—here are the most common questions that pop up (along with my tried-and-true answers from years of pumpkin truffle experiments!):
Can I use fresh pumpkin instead of canned puree?
Absolutely! Roast about 1¼ cups of cubed sugar pumpkin (the smaller, sweeter kind) at 350°F until very tender, then puree until smooth. Let it drain in a fine mesh strainer for an hour to remove excess moisture—you want it as thick as the canned stuff. Pro tip: homemade puree often needs an extra tablespoon of powdered sugar since it’s less concentrated than canned.
How long do pumpkin truffles last in the fridge?
In an airtight container, they’ll stay perfect for 4-5 days. The white chocolate might develop tiny beads of moisture after day 3—just pat them dry before serving. For longer storage, freeze them (without toppings) for up to 2 months. Thaw overnight in the fridge and add fresh graham cracker sprinkles if needed.
Why did my chocolate coating crack?
Usually means the pumpkin balls were too cold when dipped! Let them sit at room temp for 2-3 minutes after removing from the freezer—just enough to take the deep chill off but still be firm. Also, make sure your melted chocolate isn’t too hot (test a drop on your wrist—it should feel warm, not hot).
Can I make these dairy-free?
You bet! Swap the cream cheese for dairy-free cream cheese (Kite Hill works great) and use vegan white chocolate chips. The texture will be slightly softer, so freeze them for 45 minutes before dipping. Coconut cream can sub for the cream cheese in a pinch, but the flavor will be more tropical than classic pumpkin.
What’s the trick to getting even chocolate coverage?
My two secrets: 1) Use a deep, narrow cup for dipping (like a mason jar) so you can fully submerge each truffle, and 2) After dipping, gently tap the fork against the bowl’s edge while rotating the truffle—this shakes off excess chocolate so you get that perfect thin shell instead of a thick glob. Practice makes perfect!
Print
Creamy Pumpkin Truffles with Only 8 Irresistible Ingredients
- Total Time: 50 minutes
- Yield: 20 truffles 1x
- Diet: Vegetarian
Description
Delicious pumpkin truffles coated in white chocolate, perfect for any occasion.
Ingredients
- 1 cup pumpkin puree
- 1/2 cup cream cheese
- 1/4 cup powdered sugar
- 1 tsp cinnamon
- 1/2 tsp nutmeg
- 1/4 tsp ginger
- 1 cup white chocolate chips
- 1 tsp coconut oil
- 1/4 cup crushed graham crackers (optional)
Instructions
- Mix pumpkin puree, cream cheese, powdered sugar, cinnamon, nutmeg, and ginger in a bowl until smooth.
- Roll the mixture into small balls and place them on a baking sheet lined with parchment paper.
- Freeze the balls for 30 minutes to firm up.
- Melt white chocolate chips and coconut oil in a microwave-safe bowl, stirring every 30 seconds until smooth.
- Dip each pumpkin ball into the melted white chocolate, coating completely.
- Sprinkle with crushed graham crackers if desired.
- Place back on the parchment paper and let the chocolate set.
- Store in the refrigerator until ready to serve.
Notes
- Ensure the pumpkin puree is unsweetened.
- For a smoother texture, sift the powdered sugar before mixing.
- If the mixture is too soft, add more powdered sugar.
- Use a fork to dip the truffles for easier coating.
- Prep Time: 20 minutes
- Cook Time: 0 minutes
- Category: Dessert
- Method: No-Bake
- Cuisine: American
Nutrition
- Serving Size: 1 truffle
- Calories: 80
- Sugar: 6g
- Sodium: 15mg
- Fat: 4g
- Saturated Fat: 2g
- Unsaturated Fat: 1g
- Trans Fat: 0g
- Carbohydrates: 10g
- Fiber: 1g
- Protein: 1g
- Cholesterol: 5mg