There’s something magical about Halloween baking that makes me giddy as a kid—especially when it involves chocolate and a chance to get creative! These Witch Hat Cupcakes have been my go-to spooky treat for years, ever since my niece begged me to make something “witchy” for her school party. What started as a last-minute experiment turned into our favorite October tradition!
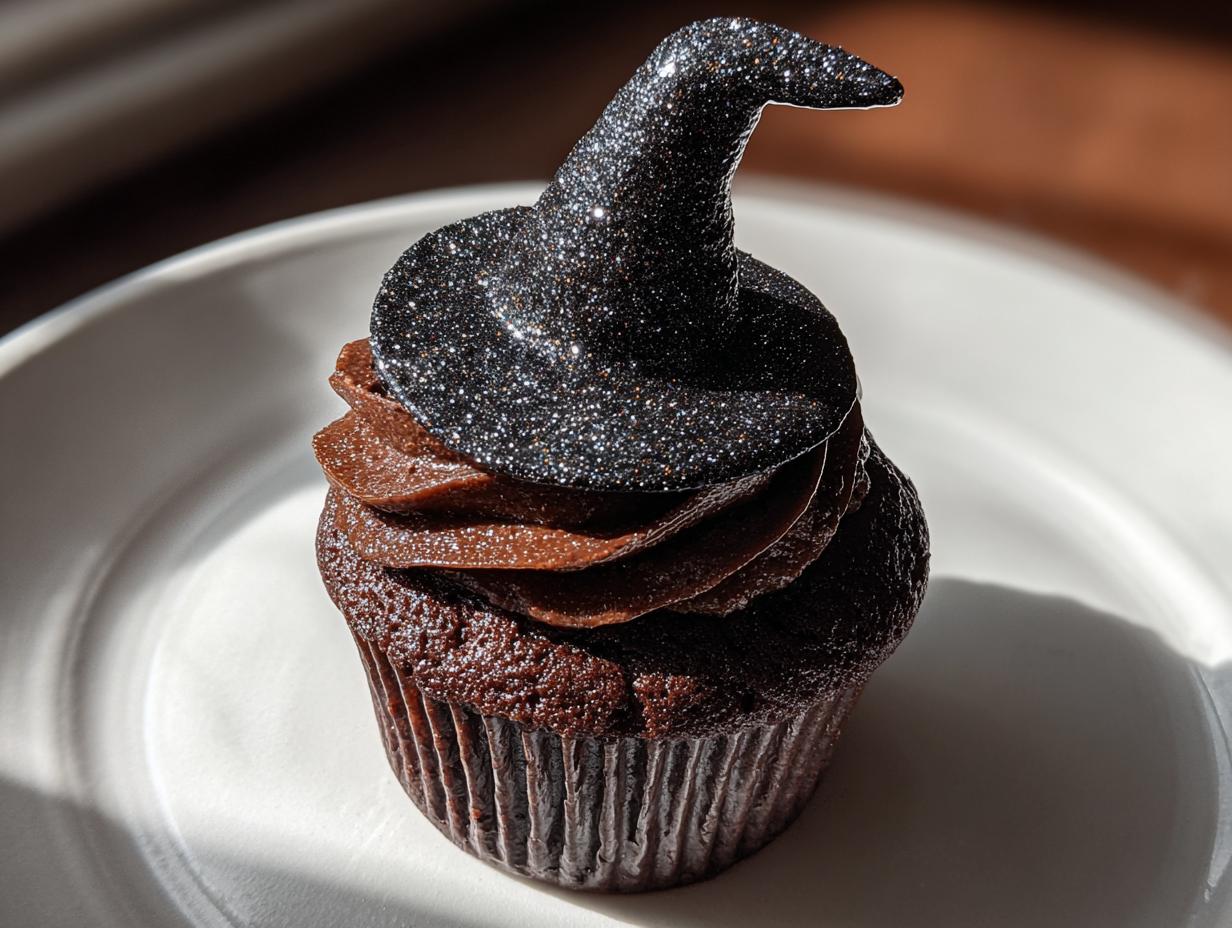
Imagine rich chocolate cupcakes topped with glossy black witch hats that look almost too enchanting to eat (almost being the key word—they disappear fast!). The best part? They’re shockingly easy to pull off. No fancy piping skills required—just a steady hand for dipping cones and the patience to let the candy coating set (okay, that last part might be the hardest).
I’ve tweaked this recipe over countless Halloweens—learned the hard way that pointy cones tip over, discovered edible glitter hides uneven coating, and perfected the candy melt-to-oil ratio so the hats snap cleanly. Whether you’re hosting a haunted house party or just want to delight your coworkers with a sweet surprise, these cupcakes cast the perfect spell.
Why You’ll Love These Witch Hat Cupcakes
Oh, where do I even start? These little witchy delights are absolute showstoppers, and once you make them, you’ll see why they’ve become my Halloween staple. Here’s the real magic—they’re way easier than they look, and the “wow” factor is off the charts!
They’re ridiculously simple. No complicated techniques here—just dip, dry, and stack. Even if you’ve never decorated a cupcake in your life, you’ll nail these. The candy coating does all the work for you, turning plain cones into sleek witch hats with zero fuss.
Kid (and adult) approved. My niece’s friends still talk about these cupcakes years later. There’s something about that edible glitter shimmer and the crunch of the candy hat that makes everyone grin. Bonus: They’re sturdy enough for little hands to grab without crumbling.
Endlessly customizable. Purple glitter for a mystical vibe? Go for it. Orange sprinkles for a pumpkin twist? Why not! Swap the chocolate frosting for peanut butter if you’re feeling wild—the hats will still steal the show.
Perfect for last-minute witches. Forgot about the school party until bedtime? Been there. With pre-made cupcakes and 20 minutes of active work, you can conjure up a batch before the first “trick or treat” rings at your door.
Trust me, once you see those glossy black hats perched on your cupcakes, you’ll be as hooked as I am. The only real problem? Deciding whether to admire them or devour them first.
Ingredients for Witch Hat Cupcakes
Here’s the beauty of these bewitching cupcakes—you probably have most of these ingredients already! The simplicity is part of the magic. But fair warning: resist the urge to skip the vegetable oil in the candy coating (learned that the messy way). Here’s exactly what you’ll need:
The Cupcake Base
- 12 chocolate cupcakes – baked and cooled completely (store-bought works in a pinch, but homemade tastes 100x better)
- 1 batch chocolate frosting – about 2 cups (my secret? Add a pinch of espresso powder to deepen the flavor)
The Witch Hats
- 12 flat-bottomed ice cream cones – pointy ones will topple! Sugar cones work best
- 1 cup black candy melts – or dark chocolate chips with black food coloring if you’re feeling adventurous
- 1 tsp vegetable oil – this keeps the coating smooth and prevents dreaded cracking
Optional Spellbinding Touches
- Edible glitter or sprinkles – purple or green look especially witchy
- Food-safe paintbrush – for fixing any bare spots after dipping
A quick note about substitutions: If you can’t find black candy melts, melt regular chocolate chips with a few drops of black gel food coloring—just know it might dull slightly when dry. And if you’re gluten-free, simply use your favorite GF cupcake recipe—the hats work with any base!
Equipment You’ll Need
Don’t worry—no cauldrons or magic wands required here! Just a few basic kitchen tools that you likely already own. Here’s what I always grab from my cupboards:
- Microwave-safe bowl – Medium-sized, for melting the candy coating (glass works best—plastic can retain odors)
- Parchment paper – A lifesaver for catching drips and preventing sticky disasters
- Small offset spatula or butter knife – For smoothing frosting without tearing cupcake tops
- Measuring spoons – That teaspoon of oil makes all the difference!
- Drying rack – Lets air circulate around dipped cones for even setting (but a parchment-lined tray works too)
That’s it—told you this was simple! No stand mixers, no fancy piping bags. Though if you want to get extra witchy, a pair of tweezers helps place small sprinkles just right. The first year I made these, I used a fork as a dipping tool in a pinch—not pretty, but hey, the hats still looked magical!
Pro tip: Keep a damp kitchen towel nearby for quick hand-wiping between cones. Black candy coating shows every fingerprint, and sticky fingers make decorating… interesting. Ask me how I know!
How to Make Witch Hat Cupcakes
Alright, let’s get witchy! These cupcakes come together in just a few simple steps, but I’ve learned a few tricks over the years to make sure your hats turn out perfectly magical every time. The key is patience—especially when waiting for that candy coating to set (I know, it’s torture!). Here’s exactly how I do it:
Step 1: Melt the Candy Coating
First things first – that glossy black witch hat magic starts here! Combine your black candy melts and vegetable oil in a microwave-safe bowl. Trust me, that little bit of oil makes all the difference for smooth dipping later.
Microwave in 30-second bursts, stirring well after each interval. The first time I made these, I got impatient and tried to melt everything at once—big mistake! The edges scorched while the center stayed stubbornly lumpy. Three 30-second zaps usually does the trick for me. Stir until it’s perfectly smooth, like melted chocolate silk.
Step 2: Coat the Ice Cream Cones
Now for the fun part! Hold a cone by its flat base and dip it straight down into the melted candy, twisting slightly as you lift it out. Let the excess drip off for about 5 seconds—this prevents those annoying puddles at the base.
Pro tip from my many messy attempts: Roll the cone gently between your fingers as the excess drips to ensure even coverage. Missed spots will show up starkly against the black, but don’t panic! You can touch them up later with a clean paintbrush dipped in the melted candy.

Step 3: Decorate the Cones
Work quickly here—you’ve got about 90 seconds before the coating starts to set. This is where you can really personalize your witch hats! Immediately after dipping, sprinkle on edible glitter or colored sugars. My favorite combo? Black hats with purple glitter that catches the light.
Place the decorated cones upside down on a parchment-lined tray. This is crucial—right side up, and you’ll get flat tops instead of pointy witch hats! Let them dry completely, about 15 minutes. Resist the urge to poke them—I promise they’ll harden better if left alone.
Step 4: Frost the Cupcakes
While your witch hats dry, prep the cupcake bases. Spread a generous, even layer of chocolate frosting on each cooled cupcake. Not too thick, not too thin—about 1/4 inch is perfect.
Here’s my secret: Use a small offset spatula to create a slight dome in the center of each cupcake. This gives the hat a stable base to sit on. Smooth out any peaks that might make your hat wobble. I learned this the hard way after a tower of toppled hats at my first Halloween party!
Step 5: Assemble the Witch Hats
The moment of truth! Gently test that the candy coating is completely hard by lightly tapping a cone—it should sound crisp, not dull. Carefully place one hat on each frosted cupcake, pressing down just enough to secure it.
If any hats seem loose (maybe your frosting was a bit stiff), dip the cone’s base in a tiny bit of leftover melted candy before placing—it acts like edible glue. Now step back and admire your spooky creations! The contrast of the black hats against the chocolate cupcakes looks absolutely spellbinding.

Pro tip: For extra drama, arrange them on a cake stand with some dry ice “fog” swirling underneath. Just be sure to keep them out of direct sunlight—those black hats can get melty if left in a warm room too long!
Tips for Perfect Witch Hat Cupcakes
After making more batches of these witchy treats than I can count, I’ve picked up some tricks that’ll save you from the mistakes I’ve made (like the year all my hats cracked like a bad spell!). Here’s what I wish I’d known from the start:
Choosing Your Cones Wisely
Flat bottoms are non-negotiable! Those pointy cones might look cute, but they’ll topple faster than you can say “abracadabra.” Sugar cones with their wide bases are my go-to—they sit on cupcakes like thrones. Test one on a flat surface before dipping; if it wobbles, it’s not the one.
Size matters too. Standard ice cream cones fit most cupcakes perfectly, but if yours run small, trim the cone’s edge slightly with kitchen scissors before dipping. Nothing’s worse than a hat that looks like it’s floating above the frosting!
The Candy Coating Commandments
Temperature is key. If your melted candy gets too cool during dipping (you’ll notice it thickening), pop it back in the microwave for 10 seconds. Too-hot coating slides right off the cones—aim for warm but not scorching.
Fix mistakes fast. See a thin spot or drip line? Immediately use a clean paintbrush dipped in melted candy to smooth it out before it sets. I keep a toothpick handy to poke away any bubbles that form, too.
Storage Secrets
Cool is crucial. These cupcakes hate heat more than vampires hate sunlight! Store them in the coolest part of your kitchen—not the fridge (that makes the frosting sweat), but definitely away from ovens or sunny windows.
The overnight trick. Need to make these ahead? Assemble cupcakes without hats, storing components separately. Dip cones up to 2 days early—keep them in an airtight container with parchment between layers. The hats stay crisp, and you’ll look like a baking wizard when you quickly assemble them before your party.
Transport tricks. Taking these to a party? Place cupcakes in a box with crumpled parchment paper tucked between them to prevent hats from bumping each other. One year I used floral foam in a box lid—poked holes for each hat to stand tall during the car ride!
Remember: Even if your first batch isn’t Pinterest-perfect, they’ll still taste amazing. My early attempts looked more like witch hats after a windstorm, but the kids still devoured them. Now that’s real magic!
Variations & Creative Twists
The best part about these witch hat cupcakes? They’re like a blank spellbook—ready for your magical touch! Over the years, I’ve played with all sorts of fun variations when the Halloween spirit strikes (or when my niece demands “more sparkles!”). Here are some of my favorite ways to mix it up:
Color Magic
Rainbow coven, anyone? Who says witches only wear black? Swap the candy melts for purple, green, or even orange to match your party theme. For a truly mesmerizing effect, blend two colors—dip the bottom half in purple, let it set, then dip the top in black for an ombre hat that looks straight out of a fairy tale.
Glow-in-the-dark ghosts. One year, I mixed glow powder into white candy melts and made ghostly pale hats that actually lit up when the lights went out! Just be sure to use food-grade luminescent powder (available at cake supply stores). The kids went wild!
Flavor Sorcery
Minty mischief. Add a few drops of peppermint extract to your chocolate frosting for a cool surprise. The refreshing bite pairs perfectly with the sweet candy hats.
Spiced cauldron. Stir a pinch of cinnamon or pumpkin pie spice into your cupcake batter—it gives that autumn warmth without overpowering the chocolate. My taste-testers dubbed these “wizard approved” after one bite!
Decorative Witchcraft
Buckle up! Use thin strips of fondant or piped royal icing to add tiny buckles and straps to your hats. Silver sanding sugar makes perfect “metal” accents—just press it gently onto wet candy coating.
Starry night. Before the candy coating sets, scatter edible silver stars across the surface. They catch the light beautifully against dark hats, like a midnight sky.
Holiday Crossovers
Christmas witches? Absolutely! Swap black for red and green candy melts, add holly berry sprinkles, and suddenly you’ve got Yule witch cupcakes perfect for December parties. My sister insists on making these every year now—she calls them her “Christmas coven.”
Birthday spellcasting. Pink hats with rainbow sprinkles turn these into magical birthday treats. Pro tip: Use the same technique but dip mini ice cream cones for “fairy hats” at a kids’ party!
The possibilities are endless—just let your creativity run wild like a broomstick on Halloween night! I’d love to hear what magical variations you conjure up in your kitchen. Tag me if you share photos—I’m always looking for new inspiration (and excuses to bake more cupcakes).
Serving and Storing Witch Hat Cupcakes
Now that you’ve created these adorable witchy treats, let’s talk about keeping them looking (and tasting) their best! I’ve learned a few tricks through trial and error—like the year I left them on the sunny porch and returned to find my hats had melted into sad witch puddles. Here’s how to avoid my mistakes:
Serving Like a Potion Master
Timing is everything. These cupcakes look most impressive when served the same day they’re assembled—the candy coating stays perfectly glossy and crisp. If you must prep ahead (we’ve all been there!), store components separately and assemble 1-2 hours before serving.
Temperature matters. Serve at cool room temperature—not straight from the fridge, as condensation can make the hats sticky. I like to display mine on a cake stand with some Halloween-themed decor around the base. Bonus points if you can find some fake spiderwebs!
Storing Your Spooky Creations
Short-term storage: Keep assembled cupcakes in an airtight container at cool room temperature for up to 24 hours. Place parchment between layers if stacking—those hats are sturdier than they look, but no need to tempt fate!
The two-day rule: After 48 hours, the cupcakes are still delicious, but the hats might start losing their crispness. If you need to store longer, freeze unfrosted cupcakes and dip fresh cones when ready to serve.
Avoid the fridge! I know it’s tempting, but refrigeration makes the frosting weep and the hats soften. If your kitchen runs hot, find the coolest dark spot—a pantry or basement works great.
Transport Tricks
Car ride spells: Transporting these to a party? Use a cupcake carrier with individual slots, or make your own by placing cupcakes in a cardboard box with crumpled parchment paper between them to prevent shifting. For extra security, I sometimes gently press a toothpick through the hat into the cupcake—just remember to warn your guests!
The upside-down method: For longer trips, try this clever trick—place cupcakes upside down in the carrier (frosting side down). The hats stay protected against the flat surface. Just flip them right-side up when you arrive. Works like magic!
Remember: While these cupcakes don’t technically need refrigeration, if your home is particularly warm (above 75°F/24°C), you might need to get creative. One year during a heat wave, I stored mine in the basement next to the wine rack—they stayed perfectly crisp and became quite the conversation starter!
Estimated Nutritional Information
Okay, let’s be real—no one eats witch hat cupcakes for their health benefits! But since I know some folks like to keep track (or need to for dietary reasons), here’s the estimated nutritional breakdown per cupcake. Just remember—these numbers can vary depending on your specific ingredients and brands.
Per Serving (1 cupcake with hat)
- Calories: About 250
- Total Fat: 10g (5g saturated)
- Cholesterol: 20mg
- Sodium: 150mg
- Total Carbohydrates: 35g
- Fiber: 1g
- Sugars: 20g
- Protein: 3g
A few important notes: These estimates assume homemade chocolate cupcakes with standard frosting and commercially prepared candy melts. If you use:
- Store-bought cupcakes? Add about 50 more calories each
- Low-fat frosting? You might save 30 calories but lose that rich texture
- Extra sprinkles or edible glitter? Negligible impact—go wild with the sparkles!
The candy coating contributes most of the sugar content, while the chocolate cupcake base provides that comforting carb-loaded goodness we all crave at Halloween. And let’s be honest—when you’re eating a dessert with an entire ice cream cone on top, nutrition facts are really just for curiosity’s sake!
Dietary note: These aren’t allergen-free by default—they contain dairy, eggs, wheat, and possibly nuts depending on your ingredients. For gluten-free witches, simply swap in your favorite GF cupcake recipe—the hats themselves are naturally gluten-free!
Frequently Asked Questions
Can I use store-bought cupcakes to save time?
Absolutely! I’ve done this many times when pressed for time (or energy, let’s be real). The hats are the star here—just make sure your store-bought cupcakes are completely cooled before frosting. Pro tip: Give them a quick zap in the microwave (5-10 seconds) to revive that fresh-baked taste!
How far in advance can I make these witch hat cupcakes?
The sweet spot is 1 day ahead—dip your cones and store them in an airtight container at room temperature, then assemble the morning of your event. The longest I’ve successfully stored assembled cupcakes was 36 hours, but by then the hats start losing their crispness. Frozen? Not recommended—the texture goes all wonky.
Help! My candy coating is clumpy. What did I do wrong?
Oh honey, I’ve been there! Usually means either overheating (stir more between microwave bursts) or using old candy melts (they absorb moisture over time). Save it by adding another 1/4 tsp vegetable oil and stirring vigorously. If it’s really stubborn, strain through a fine mesh sieve. And next time—fresh candy melts are worth the extra trip to the store!
Can kids help make these?
Definitely! My 6-year-old niece now helps every year—she’s in charge of sprinkles (naturally). Little hands can:
- Add sprinkles to wet candy coating
- Place hats on frosted cupcakes (with supervision)
- Test cupcakes for quality control (their favorite job!)
Just keep them away from the hot melted candy—that’s grown-up work.
What’s the best way to fix a cracked witch hat?
Don’t panic! Melt a tiny bit of extra candy coating and use a toothpick to “glue” the crack—it dries nearly invisible. For major cracks, embrace it! Turn it into a “broken spell” effect with some piped frosting “stitches” in royal icing. Halloween treats don’t need to be perfect—sometimes the quirks make them extra charming!
Final Thoughts
Well, my fellow kitchen witches, there you have it—the secrets to creating these enchanting witch hat cupcakes that never fail to cast a spell on everyone who sees them! I still get that little thrill every time I pull a batch out of the “oven” (okay, mostly out of the microwave these days). There’s just something magical about watching plain old ice cream cones transform into these glossy black masterpieces.
I’d love to hear about your own witchy baking adventures—did you go full goth with black frosting under the hats? Maybe add some spooky spider sprinkles? Tag me in your photos (I’m @SpookyBaker over on Instagram) because nothing makes me happier than seeing how you put your own twist on these. And hey, if your first batch isn’t perfect, don’t worry—mine looked like they’d been through a windstorm the first time too!
Most importantly, have fun with it. That’s really the whole point of Halloween baking, isn’t it? Whether you’re making these for a party, a school event, or just because Wednesday Addams is your spirit animal, I hope these cupcakes bring you as much joy to make as they do to eat. Now go forth and bake something wonderfully wicked!
Print
Dark Magic Witch Hat Cupcakes – 12 Spooky Bites Everyone Craves
- Total Time: 35 minutes
- Yield: 12 cupcakes 1x
- Diet: Vegetarian
Description
Decorate your cupcakes with these spooky yet delicious witch hats. Perfect for Halloween parties or themed events.
Ingredients
- 12 chocolate cupcakes (baked and cooled)
- 1 batch chocolate frosting
- 12 ice cream cones (flat-bottomed)
- 1 cup black candy melts
- 1 tsp vegetable oil
- Edible glitter or sprinkles (optional)
Instructions
- Melt the black candy melts with vegetable oil in a microwave-safe bowl in 30-second intervals, stirring until smooth.
- Dip each ice cream cone into the melted candy, coating the outside completely. Let excess drip off.
- Place cones upside down on parchment paper to dry. Add sprinkles or glitter if desired.
- Frost each cupcake with chocolate frosting.
- Once cones are set, place one on top of each frosted cupcake.
Notes
- Use flat-bottomed cones for stability.
- Let candy coating fully harden before assembling.
- Store in a cool place to prevent melting.
- Prep Time: 20 minutes
- Cook Time: 15 minutes
- Category: Dessert
- Method: Baking
- Cuisine: American
Nutrition
- Serving Size: 1 cupcake
- Calories: 250
- Sugar: 20g
- Sodium: 150mg
- Fat: 10g
- Saturated Fat: 5g
- Unsaturated Fat: 3g
- Trans Fat: 0g
- Carbohydrates: 35g
- Fiber: 1g
- Protein: 3g
- Cholesterol: 20mg