Halloween parties just aren’t complete without something deliciously creepy, and these zombie grave cupcakes have been my go-to spooky treat for years. I still remember the first time I made them – my nephew’s “Monster Mash” birthday party where all the kids went wild for the crawling gummy worms and edible tombstones. Now they’re a tradition in our house every October!
What I love most is how simple these are to throw together, even when you’re juggling costumes and decorations. A boxed cake mix becomes a graveyard of fun with just some green frosting, graham crackers, and a little imagination. The best part? Watching people’s reactions when they see these ghoulish goodies – adults giggle like kids when they spot the “RIP” tombstones!

Why You’ll Love These Zombie Grave Cupcakes
Let me tell you why these spooky little treats have stolen my heart (and probably will steal yours too):
- So easy even a zombie could make them – Seriously, if I can whip these up while simultaneously untangling Halloween lights and refereeing kids in costume, you’ve got this!
- Instant party hit – Every time I bring these to Halloween gatherings, they disappear faster than ghosts at sunrise. The edible tombstones and wiggly worms make everyone smile.
- Kid-friendly fun – My nieces and nephews go nuts decorating these (though I do keep the black gel pen to myself for the “RIP” writing).
- Endless ways to customize – Swap the worms for skeleton sprinkles, add red frosting “blood” splatters, or make mini graves with Nilla wafers!
The best part? That magical moment when your spooky creation comes together – when the green frosting looks perfectly moldy and the tombstones stand at crooked angles. Pure Halloween magic!

Zombie Grave Cupcakes Ingredients
Here’s everything you’ll need to bring these creepy cupcakes to life (or should I say… undeath?). I’ve learned through many Halloween baking sessions that having everything prepped makes the decorating process way more fun!
- 1 box chocolate cake mix (15.25 oz) – The dark base makes perfect “grave dirt”
- 3 large eggs – Room temperature mixes better
- 1/2 cup vegetable oil – For that moist, fudgy texture
- 1 cup water – Helps everything come together
- 1 can vanilla frosting (16 oz) – Our blank zombie canvas
- Green food coloring (gel preferred) – Gives that perfect putrid hue
- 12 rectangular graham crackers – We’ll break these into tombstone shapes
- Black decorating gel – For writing those spooky “RIP” messages
- 24 gummy worms – The more wiggly and realistic looking, the better!
Pro tip: Buy extra gummy worms – trust me, you’ll snack on them while decorating! The kids always “help” by taste-testing too.
Equipment You’ll Need
Gather these trusty kitchen tools before we dive into the graveyard fun:
- Muffin tin – Standard 12-cup works perfectly
- Cupcake liners – Halloween-themed ones add extra spook factor!
- Mixing bowls – One large one for batter, medium for frosting
- Piping bag & tip (optional) – For fancy frosting… or just use a zip-top bag with the corner snipped
- Cooling rack – Because no one wants tombstones sliding off warm cupcakes
That’s it! No fancy equipment needed to raise these cupcakes from the dead!
How to Make Zombie Grave Cupcakes
Alright, let’s bring these creepy cupcakes to life! I’ve made this recipe so many times I could do it in my sleep (which sometimes feels appropriate for Halloween!). Follow these simple steps, and you’ll have a graveyard of ghoulish treats in no time.
Step 1: Prepare the Cupcake Batter
First things first – preheat that oven to 350°F (175°C). While it’s heating up, let’s make the easiest graveyard dirt ever! Grab your large mixing bowl and dump in the chocolate cake mix. Now here’s my little secret – I always add the eggs one at a time, mixing well after each one. It makes for a smoother batter. Pour in the oil and water, then mix until just combined. A few lumps are fine – we’re making graves, not perfection!
Step 2: Bake and Cool
Line your muffin tin with those spooky cupcake liners (orange and black stripes? Yes please!). Fill each one about 2/3 full – any more and they’ll overflow like a zombie uprising. Pop them in the oven for 18-22 minutes. You’ll know they’re done when a toothpick comes out clean. Now the hardest part – let them cool completely! I know it’s tempting, but warm cupcakes make for sliding tombstones. Trust me, I’ve learned this the messy way!
Step 3: Decorate the Zombie Graves
Time to get creative! Scoop your vanilla frosting into a bowl and add green food coloring. I prefer gel because it gives that perfect sickly zombie skin tone without making the frosting runny. Mix it up – go for bright lime or moldy olive depending on your zombie preference! Now frost those cooled cupcakes. Piping looks fancy, but a simple knife swirl works great too. While those set, break your graham crackers into tombstone shapes (irregular edges are actually better!) and use the black gel to write “RIP” or other spooky messages. My niece once wrote “Boo!” on hers – so cute!
Step 4: Add the Final Ghoulish Touches
Here comes the really fun part! Gently press your graham cracker tombstones into the frosting at slightly crooked angles – real graves aren’t perfect, right? Then take those gummy worms and let them “crawl” out from under the tombstones or wiggle across the frosting. Sometimes I’ll bury one halfway under the tombstone for extra creep factor. The more dramatic the worm placement, the better! Step back and admire your handiwork – you’ve just created the coolest zombie graveyard on the block!

Zombie Grave Cupcakes Tips for Success
After making these creepy cupcakes more times than I can count, I’ve picked up some tricks to guarantee ghoulishly good results every Halloween:
- Gel food coloring is your zombie best friend – That liquid stuff just waters down the frosting. A tiny dab of gel gives you that perfect rotting-flesh green without changing the texture.
- Chill your frosting – About 15 minutes in the fridge makes piping so much easier (and prevents tombstone-slide disasters!). If it gets too stiff, just knead the bag in your hands for a bit.
- Kid supervision is key – Little hands love helping with the worms, but I always handle the black gel writing myself – those squeeze tubes can be unpredictable!
- Make extras – Between taste-testing and “oops” moments, you’ll want spare graham crackers and worms. Plus, they disappear fast once decorated!
Remember – imperfect tombstones and messy worms actually make these look MORE authentically spooky!
Zombie Grave Cupcakes Variations
One of my favorite things about these cupcakes is how easily you can change them up – every Halloween brings new spooky inspiration! Here are some of my favorite twists that have been a hit at parties:
- Bloody zombie attack – Mix some red food coloring into a small portion of frosting and splatter it across the graves with a spoon or brush. Bonus points if it looks like dripping!
- Crushed Oreo “dirt” – Sprinkle crushed Oreos around the tombstones for extra graveyard texture. Kids love helping with the crushing part!
- Bone yard – Add white chocolate bone sprinkles poking out of the “ground” for a skeletal surprise.
- Glow-in-the-dark – Mix a tiny bit of edible glow powder into the green frosting – total showstopper at night!
The possibilities are endless – last year I even saw someone use Pepperidge Farm Milano cookies as fancy marble tombstones! What spooky variations will you create?
How to Store Zombie Grave Cupcakes
Here’s my tried-and-true method for keeping these ghoulish treats fresh (because let’s face it – they rarely last long at parties!): Pop them in an airtight container at room temperature where they’ll stay perfect for up to 3 days. Whatever you do, don’t refrigerate them – that’s a surefire way to turn your crunchy graham cracker tombstones into sad, soggy slabs!
Zombie Grave Cupcakes Nutritional Information
Okay, let’s be real – we’re not eating zombie cupcakes for their health benefits! But since you asked, here’s the nutritional breakdown per cupcake (approximate, because let’s be honest, who stops at just one?).
- 210 calories – Consider it zombie fuel!
- 18g sugar – That Halloween energy rush
- 9g fat – Makes those tombstones stand tall
- 30g carbs – Perfect pre-trick-or-treating snack
Remember, these values can change based on your specific ingredients. I won’t judge if you “forget” to count the extra gummy worms you snack on while decorating!
Frequently Asked Questions
I’ve gotten so many spooktacular questions about these zombie grave cupcakes over the years – here are the ones that keep crawling back like those gummy worms!
Can I use homemade cake instead of a mix?
Absolutely! My from-scratch chocolate cake works great – just use your favorite recipe that makes 24 cupcakes. Sometimes I’ll add a teaspoon of instant coffee to the batter for extra “dark and mysterious” flavor!
How can I make these vegan?
Easy peasy! Swap the cake mix for a vegan version, use flax eggs (1 tbsp ground flax + 3 tbsp water per egg), and pick up some dairy-free frosting. Most gummy worms are accidentally vegan too – just check the label.
Can I prep these ahead of time?
You bet! Bake the cupcakes up to 2 days early (store in an airtight container), but wait to decorate until the day of. Pre-break your graham crackers and write the “RIP” messages beforehand to save time.
Help! My tombstones keep falling over!
Been there! Just chill your frosted cupcakes for 10 minutes first – the frosting firms up into perfect “grave dirt” that holds those crackers steady. If one still topples, add a dab of frosting as glue.
Share Your Spooky Creations
I’d love to see how your zombie grave cupcakes turn out – tag me on Instagram with #ZombieGraveCupcakes so I can ooh and aah over your creepy creations! Nothing makes me happier than seeing all the spooky variations you brilliant bakers come up with.


15 Spooky Zombie Grave Cupcakes to Haunt Your Halloween Party
- Total Time: 40 minutes
- Yield: 24 cupcakes 1x
- Diet: Vegetarian
Description
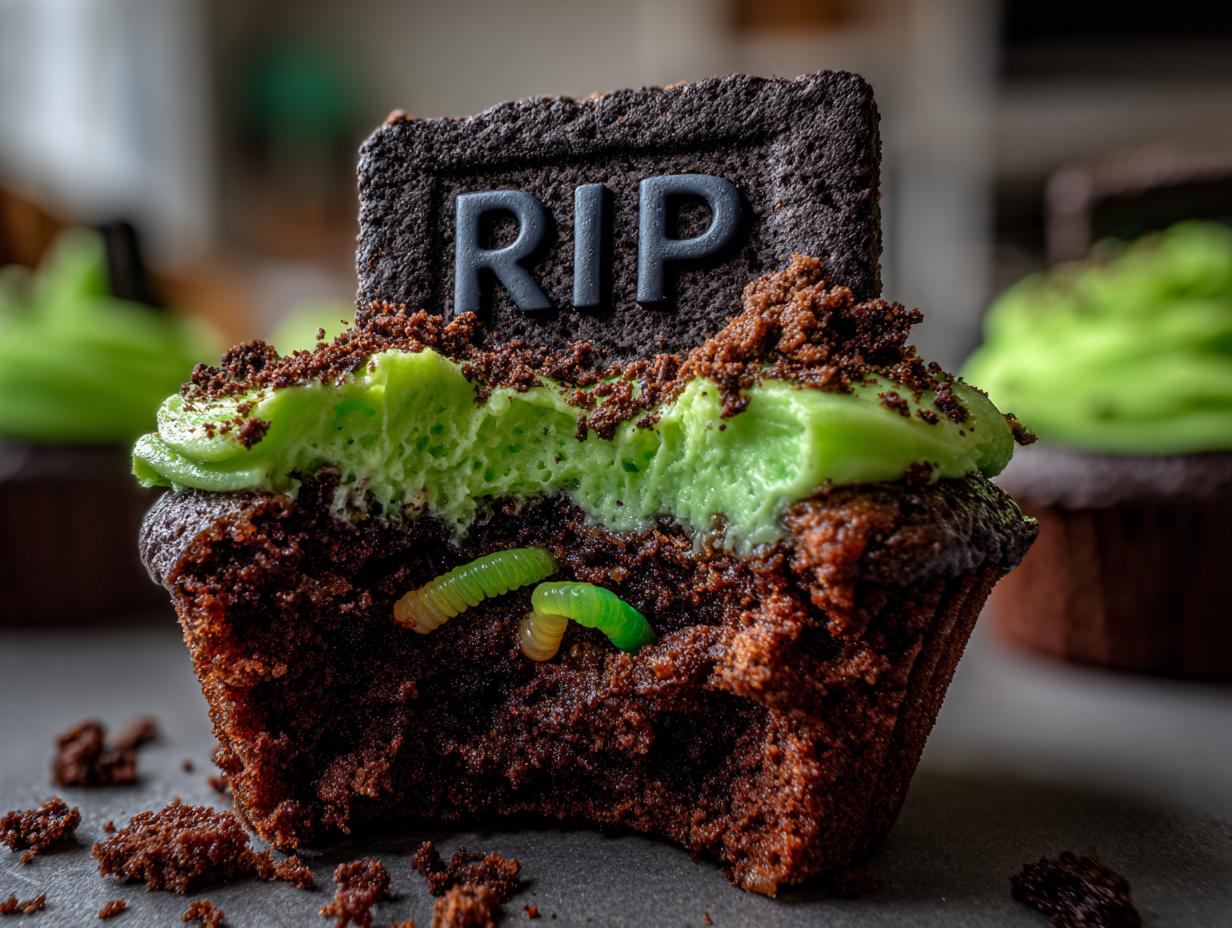
Spooky zombie grave cupcakes perfect for Halloween parties or themed events. These creepy treats feature edible tombstone decorations and a ghoulish green frosting.
Ingredients
- 1 box chocolate cake mix
- 3 eggs
- 1/2 cup vegetable oil
- 1 cup water
- 1 can vanilla frosting
- Green food coloring
- 12 rectangular graham crackers
- Black decorating gel
- 24 gummy worms
Instructions
- Preheat oven to 350°F (175°C).
- Prepare cake mix with eggs, oil, and water.
- Fill cupcake liners 2/3 full.
- Bake for 18-22 minutes, then cool completely.
- Tint frosting green and pipe onto cupcakes.
- Break graham crackers into tombstone shapes.
- Write ‘RIP’ with black gel on crackers.
- Press tombstones into frosting.
- Add gummy worms crawling from graves.
Notes
- For extra creepiness, add red food coloring to create bloody effects
- Store in airtight container for up to 3 days
- Adult supervision recommended when decorating with kids
- Prep Time: 20 minutes
- Cook Time: 20 minutes
- Category: Dessert
- Method: Baking
- Cuisine: American
Nutrition
- Serving Size: 1 cupcake
- Calories: 210
- Sugar: 18g
- Sodium: 180mg
- Fat: 9g
- Saturated Fat: 2g
- Unsaturated Fat: 6g
- Trans Fat: 0g
- Carbohydrates: 30g
- Fiber: 1g
- Protein: 2g
- Cholesterol: 25mg